
This month we are going to make flying geese for a wedding quilt for my best friend and her new husband. This will be my first time attempting a Queen size quilt, so I need as much help as I can get.
Hive Crashers are very welcome to join in!!!
Fabric:
I have taken my fabric inspiration from my friend and her fiancé:
She is very bohemian, works in environmental policy, and loves nature. Her fiancé is a nerdy, violin playing, british scientist. The colours I am going with are green, white and grey. Paisleys, polka dots, leaves, flowers, text, musical notes, geometric shapes, math/science inspired prints, anything nature inspired.
· Any shade of green or grey is okay.
· For white, off-white is okay as long as it doesn’t read as cream.
· For prints please try to go for tone on tone, or if the print is a mixture of white, black, grey or green that is perfect. I want to limit the amount of other colours in the quilt. If there is a small amount of other colours that’s okay too.
· Solids are great too.
· And since my friend loves to travel and is rather bohemian in her tastes, Batiks are okay too so long as they are tone on tone.
· No licensed fabrics
· Nothing too childish
Here are the fabrics I pulled:


Fabric Combos:
I would like you to make eight 3x6 flying geese units. We will use the “four at a time” method to make two units of four geese.
The two sets can be identical, or you can make one set of 4 in one combination, and the second set of 4 in another combo. Your geese can be any combination of green, grey or white. Just make sure there is contrast between the “geese” and the “sky”.

Four at a Time Method:
There are many tutorials out there showing the same thing, but I followed this one, which shows different methods and provides a handy math chart for each method depending what size you want to make.
Cutting for eight flying geese (2units of four geese):
Cut exact:
Geese
|
Cut 2 (same fabric or 2 different fabrics)
|
7 1/4 X 7 ¼
|
Sky
|
Cut 8 (all the same fabric, or 4 of one and 4 of another)
|
3 7/8 X 3 7/8
|
OR
Trim down method:
If you are a beginner like me, and your blocks don’t always come out the right size, you can cut a little bigger, and then trim down your individual geese.
Geese
|
Cut 2 (same fabric or 2 different fabrics)
|
7 1/2 X 7 1/2
|
Sky
|
Cut 8 (all the same fabric, or 4 of one and 4 of another)
|
4 1/8 x 4 1/8
|
Steps:
1) On the wrong side of each of the four small squares, draw a diagonal line from corner to corner

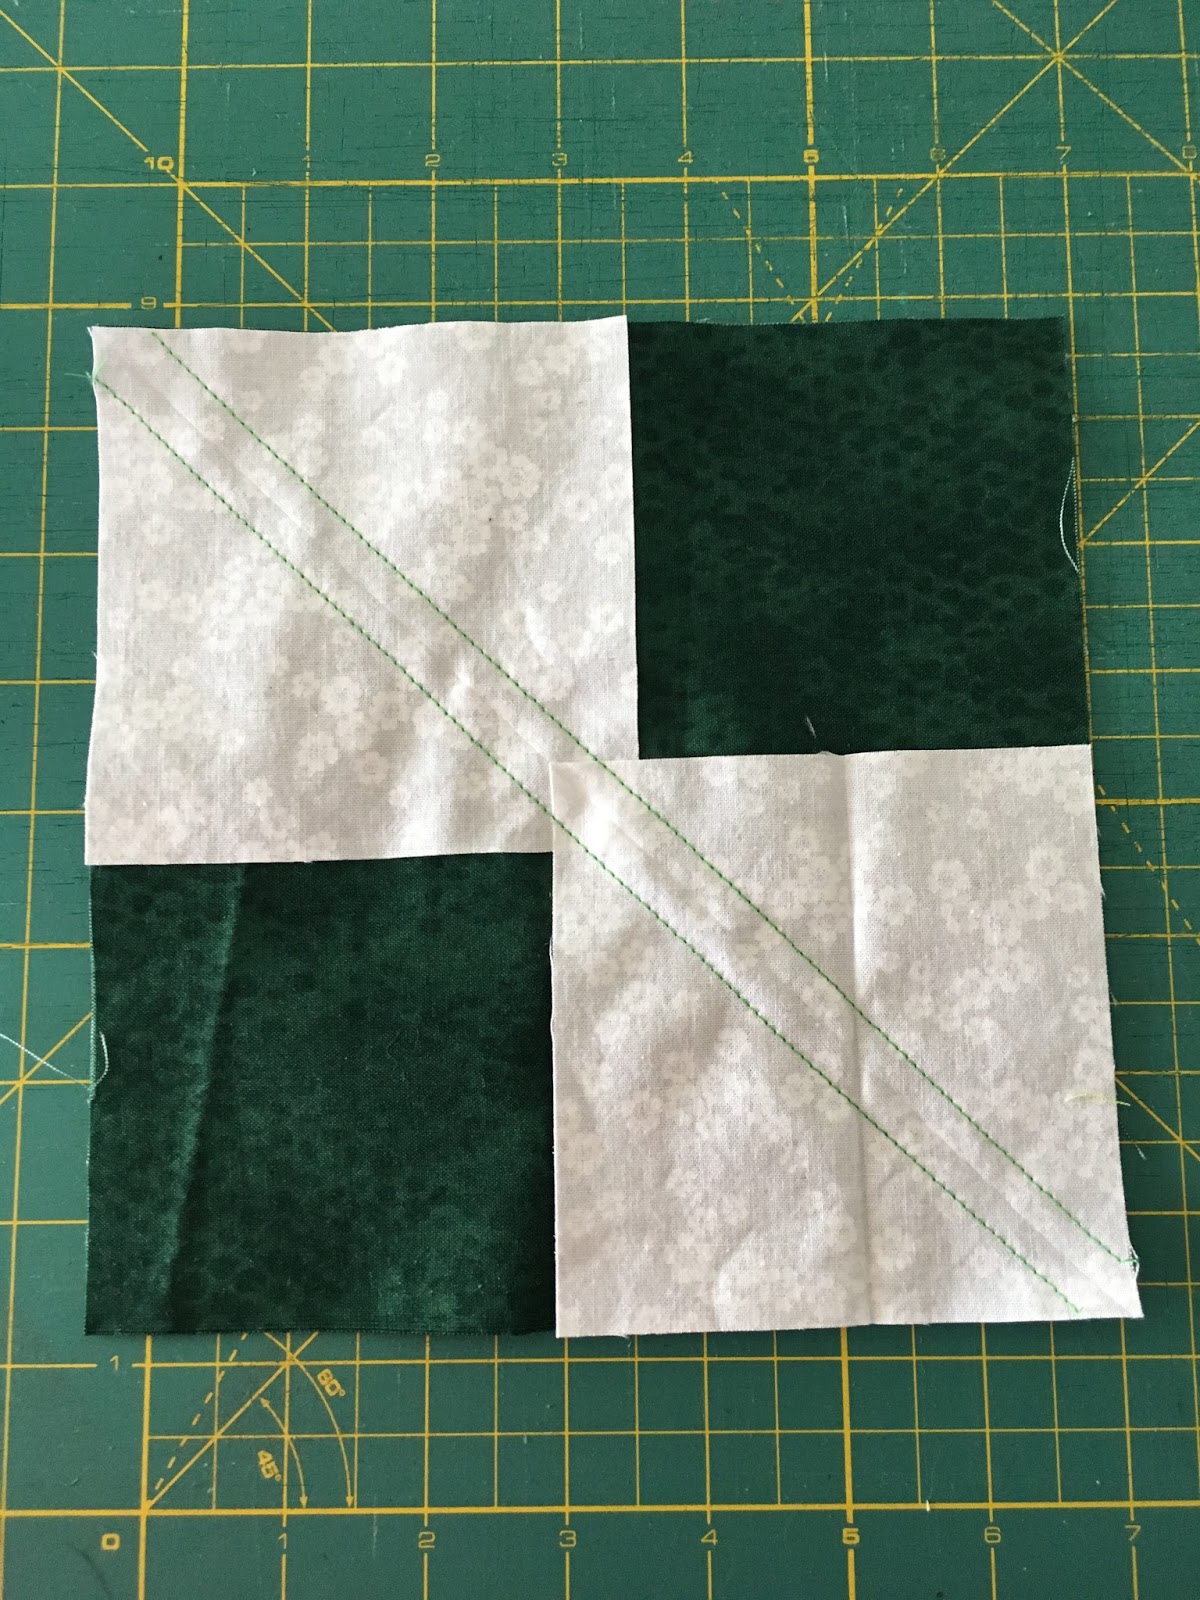
2) With right sides together, place two marked squares on opposite corners of the large square. The points of the small squares will overlap just a little bit and the drawn line should extend across the large square from corner to corner

3) Stitch a scant 1/4″ seam allowance on both sides of the drawn lines. Cut the squares apart on the drawn lines. Press the seam allowances toward the small triangles.
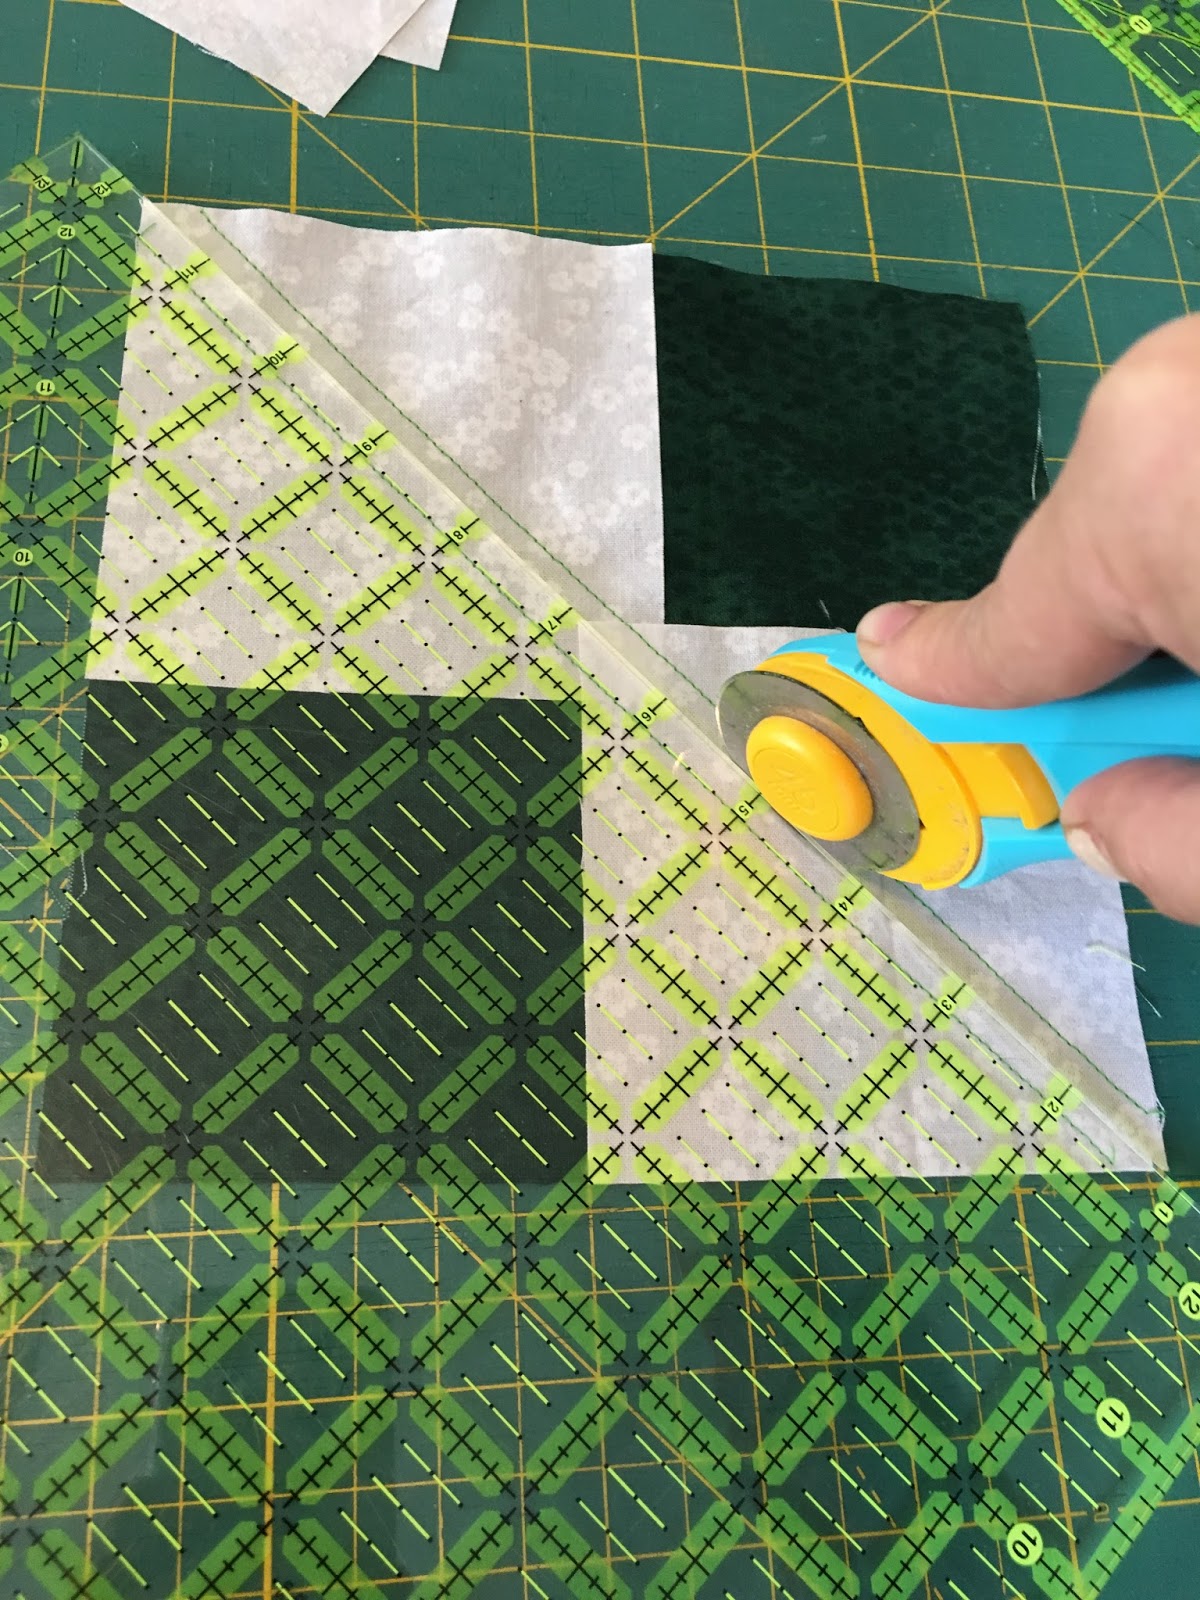
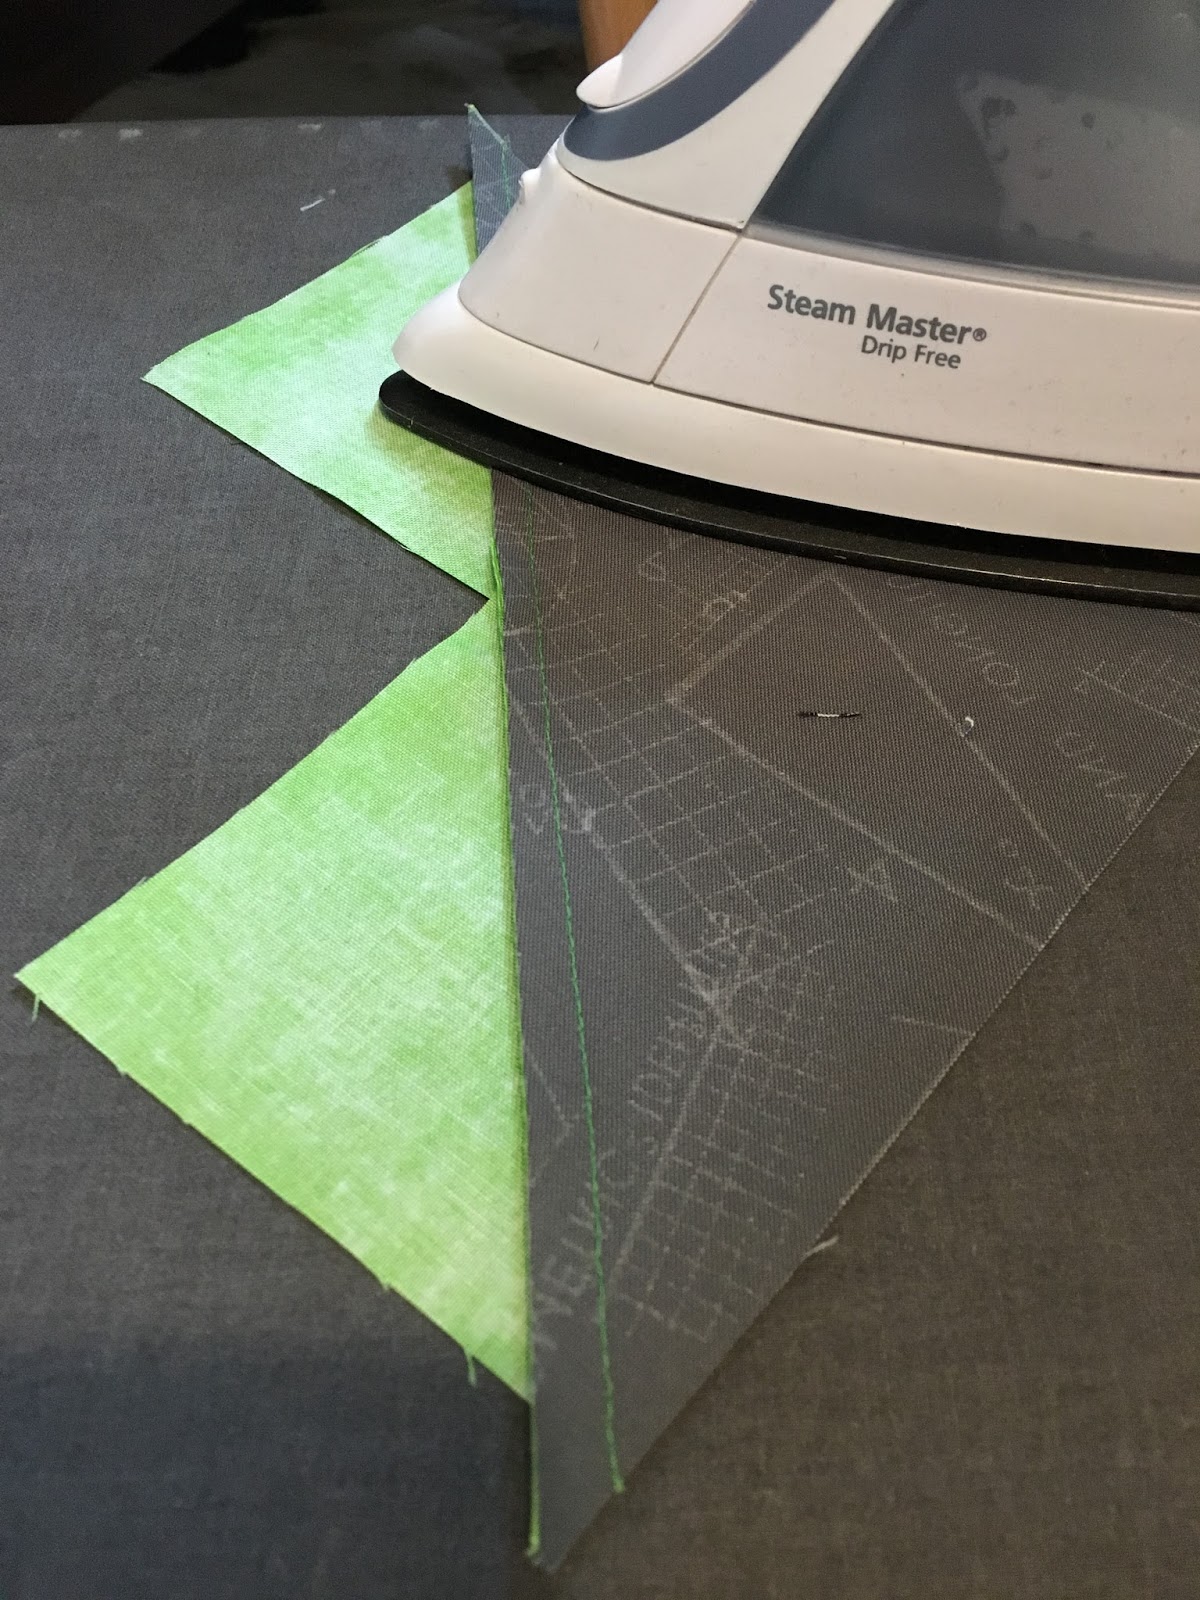
4) With right sides together, place one of the remaining marked squares on the corner of each piece. The drawn line should extend from the point of the corner to the point between the two small triangles. Stitch a scant 1/4″ seam allowance on both sides of the drawn line. Cut the pieces apart on the drawn line. Press the seam allowances toward the small triangles.


5) If you cut a little larger and need to trim down, now is the time to trim down each unit to 3 x 6

6) Now sew them together

7) Repeat for the second set of four. You can send them to me as two separate blocks, or sew them together in a long vertical strip (one flying geese unit above the other)

Looking forward to receiving your blocks!!!
Feel free to tag me on instagram:
@the_handmade_tail
Love from British Columbia, Canada!
Alanna
1 comment:
Alanna, thank you for such a clear tutorial and what a wonderful project! Looks like a lot of fun!!!
Post a Comment