Tuesday, February 28, 2023

Hive 2 March Tutorial- Scrappy Strings

 I don’t know about your stash, but I have loads of strings and off cuts that I need to use. I figured making a foundation pieced block would be the best way to use up some of those fabrics. I like the idea of a scrappy look with intention, so for this month you’ll need to dig through your scraps and pick with intention.


To start you will need to cut four 6.5 inch blocks from any gray print fabric, warm grays and cool grays are fine, just start with gray.


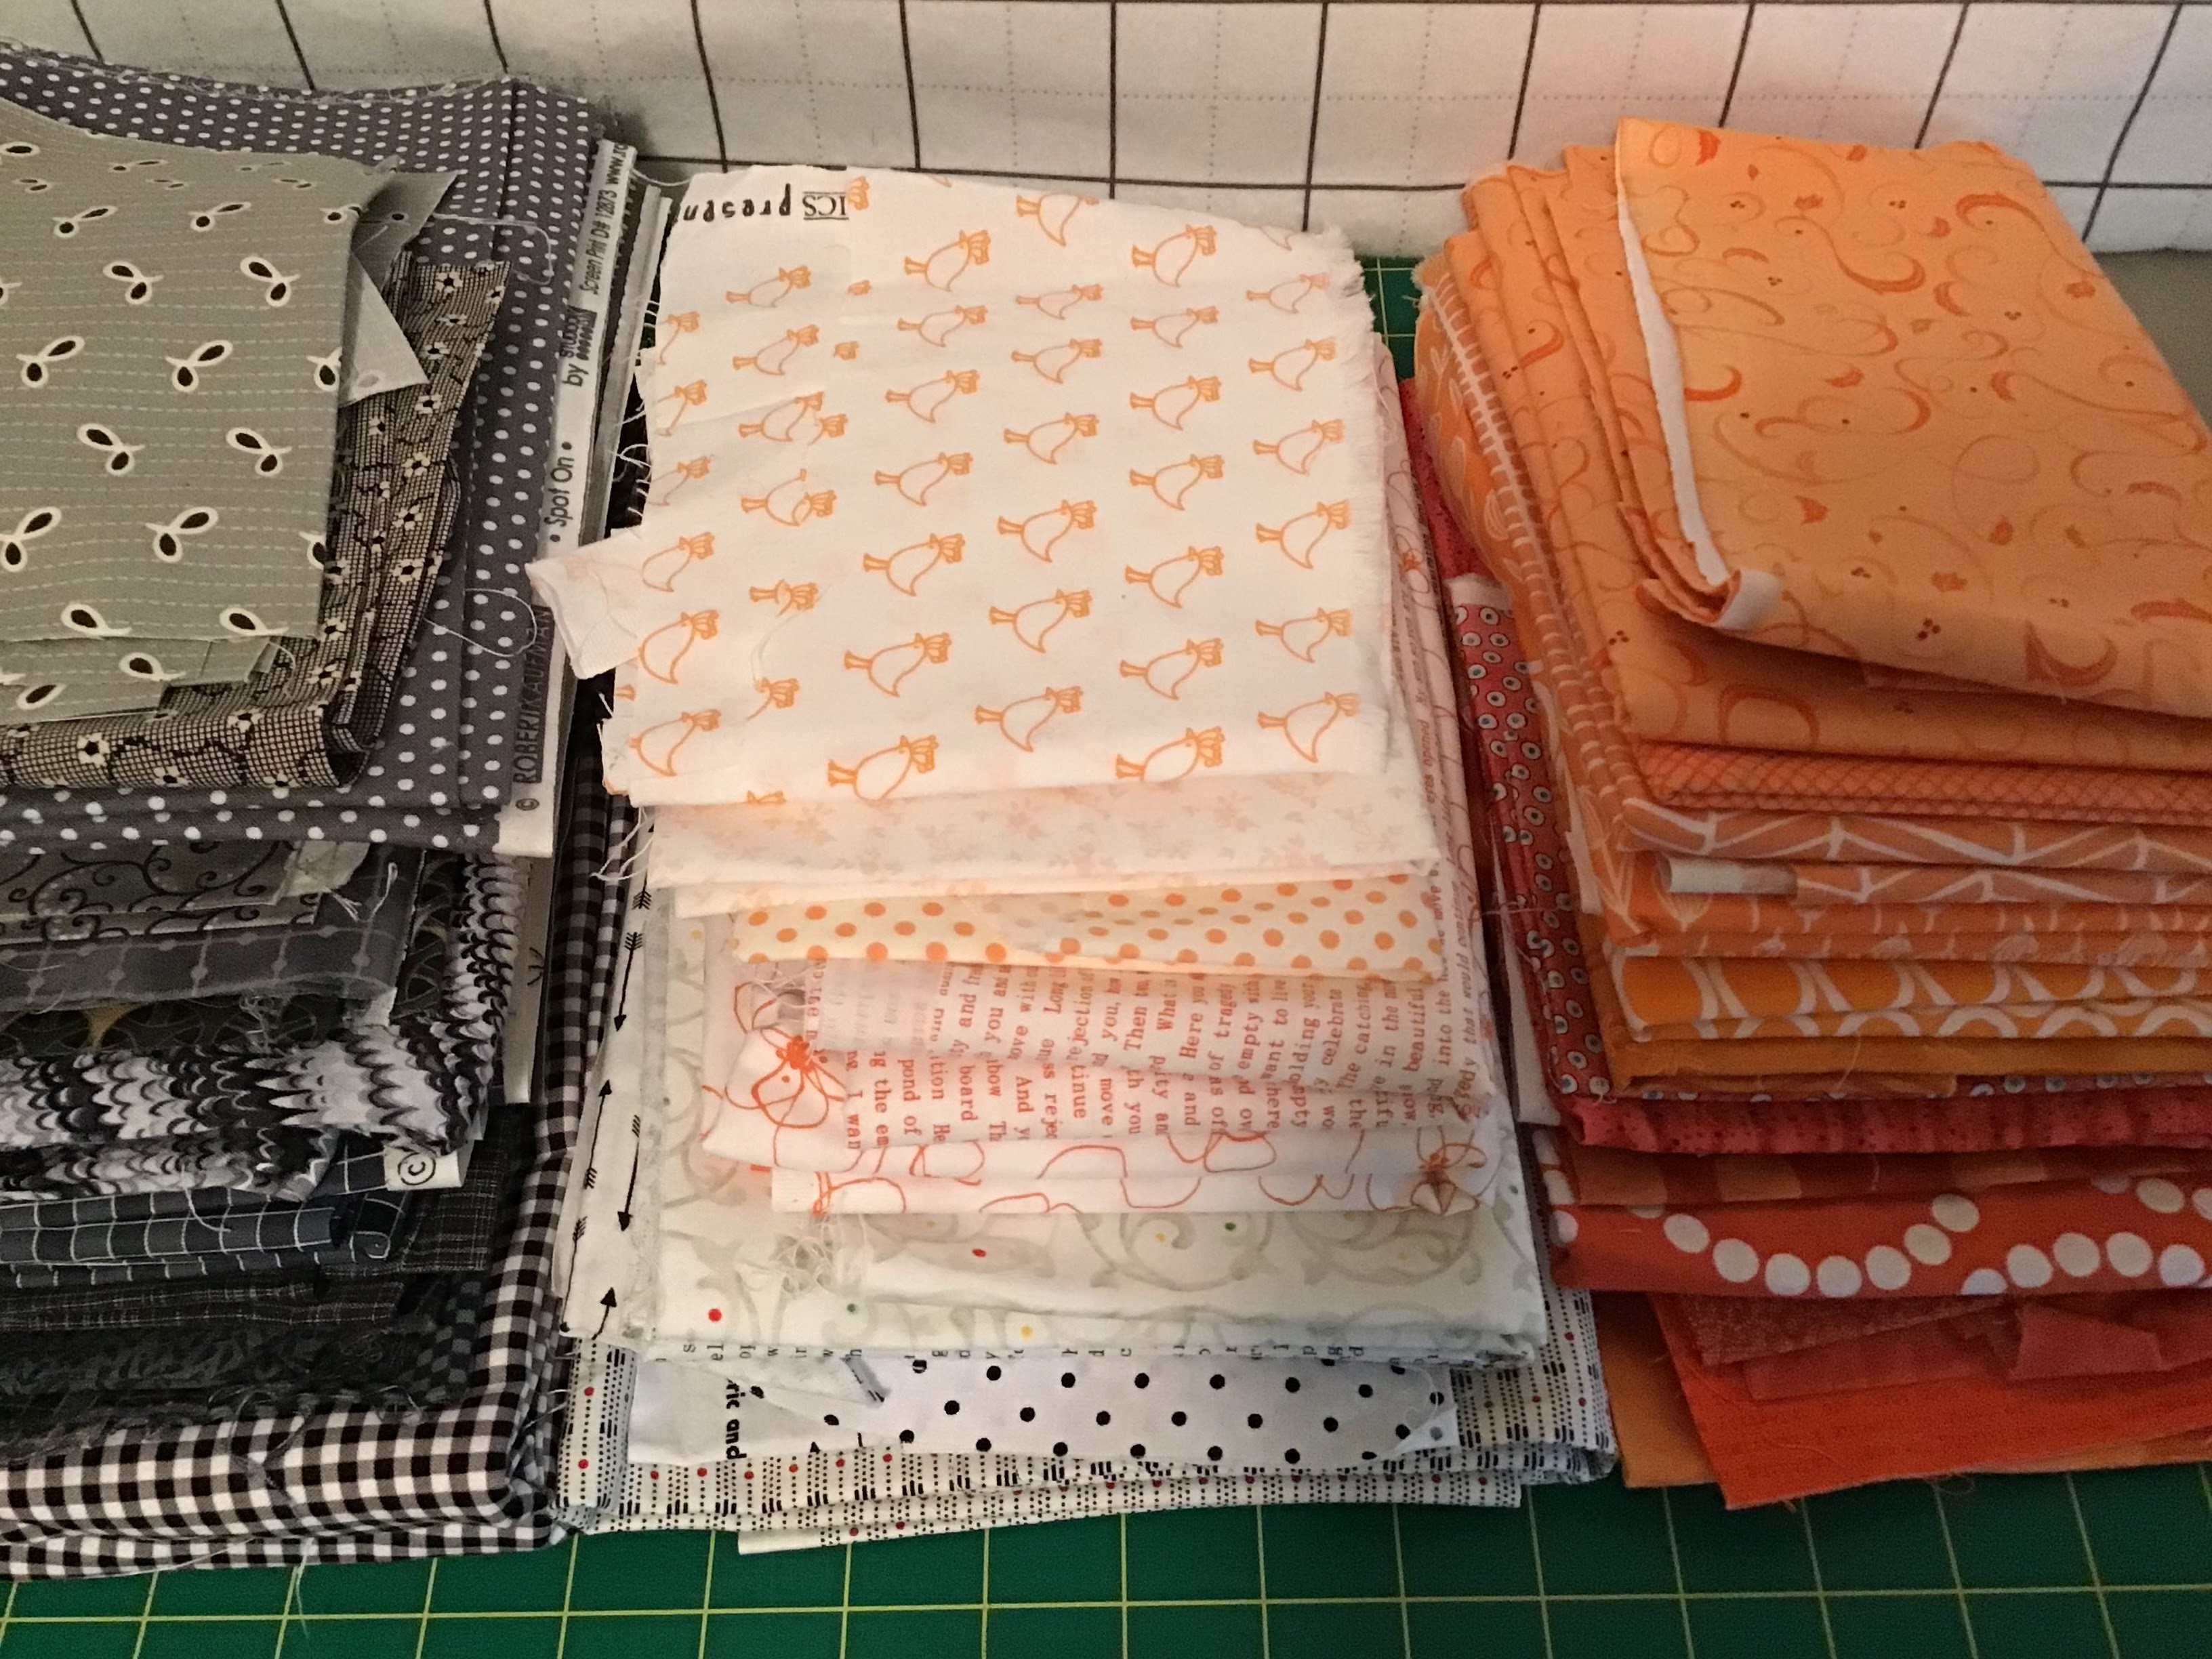
Then you will need to sort your strings by color. Please use fabrics that read as the color. For instance, if the print is small on a white background, it may read more white than color. A good way to determine is to step back a foot or two and see what color the fabric reads. Also (I know I am preaching to the choir) be sure to vary the width of your strings. Each block will have strings of a same/similar color.


So with your strings sorted into four color groups, you’re ready to sew.


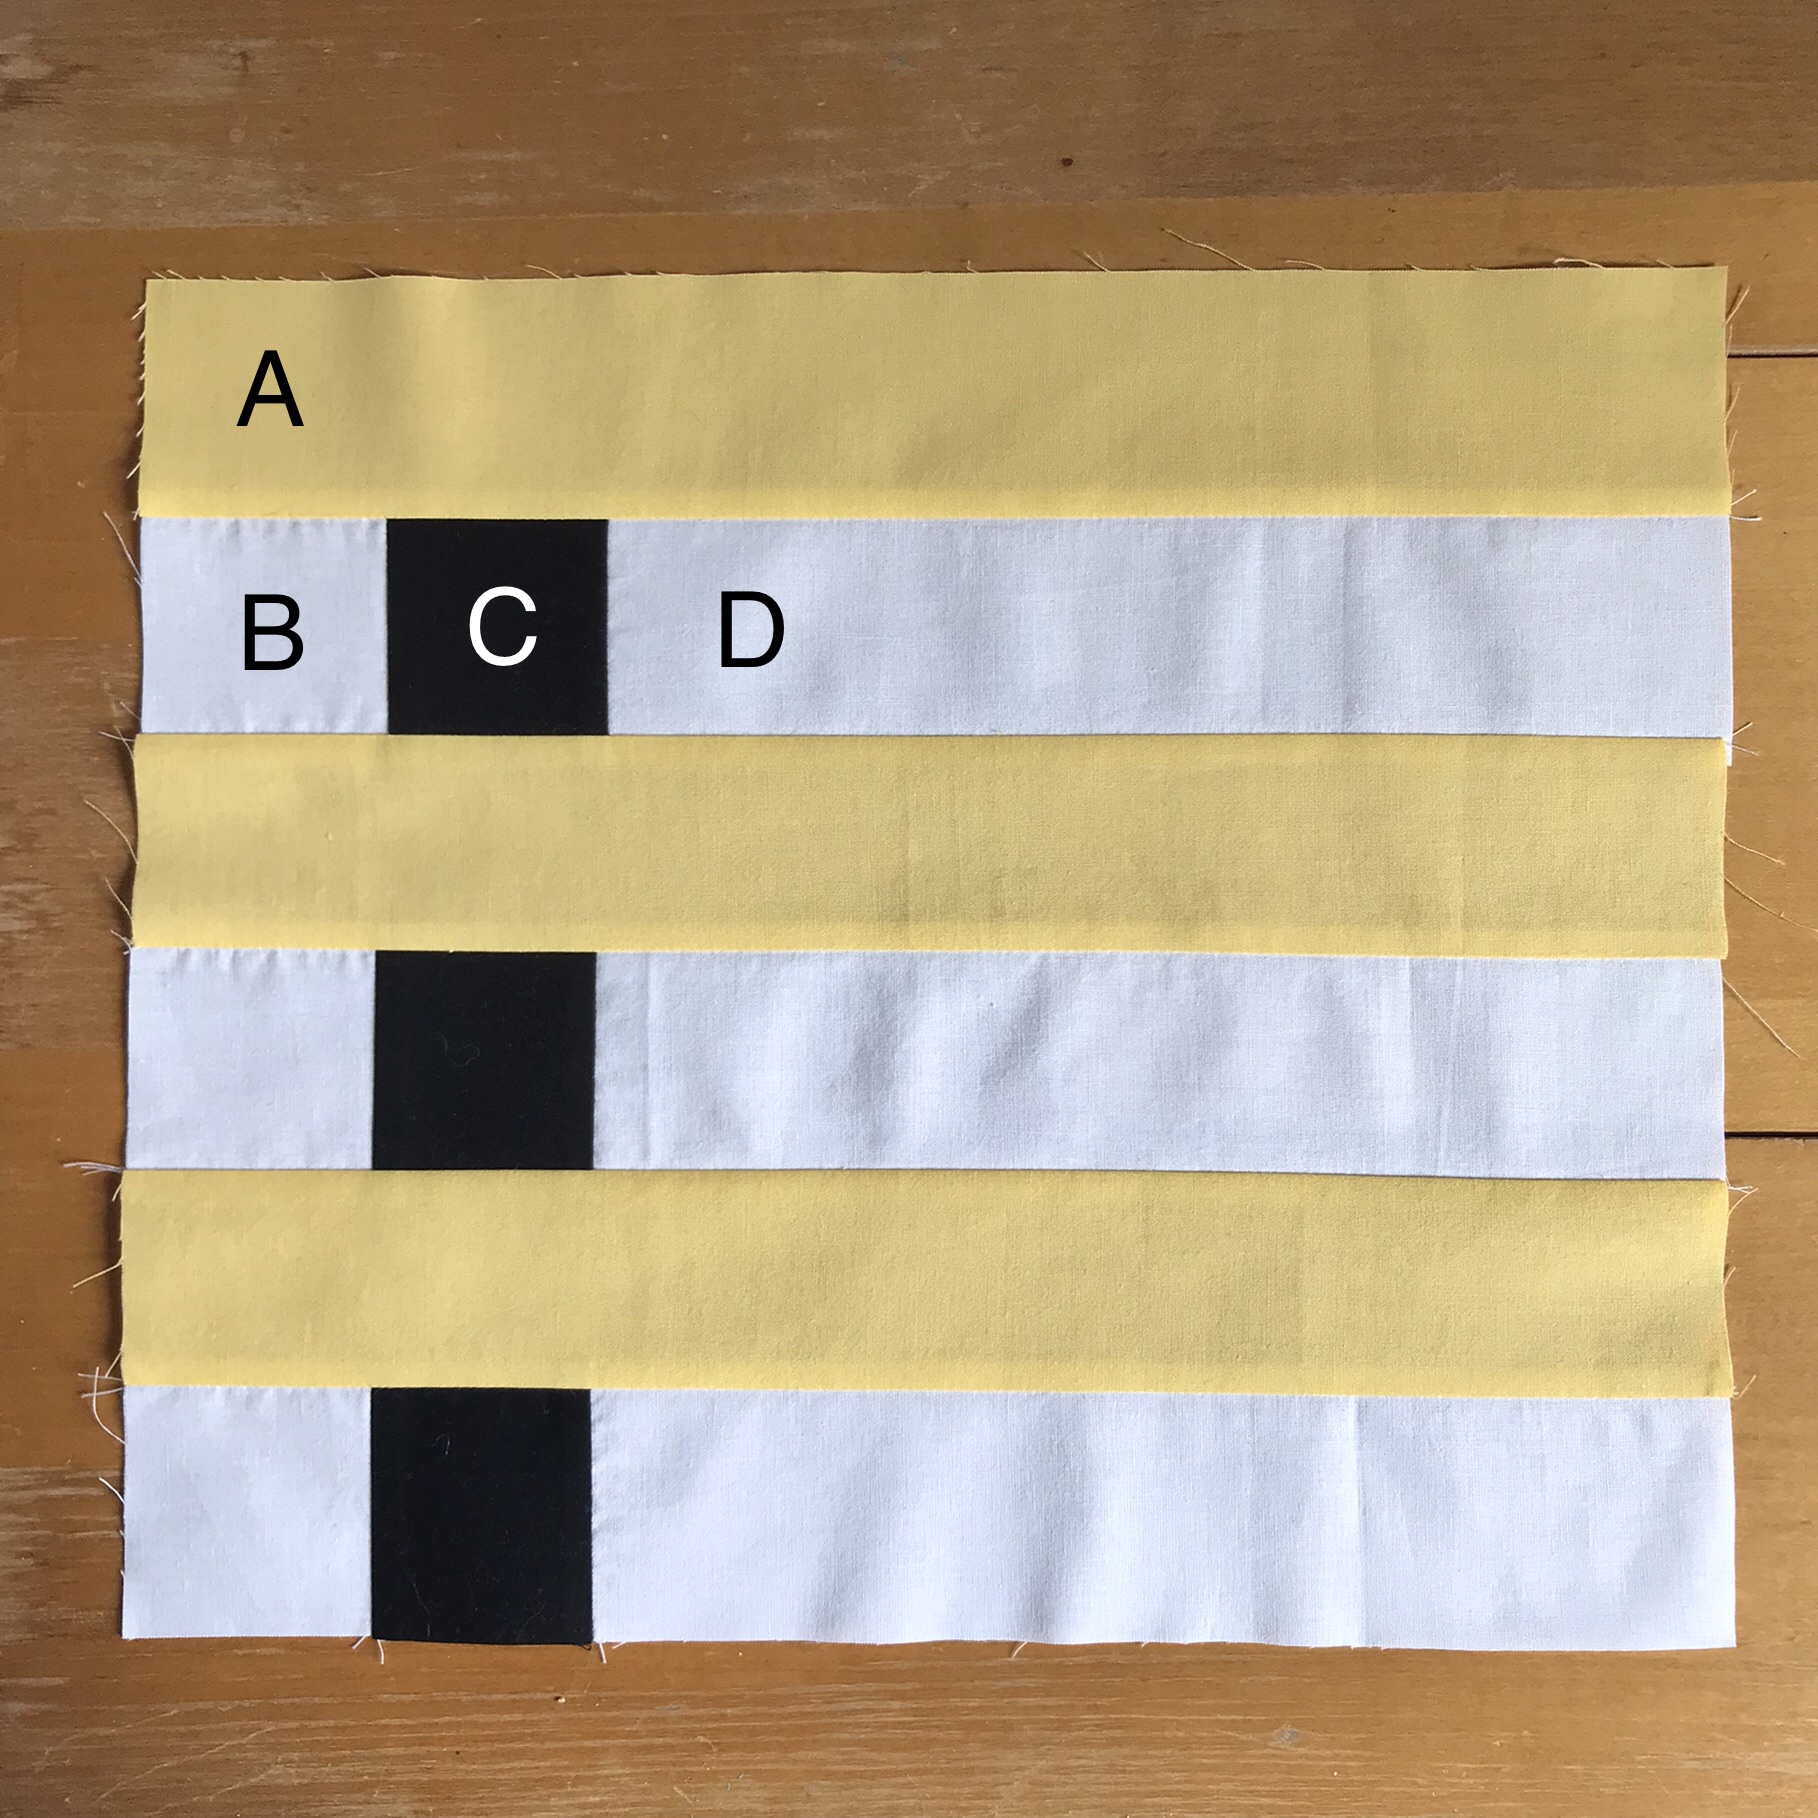
First draw a diagonal line corner to corner on the wrong side of your gray 6.5 inch squares. You may also use diagonal seam tape or fold and press a line. This will be used as a reference point for aligning your first string. Align your longest and first string right sides together on your gray square. Sew a ¼ inch seam along the diagonal.  I used a pin to pin my first string and flipped my block and sewed along my drawn line. For most of my blocks, my ¼ inch seam was quite generous. Fold string and press open, and then use your first string as your guide to line up your next string. Continue adding strings until half of your 6.5 inch gray square is covered.


Once

you’ve finished adding your strings, flip your block over and using your gray square as your guide, trim off the hanging strings. You will repeat the process and make 4 total 6.5 string blocks.


You do not need to worry about squaring your blocks, I will take care of that. My ultimate plan is to sort the squares by color and make a ROY-G-BIV/rainbow layout.

I am so excited to receive your blocks and lay out this quilt.


XOXO

Deanna


Hive 4 - March Tutorial - Block for Ruth


This year the decision which block two use for Stash Bee was a bit of a challenge. I had about 4 or 5 to chose from.

Finally, I decided on this design. It is based on a court house block.

I run a quilt group in my local church and we are supporting an organisation that looks after foster children in crisis care. When the children are taken from their families they often only got the clothes they are wearing and nothing else. So we are sewing quilts for children and babies that they can call their own and take with them when they leave crisis care and go to a permanent foster home.The finished quilt will go to this cause.

Please use fabrics in red-tones (from dark maroon over pink-ish to peach colours). My sample fabric pull is below. I prefer small patterns, so they can show on the narrow strips. You can also mix in solids. Background fabric should be low volume white/off-white. Please do not use novelty prints, licensed prints and batiks.


The finished block should measure 16" x 16"


Fabric requirements:
  • 4 different fabrics in red tones. 
    • Red 1: 6"x3"
    • Red 2: 6"x7"
    • Red 3: 6"x11"
    • Red 4: 6"x15"
  • 1 FQ low volume white/off-white background fabric
Cutting Instructions:
  • Red 1 - (2) 3" x 3" squares, put one aside
  • Red 2 - (2) 1.5" x 5" strips, (2) 1.5" x 7" strips
  • Red 3 - (2) 1.5" x 9" strips, (2) 1.5" x 11" strips
  • Red 4 - (2) 1.5" x 13" strips, (2) 1.5" x 15" strips

  • Background:
    • (2) 1.5" x 3" strips
    • (2) 1.5" x 5" strips
    • (2) 1.5" x 7" strips
    • (2) 1.5" x 9" strips
    • (2) 1.5" x 11" strips
    • (2) 1.5" x 13" strips
    • (4) 2.5" x 7.5" strips, put aside
    • (2) 1.5" x 2.5" strips, put aside
    • (2) 1.5" x 1.5" squares, put aside
Below is a sketch how to cut your strips from a FQ with the least possible waste:

Before you start sewing set your stitch length to 1.5mm. This will help with the ends not unravelling as easily and also hide the stitches when sewing white to a dark(er) colour.

Take your 3" x 3" 'Red 1' square and sew (2) 1.5" x 3" white strips to top and bottom, press seams open. Then sew your (2) 1.5" x 5" white strips to the right and left sides, press seams open.

Sew (2) colour 'Red 2' 1.5" x 5" strips to top and bottom, press seams open. Sew (2) 1.5" x 7" strips to the right and left sides, press seams open.

Sew (2) 1.5" x 7" background strips to top and bottom, press seams open. Sew (2) 1.5" x 9" strips to the right and left sides, press seams open.

Sew (2) colour 'Red 3' 1.5" x 9" strips to top and bottom, press seams open. Sew (2) 1.5" x 11" strips to the right and left sides, press seams open.

Sew (2) 1.5" x 11" background strips to top and bottom, press seams open. Sew (2) 1.5" x 13" strips to the right and left sides, press seams open.

Sew (2) colour 'Red 4' 1.5" x 13" strips to top and bottom, press seams open. Sew (2) 1.5" x 15" strips to the right and left sides, press seams open. And you are done.

You don't have to do anything further, but you probably wonder why you have a red square and a few background strips left over.

I will show you :)

Your blocks will be cut it into four equal squares, squares will be swapped around (I will not keep the blocks together, but rather mix them up nicely across the whole quilt top) and then the red square and background strips will be used to join all the blocks together.

My finished quilt will look like this :)
Thank you for joining in the fun and making my March block. Happy sewing.

Saturday, February 25, 2023

Finished quilt: Sunny Zipper Block


Finished quilt from 2022 Hive 1! I was able to get some pictures of this finished quilt while it was nice and snowy out. It turns out it snowed even more the next day--but I didn't want to do a repeat photoshoot out in the cold! 

I'll stay inside with my nice quilt instead. 


Finished quilt: Autumn Jacob's Ladder


Sharing a finished quilt! This was made with the help of 2021 Hive 1. You can see the original block tutorial here.

This quilt came out beautifully--absolutely the cozy autumn quilt I had imagined. I'm sharing a few close ups with fabrics that I especially love.


Thank you to 2021 Hive 1 for all your help!

Thursday, February 23, 2023

Hive 1 🍃🌱🍃 for Adrienne!


Leaves! These were fun--I like trying new things. But I was (am) pretty worried about my colors (my selection of green is extremely limited and very homogeneous), so I made a bunch and hope that at least a couple of them will fit your plans! I be-leaf in you! 🍃

Molli.

Saturday, February 18, 2023

Hive 1 February Leaves for Adrienne

 Adrienne - I enjoyed making these blocks! It was nice to try this more laid-back construction style, and it really got my imagination going! Thanks! 


Hive 1 Leaves done

 These fun little leaves are done and in the mail.  I dropped them at the post office this morning.

Enjoy them Adrienne!


Made by Deana


Sunday, February 12, 2023

Hive 1 February leaves for Adrienne

 I put these in the mail this weekend! This was a fun block and a great way to learn curves with some training wheels. Thanks for the great block choice Adrienne! -Julia


Saturday, February 11, 2023

Hive 1 February Leaves for Adrienne

These leaves were a quick and easy technique! I can see how they can become quite addicting. Thanks for sharing Adrienne. These two are on their way to you.

-Nik


Friday, February 10, 2023

Crashing Hive 6 - pumpkins for Marie

 When Marie posted her pumpkins for February, I knew I had to make one. They're just so cute! I can't wait to see the finished Halloween blanket; it's going to be great.


Monday, February 6, 2023

Hive 1 February Leaves for Adrienne


 I didn’t know I loved organic curves and found this block so easy and fun!  Thanks for choosing it Adrienne!  I may do a stash busting quilt with leaves!

Chris

Sunday, February 5, 2023

Hive 1 - February leaves for Adrienne


 Working with curves always makes me nervous but they always end up beautiful. Adrienne provided a great tutorial that was easy to follow and I'm happy with how they turned out. Sticking them in the mail soon!


Thursday, February 2, 2023

Hive 1 Leaves for Adrienne


Hi Adrienne,

Thank you for requesting this block - another technique under my belt! 🙂

Will be interesting how you arranging them.

The leaves are going in the post on Saturday.

Take care,

Rita

Wednesday, February 1, 2023

Hive 6-February Tutorial- Strippy Pumpkin block

Dear Hive 6 Bees,

It is a true pleasure for me to share my favorite hobby, quilting, with you this year. This is my third year in StashBee. I have always been happy with the blocks that every Bee has prepared for me. As you will see below, I am quite flexible for many aspects of the construction of the block. It should therefore be easy! 

For this February block, forget about Valentine’s Day…
Instead, let’s jump right to Halloween!

I have had a Halloween quilt in mind for a while, because it is missing from my “collection”. 

I found this fun pumpkin block idea on craftsy.com. The block is small (8”x8”) and cute! 

A similar block was requested in June 2021 by Carrie in Hive 4 in 2021 (See @lovebugdoodles to see her quilt completed). The block is bigger (14”x 14”) and lovely!

In my final assembly, I hope to break the monotony of repeating aligned pumpkins of the same size. For this reason, I am suggesting these two tutorials, each resulting in a different size block, and ask that you pick the one that works best for you. Small or large pumpkin, please surprise me! I will work with what you give me and may even add a few cats, bats and brooms in the final composition! 

Fabric request:

Pumpkin:

The pumpkin is pieced with six fabric strips. 
  • Each strip should be orange, read-orange or what you think is color appropriate for a Halloween pumpkin! This means purple, brown, gold and even black works, as long as the pumpkin contrasts with the background fabric you choose (more below under "Background")
  • Prints (including Halloween prints), solids and batiks are all good. Bright colors work also.
  • If you have six different colors/fabrics for the pumpkin, then go ahead and use all six! If you don’t, don’t worry. Pick two colors/fabrics and alternate the strips. 
  • Repeat colors/fabric is fine. 

Stem & Leaf: 

  • The stem should be "stem" color, such as brown, grey or black, and again, should contrast with the color you pick for the background.

  • The leaf should be any type of green...as long as it reads green.

  • Both stem and leaf can be solid or prints.

Background: 

Please choose a background color that contrasts with the pumpkin, the stem and the leaf. 
  • Any fall color works, such as light brown and gold.
  • Prints are fine.
  • When in doubt, use solid cream. 
Instructions:

The project has been very well described, step by step, so I let you choose one of these two tutorials:

1- The smaller block from craftsy.com can be found here.

Note: There seems to be a small error in the tutorial with the dimension of a background strip. The one strip 1 ½” x 3” should be 1 ½” x 3 ½”. 

The finished size of this block is 8.5" x 8.5" unfinished (8”x 8” finished)

2- The larger block from the Stashbee blog can be found here.

The finished size of this block is 14.5" x 14.5" unfinished (14”x 14” finished)

Here are the two blocks I prepared already.


Thank you for the time you will spent on this special request. I really appreciate your contribution to my future pumpkin quilt!

-Marie

Hive 5 February Tutorial - Bear Paw block for Marie


Hello,

The winter in Maine has been non-existent until last weekend and now it won't stop.  Shoveling, ice removal and zero temps have taken over my days but it is beautiful.   I hope your winter is going well.

My block this month is a simple Bear Paw.   My sewing goal this year is to use colors that I tend to shy away from so this block has orange in it.   Here is the finished block and my fabric pull.


You will need:

(8)  3" orange squares

(8)  3" low volume squares

(4)  4 1/2" medium/ medium dark gray squares

(4)  2 1/2" low volume squares

(4)  2 1/2" x 6 1/2" low volume rectangles

(1)  2 1/2" orange squares


The low volume can have orange, gray or small amounts of black in it but should still remain mostly low volume.   The oranges can range from light peach to deep orange.   It can have red,  yellow or black in it but still read as orange.   (And please don't use Halloween novelty fabrics).  The grays should be medium to medium dark.  


To begin: 

With the orange and low volume 3" squares, make 16 half square triangles.  (HST)

To do this, draw a diagonal line on the back of the low volume squares.  Place this with a 3" orange square, right sides together and sew 1/4" on either side of the drawn line.   Cut on the line, giving you the 16 HST's.  Press toward the orange.  Then place the diagonal line of the ruler on top of the diagonal line of the square, as seen below, and trim to 2 1/2".


Following the picture below,  sew two sets of HST's together.  Place one set with a gray 4 1/2" square  and the other with a 2  1/2" low volume square and sew together as shown.   Sew top piece to bottom piece and press.  Please make four of these.  They should measure 6 1/2".   


Below is how the block will be set up to sew.


Piece this as you would a nine-patch block,  sewing one quadrant to a low volume rectangle and then another quadrant.  Repeat for the bottom segment.   Sew the center rectangles and  2  1/2" square together.  Sew rows together and press toward center.  Unfinished block should measure 14 1/2".

And here is one of my blocks put together.


Thank you for sewing for me this month.  I can't wait to see the results.


Hive 4 - February Tutorial - Changing Squares Part Two

Greetings Hive 4 

Two years ago, I asked for blocks based on a painting that I loved. I'd really like to increase the size of the final project, so am asking my 2023 hive to help. This year I'm only asking for parts, not a completed block, to allow for lots of possibilities in placement. 

This is Twelve Fields with Changing Squares (1948) by Richard Paul Lohse (1902-1988). He was a Swiss painter and graphic artist who used position and color to determine the rhythm of group units. 

I designed a block that consists of 3 bands of a solid color and 3 bands of a two (Block A) or three (Block B) color unit. Because this block uses 2.5" strips and squares, it's jelly roll friendly. I hope that this block will be quick, easy and provide you with an opportunity to play with color combinations. 

Block A                                                                                Block B


Please use solids only.  Here's my color pull: black, white, navy blue, yellow, green, orange. Think 1940s colors. The green is the most unique color in this group (mint mixed with a bit of gray).


You have two options for your block design:


#1 Block A with three colors or


#2 Block B with four colors.


Contrast is the thing that makes these blocks sing, so play with your placement and color combinations to achieve the most contrast. You can use the painting as inspiration for color combinations or you can make your selections based on your stash and whims.


Once you've chosen your 3 or 4 colors, you will make the following cuts:


A    3 - 2.5" x 14.5" for your solid color bands


B    3 - 2.5" x 2.5" squares


C    3 - 2.5" x 2.5" squares


D    3 - 2.5" x 10.5" strips


Construct the B/C/D units.  


Sew the B and C (2.5") blocks together. When sewing small units together some of you may have experienced what I circled in red in the picture below. The fabric on the bottom gets pulled slightly more than the top (unless you have a dual feed system or use your walking foot for piecing). The best way to avoid this, is to double pin those small units and sew slowly. Even though it's a small discrepancy, it can cause a distortion in the final block.


Please press the seam towards the darker fabric.  


Now join the B/C unit to D. Keep using those pins . . . . . 


Each B/C/D unit should now measure 14.5" long unfinished. 

And you are done! Mail me three B/C/D units and three A units. These should fit nicely into a 4 1/8" x 9 1/2" envelope. In the States, if you use a first class and an additional ounce stamp, you'll have enough postage (if you aren't adding anything else to the envelope). That would be a total of 0.87 if using stamps with printed prices.


These are the blocks I received from seven of my 2021 hive members. You can imagine all the fun I'll have making new arrangements (flipping, mirroring, etc.).


Thank you very much for contributing to my quilt.  Email or send me a message through Instagram if you have any questions.

With much appreciation, 
Cathleen
@KitchKouture