Sunday, April 30, 2023

Hive 1 April Diamond Star for Rita

I'm in just under the wire for this one, so only got two sewn--all the fabric is enclosed for you to finish up the block! I don't always sew FPP so I always have to watch a video to get in the groove, but then love it once I get going. I left most of the block still to be trimmed. This will be a beautiful quilt!

-Julia 

Saturday, April 29, 2023

Hive 1 April Diamond Star for Rita


Well, after a session with my seam ripper on the first one, the next ones were a snap!  Coming to a mailbox near you next week!

Hive 1 April Diamond Star for Rita

 Thanks for choosing this block, Rita. I love foundation paper piecing - it's so quick and gets great, crisp results! I'm excited to see what your final layout looks like!


Friday, April 28, 2023

Hive 4 - May Tutorial - Snowflakes


 Hi Everyone -

Happy May Day!

This is my 3rd year in Hive 4 and have made two beautiful quilts which I donated to charities, because that's pretty much where most of my quilts go.  This year, I am going to be selfish and make a quilt for me. I love Christmas quilts and quilts with houses, so when I saw "Snow Village" by Gigi's Thimble,  I bought the pattern.    In reviewing the instructions, I realized that it called for 12 snowflake blocks that should be of different fabrics since all snowflakes are different.   I contacted Amber Johnson, the pattern designer and asked if I could share the snowflake block and she generously agreed as long as I don't share the whole pattern (I won't!) and that I give due credit in all pictures, which I will.   I ask that you include Amber (gigis_thimble) in your posts as well.  

This a very simple block, which only requires two colors.   I'm asking that the background square be as close to snow white as possible.  White on white low volume is fine.  Just try to stay away from cream.  For the snowflakes, I'm asking for something in the tan or beige family.   No batiks please.

For the background, solid white or white on white prints are fine;


For the snowflakes,  here's a few sample that would work from light to dark, no solids please:


Fabric Cuts:

Tan:  1 - 21" x 2.5" Strip and 4- 4.5" x 2.5" Rectangles

White: 1 - 21"  x 2.5" Strip and 1- 2.5"Square


Super easy to assemble:

Sew the tan and white 21" strips together on the long side.  Press towards the dark.   Subcut into 8- 2.5" strips and assemble to make 4 - 4 patch units.  Press seam allowances open.

Next, piece the 2.5" white square to the two tan rectangles (middle section) , and assemble the block as shown below:


For top and bottom rows:  Press seam allowances toward the rectangles.
For middle section: Press seam allows toward white 2.5" square.

Sew the rows together and press the seam allowances open.

Block will measure 10.25" x 10.25" unfinished.


Super easy!  Thanks everyone for the help!

Here's a snap of the pattern, so you can get idea of what I'm planning.


Joan


Thursday, April 27, 2023

Hive 1 block for Rita

 Here she is.  This quilt will be fabulous! Will be mailed tomorrow .


Tuesday, April 25, 2023

Hive 1 💎⭐️ for Rita!

Lovely Rita! This was a good time! I can't wait to see how it all looks together -- non-square blocks are always interesting!! 

 These will be in the mail tomorrow.
P.S. Uh, pardon any weirdness of scale in the image -- I had to make an adjustment to the photo, but I swear it's all good in real life! 😅

Wednesday, April 19, 2023

Hive 1 - April - Diamond Star for Rita

 Hi Rita,

Ok, this was a really fun one!! I did a test block with printer paper and while it fold nicely, it doesn't cooperate with my machine so I ordered newsprint paper. That is a game changer! I want to paper piece everything now!

 My test block was with some lovely mints but the pieces were a bit short on the edges so I went diving into more bins. I found some amazing ombre Stonehenge fabrics I have been "saving" (i.e. forgot I had it).

I am putting it in the mail tomorrow 😁 Can't wait to see it all done!

~Adrienne


Thursday, April 13, 2023

The Cat's Meow - A Purrfect Finish

 I am beyond thrilled with how my Hive 1 quilt turned out this year. This is the first time I've finished a bee quilt in the same year I got the blocks, but since it's for a charity auction later this month, I was under a deadline. 

I can't thank my hive mates and everyone who crashed it to help me make such an amazing quilt for a good cause. My cat Poe also thanks you!


~ Diana @ Red Delicious Life

Wednesday, April 12, 2023

Crashing Hive 5 in April - wonky star for Nina


This looked like a fun and easy block. I couldn't resist crashing hive 5 when Nina posted this block.

I sure got the wonky part right! 😂😂

It's in the mail to you, Nina. I am looking forward to seeing your finished project.

Cheers,
Nicole


Thursday, April 6, 2023

Paper Piecing for Rita

 I love all the different shapes you can make with foundation paper piecing, and while this one is a pretty basic pattern (which is great for our newer sewists!), I think this is going to have a big impact once Rita puts all of her blocks together.

I'm really looking forward to seeing her finished creation.


~ Diana @ Red Delicious Life

Wednesday, April 5, 2023

Crashing in Hive 1: April Diamond Star for Rita


Hi Rita, 

I couldn't resist crashing in (again)! FPP and no need to tear the paper off!?! Easy enough!

Congrats on this fun pattern!

Take care,

Marie


Hive 1 - April Diamond Star for Rita


Not gonna lie, I was super intimidated to try this FPP block since it was something I'd never done before. I watched the tutorial videos online, I read thru the instructions multiple times, but I knew I'd just have to jump in and do it. It was so much simpler than I imagined! Once I got going on one template, sewing up the other 3 took no time at all. The one tip I found useful in the tutorials was to use a card/cardstock for the template folds. That really helped keep my lines crisp. 


I went a little retro-inspired with the colors since that's the vibe the pattern gave me. I can't wait to see what Rita does with her pieces!


Thank you Rita for giving me a new skill. Your diamond is in the mail!  😊


--Nicole
 

Saturday, April 1, 2023

Hive 1 March block for Julia

Ended up with 5 the right size and 2 that are too small. Needless to say I overdid it being worried about not having enough. I'm late getting these out so I hope the extras will help Julia forgive me. 

Hive 6 - April Tutorial - Scrappy Bear Paw

 I'm so excited for this block - it's one of my favorite blocks and I have used it in quite a few different ways.  This one was inspired by a finished quilt I saw on Instagram by @tilkumviilaaja.  I was scrolling and stopped in my tracks - it just caught my eye.  It fits beautifully into my theme this year - "do something with the mountains of scraps you have in your room!"  Though I will tell you, I have cut for days and have yet to see any change in the mountain.  
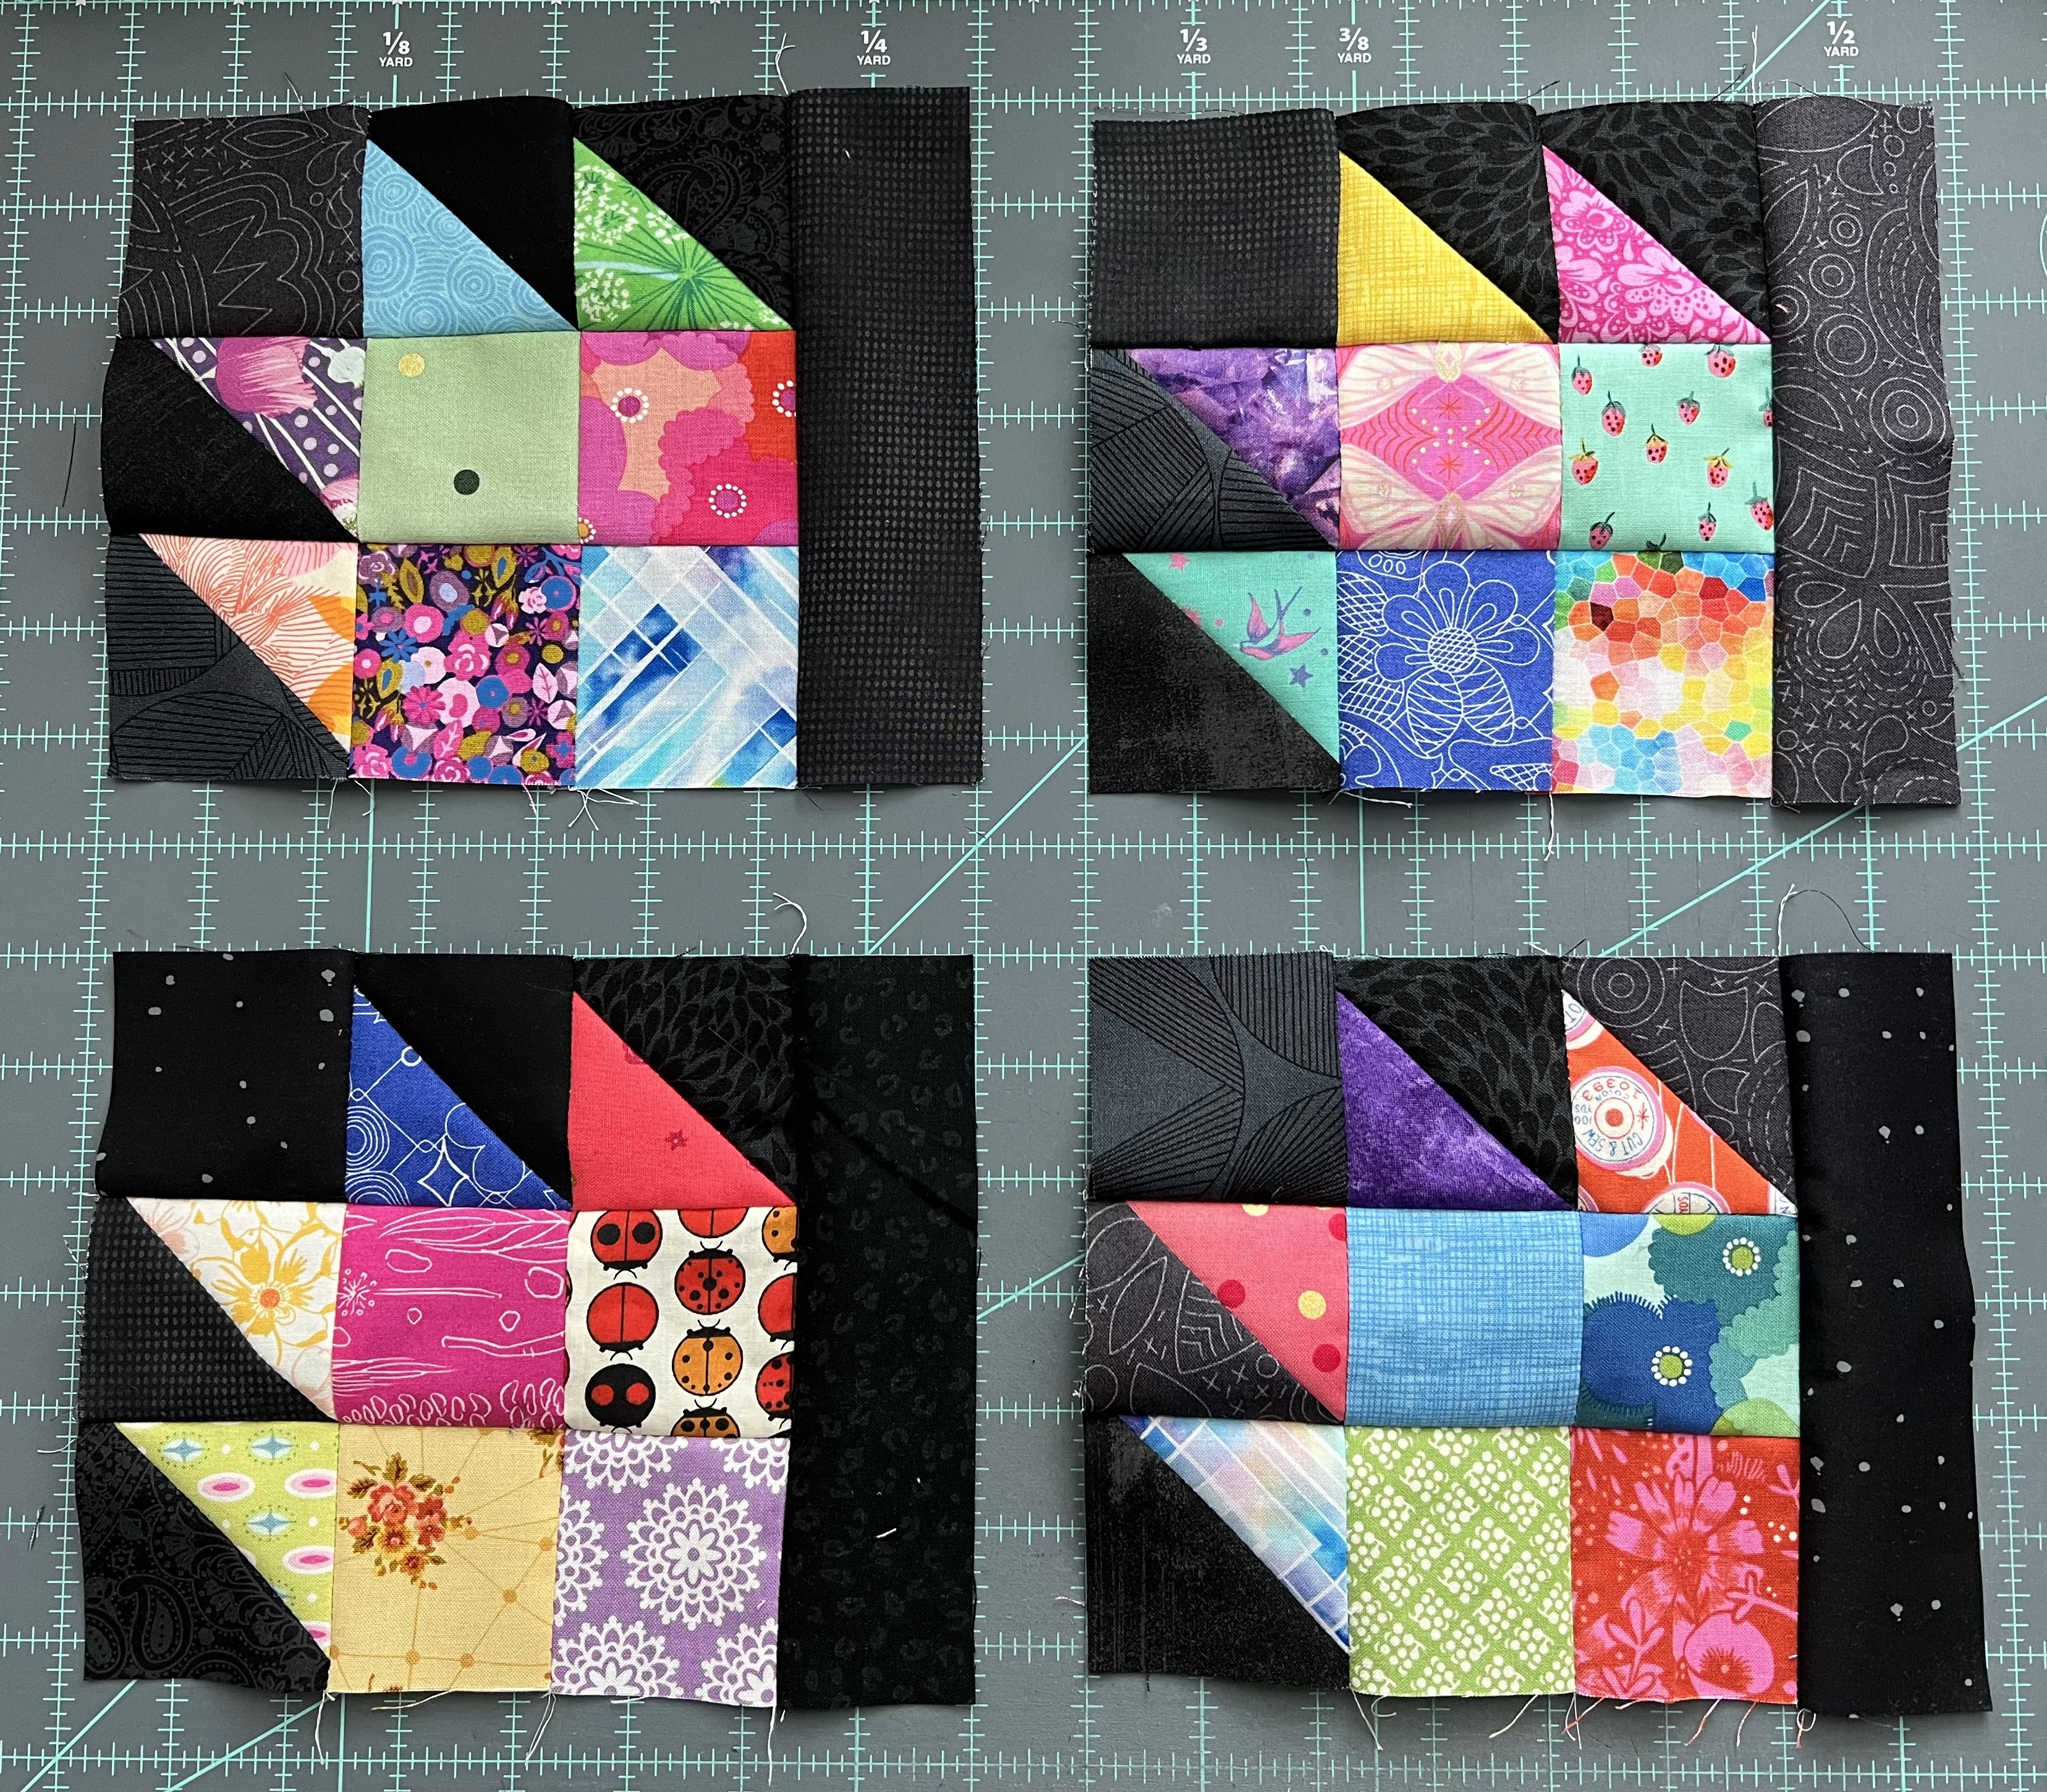
Completed block

As you can see, this is a scrappy block.  And you will not be sending a finished block to me.  I am asking for you to send me 4 quarters instead.  That will make it easier for you and I will be mixing up the quarters you send with quarters I make and quarters others send.  That will make all the different fabrics blend well.  The pink center will be the only piece that is the same in every block. The finished quilt is 36 blocks.

.
What you will send

Colors:
For the colored scraps, use bright, vibrant colors.  Pattern, batiks are ok.  Fussy cuts are ok.  It will all blend.
No licensed characters.  Avoid dark colors, muddy colors, black, brown, or fabrics that are primarily white.  

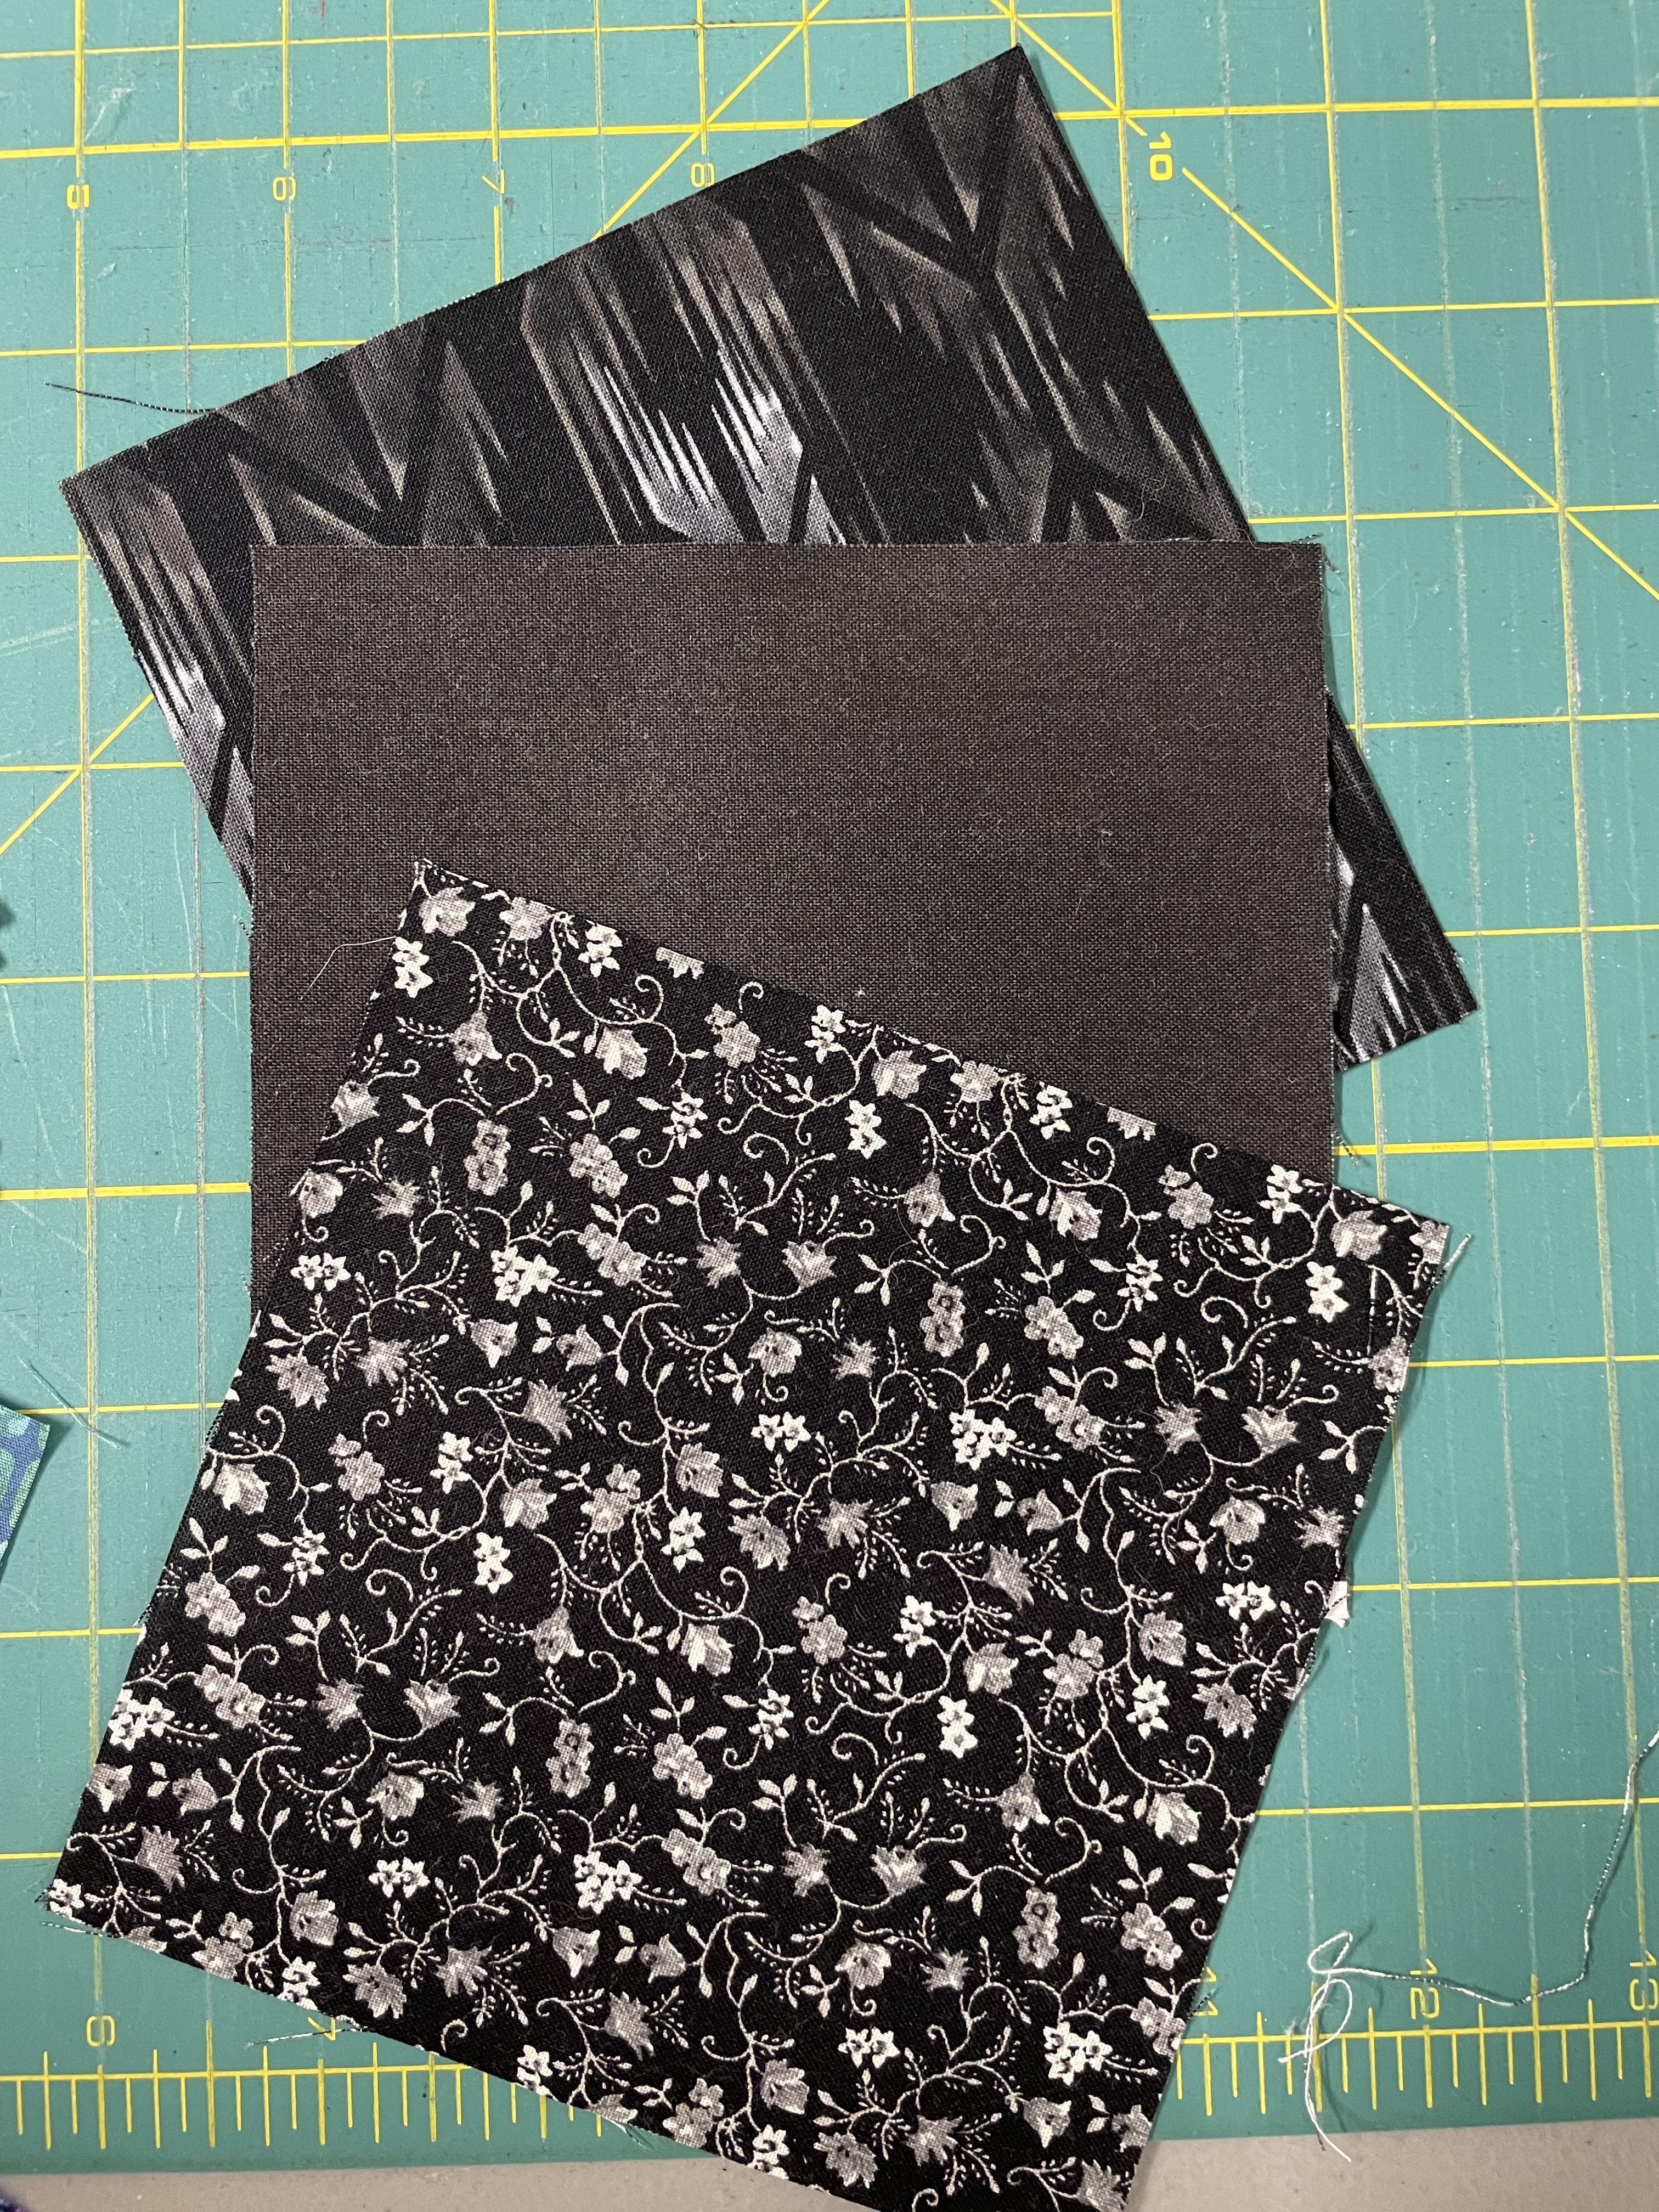
For the background, choose blacks or charcoals with a tone on tone look-or use solid black or dark gray/charcoal.  It will all blend!
Yes (the one with dots is black with darker gray dots)

Avoid background choices that have a white or color pattern in them or are very light gray

Avoid these (the one here with dots is black with white dots)

 What you need:

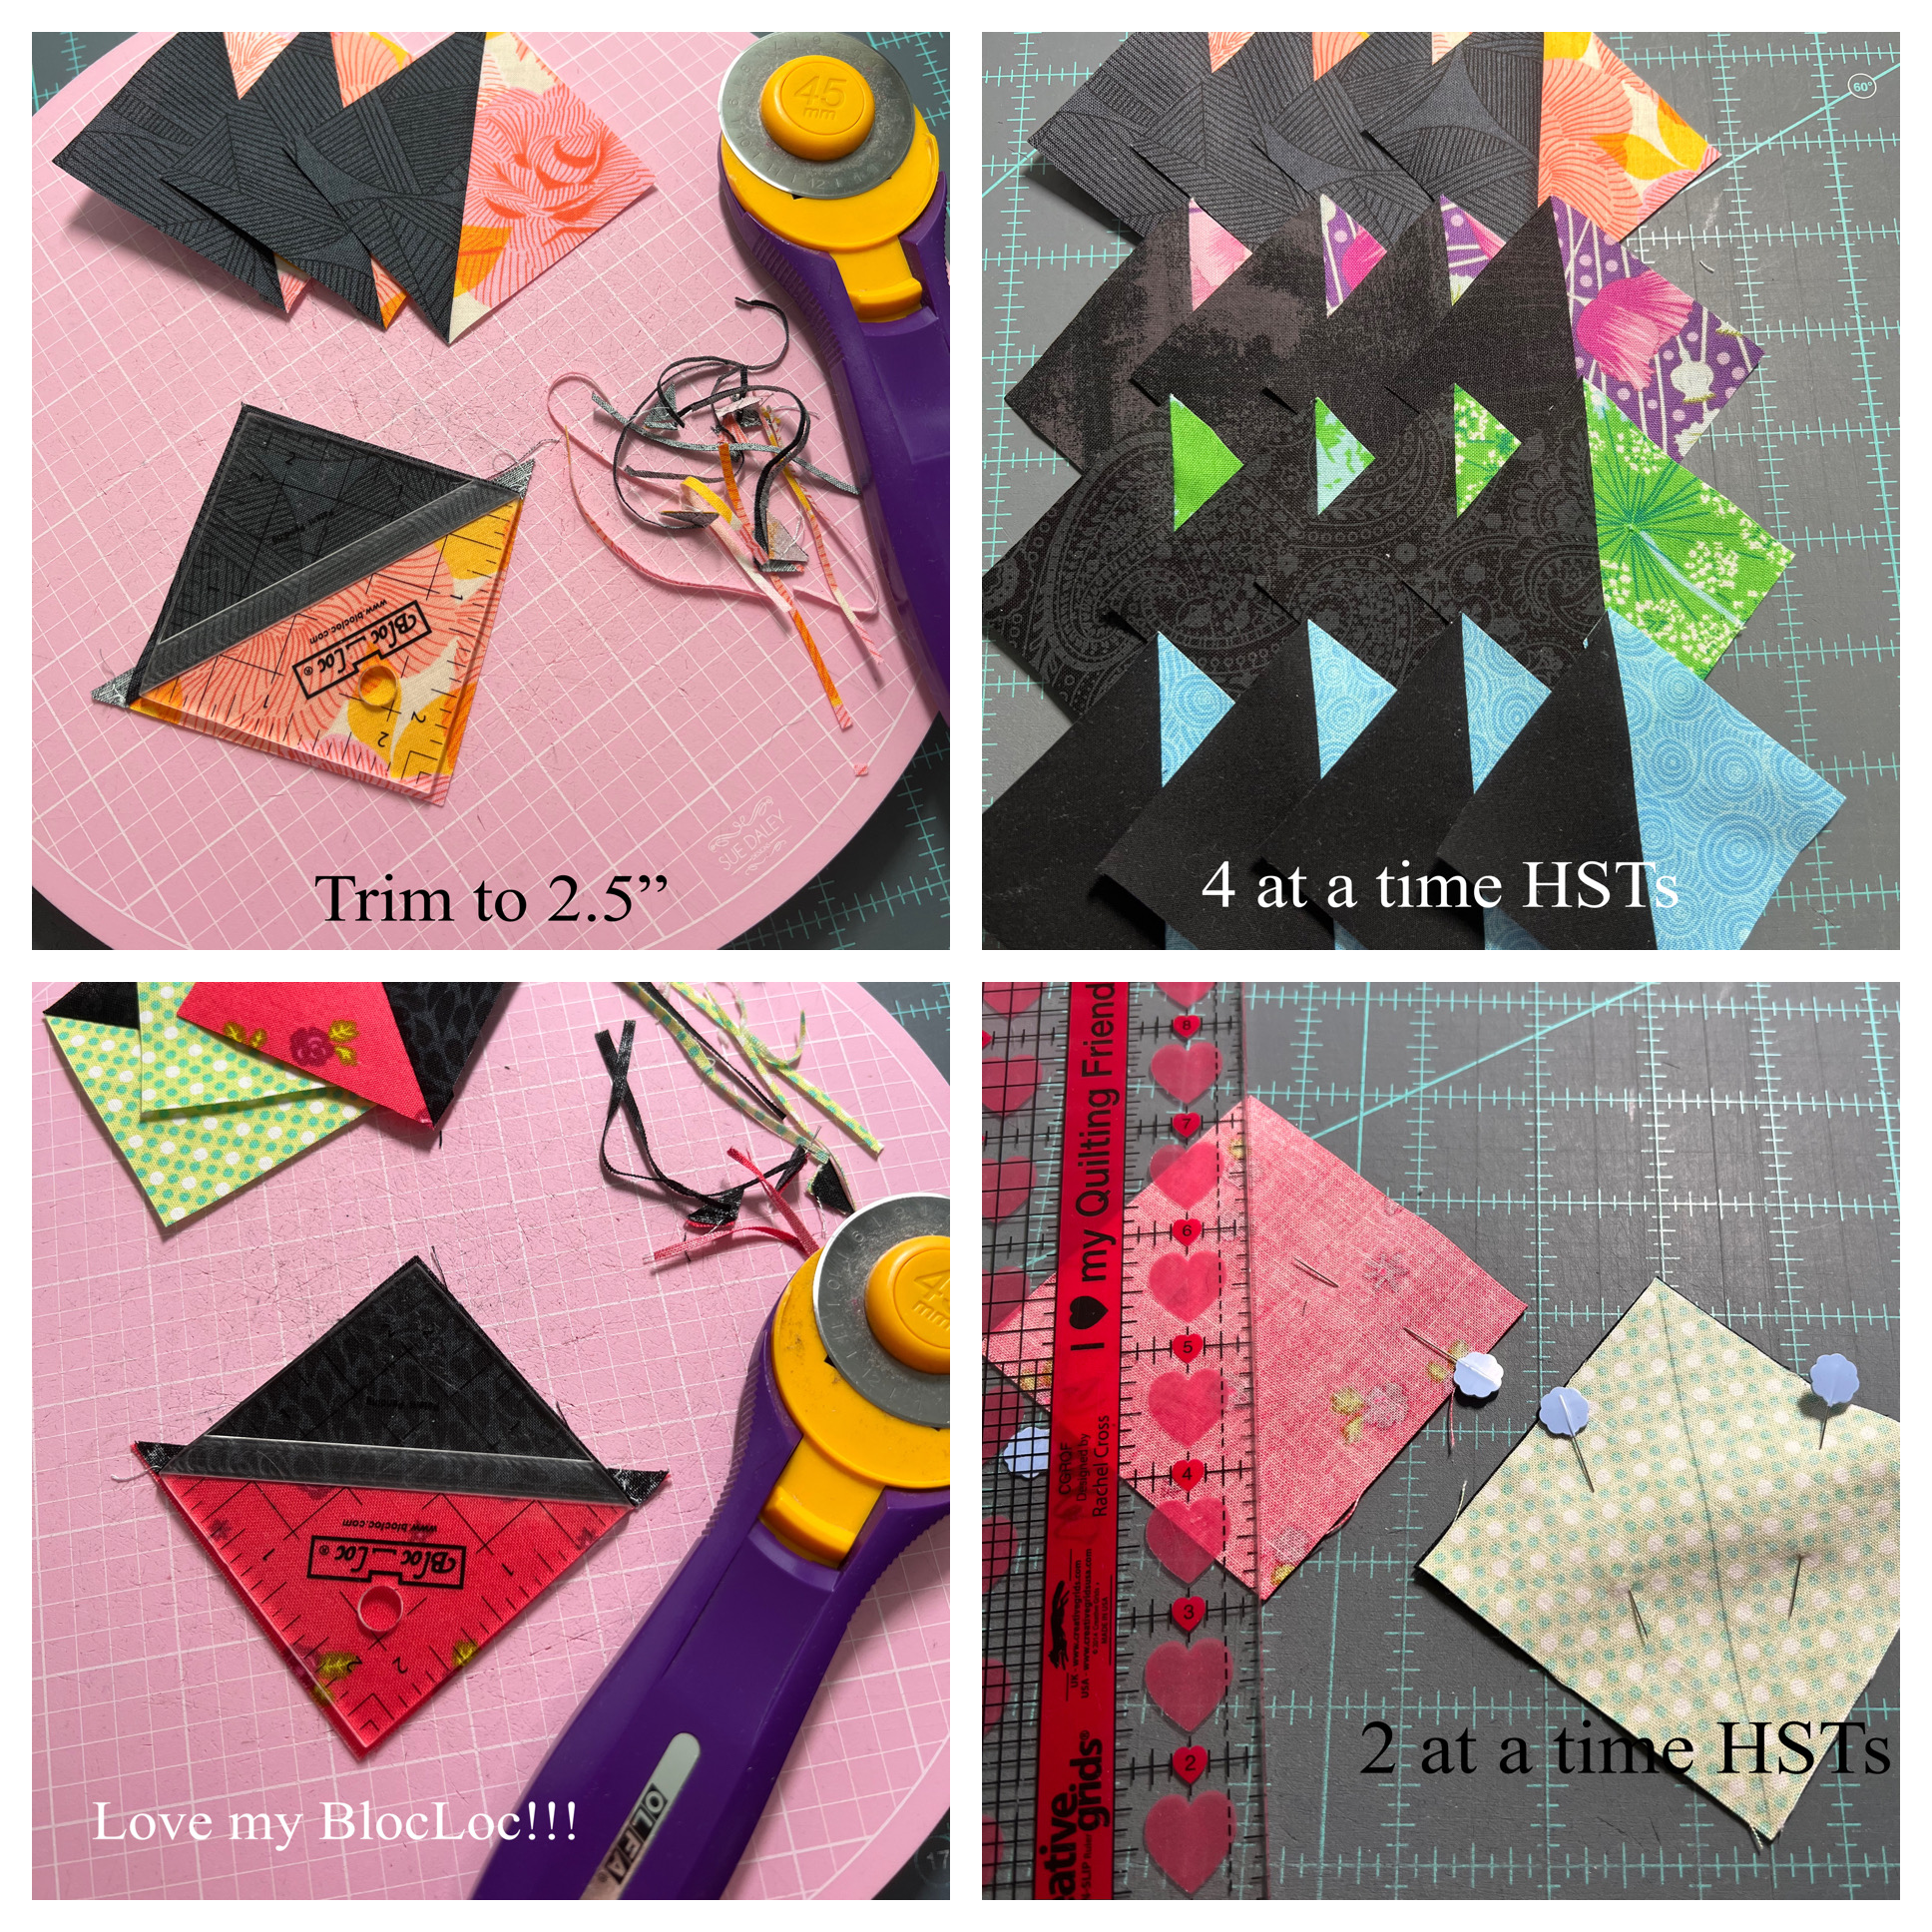
Let’s talk about the HSTs.  Each quarter has (4) 2 1/2 inch HSTs for a total of 16 HSTs in the block. As you can see in the finished block, each of the 16 total HSTs are different and I am going to let you decide how you want to do that.  Since the 4 quarters you send me won’t be sewn together in a finished block, you can use this tutorial for 4 at a time HSTs.  If you prefer, you can use this tutorial for 2 at a time HSTs.  That will make your quarters even more varied. 

If making 4 at a time HSTs (a total of 16):

Cut (4) 4 1/4” squares each of colored fabric and background fabric. Try to vary the colors. Please try to use 4 different background fabrics if possible.  It’s ok if not.  Follow tutorial. Trim each HST to 2 1/2”.

OR

If making 2 at a time HSTs (a total of 16):

 Cut (8) 3” squares each of colored fabric and background fabric.  Each colored fabric should be different.  Please use a variety of background fabrics if possible.  Follow the tutorial.  Trim each HST to 2 1/2”.

..
PSA: BlocLoc is amazing!

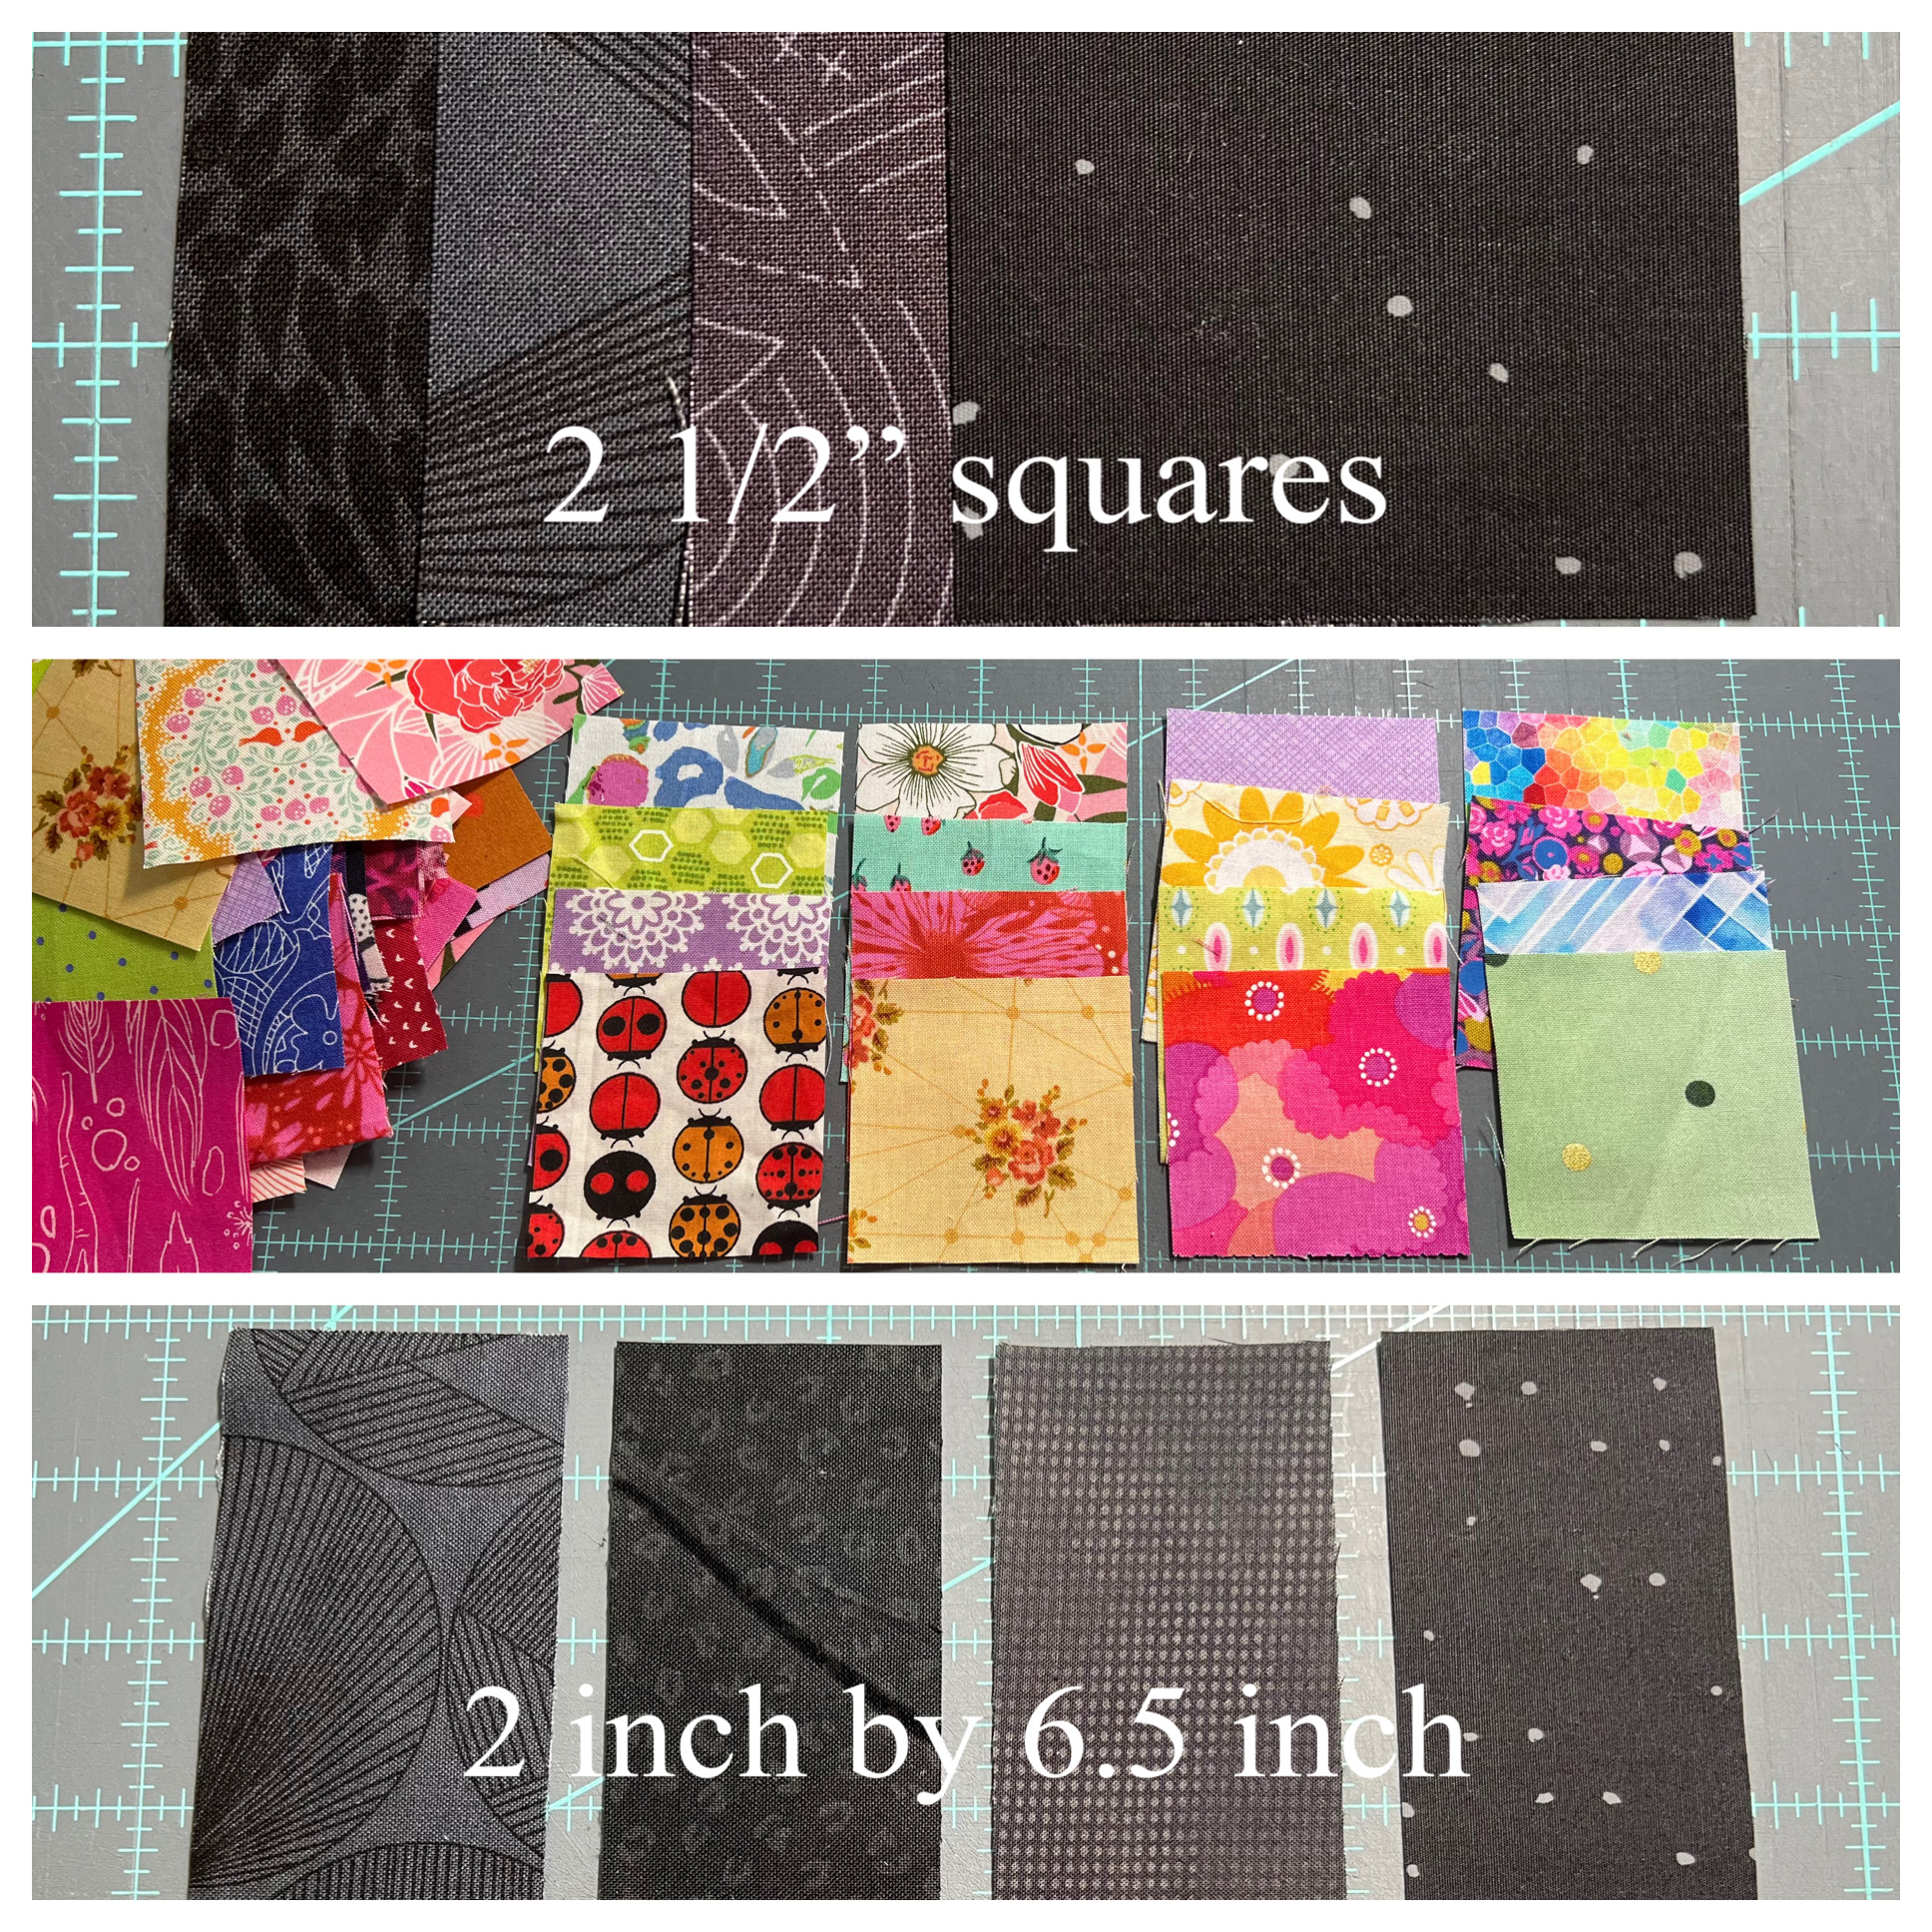
For the remainder of the quarters:

(4) 2 1/2“ background squares

(16) 2 1/2” vibrant and varied colored squares

(4) 2” x 6 1/2” background rectangles

.

 Assembling the Quarters

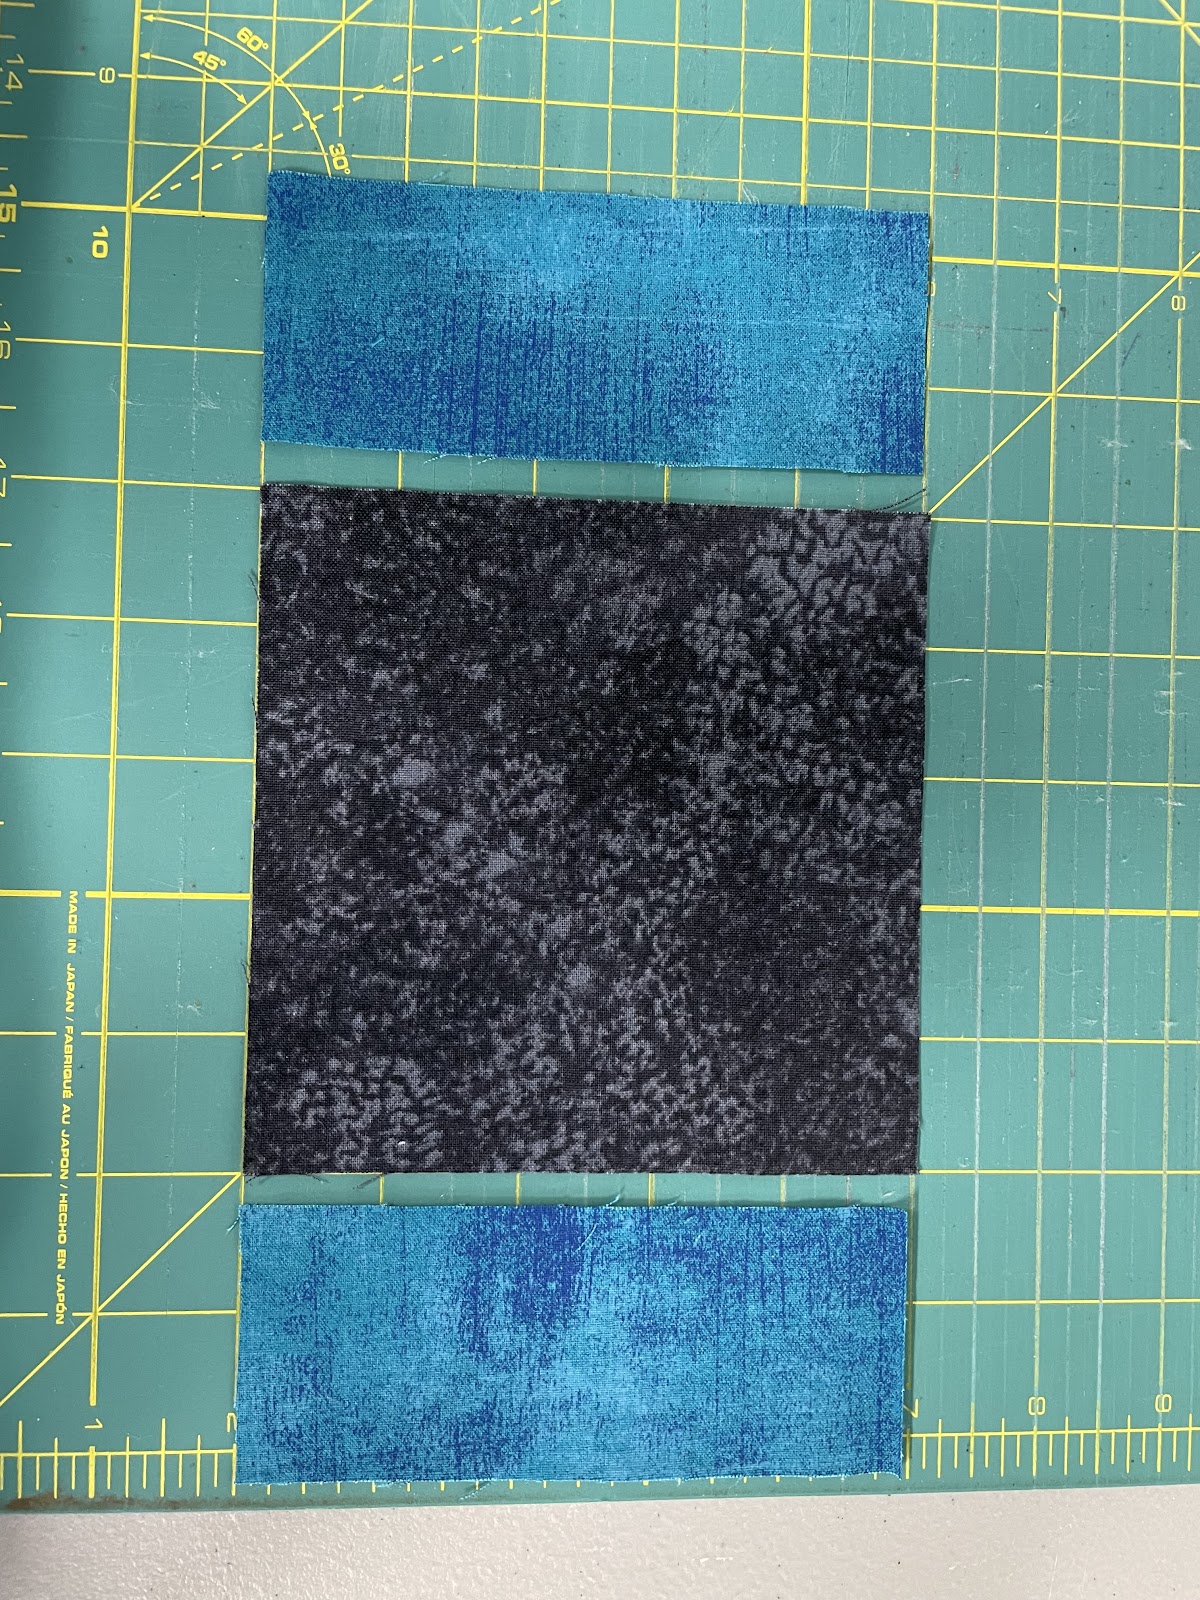
Choose (4) colored 2 1/2" squares, (4) 2 1/2 HSTs, (1) 2 1/2" background square.  Please be sure all of the colored fabrics are different in each quarter.  It's not important if the background fabrics in each piece are different within the quarters.  It is fine if colored fabrics show up again in different quarters.  All 4 of your quarters could even be the same if that's easier.  Again - I am mixing them all together.  They will blend.  Arrange as shown:

Sew each quarter as you wish.  I used a scant 1/4" seam, sewed in rows, pressed each row to the opposite direction as that made it easiest to nest the seams.  At this point, your block should measure 6.5" by 6.5".  Add the 2" x 6.5" block to the right side as shown.  Your final dimensions should be 8" by 6.5".  

Here are the 3 blocks I have finished.  This is going to take a while but I think it will be lovely and make a good dent in my sizable scrap mountain.  At least, I sure hope so!

Thank you!!!!

Debbie Grosskopf


Hive 2 April Tutorial - floating square block


This tutorial will create a 11.5” x 11.5” block. If you have any questions, please reach out. I’m excited to see what y’all create!


You will need:

  1. 1 - 5”x5” square that is mostly black/dark gray (some white/light gray is okay but please choose something that is majority black/dark gray)

  2. 2 - 2”x5” strips of jewel tone fabric (solid or mostly solid - majority the jewel tone color)

  3. 2 - 2”x8” strips of same jewel tone fabric as B

  4. Various strips of white-on-white fabric


    Fabric pull - see pictures for examples of what I’m looking for. 


    Black/dark grey center square


    Jewel tone fabric - Batiks and patterns/texture prints are fine. Please avoid novelty prints. I’m looking for rich, saturated, jewel-inspired fabrics.


    White-on-white - most white-on-white prints are fine. 

    Please avoid white with gray or cream print.


Please use ¼” seams and iron seams towards the darker fabric.


Step 1. Start with the 5” square and the two 2x5 strips. Add one strip to each side of the square. 


Step 2. Add the two 2x8 strips to other sides of the square to box in your 5” square. 


Step 3. You will now have a 8”x8” square. Use your white-on-white to add strips to each side to create a finished square size of 11.5”x11.5”. Ideally, the boxed in square will not be centered in the finished square. Please use the same white-on-white for all pieces that you add.