

Thursday, July 23, 2020
Hive 1 block for Pam
Pam, this was a great block to make! I forgot to include a note inside the envelope (again), but wrote something on the back of the envelope. ~Amanda

Wednesday, July 22, 2020
Hive 1 Block for Pam

Hi Pam,
Better Late than never! This month flew by, especially with me starting a new job (Ooh, I like it!).
The block intrigued me, though, since the beginning of the month, but I just didn't get round to give it a go. Our kitchen table, aka my sewing space, was still occupied by the quilting set up for my mum's 80th Birthday quilt, which I unfortunately didn't finish during my time off. That's finally done (only binding to do). So I (finally!!) got space and time to do the block on Monday night.
The block went into the post today, so it should already be on the way to you as I write this.
I hope you like it. Really curious what your finished quilt will look like!
Warm Greetings from Ireland! Hope you all are well.
Take care, Rita
Saturday, July 18, 2020
A Finish! Hive 1 2019 Brights on Darks Quilt

Thanks to my 2019 Hivemates who made my Brights on Darks blocks. I love how my quilt turned out—the dark backgrounds really make the bright strips POP. The quilt measures 80” x 64.” I quilted it with vertical straight lines 1/2” apart. This quilt was my third Stashbee quilt, and I’m participating again this year. Happy quilting!
Pam


Intersection block for Pam
This Block was challenging but fun. I wasn’t totally happy with my first block so I made another, but didn’t get a picture before sealing the envelope. Can’t wait to see the finished quilt. Be well. 

Thursday, July 16, 2020
Fun Block for Pam
This was a fun block Pam!
As usual, I made two for you, but you won't see the second until you open them!
They should go in the mail to you tomorrow.
Stay well and safe in Florida!

Wednesday, July 15, 2020
Block for Pam
Here is my block for Pam.
This was a fun block, something I haven't done before.
It is already on it's way.
Enjoy! Rose

Saturday, July 11, 2020
Hive 1 July block for Pam
I don't know why on this hot summer week I decided to use fall colors for your block. Wishing for cooler weather I guess. This is a great block for scraps and I can see using it for myself.
Kathie L

Kathie L

Thursday, July 9, 2020
Hive 1 2020 finished quilt
I finished the red quilt with white lightning blocks that my bee mates wonderfully sent to me. I love how it turned out!


Tuesday, July 7, 2020
Hive 1 July block for Pam
I loved doing this block, Pam. Easy but different. It would look good in so many color ways. I'm thinking of a baby quilt for Christmas. Thanks for a great idea.


Monday, July 6, 2020
Hive 1 July Block for Pam
This was a fun block to make and for some reason tested my brain trying to visualize what the heck it was going to look like when it was done. I kept having to say out loud to myself, "the outside is going to be the inside..." In any case, here it is. I hope you like it. There is lots of room for trimming it down as it is almost 19" square at the moment. Dropping it in the mail soon. Karen


Hive 1 July Block for Pam
Hive 1 July Block for Pam
I finally had a few days off from work to collect my thoughts and spend some time sewing, although that was cut short since my back did not agree with me digging in the yard for four hours straight. I did manage to finish Pam's block, which I really loved making. Hopefully you like it too 😊

It is on it's way to you today.
💗 Rochelle
Saturday, July 4, 2020
Crashing Hive 4 - Scrappy Block for RobinSue

I had a lot of fun with this block, RobinSue. It was a treasure hunt in my stash to find small scraps to fit into your layout. This is my favorite part of Stashbee--getting to make a fellow quilter's original block with my own fabrics.
Happy quilting,
Pam
Hive 1 blocks for Pam

What an easy and fun block. I hope these will fit into your plan. In the mail next week Pam.
Thursday, July 2, 2020
Finished Flying Geese Quilt from 2017, Hive 5
Working hard to to get the quilting done on completed tops. I admit I have a lot! It is an addiction. Thanks to all who contributed blocks!


Hive 2 July Tutorial- Waving Flag
Hive 2 Tutorial – Waving Flag
Hi All
I ran into some technical difficulties and my apologies for
getting this posted so late. We will be
doing an improvisational Bargello style block that is traditional yet a modern
take on the American Flag. Here is the
finished block. I loved learning this
new technique!

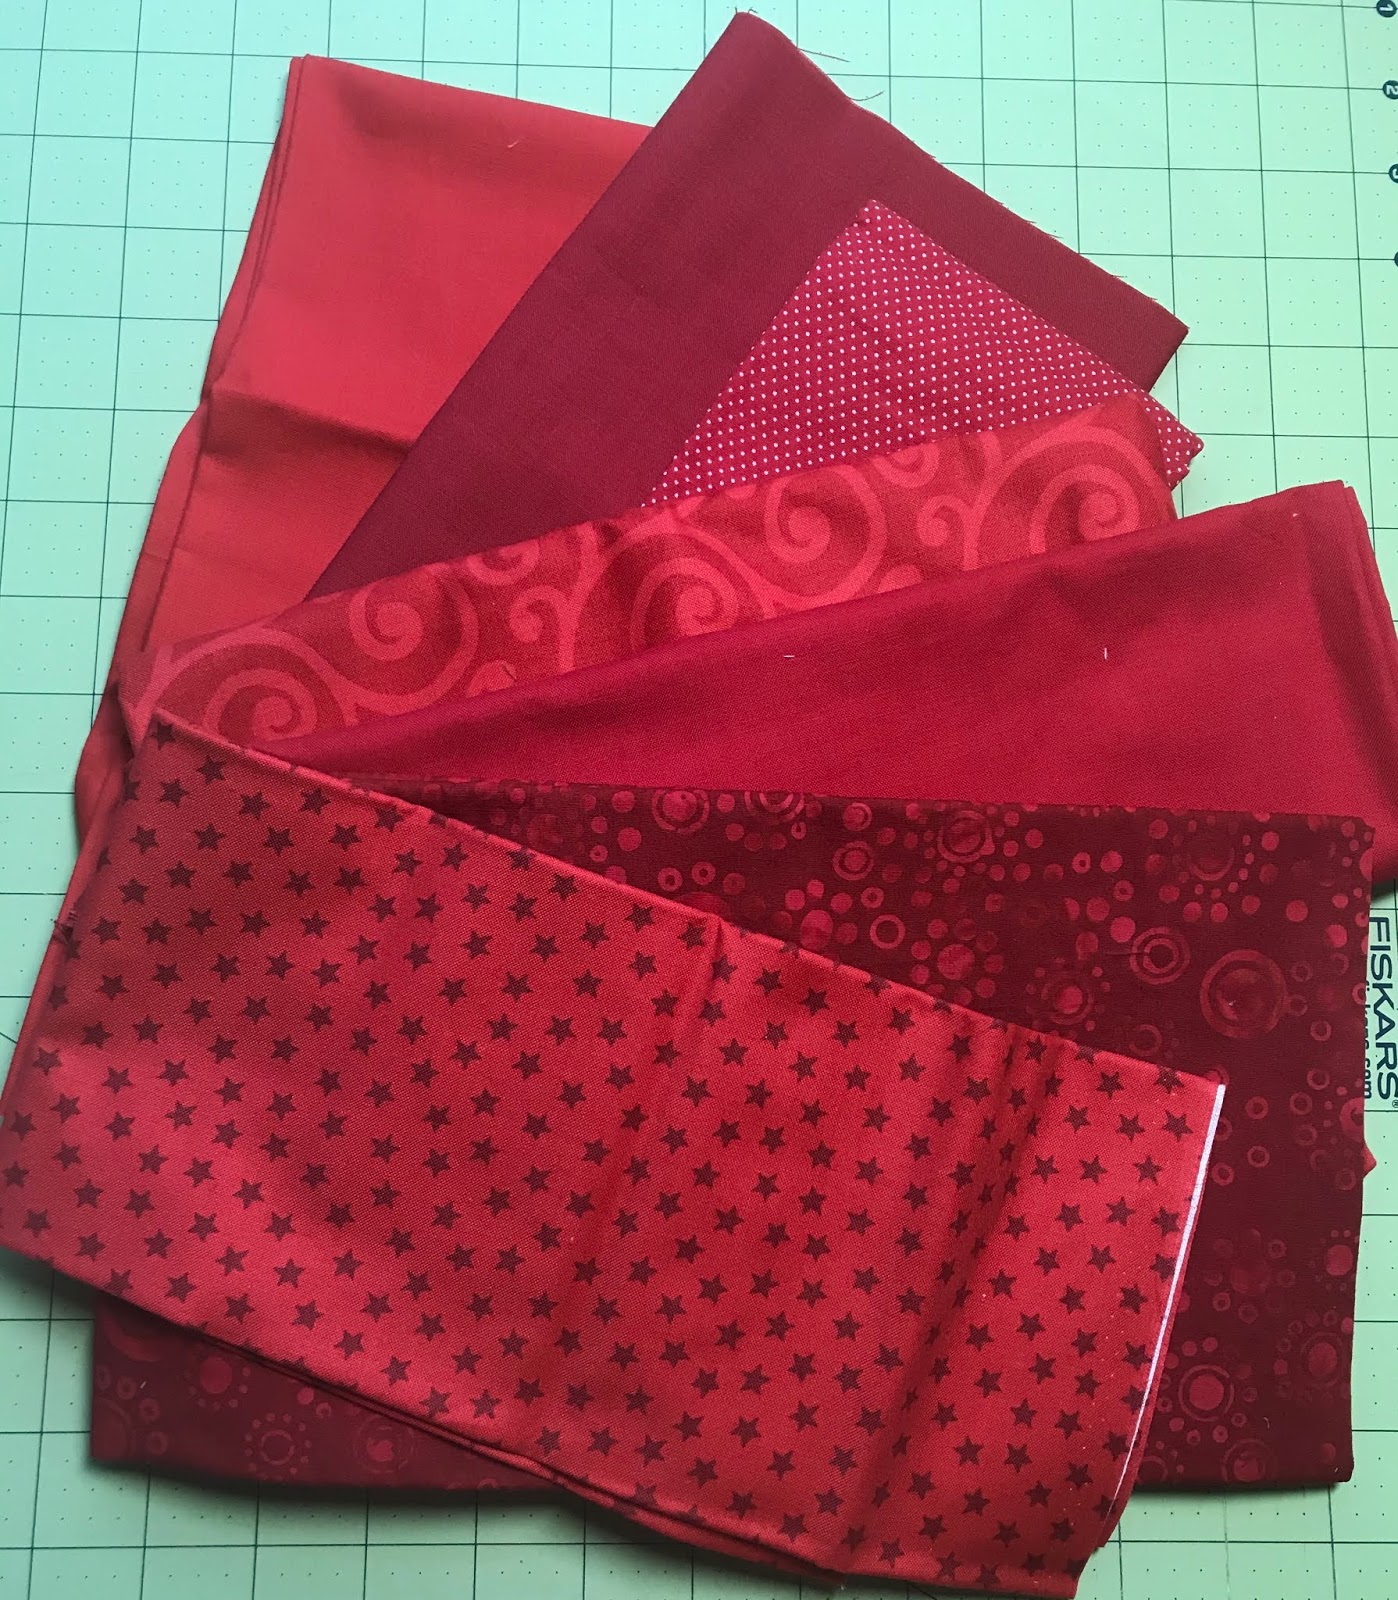
Fabrics – Think American Flag traditional Red/White/Blue
I prefer the fabrics to be prints if you have them that
still read as the main color. Solids can
also be used. Here are pics of my fabric
pulls.


Here is the link to learn the method for how to put this
block together. You may want to watch it
to get the idea then read my instructions for the specifics of how it applies
to this block.
Blue Strip Set
Use 4-5 strips that are about 20-21’ long – Strip widths can
vary between 1.25” and 2” depending on what you have. The top strip of blue needs to be 3-3.5”
wide.
Sew the strips together into a strip unit with the top strip
being 3 – 3.5” wide. Press the strips
all the same direction away from the top strip and towards the
red/white strip set.


Red/White Strip Set
4 Red Strips and 3 white strips – Strips are 20-21” long and
vary between 1.25” – 2” with the bottom red strip at 3 – 3.5” width. Press all
strips down towards the bottom of the block or wide red strip

Sew Blue strip set together with red/white strip set. Trim
right and left edges of the block which should now be about 20-21” wide and
17-18” long.
In the video she used scissors to cut the strips but I don’t recommend that..
using your rotary cutter and a ruler is much more accurate and keeps your block
square. You will cut strips from the
left side of the block and sew them back on to the right side of the block in a
“bargello” style. Strips are cut at 1.5
– 2’ with a couple at 1 or 1.25”. Those
skinnier strips are what help to make it look wavy.
First cut from the left then when sewing to the right shift
it up about ¼” to offset the horizontal stripes.

Continue making cuts and sewing to the right side shifting
up for the first 3 strips then shifting down and then back up – refer to the
pic of the final block. Your up and down
does not have to be exactly like mine just make sure the colors still connect
across for at least part of the stripe or you lose the effect. (white touches
white, red touches red, etc.) This shifting up and down is why the top blue
stripe and the bottom red stripe need to be bigger to allow enough space to
make a stripe after the top and bottom are trimmed.

The last cut needs to be at least 1.75” wide to move to the
right side and still leave at least 1.75” on the left side. This will give
enough room to trim if needed. The blue
stripes should be about 4-5” at the top of the block.
Even off the top and bottom of the block and check the
size. It should be more than 15”
square. If you want to then trim down to
15” square or send to me untrimmed, either way is fine.
Have a wonderful July 4th Holiday!
Lisa...
Wednesday, July 1, 2020
Hive 3 July Tutorial - Scrappy Blue Squares
Hive 3 Mates, it has been crazy times this year. Hope things are returning to some type of normal for everyone.
My name is Jan and I have been in Bees for the last 4 years. I started quilting in the Fall of 2015, so it has been a fun five years.
Whenever I bought fabric collections, layer cakes, charm packs or bundles, I also bought a mini charm pack. Earlier this year I put together a stamp quilt using all those packs. I used 1600 2.5 x 2.5 blocks. It made 25 8x8 blocks.

I love this quilt. Now I want to do one with blues, navy, dark blues and a few whites. I don't have much variety in the blues so am asking for your help.
It will be an easy block. Thirty six 2.5 x 2.5 pieces. If you have a variety of blues that will be great.
Cut 36 2.5 x 2.5 fabrics. I know that the rules say no more than 10 fabrics. Dig through your scraps. If you have more than 10 and want to get rid of a few, you can use more than 10. If you don't have ore than 10 that is ok. Put together 6 rows of 6 pieces. Put those rows together for one block.
If each row uses the same fabrics not a problem, no need to sew the rows together. Just send the 6 rows and I will mix things up when I get them. Also, no need to iron or trim your rows.
Here are the blues that I have in my stash. I'm looking for darker colors. If they are whites with blues a small amount of that is good, maybe one piece per row of 6.
Try to stay away from pale blues and baby blues.


I put one block together.

Hive 4 July Tutorial - Let's go Scrappy!
Scrappy Block
Hello to all. I'm RobinSue - recently retired from teaching, living in Southern California with my husband, daughter (temporarily back home) and our dog. Half a year gone & it feels so much longer. I don't know about you, but I've doing a lot of sewing and quilting, hence, tons of scraps! One day I couldn't take it anymore and decided it was time to tame these scraps. So many, where did they come from?
I designed a block to tame these scraps and use up the bits that have been lingering for years. The block is quick to make, and I know yours will be beautiful.
No special colors, this is scrappy. Have fun!
 |
| Correction: 1.5 x 2.5 is either print or solid. Then again, it's scrappy! (Note to self: Don't write instructions while watching TV, seriously). Correction: It's easiest to follow the photos - I am not picky about low volume vs. solid vs print for the 1.5 x 2.5. Feel free to mix. In the solid rows, the 2.5 square can be either solid or low volume. Both drawings are the same block drawn in reverse layout. |
 |
| First sew 1.5 x 2.5 to 2.5 x 4.5 Then join to 5.5 to make columns. |
 |
| Sew the 2.5 squares into a column. |
 |
| Nest the seams. |
 |
| Finished Block! |
 |
| Pressed to the center. |
 |
| Same block in reverse order I'm a visual learner so I drew this out. I hope this inspires you to use those bits and pieces. RobinSue |
Hive 1 July Tutorial - Intersection Variation Block
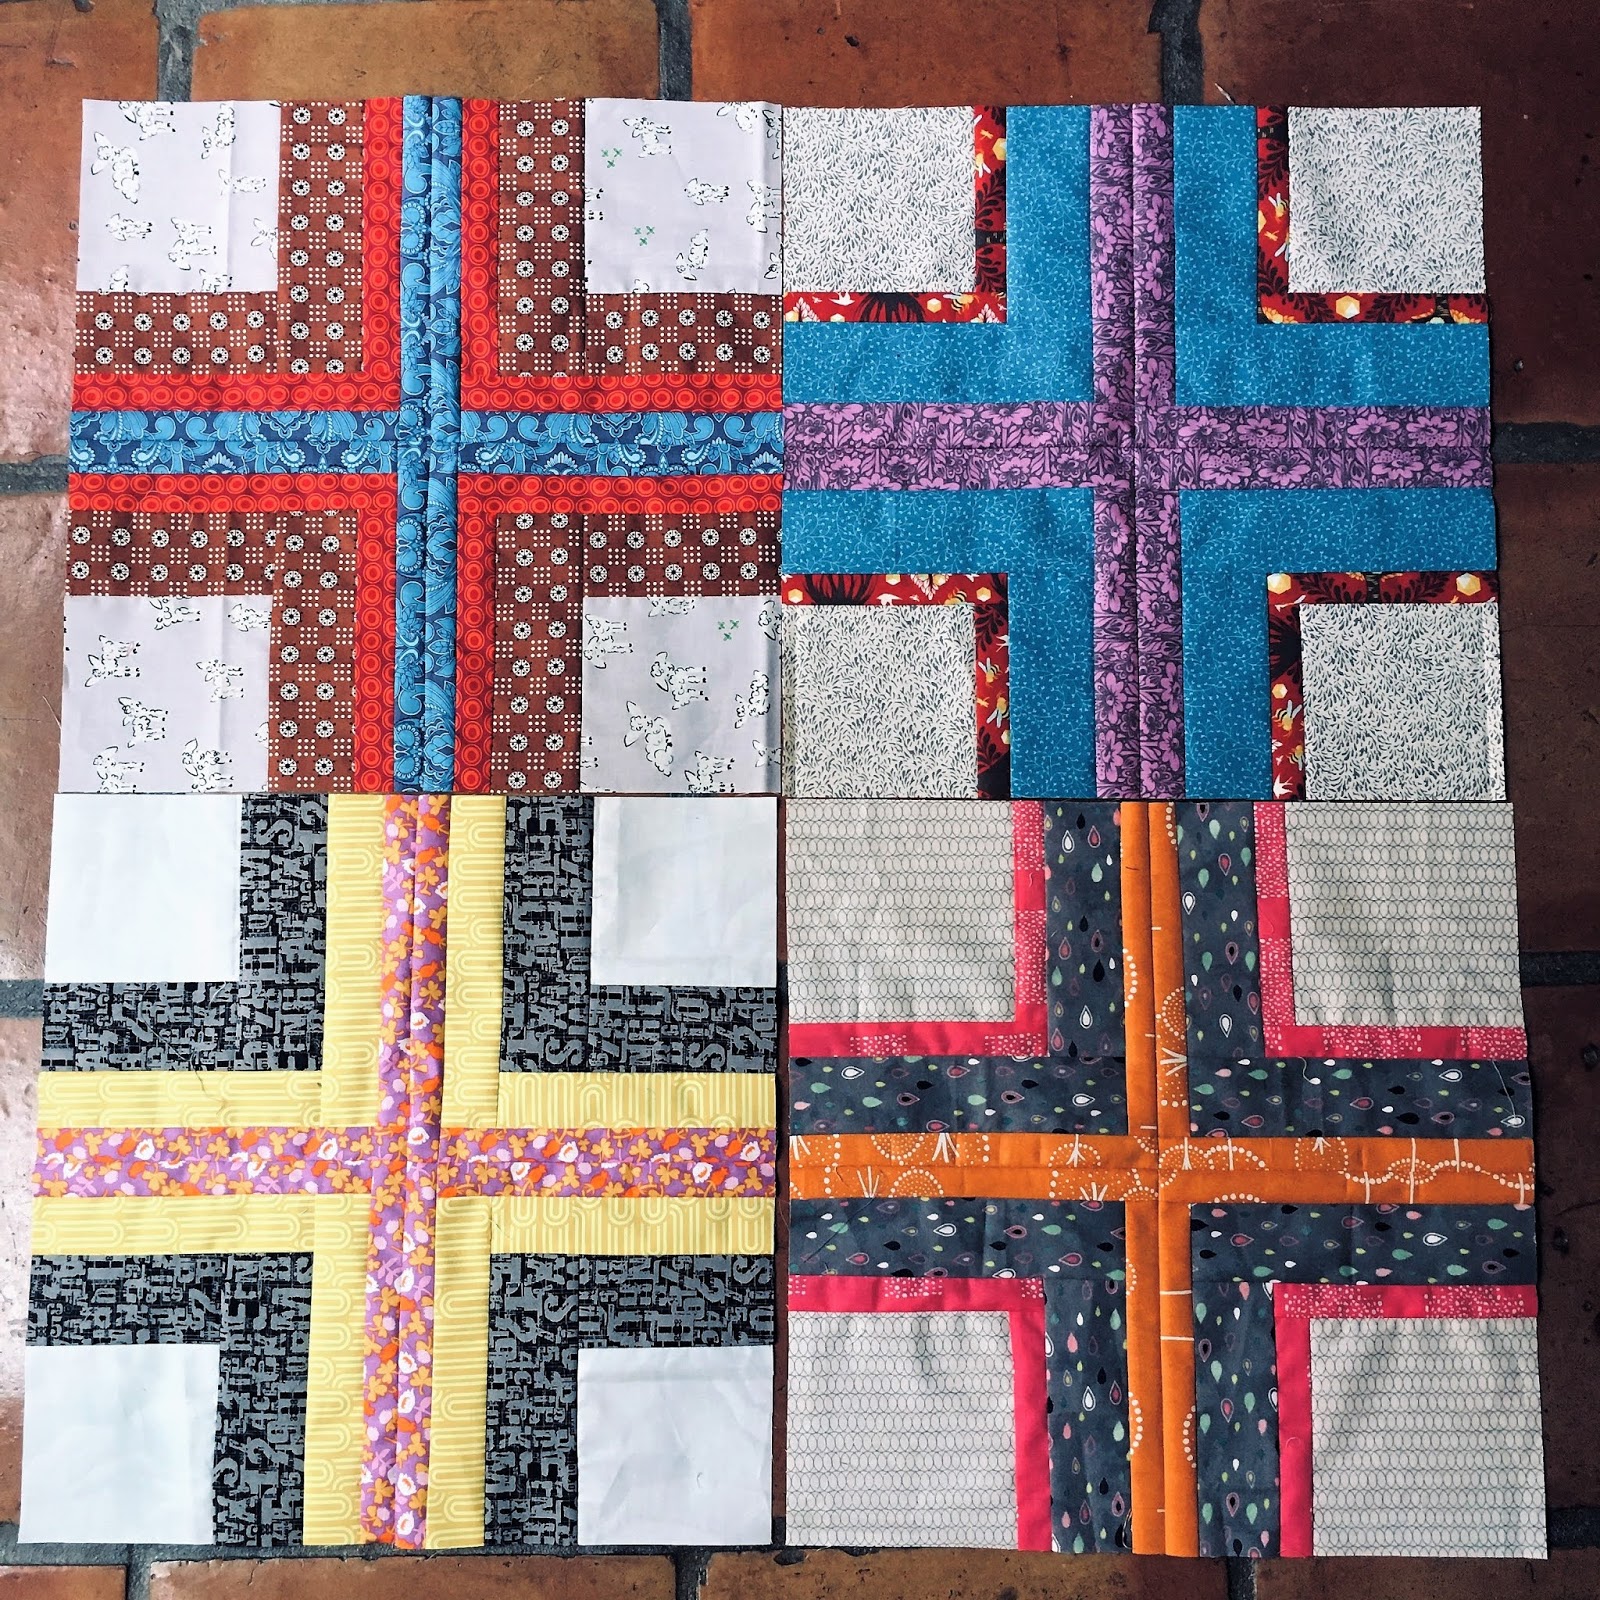
This block is basically a big framed square, cut in fourths, and the units rearranged and sewn back together. My variation is a big block--16-1/2"--and has a neutral/low volume background to tone down the unrestrained scrappiness of the intersecting strips. Instead of specifying the size of the background square and widths of the strips, I use a range of sizes. Here are the steps to follow to make my Intersection Variation block:
1. Pick and cut your fabrics. You'll need one square of a light neutral or low volume print for the background. The square can be from 10" to 11". For the strips, you'll need several different bright or dark prints or solids that will contrast nicely with your background square. The strips can be anywhere from 1-1/4" wide to 2-1/2" wide, in lengths to go around all four sides of the square. Depending on the size of your center square and the widths of your strips, you'll need from two to four sets of strips to make your square big enough--use a variety of different-width strips to make the block interesting.
2. Make a big framed square. Start with your center square, and using a stitch length of 2.0 or smaller, sew two strips to either side of the square. Press towards the strips, then trim up the ends even with the sides of the square. Sew two more of the same strips to the other two sides of the square, press, and trim up.


3. Add more rounds of strips to get to desired size. Repeat with additional sets of strips until your square is at least 17-1/2". I added three sets of strips, and my block turned out to be just shy of 18" square. This will give room for cutting and sewing and trimming to size later.


4. Pressing tip. On the last pair of strips, press one of the seams towards the center rather than towards the strip. This will allow the seams to nest when you get to step 8.


5. Create pressed lines for cutting. Fold your block in half and iron a crease down the center, then fold the other direction and press a crease. This will give you your guidelines for cutting the square into four units.

6. Cut your square into fourths. Using the pressed lines as your cutting lines, cut your big square into four units.

7. Rearrange the four units. Flip your four units so the strips are towards the center.

8. Sew the four units together to create the Intersection Variation block. Arrange the four units so that those seams on the last round of strips will nest when sewn together--that's why we pressed one of those seams towards the center. We're making a big four-patch now, so sew the two pairs of units together, pressing the seams in opposite directions, and then sew those two halves together, nesting and matching the center seams.


9. Yay, your Intersection Variation block is done! It should be a bit larger than my desired size of 16-1/2", and it may look a bit shaggy around the edges, but don't trim it down. I'll trim all the blocks to the same size before assembling the quilt top.

THANKS FOR MAKING MY INTERSECTION VARIATION BLOCKS, STASHBEE FRIENDS!
Happy quilting 💖
--Pam
Subscribe to:
Posts (Atom)