Thursday, February 27, 2020


Hive 1 February Hourglass Block

It feels like February flew by and while I made my blocks two weeks ago, I wanted to square them up before mailing and I realized they were much smaller than the 6 1/2" they should have finished at (more than 1/4").  For whatever reason, me and 2 1/2" squares do not get a long very well.  I also was not happy with my initial fabric choices. These are the blocks that I made originally:


Thankfully, last night I had a bit of time to remake them AND they are all the correct size. YES! I'm mailing these blocks to you today 😊


I started squaring them up and cut myself with the rotary cutter.  To save the blocks from a bloody mess, I decided against squaring them up any further (why do rotary cuts bleed so much???). Hope you like them!

-Rochelle
@mcallisterwench


Sunday, February 23, 2020

Hive 1 February Block for Kathryn


This was a quick and easy block to make.  I used the same fabrics in all four units, but didn't sew them together so Kathryn can scatter them around in the quilt.  It's going to be nice and scrappy!

Monday, February 17, 2020

Hive 4 2019 quilt

Thank you to all the Hive 4 quilters last year!  I just finished up the quilt and sent it off to a baby!  I love how it turned out.


Hive 1 for Kathryn

Fun blocks to put together. Made a few extra, enjoy! Should be in the mail tomorrow. Joan


Thursday, February 13, 2020

Block for Kathryn

Hello Hive 1
Here are my blocks for Kathryn. 
These went together really fast.
 I have been working with this size blocks so  I had lots of great colors to choose from.
 Hope you like them. 
They went out in the mail a couple of days ago. 
Enjoy, Rose


Tuesday, February 11, 2020

Feb blocks for Kathryn

Hi Kathryn!! What fun blocks to make! So much fun that I made another set using same fabrics in opposite positions. You'll see those when you get them!!

I'm hoping to drop them in the mail to you tomorrow or Thursday!!
Liz Horgan

Saturday, February 8, 2020

Hi Kathryn,

That was a quick block to make, thanks. I wasn't sure how wild I could go with the fabrics, so I tried to play it safe. Hope you like them. Seeing the other blocks already, this will be a fun quilt to choose the layout on. Love to see what you are making from them.
The block will be going to the Post on Monday.

Have a lovely weekend,
Rita.

Thursday, February 6, 2020

February Block for Hive 1


This was a nice block to put together.  Hope solids are okay with what you had planned.


Wednesday, February 5, 2020

February blocks for Hive 1


Hmm, I realized that I rotated my blocks in a different pattern than everyone else.  I think the secondary black pattern, of any layout, is going to look really nice! 

Monday, February 3, 2020

Hive 1 February blocks for Kathryn


I hope you can use these in your project. Fast and easy to do.  Looking forward to what you do with them all.  Paulette

Hive 1 February Blocks for Kathryn

Hi Kathryn, here you go!  I look forward to seeing all your Hourglass blocks put together.   Karen


Saturday, February 1, 2020

Hive 1 - February Tutorial

Good morning and happy Groundhog Day.  Here in Pennsylvania we have had a very mild winter, and I like it that way.  My husband and I are both retired.  He loves to read and I love to sew. Our house rule is that he can buy as many books as he wants and I can buy as much fabric.  I chair the community service committee for my guild and sewing for charity is a passion of mine.  I'll head to my sewing room today to make blocks for Quilts of Valor.

My block this month is an Hourglass block.  I won a number of these blocks last year in the Block Lotto.  My aim is to increase the number of these blocks through you Stash Bee friends to have enough for a full quilt.  The block is only 6 inches square, so if you'll make 4 of them, that would equal a 12 inch block.  You can make each of the four blocks with the same fabric or use different fabrics.  I'll ask that you leave them as 6 inch blocks so that I can decide which blocks go where.  Thanks so much for helping me get to a quilt.


Hourglass Block - 6 inches - make 4

Fabric requirements for each 6 inch block:
Black or tone-on-tone black - Two 2-1/2 inch squares and one 3 inch square.
Light fabric - One 2-1/2 inch square and one 3 inch square.
Medium fabric - Four 2-1/2 inch squares.

'Medium' and 'light' are just relative terms.  I just mean that the medium should not blend in with the black background and the light should not blend in with the medium.  Any color is fine.

Construction:
Draw a diagonal line on the back of the light 3 inch square.  Pair it with the black 3 inch square, right sides together.  Sew 1/4 inch on both sides of the drawn line, cut on the drawn line, and iron the resulting two half-square triangles to the dark.  Trim to 2-1/2 inch square.

Lay out the 2-1/2 inch squares in the pattern shown below and stitch together.  The block should measure 6-1/2 inches.


Hive 3: February Block - Scandinavian Stroll

Hello Hive Three!

Megan here! This is my second year in stash bee. Last year I asked my hive to make Viking long ship blocks to use as a couch quilt in the new house my husband and I are building. (We joke that our decor is Viking Modern because it combines Danish Modern furniture with heritage pieces from the 19th century and antique snow gear that my husband collects.) This year I am asking for blocks that will coordinate with the long ships as either a wall hanging or even cushions.

We took a trip to Scandinavia several years ago, and fell in love with the waterfronts of Bergen in Norway and Nyhavn, Copenhagen in Denmark. I have designed a block based on those buildings, and am calling it Scandinavian Stroll.


The block finishes at 6” x 12”, but I’m going to ask that you send it to me without sewing the houses together so I can shuffle them up for better balance in the finished hanging/cushions. I am hoping that this is a nice quick and easy block for everyone since February is such a short month!


Fabrics:
For the houses I am hoping for tone on tone or low volume fabrics that read as primarily a single color. I am looking for mostly warm tones: gold, yellow, orange, rust, red, tan, maroon. But if you want to throw in a turquoise, green, blue, or even purple as one of the four houses that would be great. (Just please limit yourself to one zing house with the rest being the warm tones.) For inspiration here are photos of the two waterfronts, as well as my initial fabric pull from my stash. The background/sky fabrics can be any
solid/tone on tone/low volume cream or white.


 Cutting:
4- 3½” x 6½” rectangles (1 each of four colors)
8- 2” squares low volume or solid white/cream (all the same or 2 each of four)


Construction:

1. Draw a diagonal line across the back of the 2” squares.


2.Place one square on the upper left corner of each colored rectangle and sew on the drawn line.


3. Trim ¼" from sewn line.


4. Press seam open.


5. Repeat steps on opposite corner.


And now you are done! Send me the four houses and I will shuffle them all up and decide on what my final product will be!

Thank you!


Hive 2 : February Tutorial - HSTs

Hello Hive 2!
I'm excited to share my chosen block for this month. I wish I could take credit for it but I can't as it's one that has been done before in Stash Bee a few different times, but the finished product is oh, so stunning! And -- it's completely made up of half-square triangles.


The color palette that I'd like are solid white, black, and various shades of gray plus one bright colored solid of your choice. If your stash is short on solids, please message me and we can come up with an alternate plan. This quilt will be for a guy so the only colors I'm asking that you not use are pastel pink or purple. Bright (or royal) purple and bright pink are both ok as long as they are rich and saturated.

Here is my grayscale fabric pull consisting of 1 black, 1 white, and 3 different shades of gray. Having more than 1 shade of gray is ideal, but again, work with what you have or let me know and I can send you some.


Cutting Instructions:
  • Cut 17 (seventeen) 4.5-inch squares from the black, white, and grays 
  • Cut 1 (one) 4.5-inch colored square
** Please note, the unfinished HSTs will measure 4-inches. If you prefer a little extra wiggle room for trimming you might want to cut 5-inch squares **


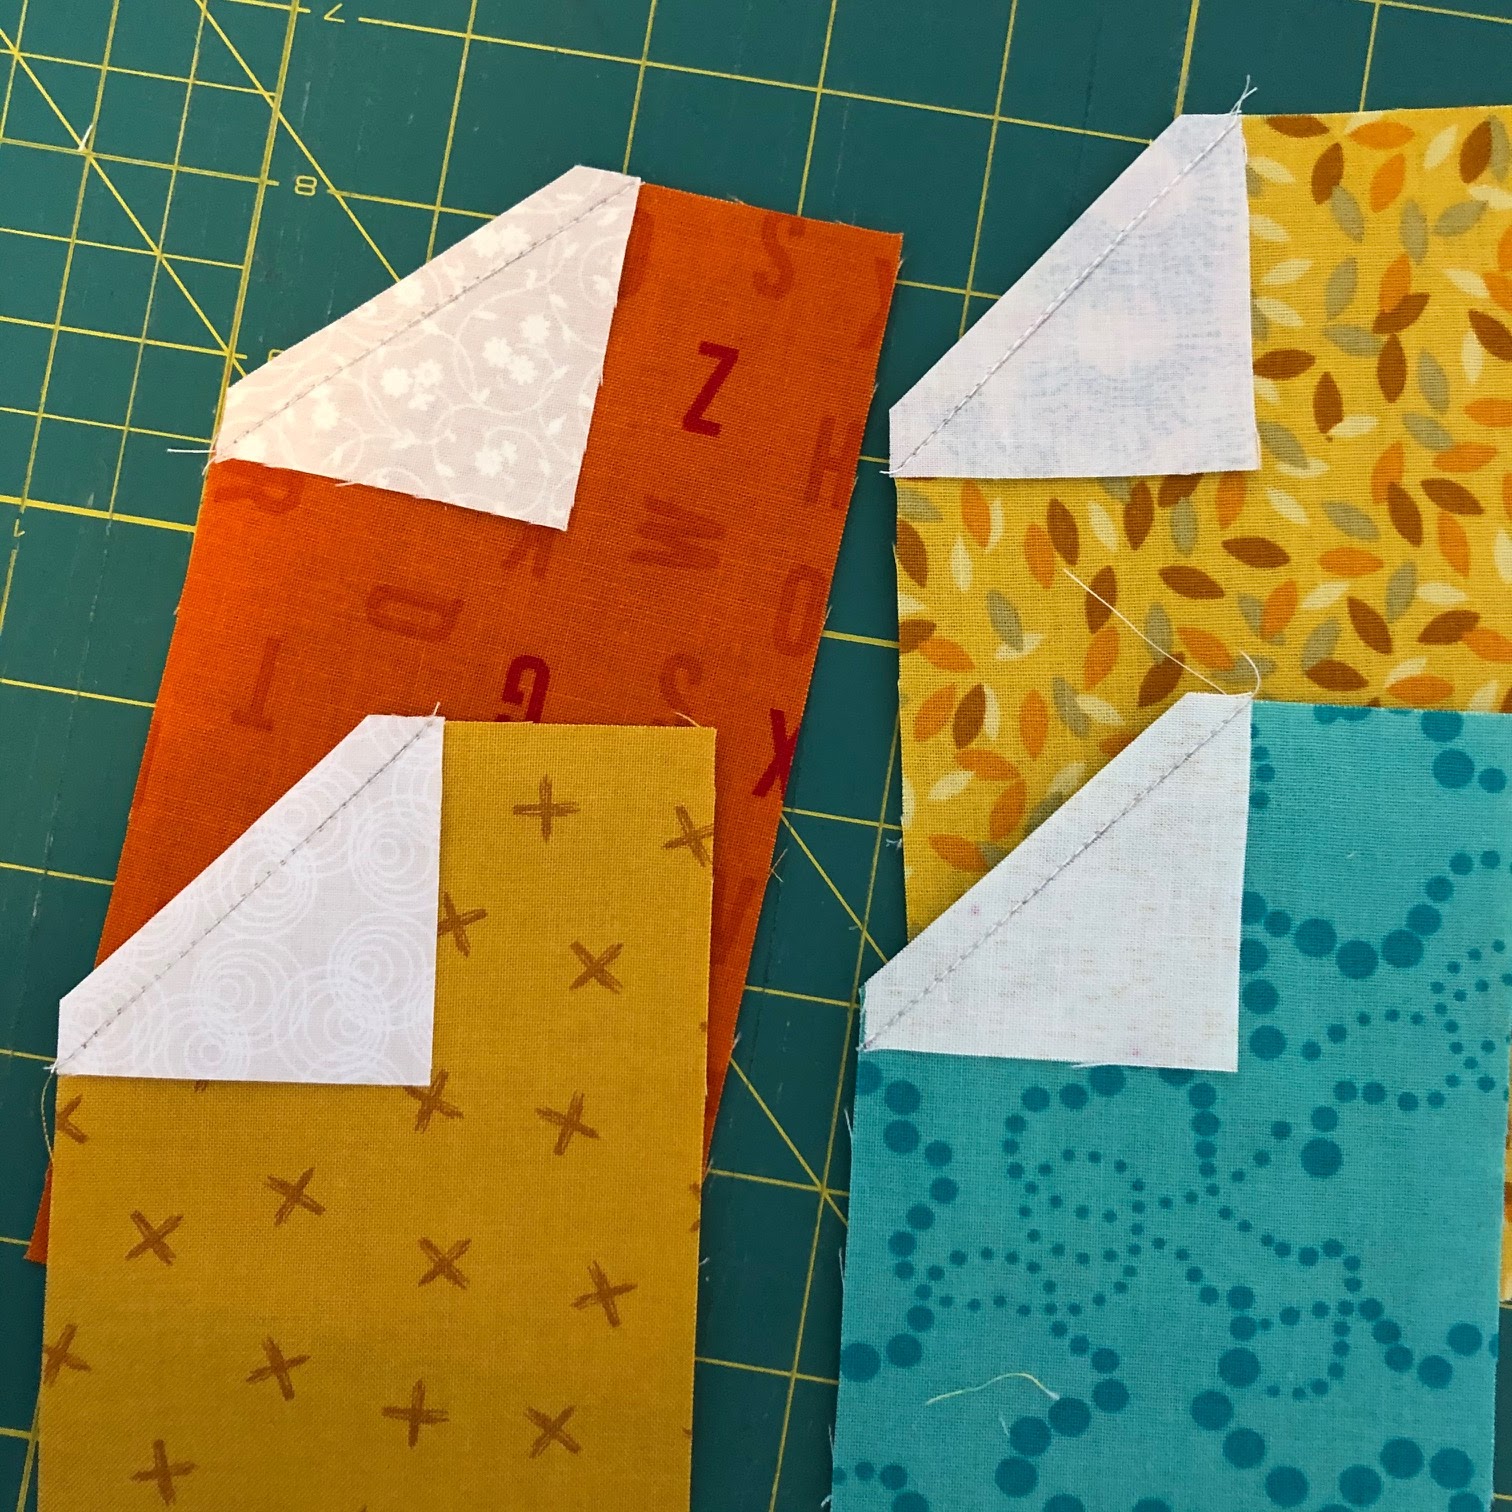
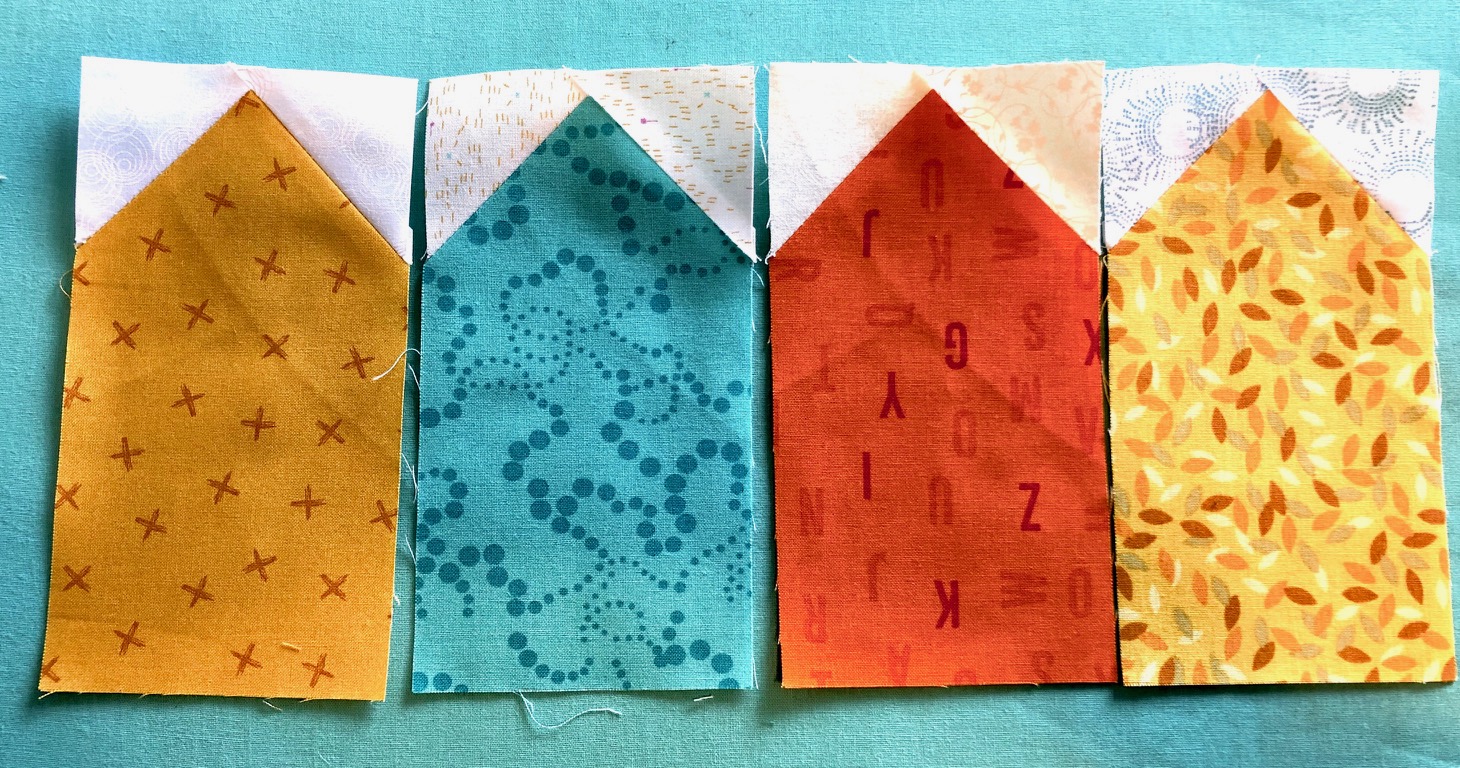
Here are my squares all cut:


Sewing Instructions:

The whole point of this block is for it to look random. I'll admit, that I suck when it comes to improv piecing so what helped me was to put all of my squares into a bag and randomly pick out 2 pieces to sew together. Don't feel like you have to do this; just as long as your block looks random when you're done.


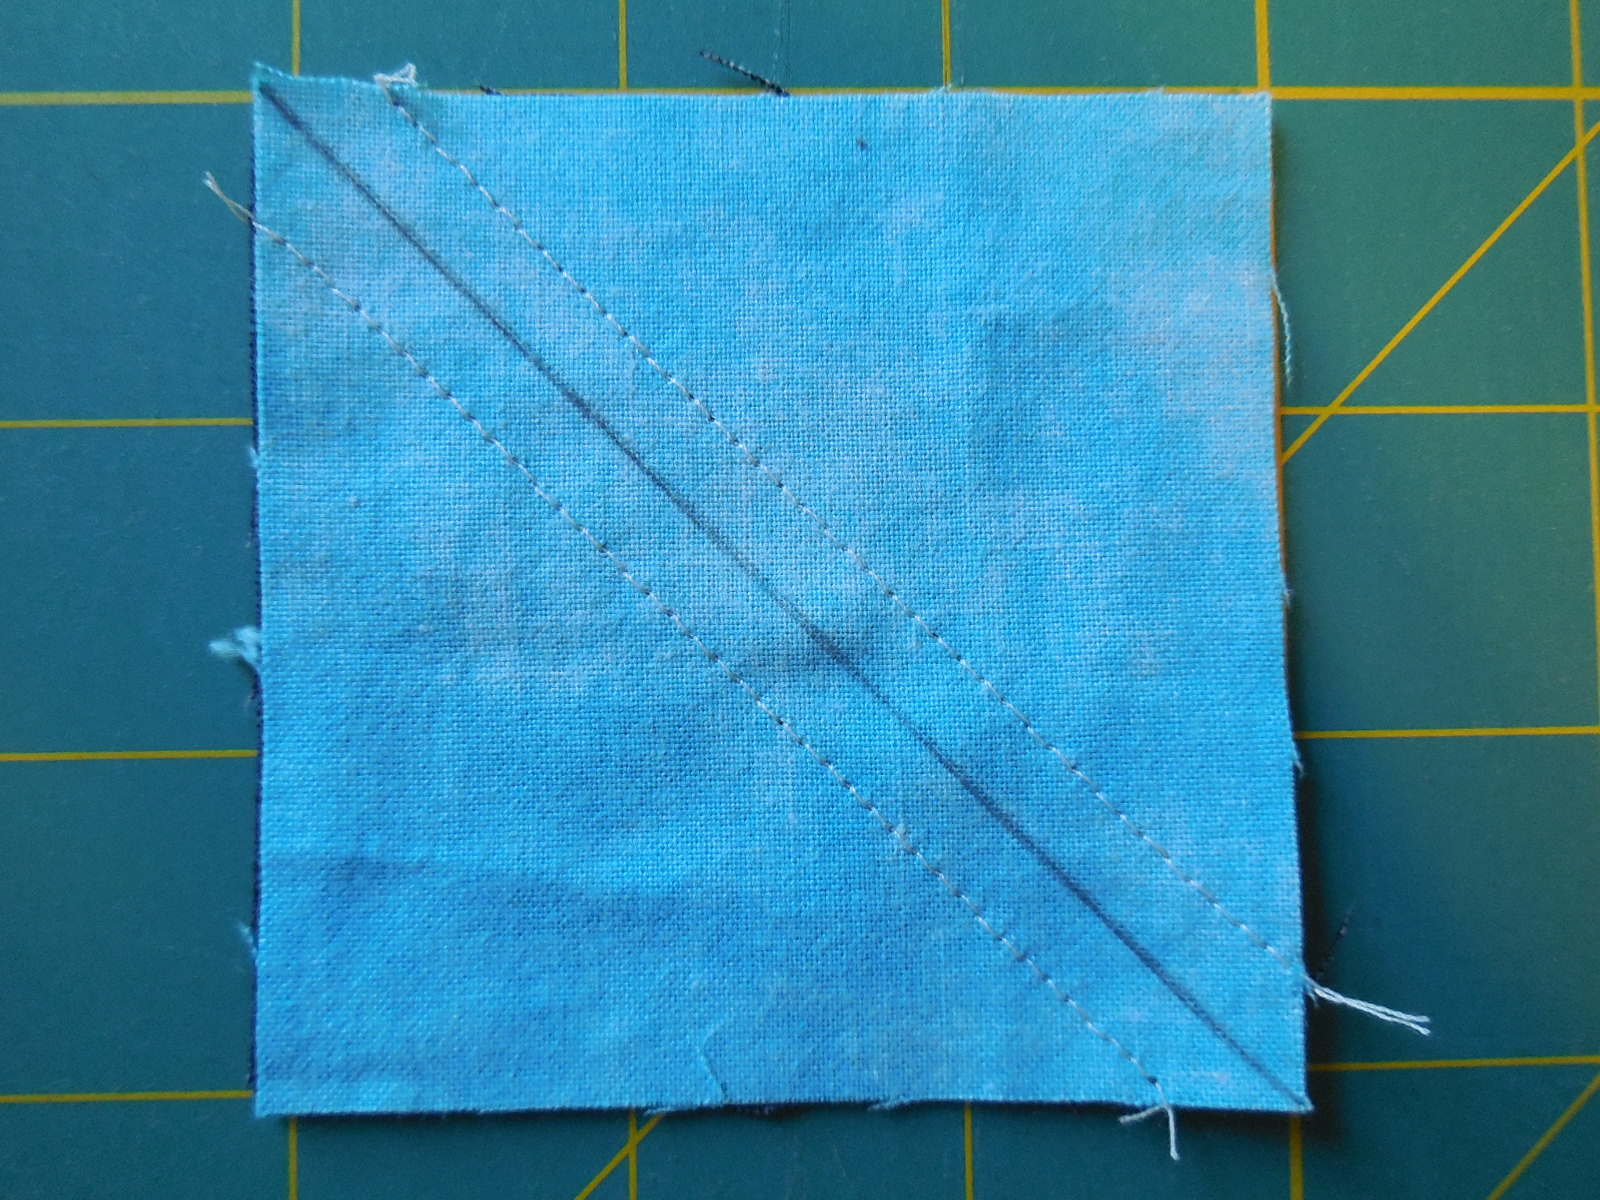
Once you have 2 squares picked out, take a pencil and draw a diagonal line on one of the squares. You'll sew a ¼-inch on either side of the line and then cut on the marked line. If you need a more detailed tutorial on how to make HSTs, here is one.


Press your seams toward the dark side or open, whichever you prefer, and trim to 4-inches square.

Continue pairing up your squares and making HSTs until you have 18 total.


Time to assemble the block. It only uses 16 HSTs so there will be 2 left over. You should only use 1 of the colored HSTs so please set one aside and place all of the other blocks back in the bag.


Like before, start pulling out 2 blocks at random and sew them together. You will sew them into 4 rows, with each row containing 4 blocks. When sewing the rows together, I ask that you press your seams open, please. You will have one block left in the bag (just make sure that it isn't the colored one!).

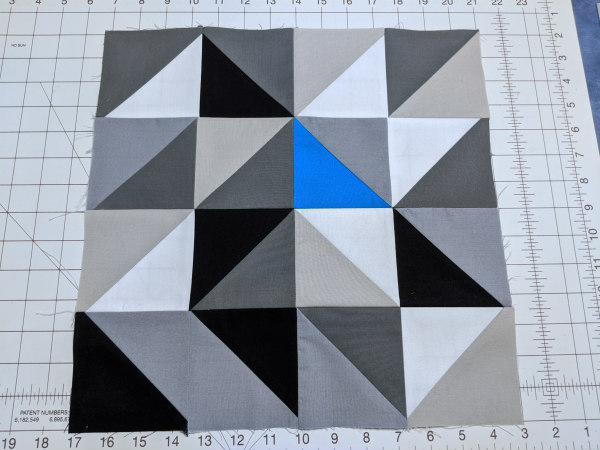
Here is what my finished block looks like:


The block should measure 14.5-inches square (don't worry if your block is a little over or under this measurement). DO NOT TRIM.

If it's not too much to ask, I'd love for you to send me the 2 leftover HSTs (one colored, one black/white/gray) along with your block. That will allow me to make a few more blocks for my quilt.

Thank you so much and I can't wait for all the happy mail coming my way this month!

~ Diana

Hive 4: February Tutorial - Double Disappearing 9-patch

Hi Stash Bee!

My name is Em and I have participated in Stash Bee all except one year, I think. Five times? Anyway, I always enjoy this bee and I LOVE that there is now an Instagram hive because that's my main mode of social media interaction. You can find me @moonlightsewing. 

Since I'm part of the IG hive, I prepped this tutorial so that I could make it available on Instagram as well. 


This is the classic "double disappearing nine patch" block and I made it so that the starting pieces are 5-inch charm squares.

FABRIC REQUIREMENTS

(5) 5 inch squares in blue/turquoise/navy
(4) 5 inch squares in yellow/lime/green
(1) 7 inch square in yellow/lime/green
(4) 7 inch squares in low volume, low contrast prints


BLOCK CONSTRUCTION

Step 1: Create a nine-patch block with the 5-inch squares. The blue/turquoise/navy squares will be the center and four corners. The yellow/lime/green squares will be the middle edges. 


Step 2: Cut the 9-patch in both directions down the center (7 inches from each side) to make four quarters. 


STASH BEE STOP HERE. Go ahead and send me the 4 quarters and I will finish the blocks when I receive them. This is a 19-inch block when finished (19.5 inches, unfinished) and thus is larger than the 16-inch maximum block size for this bee.

I will continue the tutorial for anyone who comes across this post and wishes to make a double disappearing nine patch using charm squares.

Step 3: Slide the 7-inch quarters out to become the corners of a second nine patch. Place your 7-inch yellow/lime/green square in the center and the (4) 7-inch low volume squares in the middle edge positions.


Step 4: Sew the nine patch together, then cut in both directions down the center (10 inches from each side) to make four quarters. 


Step 5: Rearrange the four quarters so that the center is at the outside corner for 2 diagonal quarters. Sew the block back together. 


Finished!!