Had a lot of fun picking out the fabrics for this one! Thanks for a great block!


This was a fun block to make, and one I've never seen before!

Candace,
You must have seen my backup block, it was Hidden Wells!! I remember seeing a video tutorial and immediately added this block to my To Make list.
I really went digging through my stash and found this lovely bundle of 4 fat eighths. Where this bundle came from, nobody knows, but I have saved it for years 😂
I love how quickly it came together and how beautiful it looks. These blocks are going to look amazing all together!!
~Adrienne

I loved how easy this block was to put together and also how it ends up looking more complicated than it really is. I may put this design in my to-do pile (at the end of my already long list 😂).
We are a bright and wacky family and I let my wife pick out the fabrics for this month. I absolutely love how joyful it turned out, and I hope you do too, Candace!

With joy,
Nicole
I was cutting out a few things for various round robins and ended up cutting one of these. I hope you enjoy them!
Thanks Amanda for sending me your address. I will get it in the mail soon.
.jpg)
I couldn't have asked for a more perfect block to make this month. With the last few weeks of school looming, I've been crazy busy and this block was so quick and easy to whip up. It was super stress-free which is just what I needed. I hope you like it, Candice!

~ Diana @ Red Delicious Life
Hi Candice!
This jelly roll friendly block is exactly what I needed after struggling with the FPP block from last month. It was so easy and came out so cute! I hope you like it as much as I do!
Happy Sewing,
Nicole
Hi Rita!
I wish I could say April Fools! I’m sorry this is getting to you late. I definitely struggled wrapping my head around FPP. But working on this project gave me more confidence in paper piecing. I hope you enjoy!

Nicole
Oh boy. 👀 I love this block so much that I now have plans for a new quilt using it, so... thanks!! 🙂🙃🙂🙃🙂
You mentioned jelly rolls, and I happened to have some of those in my stash for which I hadn't made plans...and here we are!
I just could not get the points to all match up. I think it has something to do with trimming it to 8" on the lengthwise edges. But hopefully it's not incredibly obvious!!
I'll get them in the mail ASAP!


Hello everyone! I have the tutorial for May. I have considered at least four different blocks and this is my second post. I scrapped that last one, maybe because I thought about it too long. Anyway, I don’t have a recipient in mind for this quilt yet but I thought that a heart quilt would be something that I can gift to a number of people. And it is just time to stop waffling on this one!
I am trying to put together a small inventory of quilt tops so that when I need or want to give a quilt to someone, I just have to make the sandwich and bind it! I never get enough time to plan for these things.

Also, pinks and reds or traditional ‘heart’ fabrics and colors are fine but don’t be afraid to mix things up. All the normal rules apply with the prints - please no holidays, trademarked, political fabrics. And no batiks either please. If you use an all over floral, please make sure it is modern. I am really excited to see how different patterned and colored hearts look together in one quilt!
I hope you enjoy making this square! Happy quilting!
Beth Norton
Happy May!
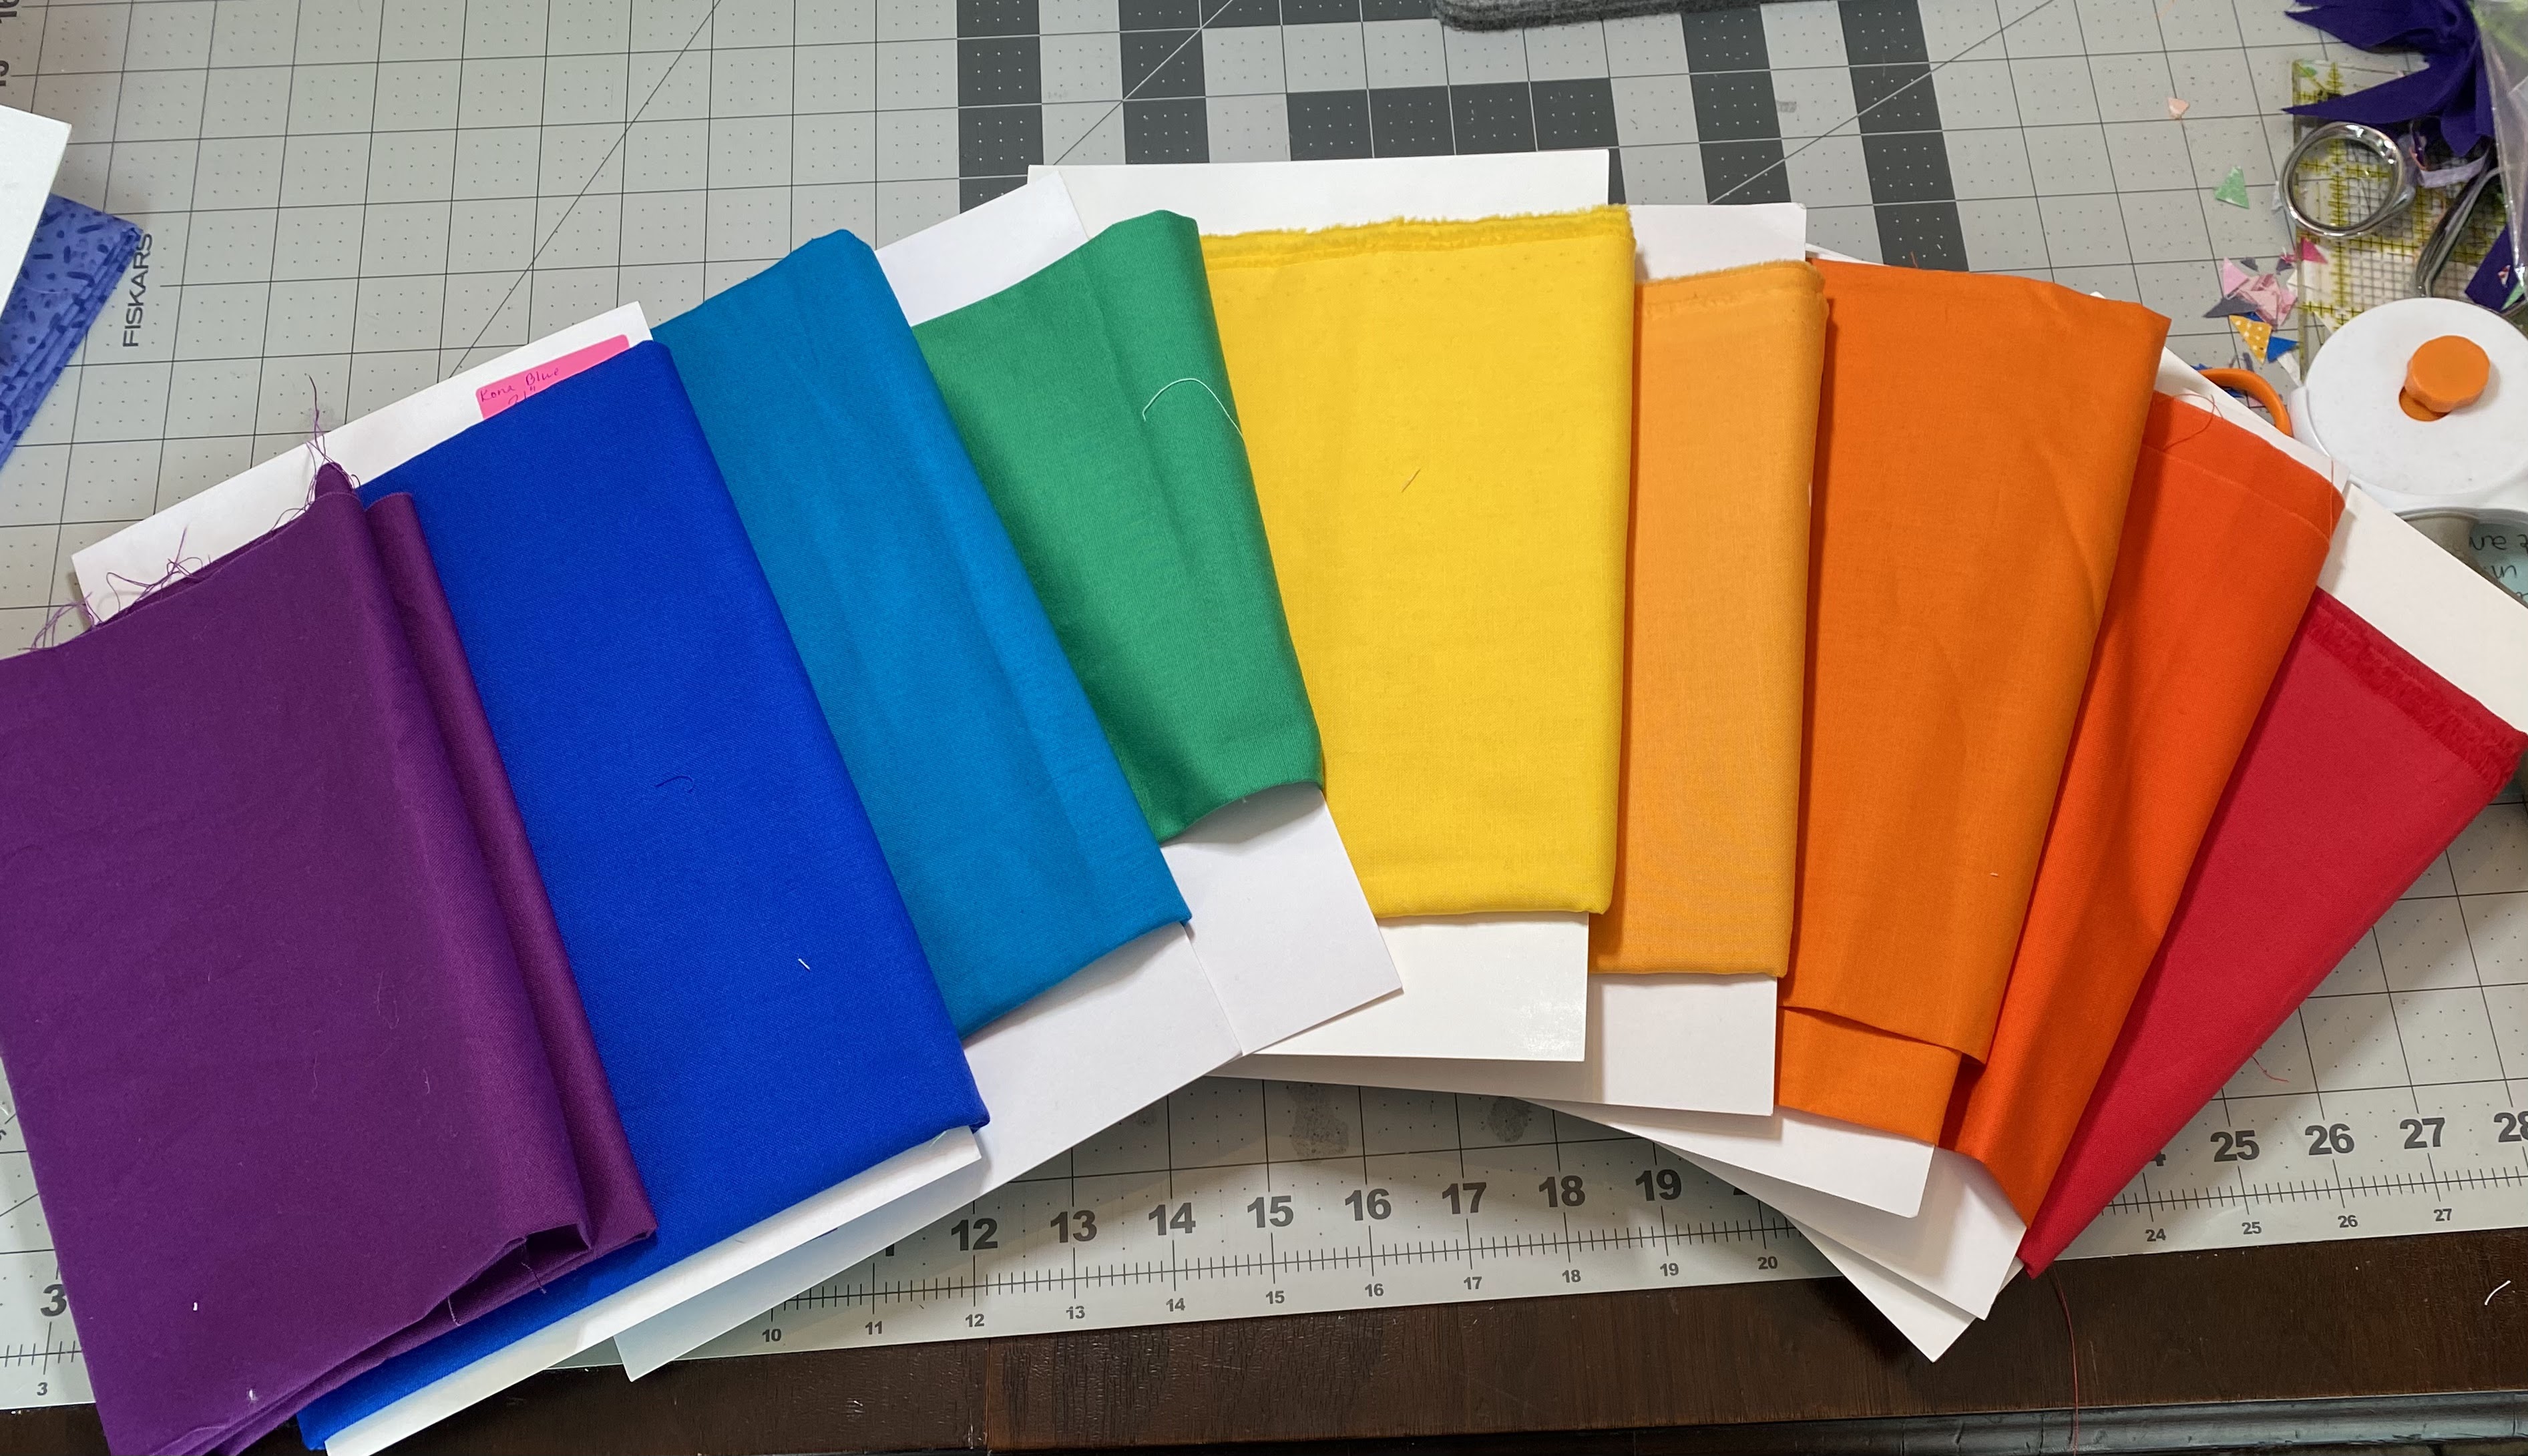
I've been going through the rainbow, slowly making quilts out of every color. The last color I have is yellow. I was having a bit of a hard time with yellow, because I didn't know what neutral to put with it. Nothing seemed to work: it's a light color like white, black will look like a bumble bee, grey didn't seem quite right, and I don't love brown. But then it hit me: dark green. It's not really a neutral, but will offset the yellow well.

Fabrics
For the fabrics, before we get into the specific colors, there are some guidelines. Please stay away from novelty prints. It turns out I have a different definition of novelty prints as others, but to me a novelty print includes something man-made. Suns, flowers, leaves, hearts, geometrics are not novelty prints. I love solids and would be happy to have you include them. I'm also open to batiks.
Yellow: please choose bright yellows. Slightly mustardy is ok, but try to stay away from the brown-yellows. Please try to choose something mostly yellow or with white accents, staying away from other colors.

Green: please choose dark greens, thinking deep forest. Again, please try to choose fabrics that are all green or only have dark accents.

Cutting
Each square should be made with the same fabric. The center and outer squares (cutting instructions: yellow 2 & 3 along with green 2 & 3) can be the same fabric or different fabrics. I did one of both.
Yellow 1: (2) 2"x3.5", (2) 2"x6.5"
Yellow 2: (1) 3.5"x3.5"
Yellow 3: (2) 2"x6.5", (2) 2"x9.5"
Green 1: (2) 2"x3.5", (2) 2"x6.5"
Green 2: (1) 3.5"x3.5"
Green 3: (2) 2"x6.5", (2) 2"x9.5"
Sewing
Layout the pieces like the picture below and sew together like a log cabin. After the middle square is attached, the block should be 6.5" square. After the last square is attached it should be 9.5" square.


I am 100% the person who has an obsession with purchasing jelly rolls. Because of this, I love all patterns that need pieces that are 2.5" wide, bonus points if I can just sew the strips together.
So - the May block is a simple use of 2.5" strips. The pattern is called Hidden Wells and I based it on the pattern supplied by Connie Kresin.
For the material - you will need 4 different fabrics (I don't care what color, pattern, or type as long as they're cotton). From each color, you will need a strip that is 2.5" x 18".


I’m excited to be the Queen Bee this month, especially because I’m moving on May 1st. I’ve updated my address in the Google Doc.
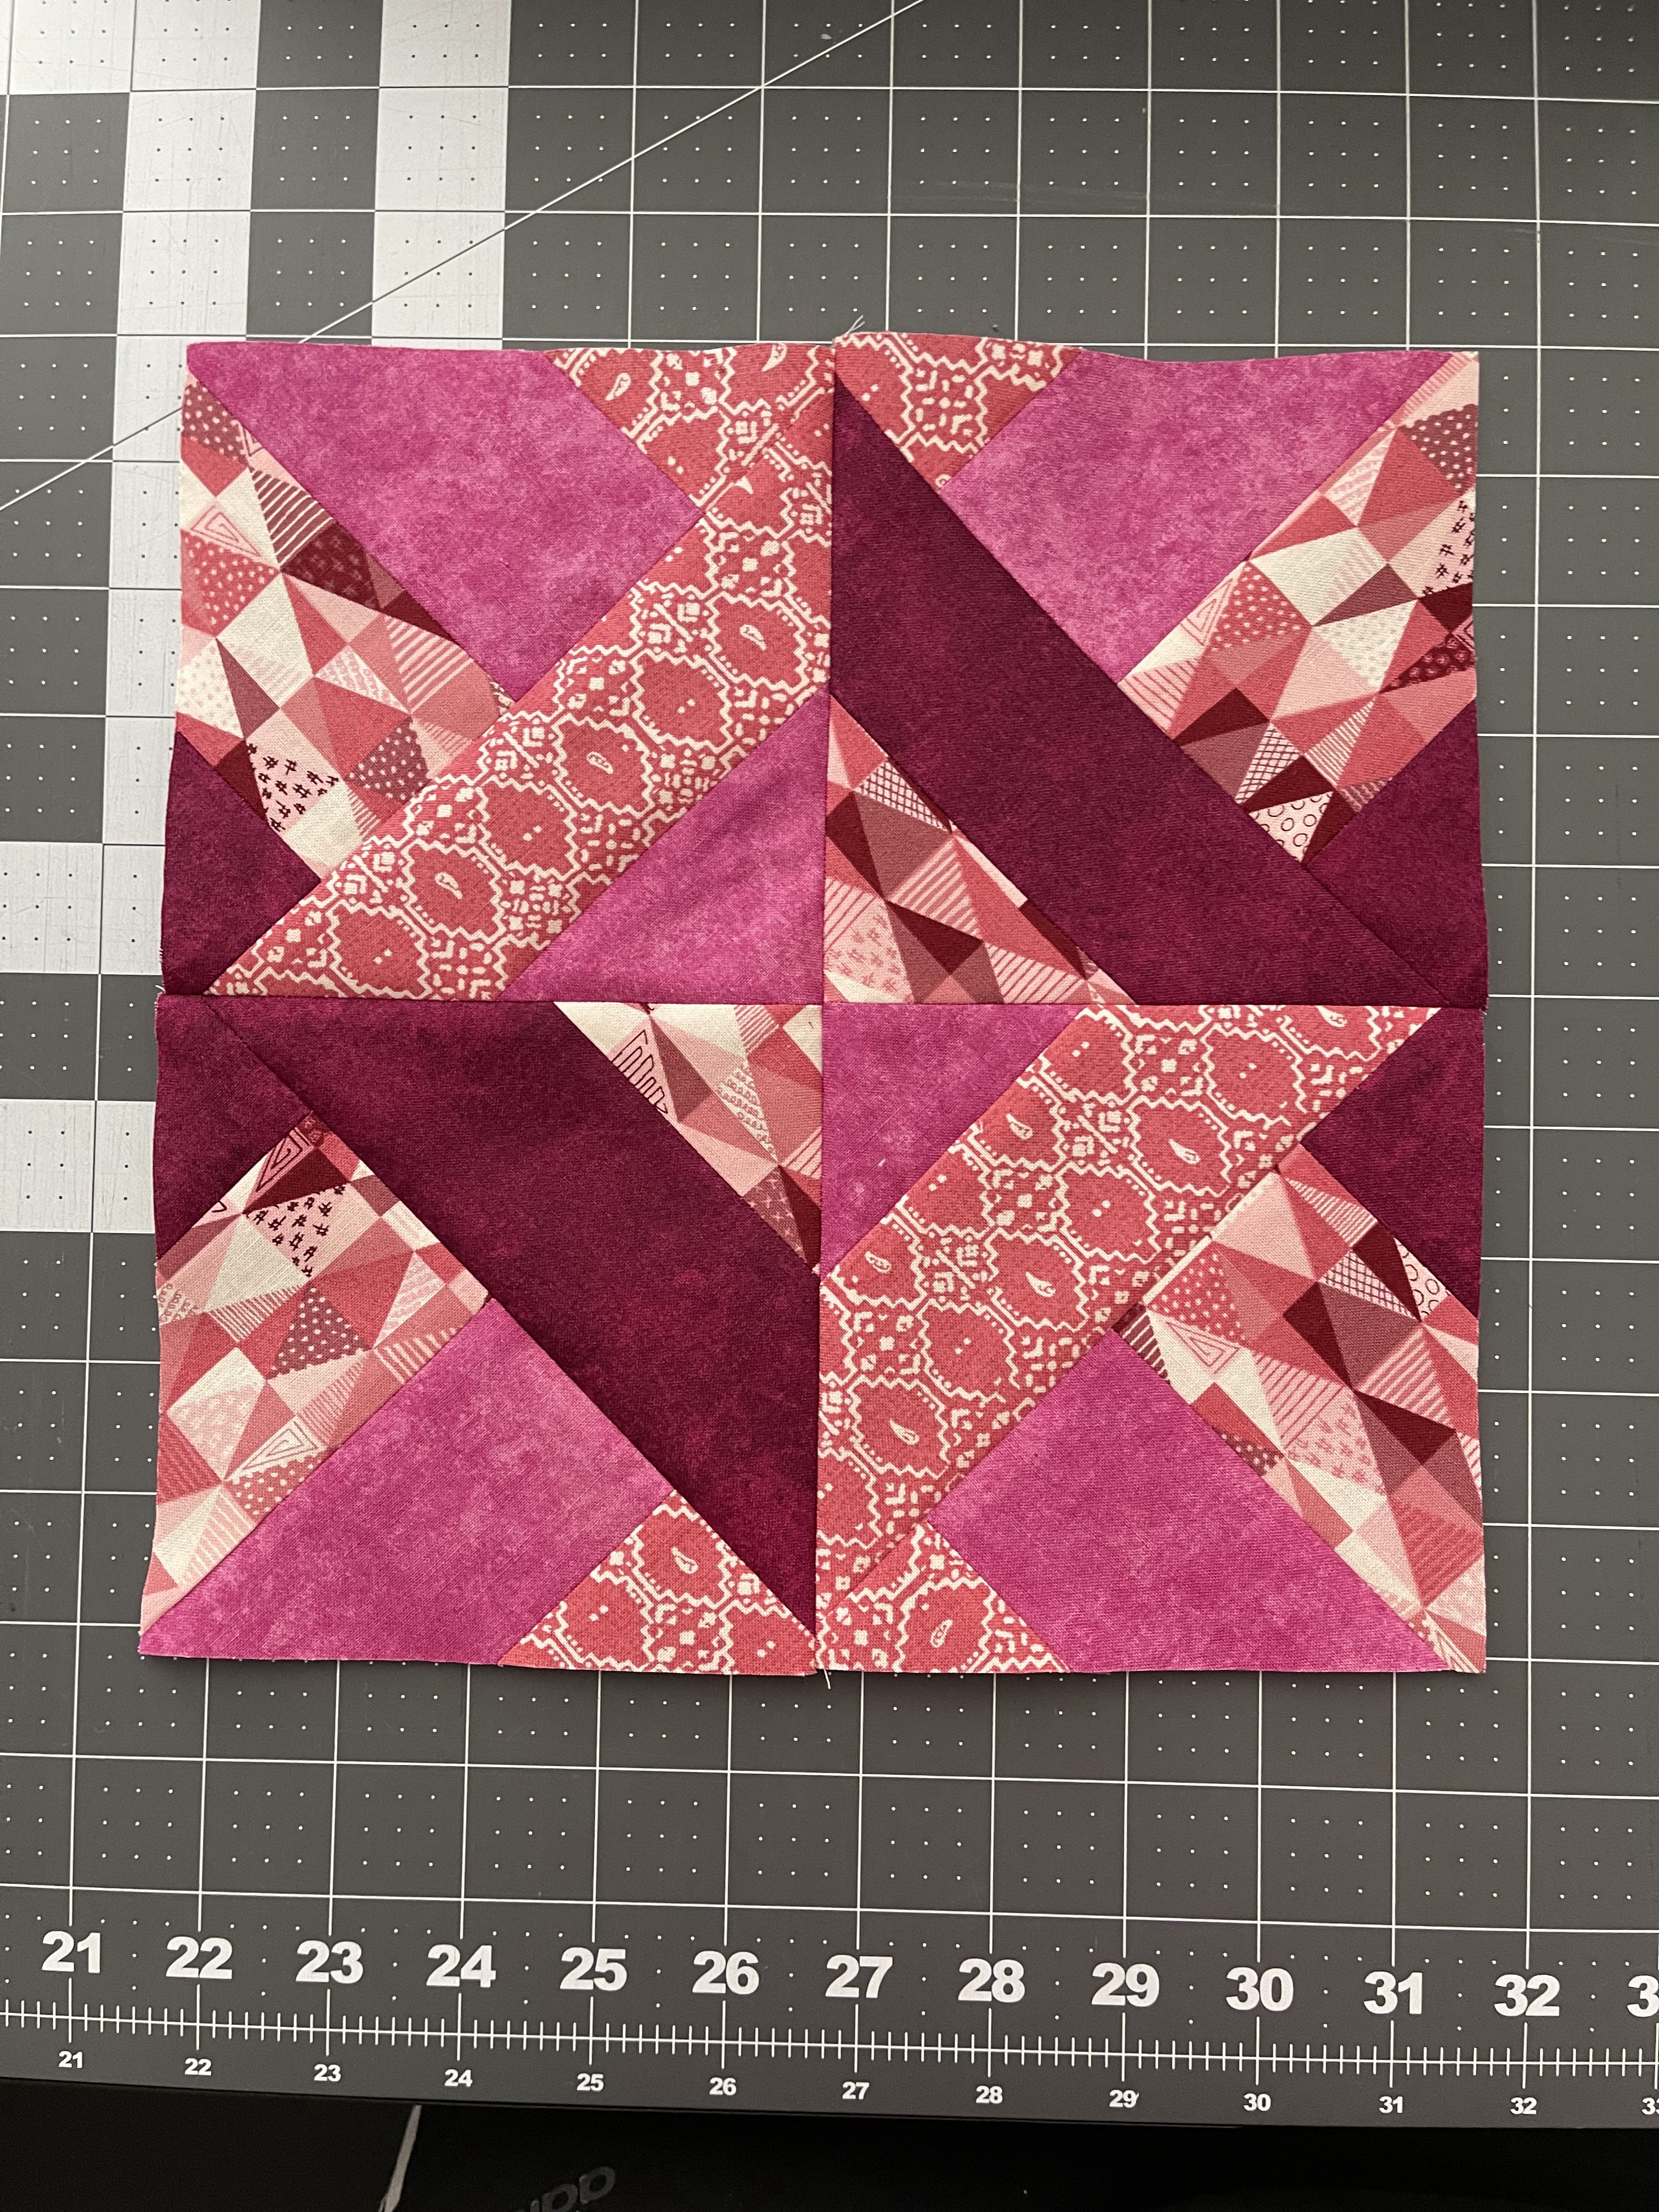
I thought we’d have a little fun with some color theory. A triad is a color scheme, a special variant of the split-complementary color scheme, with the equal distance between all colors. All three colors are distributed evenly around the color wheel, causing there to be no clear dominance of any one color.

Fabric Cutting Instructions
Here are the original instructions for this block, as well as the template for the triangle pattern.
Choose three fabrics that create a color triad. The original instructions ask for a light, medium and dark fabric for each block. Since the point of the triad (pun not intended) is for no one color to stand out, choose whichever fabric for each part of the pattern.
From Fabric 1 (Light from original instructions), cut:
4 of the Triangle Pattern

From Fabric 2 (Medium from original instructions), cut:
2 2 ⅝ squares, cutting each in half diagonally, for a total of 4 triangles

From Fabric 3 (Dark from original instructions), cut:

Block Assembly Instructions
Sew a Fabric 1 triangle and a Fabric 3 triangle together, to make a triangle pair, using 1/4 inch seam allowance. Press the seam allowances toward Fabric 3. Repeat to make four pairs.


.jpg)