
Hello ladies
Happy New Year to you all, hope you have had a lovely holiday break - I am really enjoying my summer holidays after another long difficult year. Each year seems to get more difficult as I get older.
I would like to continue making a quilt with your help for the king single bed in my husbands office. It is the only bed in our house without a dedicated quilt made for it. And every bed needs at least one quilt right?
The block I would like you to make for me this month is an adaptation of the Chainlink block which you can see the original free tutorial here:
https://www.blossomheartquilts.com/2015/02/bee-hive-chainlink/
This is a drawing of what the quilt might look like. You are making me the part in the drawn squares. The extra sashing parts make the alternate block appear.

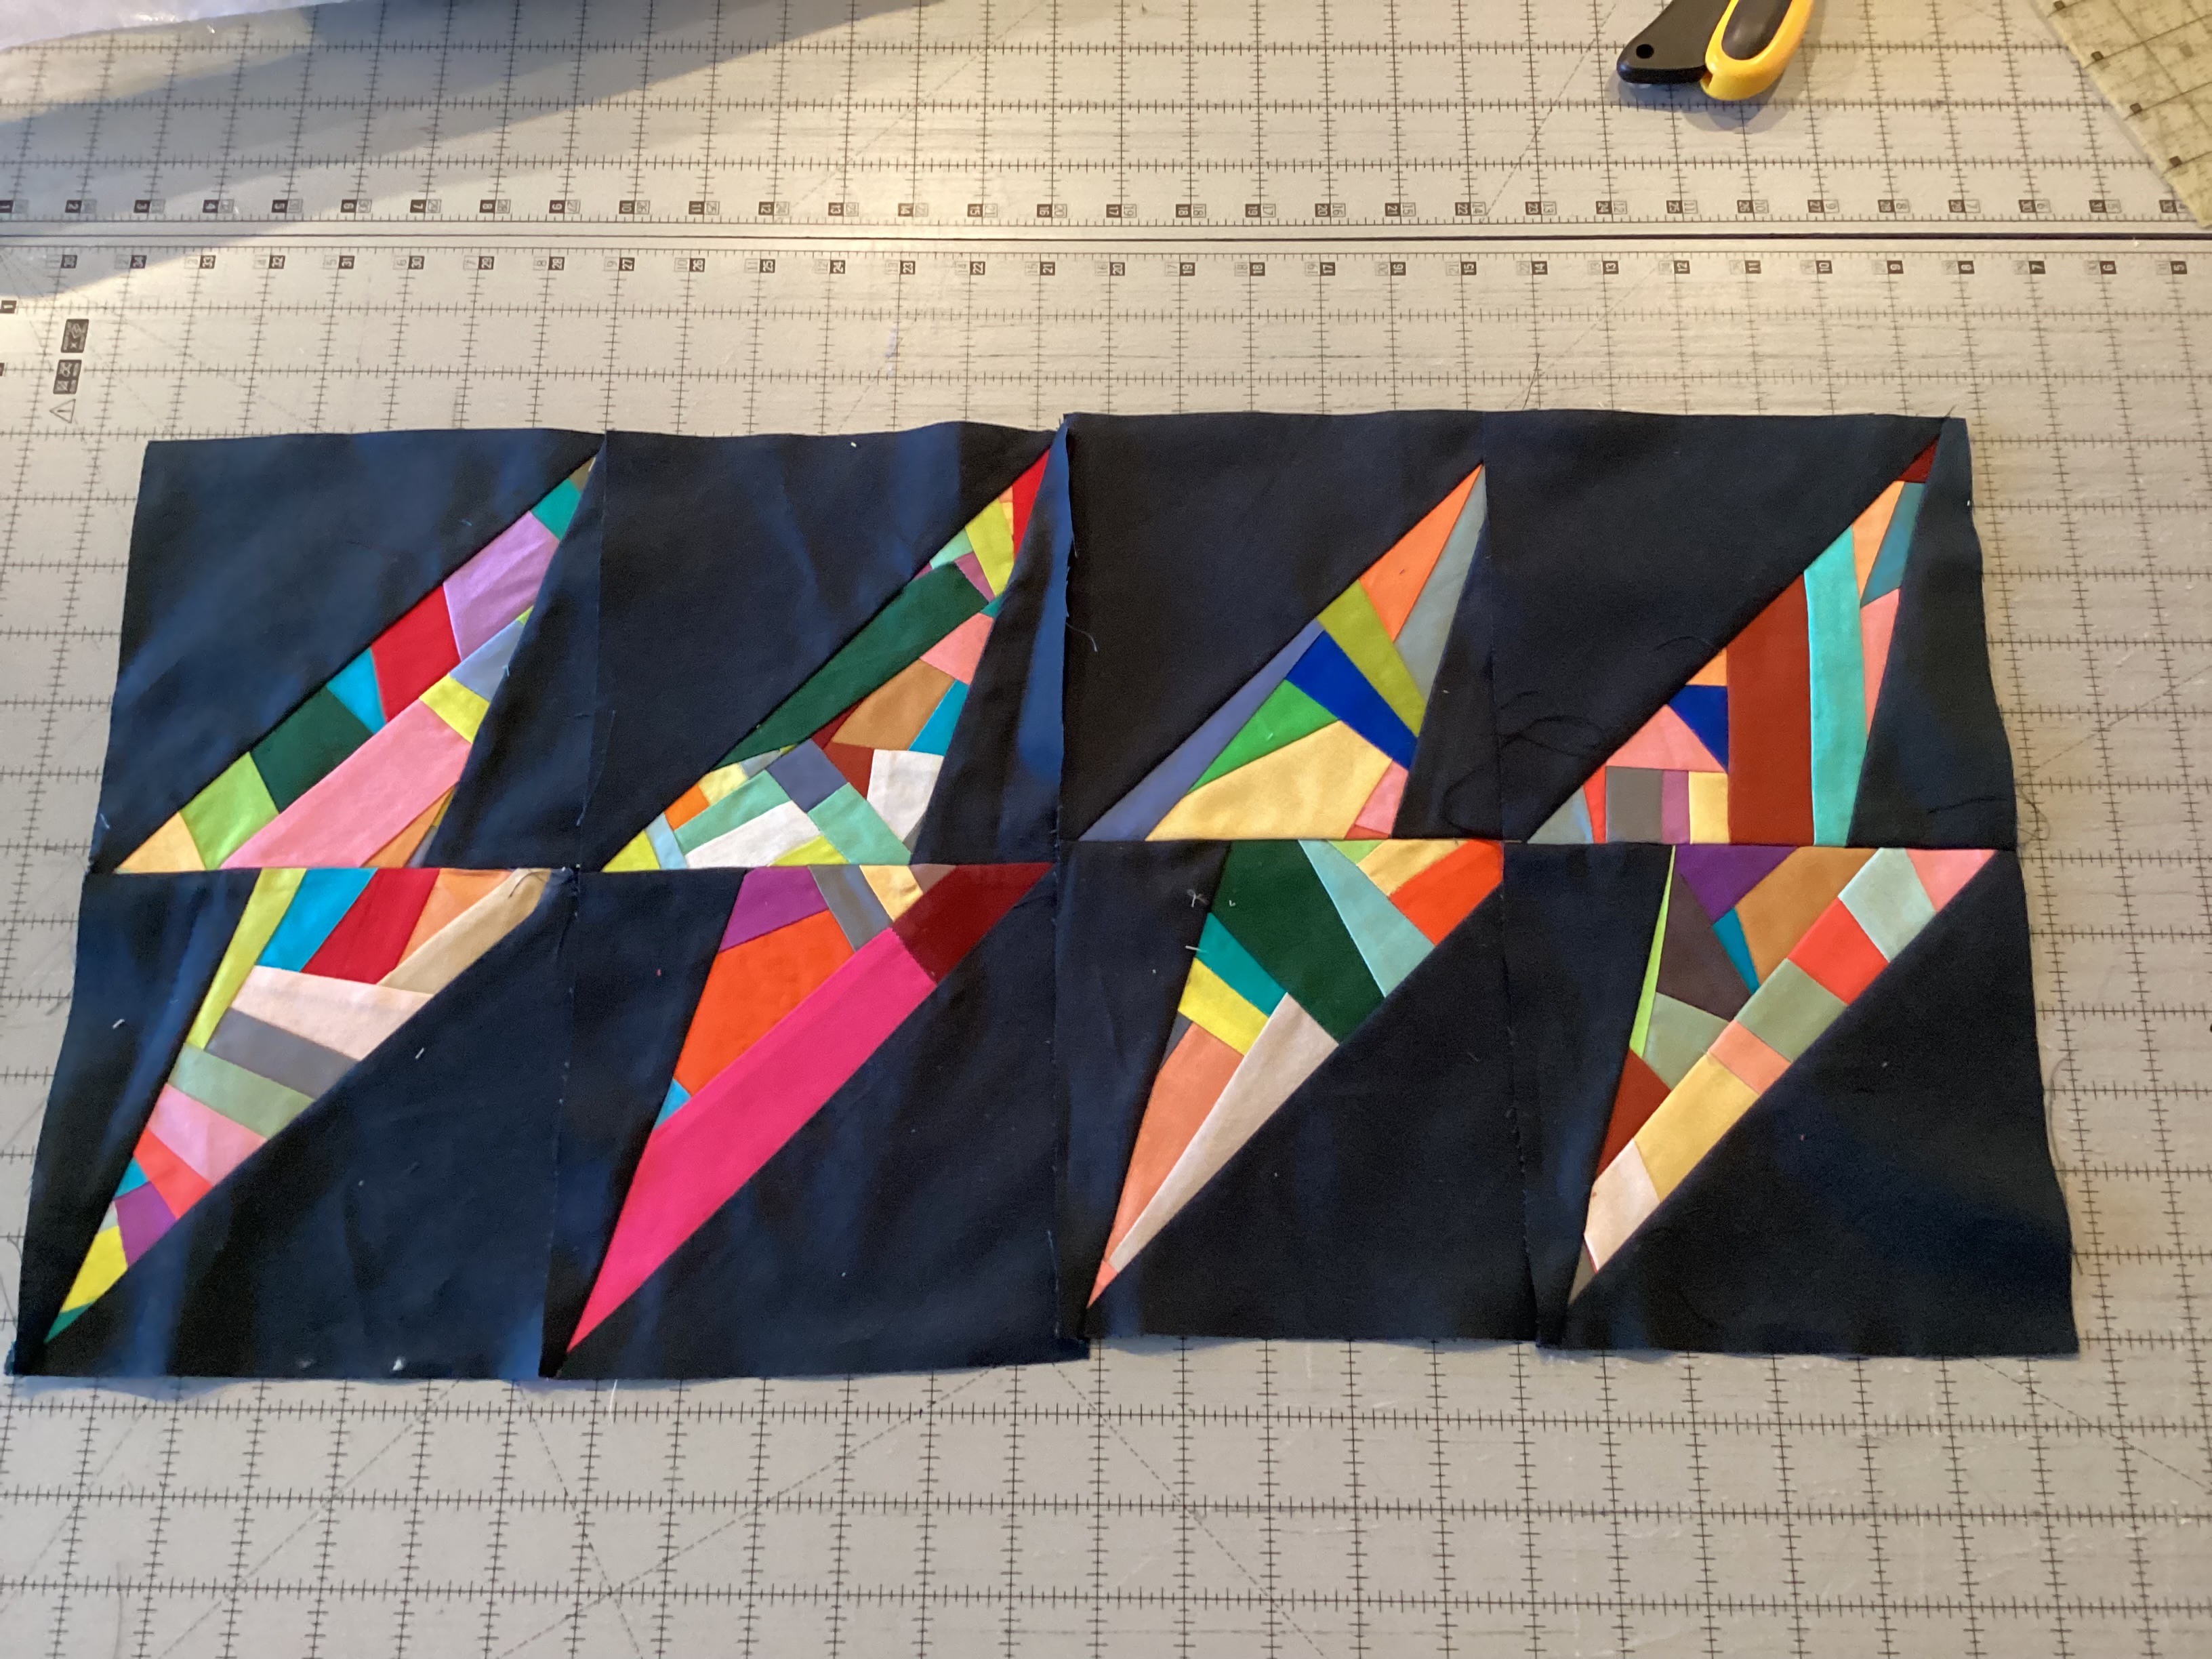
Here is a picture of 4 blocks I have made and sewn together with the sashing that I would prefer. The original block has a lot more pieces than my version and I am only asking you to make the block without the sashing parts. However, at the end of the tutorial, I will ask you to send a little bit more fabric to me with your block - more on that later.

Here is a photo of the blocks I received during the 2023 Stash Bee. I am so pleased with how it is starting to look. Thanks so much to my 2023 bee hive for getting me so far along.

Please ignore the EPP rosettes at the top and side, that is part of another quilt I am trying to finish in time for an exhibition in May 2024 - I am a bit behind.
And here is an example of a 10.5 inch unfinished block that I would like you lovely ladies to make for me.

This is a very easy block to make using 2.5 inch squares and 3 inch squares turned into 2.5 inch half square triangles and then all sewn together in the right order. The affect of the chain link comes from the colour value of the fabrics.
Choosing fabrics:
You need a black or very dark grey/charcoal, a medium grey, a light grey and a low volume neutral that is light enough to contrast with the lightest grey.
You also need a clear bright coloured floral.
The fabric needs to be modern style fabrics as per the rules of stash bee.
Here is a photo of my fabric pull for this quilt:


Please try and keep the light grey contrasting with the neutral and the medium grey so that the "shadow' affect can be seen in the block.
Cutting:
You are selecting 1 of each fabric colour (the quilt will be scrappy but each block is made of 1 each of the 5 colour fabrics - please see pictures of blocks as examples and my 1 block pull below)
Fabric sewn into the block
Dark grey or black - 4 x 2.5 inch squares
Medium grey - 8 x 2.5 inch squares
Light grey - 4 x 3 inch squares (for 2 at a time HST) OR 1 x 8 inch square (for 8 at a time HST)
Background/neutral - 4 x 3 inch squares (for 2 at a time HST) OR 1 x 8 inch square (for 8 at a time HST) and 4 x 2.5 inch squares
Brightly coloured floral - 1 x 2.5 inch square
Fabrics not sewn into block but sent to me with your block.
Background/neutral - 1 x 6.5 by 2.5 inch strip
Light Grey - 4 x 2.5 inch squares
Floral - 1 x 2.5 inch square


Sewing:
Please use a scant 1/4 inch seam through out.
Making the centre 9 patch:
Take the 4 dark black/grey squares, 4 of the medium grey squares and the bright floral square and make a 9 patch. I tend to press my seams open but you can press them to alternating sides in each row so they nest if you prefer. I don't mind either way. I am not providing pressing instructions.


A successfully sewn 9 patch should measure 6.5 inch square unfinished (with seam allowances).
Making half square triangles
There are 2 ways to make these, one is the 8 at a time method and a tutorial can be found here:
http://www.blossomheartquilts.com/2015/05/hst-tutorial-eight-at-a-time/
The tutorial says start with 7.75 inch squares but I suggest rounding the starting squares to 8 inches and trimming down the HST afterwards - gives more wriggle room. So instead of 4 x 3 inch squares of lightest gray and 4 x 3 inch squares of neutral/background, you would start with an 8 inch square of lightest grey and an 8 inch square of the neutral/background.
The other way you can make them is 2 at a time as per below:
Take the 4 x 3 inch light grey squares and the 4 x 3 inch neutral/background squares and make 8 half square triangle blocks.
- mark a diagonal line on the back of the 4 light grey squares with a pencil or erasible pen (I use the ones that iron off - they are on the back so it doesn't really matter as long as they can't be seen from the front).

- pair up right sides together with the 4 x neutral/background 3 inch squares and sew a scant quarter inch seam either side of the marked line.

- cut the unit in half along the marked like and then press the block open ready to be trimmed down to 2.5 inches. I over-sized this deliberately at 3 inches to start with so that the block could be trimmed down rather than be too small right from the start.


Arrange the remaining 2.5 inch squares and the 8 half square triangles you just made around the 9 patch you also just made. Please note the orientation of each of the half square triangles. Correctly placed, they make the shadow affect so that when all the blocks are put together, creates a "chain" affect.

Sew the top and bottom 5 blocks in a row in the right order and orientation and then the 3 blocks on each side in the right order and orientation. Sew the 2 side strips to the centre 9 patch and then the top and bottom strips to the block. Take care to line up seam intersections. I press my seams open so I pin either side of the seam intersection so the fabric does not "slip" forward with the presser foot.

How to keep those points nice.
Pin so you can see where the point edge of the block attaches to the straight part and make sure your line of stitching runs just to the right or left of the point in the background or darker fabric. If your cutting and seam allowance is reasonably accurate it should be easy to keep your points.
 See the stitching line to the left of the point.
Happy sewing
Helen


