Monday, April 20, 2020

Hive 1 April Block for Paulette

Hive 1 April Block for Paulette


Paulette, I actually mailed your block out on Friday but forgot to finish my post.  In my dark sewing dungeon, the purples seemed a bit darker but when I brought it outside to take a picture I realized they were not, I hope it will work for you!


It has been very hard for me to find motivation for sewing right now, I feel like I'm barely accomplishing getting dressed for work.  While my little bubble is actually just fine and dandy, I can't help but feel for those who are not.  This block really helped me miss sewing, and this past weekend I figured out my May block and stitched one up.  I *think* I may be getting out of the funk I've been in, wooooo!


💗 Rochelle
@mcallisterwench

Late post for Paulette!

In between making masks, I made two blocks(second one is hidden) for Paulette and mailed them off. She has received(and hopefully liked) the blocks and extra HST, but I forgot to post here.
I hope all of you hive mates are staying safe and healthy!!
Liz

Sunday, April 19, 2020

Saturday, April 18, 2020

Hive 1 February blocks in the flimsy stage

Despite spending all my time at home for the last month, I've gotten surprisingly little quilting done.  However, today I made it my mission to get my Stash Bee blocks from February put together.  I had the perfect sashing from my stash.  Here is the result.  It turned out just as vibrant as I imagined.  Thanks to everyone in Hive 1 for making it a terrific quilt.  I expect to use it for a Project Linus quilt donation in the future.
Kathie L in Allentown

Hive 4 for Paulette - oops

Well, here's how the morning went down...

Get the envelope for Paulette's block.
Write the address, realizing that normally I would go to the post office to send this block.
Spend ten minutes trying to figure out what the international postage would be.
Wrap up the block and seal the envelope.
**Realize that I forgot to take a picture of the block!!**

Dealing with the postage completely threw me off, so I'd like to present a picture of the envelope instead.  Sorry for any problems this causes, but I promise the block is in there!  It turned out a bit more Christmas-y than I was expecting, but the plus is a bright blue so it isn't too Christmas-y.

Tuesday, April 14, 2020

Hive 1 April Block for Paulette

Hi Paulette,

This is my version of this month's block for you. Hope it finds a place in your quilt.

Stay strong and enjoy the spring as much as you can.

Take care,
Best wishes from Ireland,
Rita.

Hive 1 block for Paulette


I love this block!  Simple but the end result is always striking.  Looking forward to the finished product!

Saturday, April 11, 2020

Hive 1: two x/+ blocks for Paulette


I'm loving the variety of looks for this x/+ block.  I know Paulette's scrappy quilt is going to be great.  Happy quilting, and stay well.  :)

Pam

Sunday, April 5, 2020

Hive 1 April Block for Paulette

Hi Paulette,
I love this block, especially the way you're planning the color red to show as a grid in the background!  I might just ask for this block when it's my turn...  😊   Karen


Wednesday, April 1, 2020

Hive 1 April block for Paulette

You've picked one of my all time favorite blocks.  I did a block exchange using 1930's fabrics with this block.  Here's my version for your quilt.  It will be spectacular.
Kathie L in Allentown

Hive 1 April Tutorial: + and x Block

Hello everyone from Paulette here in western Canada.  Like most of you, I am at home and doing my part for social distancing.  I have been using this extra time to catch up on a few things and that includes some unfinished sewing projects.  So for my turn as queen this April, I am asking you to contribute to my + and x quilt.  These are the blocks I have already made. Very scrappy.


As you can see, I am completely open to any colour. 

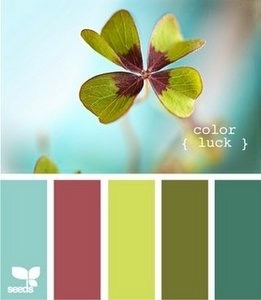
The plus in the centre can be any colour but I am asking that the extensions to it that touch the edges of the block be a red.  Any red will do as long as it reads red.  You can see from my blocks on the design wall that they create a secondary grid design. 

For the block, you will need a backgound (light, medium or dark), one colour for the middle plus sign, one red fabric for the plus sign extensions, and four similar coloured x pieces.  I don't mind if there are other colours included as long as all four read as green, or purple, or off white as illustrated above. 

Mix vintage and new fabrics if you like, but please no solids, no batiks, and no Halloween or skulls. 
Here is a sample pull of fabric that includes a dark background, light plus sign, red, and four sort of turquoisey fabrics.  


This is the block it made.  
Ooops…. proof reading has proved that I switched out the plus sign fabric to orange when I sewed it.  But, it still works for me. 👍


I hope you are getting the idea.  

Cutting for      Background  8(3 1/2" x 3 1/2" squares)
                        Plus Sign       2(2 1/2" x 2 1/2" squares) and one 2 1/2" x 6 1/2" rectangle
                        Red                4(2 1/2" x 3 1/2" rectangles)
                        x diagonals    1(5 1/2" x 5 1/2" square) from 4 different fabrics that are in same colour                                                 family  -Total 4

Here are the cut pieces for a block.


Sewing:  Draw a diagonal on the back of your background squares. 
Place 2 of them like this on your four 5 1/2" squares and sew on the drawn diagonal. 

Please trim off  the outside triangles.  I know there is a lot of waste here.  I actually sewed another seam line about 1/2" from first sewn line and then cut between the two sewn lines.  This will give you some half square triangles to play with or you can send me the cut offs.  Press background toward the outside of the block.  Arrange your pieces like this. 


Now you can add the red rectangles to the plus sign pieces.  Press toward the plus sign fabric.


Attach sections to make the top and bottom rows. Press the seams toward the x diagonal pieces. 


Now sew the rows together, pressing these last two seams toward the middle of the block. 


And there you have it. A beautiful + and x block.  

Thank you so much for sewing for me. I am looking forward to what you create.  This UFO is back on track. Happy sewing.  Paulette


Hive 4 April Tutorial: Solid Checkerboard Bloch


My inspiration this year comes from this pic. It is for a very popular kit from Blueprint. With their permission, I’m posting my own tutorial for my take on this beauty.


First—color pull. For this block, I would like everyone to use solids. Think rich, deeply saturated colors.  I definitely see my own personal pull toward purples and blues, but, I’m open anything that is bright and deep.  These are just examples. Here is my color pull for my sample blocks.


Here are some other color inspiration swatches I’ve been collecting:


For this block, you need 4 fabric strips, 3" x WOF:
   - checkerboard dark (1)
   - checkerboard contrast (1)
   - border (2)

For the center (checkerboard), you can either work from 3” strips or 3” squares; I used strips.

Cutting Instructions: 
Cut 1 each--3" x WOF (or at least 25") of checkerboard colors
Cut 2 - 3”x10-1/2” AND 2 - 3”x15-1\2” strips from your border fabric.


Sew one dark and one contrast strip Right sides together.  Press to the darker color and cut strips into 8 - 3” segments.  I cut my segments from the back side, lining one of my ruler lines along the seam.


Pair up two segments to make a 4-patch as shown. Repeat 3 more times.


Sew 4-patch units together to make center checkerboard as shown. I pin all intersecting seams to help things match up better for me. 


Now take one of each of the smaller border pieces on opposite sides of the checkerboard. Press towards the outside of the block.


Repeat with final two border pieces to fully enclose the checkerboard.


Beautifully done! Thank you all for helping me make an amazing, colorful quilt!


Hive 3 April Tutorial - Jewel Tone Square-in-a-Square Block

Hello fellow hive-mates! 

These are certainly unprecedented times we are living in! I hope this post finds everyone safe and healthy at home. If you are a front line or essential worker who is required to continue working, THANK YOU for everything you are doing to keep the rest of us safe and able to remain at home! You truly are heroes, and I pray that you and your families will be safe through this crisis.

I am a teacher (my husband is, too) and we live in Ontario, Canada. We have two kids (both teenagers as of yesterday!) that we are in the process of adopting, and two rescue cats (Q and Jyn). Although it is tough to be cooped up in the house, we are finding that this time has been a blessing in disguise, as it gives us more time to bond as a family. We've been watching movies, doing creative activities, playing board games, and (of course) schoolwork! Since I teach elementary school and my husband teaches high school, we have ALL the bases covered (much to the kids' chagrin!). 

For my block this month, I've decided to ask for the same blocks as last year. I'm hoping to make a bright and cheerful quilt just for me :) and I appreciate your help in creating some bright, colourful blocks! I love bold colours, (my favourite colours are orange and bright green) and rich, saturated tones. I've chosen a block that I'm hoping will come together fairly quickly and that will allow everyone to use a little improv (if they wish!) to make each of their blocks unique.

I am asking for square-in-a-square blocks - with an improv twist. I'm looking for blocks that have a variety of squares and rectangles within the block itself. If the improv makes you nervous, feel free to make all of your cuts at 2 or 2.5 inches in order to keep things simple!

Allison of Cluck Cluck Sew has a fabulous tutorial for creating these improv square blocks (the first section of her tutorial shows traditional blocks, improv blocks are farther along): 

http://cluckclucksew.com/2018/04/easy-stack-cut-and-sew-blocks-tutorial.html

In the tutorial, Allison uses prints with white fabric. I would like my quilt to be bright prints (jewel-tones) paired with low volume contrasts - preferably in grey or black & white. Please avoid large florals, solids, and pastels. Tone on tone fabrics work well, or prints with very few colours - for example, a green background with a yellow or a green or a blue pattern, but not all those colours at the same time. 

I'm asking that you make me four blocks with two different colours. Feel free to create blocks with any sized rectangle / square in the middle - they can be all the same, or a variety. I love the random spirit of these squares! 

Designers like Libs Elliot, Allison Glass, and Rebecca Bryan tend to use the types of tones and colours I am hoping for:


Some Tula fabrics work, too, although I find that most of her prints are too busy for these blocks. Please don't worry about having to use these designers in your blocks - I just seem to have a lot of their prints in my stash!


I hesitated about the mice on the green and orange prints, but since they are simply grey on a bright colour, I think they would be a lot of fun! 


I pulled these fabrics from my general stash (I don't know what line they are from, or who designed them). They are not quite jewel tones, and they are a little washed out in the picture, but they are still bright and cheerful!


Here are some of my low-volume pulls. I would prefer monochromatic (grey, black & white) prints, but trust you to chose low-volumes that work with your colour choices. Text fabrics are fabulous, too!


You will need four 8.5 inch blocks to start - 2 low volume (these can be the same for all the blocks if you wish), and 2 different colour prints. Your blocks should finish at 7.5 inches (7 inches once I sew them together).


Making the blocks:

1. Stack one 8.5 colour block and one 8.5 low volume block on top of each other, right sides up.


2. Make two horizontal cuts through both squares at least 1 1/2 inches from the outside edge. Please don't cut closer than this, as I'd like to have a minimum of a one inch border around each centre print.

I made these first two blocks by making each cut 2.5 inches from the edge for a symmetrical block. I used a variety of measurements for my next blocks!


3. Make two vertical cuts in the middle piece only, again at least 1 1/2 inches from the edge. The top and bottom pieces should not be cut again in this step. Somehow, I forgot to take a picture of this step - sorry!

4. You should now have four strips and one centre square / rectangle for two blocks. Rearrange the pieces so that one square has a colour centre with low volume frame, and the other has a low volume centre with a colour frame.


5. Sew the blocks together. Trim to 7.5 inches


6. Repeat for two more blocks.


Once again, here is the link to a very clear tutorial by Allison at Cluck Cluck Sew:

http://cluckclucksew.com/2018/04/easy-stack-cut-and-sew-blocks-tutorial.html

It took me about an hour to finish six blocks - I hope you find them as fun to make as I did! 

Here are some of the amazing blocks I received last year!


If you have any questions, please send me a message through Instagram @sewgeekcanada


I'd like to make the throw sized quilt, so I'll need 80 blocks in total - with my blocks from last year, I should have enough! Thank you so much for contributing to my quilt 😀


Tanya (like lasagna).