Hello!
This is my first year participating so I am a little nervous. I have put together two tutorials here, for very similar block. One uses paper piecing and one does not. I personnally prefer paperpiecing since I feel it gives everything cleaner eged and corners. I know though, that a lot of people don't really like it so here you have the choice which method you want to use.
I want to make a plant themed quilt for our daughters room. There is a green, turquiose and blue mural on one of her walls so I chose this for the colour scheme.
The sizes are 6" for the paper piecing, or 12" for the Snail Trail.
Fabrics
- Grey
- solid or near solid
- medium to light
- not too dark
- Blues and greens
- light okay, but prefer medium to dark
- novelty plant prints
- any pattern as long as its mostly blue or green
- plant based patterns preferred
- batics
- no solids
- Bright rainbow colour
- solids
- tone in tone
- novelty flower prints
- any flower themed pattern
- any tone in tone pattern
Please only use one grey frabric and at least one blue AND one green.
You will only need one triangle on the bright rainbow colour, so a great way to use scraps!
My choice for the grey fabric.
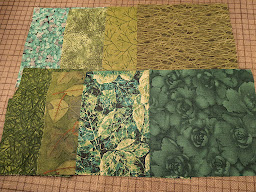
Green More Green

Blue
Batics Green & Blue
Plant-themed fabrics

Bright colours (I mainly have yellow and pink but literally all super bright colours are great, even blues and greens as long as they look different than the rest you are using)
Im likely gonna use most if not all of these fabrics to make expand the size of the quilt so I hope you can find something that matches my selection. Feel free to use as many different blues and greens as you like for your block.
Tutorial Economy Block
I have found the Economy block here on a previous StashBee entry. And I followed the link provided on there to the Generations Quilt Patterns website where you can find the pattern you will have to print for the paper piecing. Please use the 6" pattern.
I have slightly modified this block so you dont start with a solid square in the middle but instead 4 smaller squares. So if you use their tutorial and measurements just replace the Patch 1 square, by four 2" squares.
Both my blocks are constructed very similar so I will start with the paper piecing one first.
You will need:
Grey:
2x 2" squares
1x 3½" square - cut diagonally to get two triangles
1x 4⅜" square - cut diagonally to get two triangles
Blue/Green:
2x 2" squares
1x 3½" square - cut diagonally to get two triangles
1x 4⅜" square - cut diagonally to get two triangles
(Replace any one of these triangles with a bright colour)
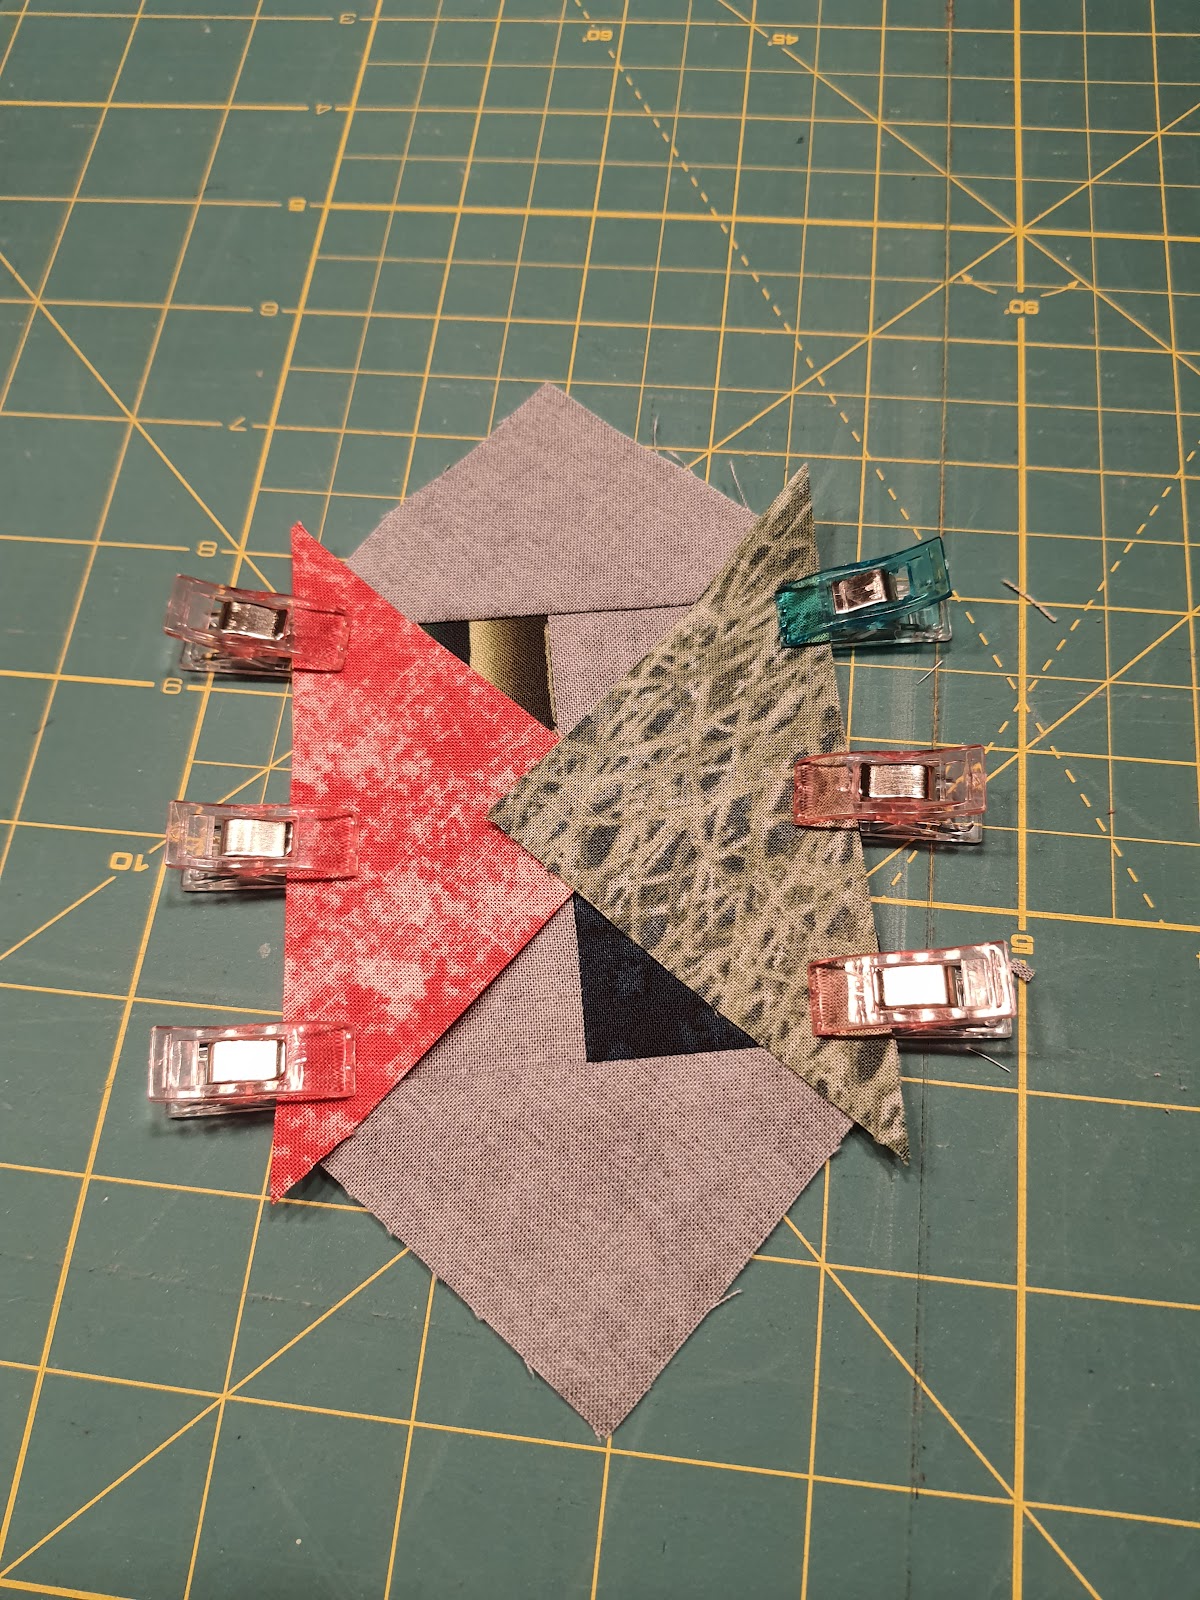
You should end up with these parts.
Now take a grey and a coloured 2" square and sew together.
You'll end up with these two. Press seams towards the grey.Then sew these together so the grey and colour are together again.
And you' get one of these checkered squares.
For these I have pressed the seams to either side since I think it gives the cleanest look.
Now you'll want to get your paper piecing pattern out. I usually prefold all the lines. And ones you've done that, line up the square in the center of the paper, on the BLANK side. hold it against a light source to see the lines through the paper. Pin in place. (This square should exactly fit into the dotted lines)


Now take any one of your smaller triangles and aline with one edge.
Turn over carefully while holding the triangle in place (you can also pin if you want) and sew over the line on the other side. If you are unsure you can use bigger pieces of fabric since they will get trimmed down afer. The only important thing is that the fabric piece you choose is big enough to cover the pattern on the paper plus seam allowance,
Repeat on the opposite side with the same fabric. I decided to start with the grey ones.
Now fold back the paper all the way to the seam and trim the fabric that sticks out back to 1/4", Then iron the triangles outwards.
Now for the other two sides take the remaining small triangles and attach, trim and press the same way.
Now for the next step you need to make sure you continue the pattern. The next grey triangles should be attached on the side away from the grey square.
Attach, trim and press like previously explained, then turn the paper facing up and trim around the outer edge. Now you can carfully remove the paper along the seams, from the outside in.
And voila, your done, and all the edges and corners should be very neat thanks to the paper piecing technique.
Tutorial Snail Trail:
I found the tutorial for this block on AllPeopleQuilt , if you want to check it out there
For this block you'll need:
Grey:
- 1--6-7⁄8" square, cutting it in half diagonally for a total of 2 extra-large triangles
- 1--5-1⁄8" square, cutting it in half diagonally for a total of 2 large triangles
- 1--3-7⁄8" square, cutting it in half diagonally for a total of 2 medium triangles
- 1--3" square, cutting it in half diagonally for a total of 2 small triangles
- 2--2" squares
And Blue/green:
- 1--6-7⁄8" square, cutting it in half diagonally for a total of 2 extra-large triangles
- 1--5-1⁄8" square, cutting it in half diagonally for a total of 2 large triangles
- 1--3-7⁄8" square, cutting it in half diagonally for a total of 2 medium triangles
- 1--3" square, cutting it in half diagonally for a total of 2 small triangles
- 2--2" squares
Again choose one of those blue/green triangles and replace it with a brightly coloured one.
Heres what you should have now:
Now first you need to put together the 2" squares into a bigger square just like in the economy block.
You will end up with one square like the ones shown above.
Next choose if you want to start with grey or coloured triangles, (I started with grey). Align them along opposite edges, and align the middle corner with the center of the square.
Now you want to trim all 4 sides to exactly 1/4" seam allowance. For this you want to be 1/4" away from the inner squares corner, just like in the picture below.
Now repeat these steps for the next two layers. Make sure the colours form the spiral pattern that is typical for this block.
This block should be 12". Dont worry about trimming down the last edge, I will do that when I fit it into the quilt.
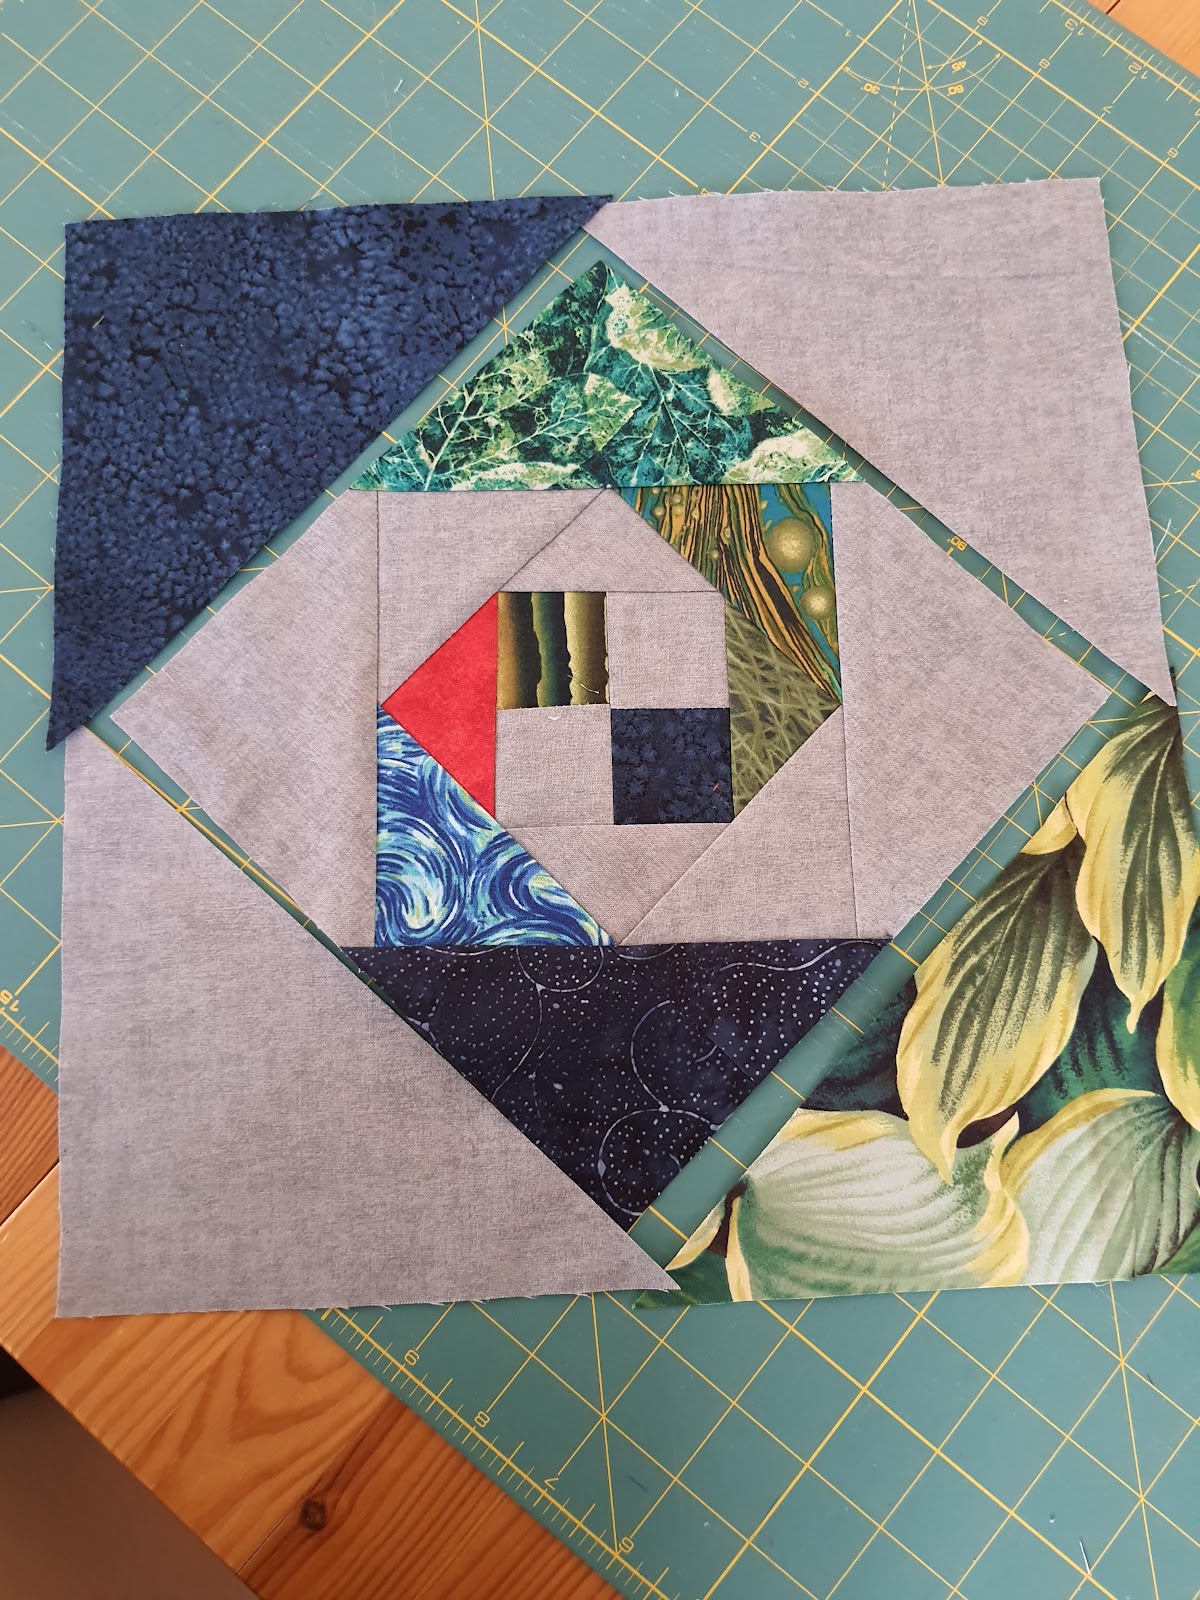
This is what your finished block should look like:
I'm very excited and can't wait to see what you all put together. Have a wonderful month of April everyone!