
Happy February Fellow Bees!
My name is Katie, and this is my fourth year in the Bee. I came to quilting right after I finished my undergraduate degree. I was a band kid in high school and had all the t-shirts to show. I didn't want to wear (read - couldn't fit into) the shirts any longer but still wanted the memories. Enter the t-shirt quilt!
 |
| Middle quilt is the first one I ever made; other two are my brother's and sister's quilts (held by them) |
 |
| Yep, I made double sided quilts. I'm a little nuts. |
I've made a number of t-shirt quilts since and have used two different machines. My favorite thing about quilting is the look on people's face when you pull out the finished product. The satisfaction from taking something simple (fabric) and turning it into a long lasting item is pretty awesome.

This month, I was looking through old bee posts and found such a cute block designed by Carolyn over at the blog Sweet Boater Chick (http://sweetboaterchick.blogspot.com). She graciously allowed me to use her block (designed by her) so here we go! She calls it the Every Which Way Pinwheel. It is an easy pieced block incorporating flying geese.
(For another excellently written tutorial, here is the link to her original post: http://stashbee.blogspot.com/2017/11/hive-8-tutorial-november.html)
 Fabric inspirations: I am copying Carolyn's color picks - I would like low volume neutrals for the background and a mix of dark gray, dark blue/navy, and mustardy yellows for the flying geese bodies.
  Be as scrappy as you can, except for the "wings" of the flying geese - please use matching triangles for a single flying geese block.
Cutting instructions:
5.5" x 3" (12) for the geese bodies (grey, blue, and yellow)
3" x 3" (12 sets of 2) for geese wings (background)
5.5" x 3" (4) background
3" x 3" (4) background

Sewing instructions:
I followed Carolyn's instructions and used the flip, flip, and finish method to make my flying geese.
Start by drawing a diagonal line on each of the geese wings. Line up one of the wings with one of the geese body sides and stitch on the diagonal line. (Chain piecing is your friend!!) I find that sewing just to the outside of the line will make it so that, when folded out, everything lines up appropriately.
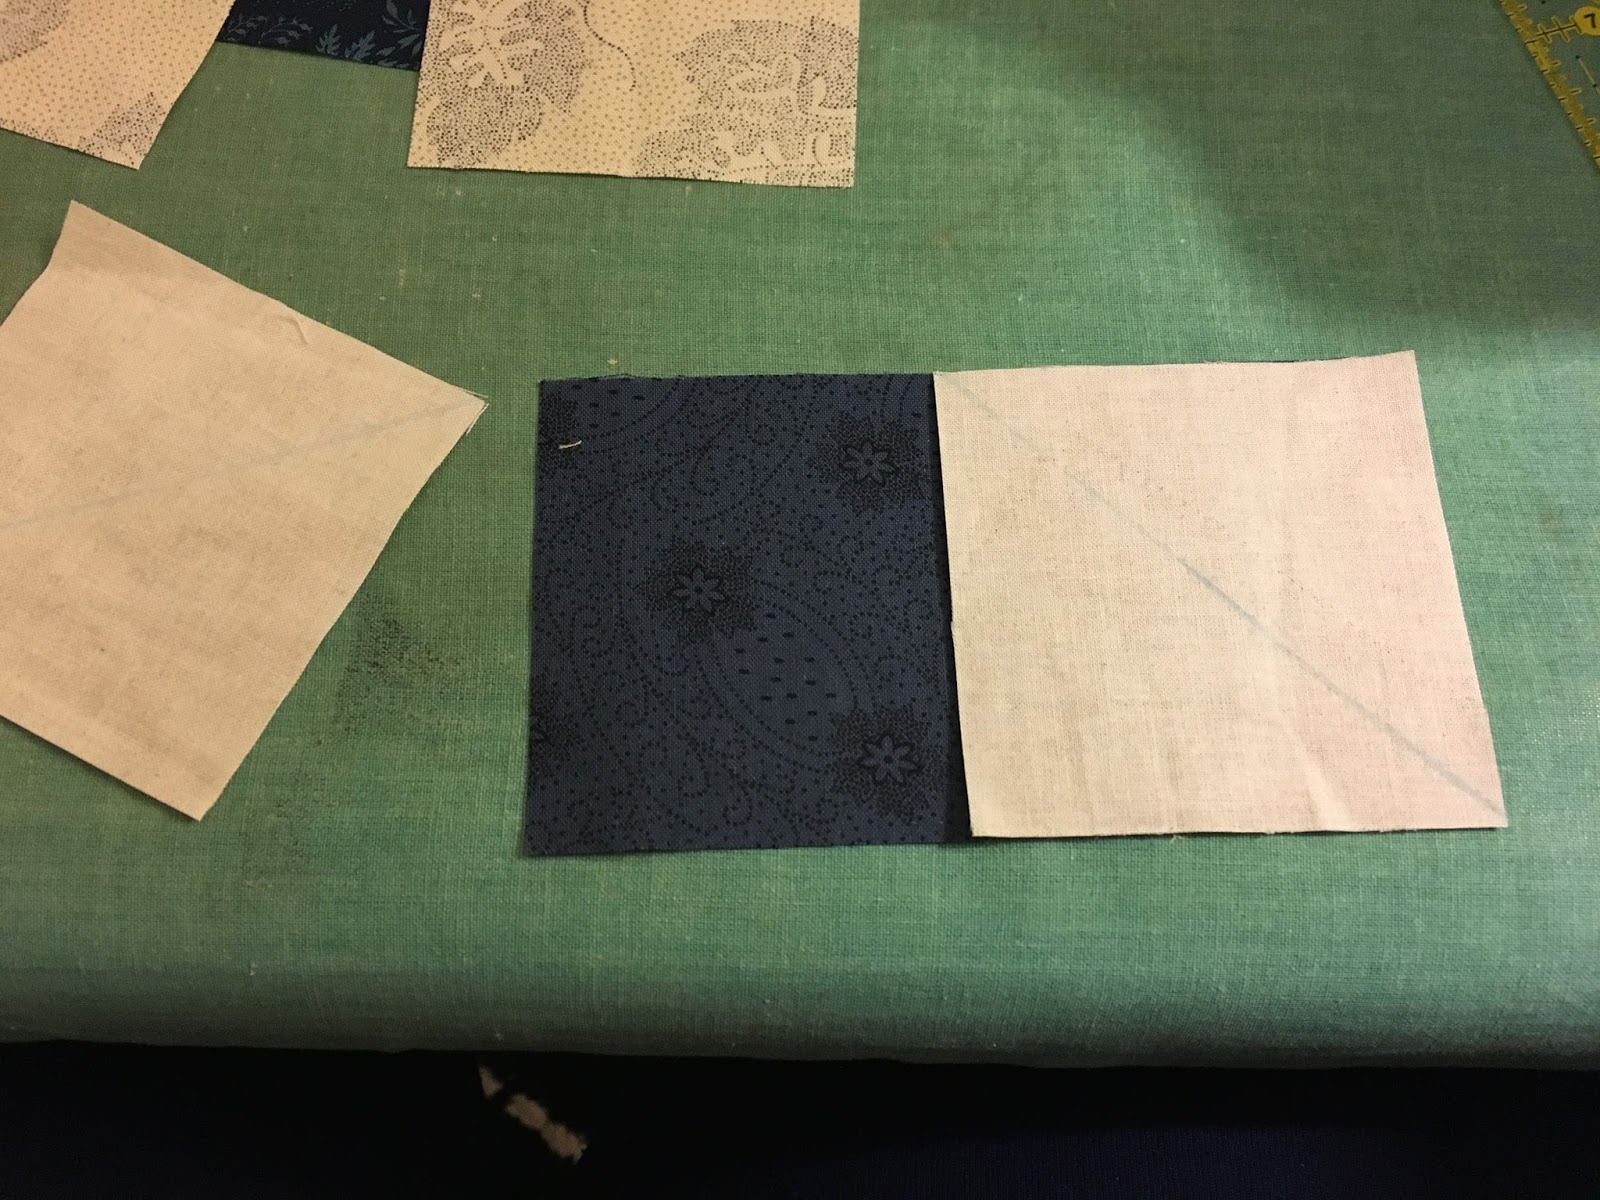
Trim ¼" from the sewn line, then press the wing out. Repeat with the other side and you will have flying geese! If you would like, please feel free to send me the triangles leftover from trimming. I sew these together as half square triangle units and will use them for a border (or something :).

For each quadrant of the block you will need three of the geese blocks, one of the 3"x3" squares, and one of the 5.5"x3"rectangles. Sew these together as below (picture borrowed from Carolyn):


Feel free to press whichever way you would like. Once you have all four quadrants done, sew them together to make the pinwheel. Press the large seams (quadrants together) open to reduce the bulk. You are done! The final block should measure approximately 15 ½" by 15 ½".

I look forward to seeing the creations!
No comments:
Post a Comment