I’ve chosen the Tic Tac Toe block from Blossom Heart Quilts,
which is a fun easy to make block. I know because I’ve already made a quilt
using it. Here is a link to the tutorial it is very easy to follow. I timed myself making one block from start to finish and it took me less than an hour, and I'm not fast. I'll walk you through the tutorial here, and there is the link to original tutorial, but if you have any questions feel free to reach out to me.
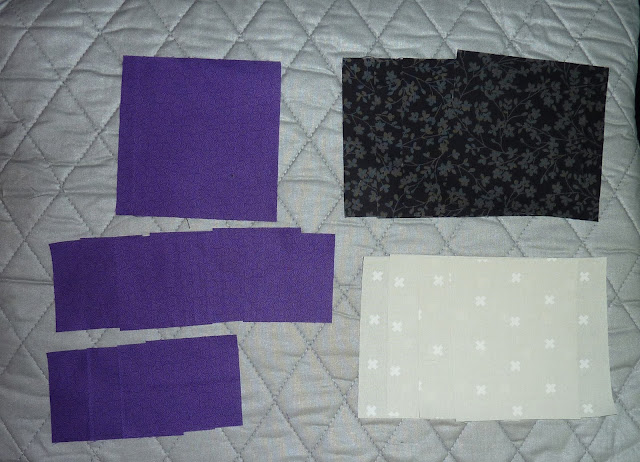
Let's start with colors, the blocks need to be purple, black and light grey. I went through my stash and pulled samples, but man were they hard to photograph. It felt like the purples and grays washed out, and the blacks were drab. But really the combination looks good in person. I would prefer the fabric not be too "girlie" since it is for my nephew. The purples I chose don't have a lot of other colors in them except white (except the Tula Pink one that has some blue), but that is mainly because this is what I have, as long as it reads purple it should work. I also tended to use more blue purples. The blacks can have some print to them, just as long as they read black. The grays need to be a light grey so they contrast to the black, but as you can see I used lots of different shades of gray.
You need to cut the following
4 - 4 1/2 x 4 1/2 squares of black (orange on the tutorial)
4 - 4 1/2 x 4 1/2 squares of grey (white on the tutorial)
1 - 4 1/2 x 4 1/2 square of purple (pink on the tutorial)
12 - 2 1/2 x 2 1/2 squares of purple (pink on the tutorial)
Next you you need to snowball the one corner of each of the gray and black pieces, with one of the small purple squares. Now you can do this by drawing a line diagonally across the back of the purple square, you can iron the square in half diagonally or whatever method you prefer. I hate marking, so I use Quilt In A Day Sew Straight and love it. You will end up with pieces that look like this.
You then simply trim 1/4" from the seam and they will look like this.
Now the trickiest part of the block happens now and it involves the ironing. And I will admit I struggled with this because it seems wrong. On the gray blocks you will press towards the purple, which seems natural to me. But on the black blocks you press towards the black. This is so the seams nest together when the block is assembled, but I just naturally want to press towards the snowballed corner. It was hard to photograph, because the gray fabric kept washing out, but here is the difference.
Next snowball a second corner on the gray blocks. Trim and press it just like the first one. Now this is the point where I start to get excited about the block. And this excitement meant I didn't get a picture of the trimmed/ironed block, but I think you can imagine what it looks like.
Now the fun part happens layout out the block in three rows as per the photo below. And sew the rows together. When the rows are sewn together you will iron towards the black on the top and bottom row and towards the purple on the middle row, so the seams nest nicely.
After the block is sewn together if you would iron the last two seams towards the middle. This allows me to rotate the blocks as needed when I'm assembling the quilt.
And here is the final block.
I know this post has had lots of pictures, but that is the easiest way I know how to explain things. I've made ten blocks for the quilt already, because they are easy and I know I'm going to need a lot to make it long enough for my nephew. Here are the blocks I've done so far on my design wall to give you an idea of what the quilt is going to look like.
I also want to say thank you in advance for your blocks. My nephew is a pretty simple guy and he doesn't ask for much. When he saw the sample blocks I've made his response was "that is sick!" which means he really likes it. I know he will use the quilt for years to come. I hope you have lots of fun making this block and I can't wait to see your work!!!!


1 comment:
I love how the X comes out on this block. Great colors. I can't wait to try it. There is also a lot of Hives that I would like to make blocks for this month.
Post a Comment