

Showing posts with label #July. Show all posts
Showing posts with label #July. Show all posts
Saturday, August 15, 2026


Friday, July 31, 2026
Hive 1 July Beggar’s block for Cindy
I’m really sorry this is going to be a bit late. An international family wedding and jet lag hit me harder than I expected! It’ll go in the mail tomorrow. I hope you like it! I think it turned out a little dizzying, but I’m hoping that’s mostly just my addled brain and you’ll be happy with it!


Saturday, July 18, 2026


Thursday, July 16, 2026
Hive 1 July Beggar's Block for Cindy

Tuesday, July 7, 2026
Hive 1: July block for Cindy
Fun block. I made a hair ribbon with the original cutting directions. Here it is in the right size - I hope.
Jane A.

Wednesday, July 1, 2026
Modern almost 9-Patch Tutorial for Jennifer Hive 3
This is my 11th year in Stash Bee. I love this group because it gives me the push to sew something every month. Each block is fun to pick the fabrics and see things come together. I've made several quilts as a result of this group.
This month when I was thinking of what to ask for, I kept looking at a postage stamp quilt I had started with scraps. I have no inspiration to keep working on this because it is so blah, so I decided to ask you to help me give it a bit of a modern kick. We are adding some random uniformity to a plain quilt. I will insert these squares somehow, maybe with a plan, maybe not, but I'm sure it will give me the inspiration to finish it. I'm going for a large King size quilt.
Here are my finished pieces with the quilt so you can see what I'm going for:

This isn't quite a 9 patch since there are only 5 strips per block, they look like a 9-patch. These are small blocks with a multi color fabric in the middle surrounded by Red.
I will insert these in a large postage stamp quilt to add some interest.
- FABRIC PARAMETERS:
The center square should be multi-color. It doesn't have to contain red. It really can be anything since this is a scrappy quilt.
Strips - cut a 1.5 inch strip of the red. You will need a length of 40 inches so you may need to cut two like I did:

From this red piece you will need:
8 x 3.5 inch blocks
8 x 1.5 inch blocks

From the multi color scrap you will need:
4 x 1.5 inch squares. They can all be different or the same fabric for these centers. I prefer them to all be different to add to the scrappiness if possible. How many 1.5 in scraps do you have? I know I have a ton!
They will be assembled like this:

I pressed to the outside:

Here are the final squares. Feel free to trim them or send them as-is and I'll take care of the trimming:

- Jennifer
Hive 2 - July's tutorial - Rail fence quilt block
Hi, Happy Semi quincentennial!
You had to know it was going to be a Red, White and Blue theme. With vacations, kids out of school and a month of many celebratory events I figured it would be good to have a simple and easy block. (I promise next year's will be more complicated. 😉)
So, the colors pulled are just red (red-blue, if possible, compared to red orange) and white. The red just has to read red. Please check ** if the red fabric as they are prone bleed White on white is okay as well as Batiks fabrics.
 U
You will need three red fabric strips and two white fabric strips of 2.5" by 10.5" so, it should measure 10.5" x 10.5" unfinished. The fabrics can be the same bolt or different bolts.
Lay out will be red, then white, then red, then white to finish up with a red strip. The red strips start and finish the block. I ended up using an ombre fabric.

Sew the first two strips using a 1/4" seam allowance. Then sew the next strip to the ones already sewed and so (sew) on.

Press your seams towards the darker fabric.
I'm sure you are wondering where the blue comes into play. I'll be making white stars on blue background to finish up the quilt.
Thanks for your assistance & enjoy 250th celebration of the America's independence.
Deb
😃
** A good test to see if the red fabric will bleed is to take a small piece like one inch square and wet it completely and put it on a white paper towel to dry to see if the dye transfers. If there is a terrible problem, you can wash the fabric till it runs clear.
Friday, August 1, 2025

Thursday, July 31, 2025
Hive 1 Christmas Gnomes for Beth

Friday, July 25, 2025
Hive 1 Christmas Gnomes for Beth
Gnome complete and will be sent tomorrow! The green looks darker in the pic than it is.

Wednesday, July 16, 2025
Hive 1 July 2025 Christmas Gnome for Beth

--Caitlin
Tuesday, July 15, 2025
Hive 1 - Christmas gnomes for Beth
I got a little carried away with these because they come together so easily. This is just such a fun pattern.
I recently made a mushroom garden quilt and included a gnome friend on it. They're so cute and versatile!
I hope these fit well with your theme.


Happy sewing,
Nicole
Sunday, July 6, 2025
Christmas Gnomes for Beth
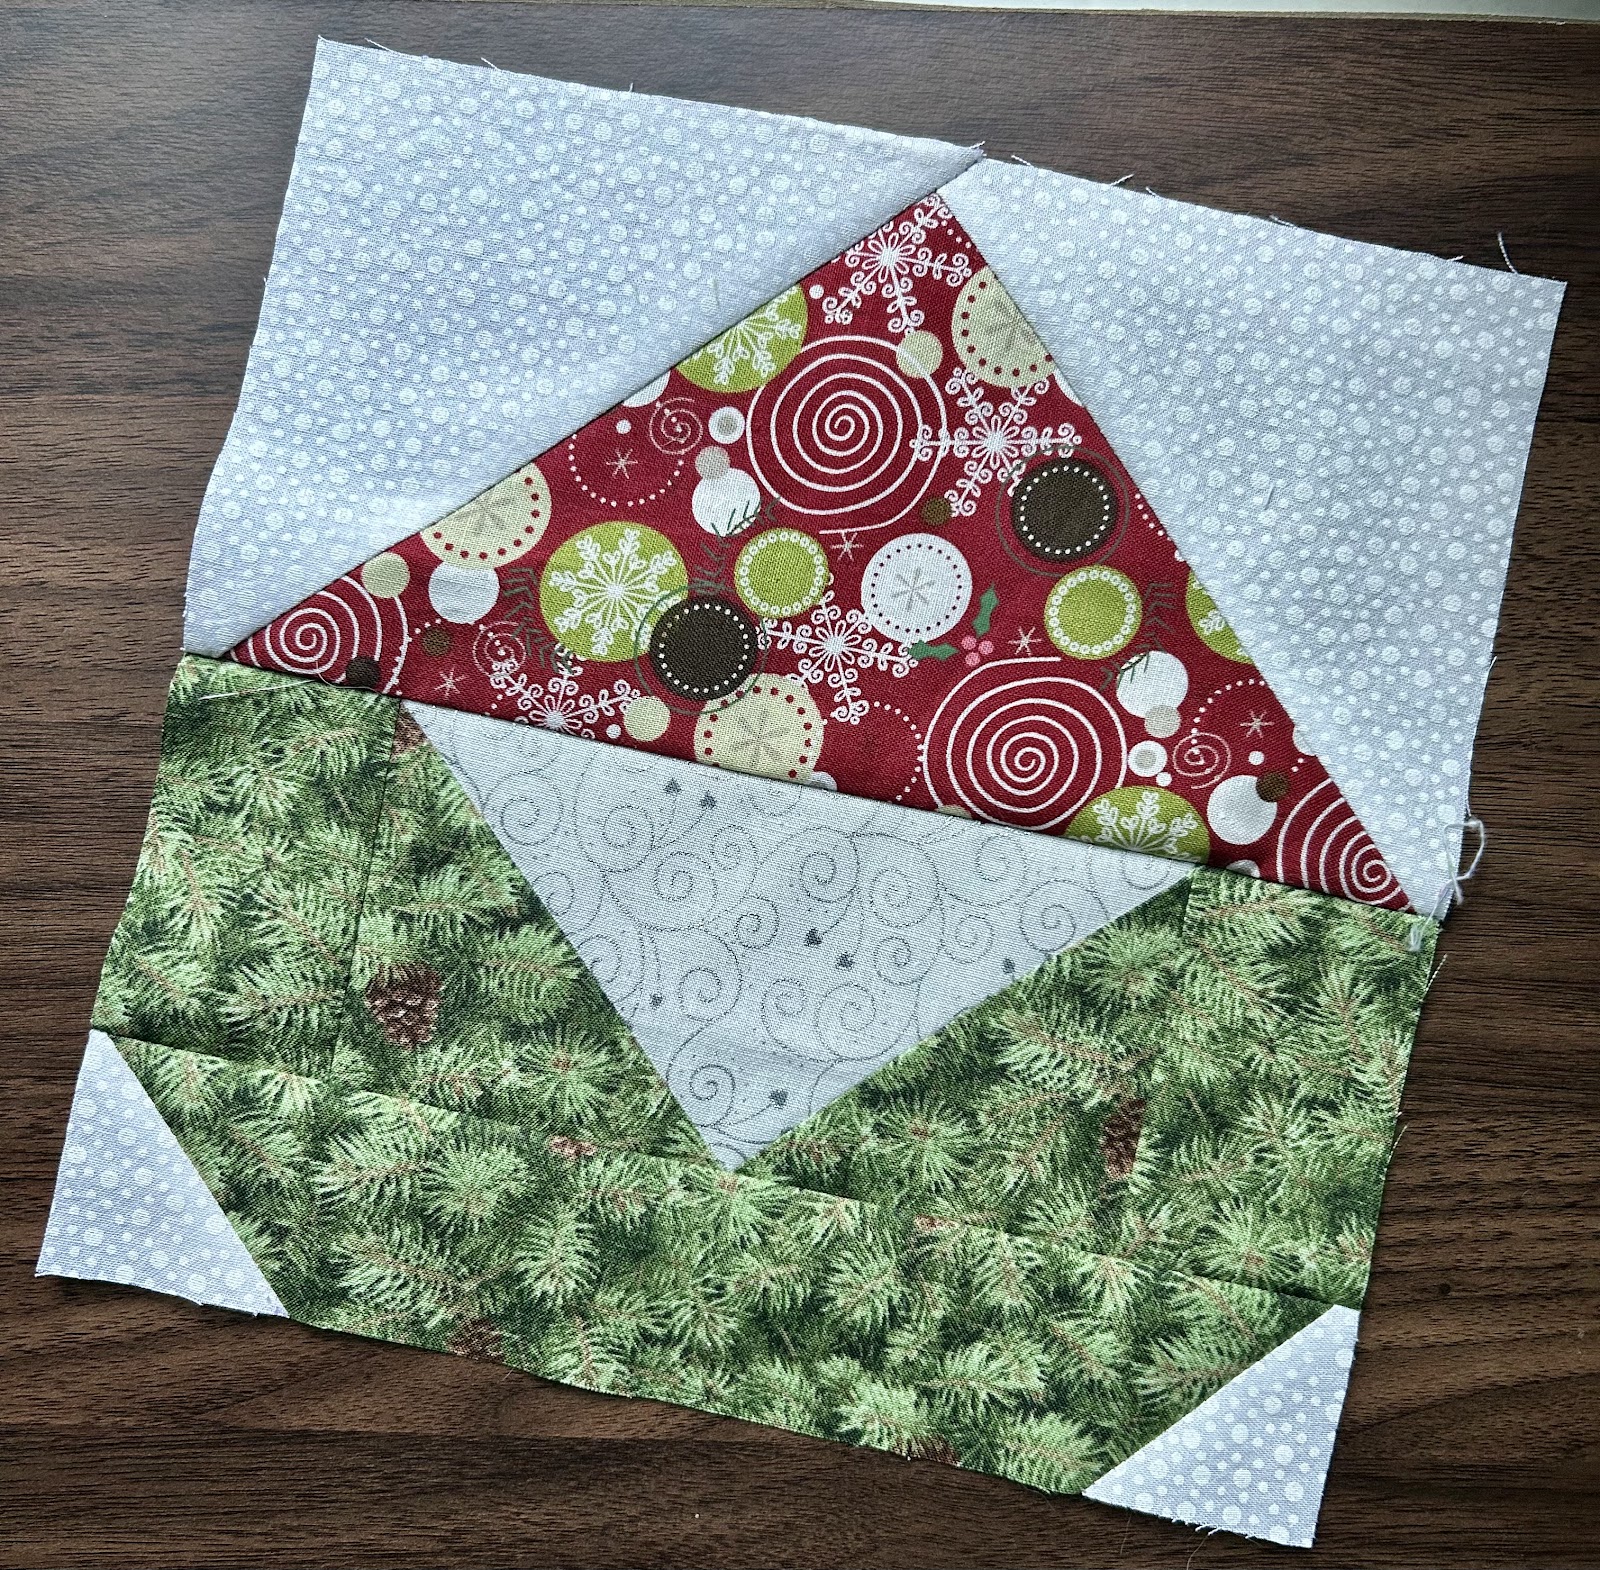
This nose-less gnome is heading your way!
I don't have much in the line of holiday or winter fabrics but I think this
mid-year dressed gnome with grey haired-swirled beard should fit the vibe check.
I'll get him dropped in the mail this week. -Tasha
Tuesday, July 1, 2025
Hive 1 Christmas in July Tutorial for Beth
🎄Christmas in July for Beth🎄
This quilt will be for my niece. She loved gnomes when she was younger, and I figured that Christmas gnomes would be a good quilt. Even if she isn't into gnomes like she was, I thought it would still fit.
I found a gnome quilt square that I really liked from the 'Sew Can She' blog at the following link: Sew a Gnome Mini Quilt - Free Gnome Quilt Block Pattern. I changed up the sizes of the pieces so please use the following cuts but the directions on the blog should still work. I made a few squares at the adjusted sizes with this tutorial, and I was pleased with it (see below). It will result in a square about 9.5" tall by 9.25" wide. I plan on making a quilt with a number of different colored gnomes and possibly adding in a few trees. I was thinking that it will be a throw quilt size.


Colors:
The tutorial has a blue hat and a red body (or shirt?), but I think that you can get creative here. I would be careful if you go with red and blue that it doesn't come across as too summery or patriotic instead of Christmasy. I think my first example above does kind of start to look too patriotic with the gingham fabric so we will see if he makes it into the finished quilt.
Please avoid any childish or religious Christmas fabrics, florals, or licensed fabrics. But I am fine with other Christmas prints. I like a good metallic so feel free to use metallic fabrics or fabrics with metallic flourishes.
I think the blue fabrics could be a range from dark blue to light blue with even some light green-blue colors as well. That one fabric in my blue picture is not gray but light blue. I know it appears like that in the picture.
For the background, please keep it to white fabrics. I am fine with white-on-white designs, but I want it to go together as much as possible so please try to avoid the creams. For the beard, I used a different white than the background, more a white-on-white design.
There might be other color combinations that work really well together so please be creative. Like a green hat? What would a non-traditional Christmas color look like? Like if you had a pink Christmas pattern? Let me know if you have questions around color combinations.
Below are some examples from my stash.
Green: Blue:
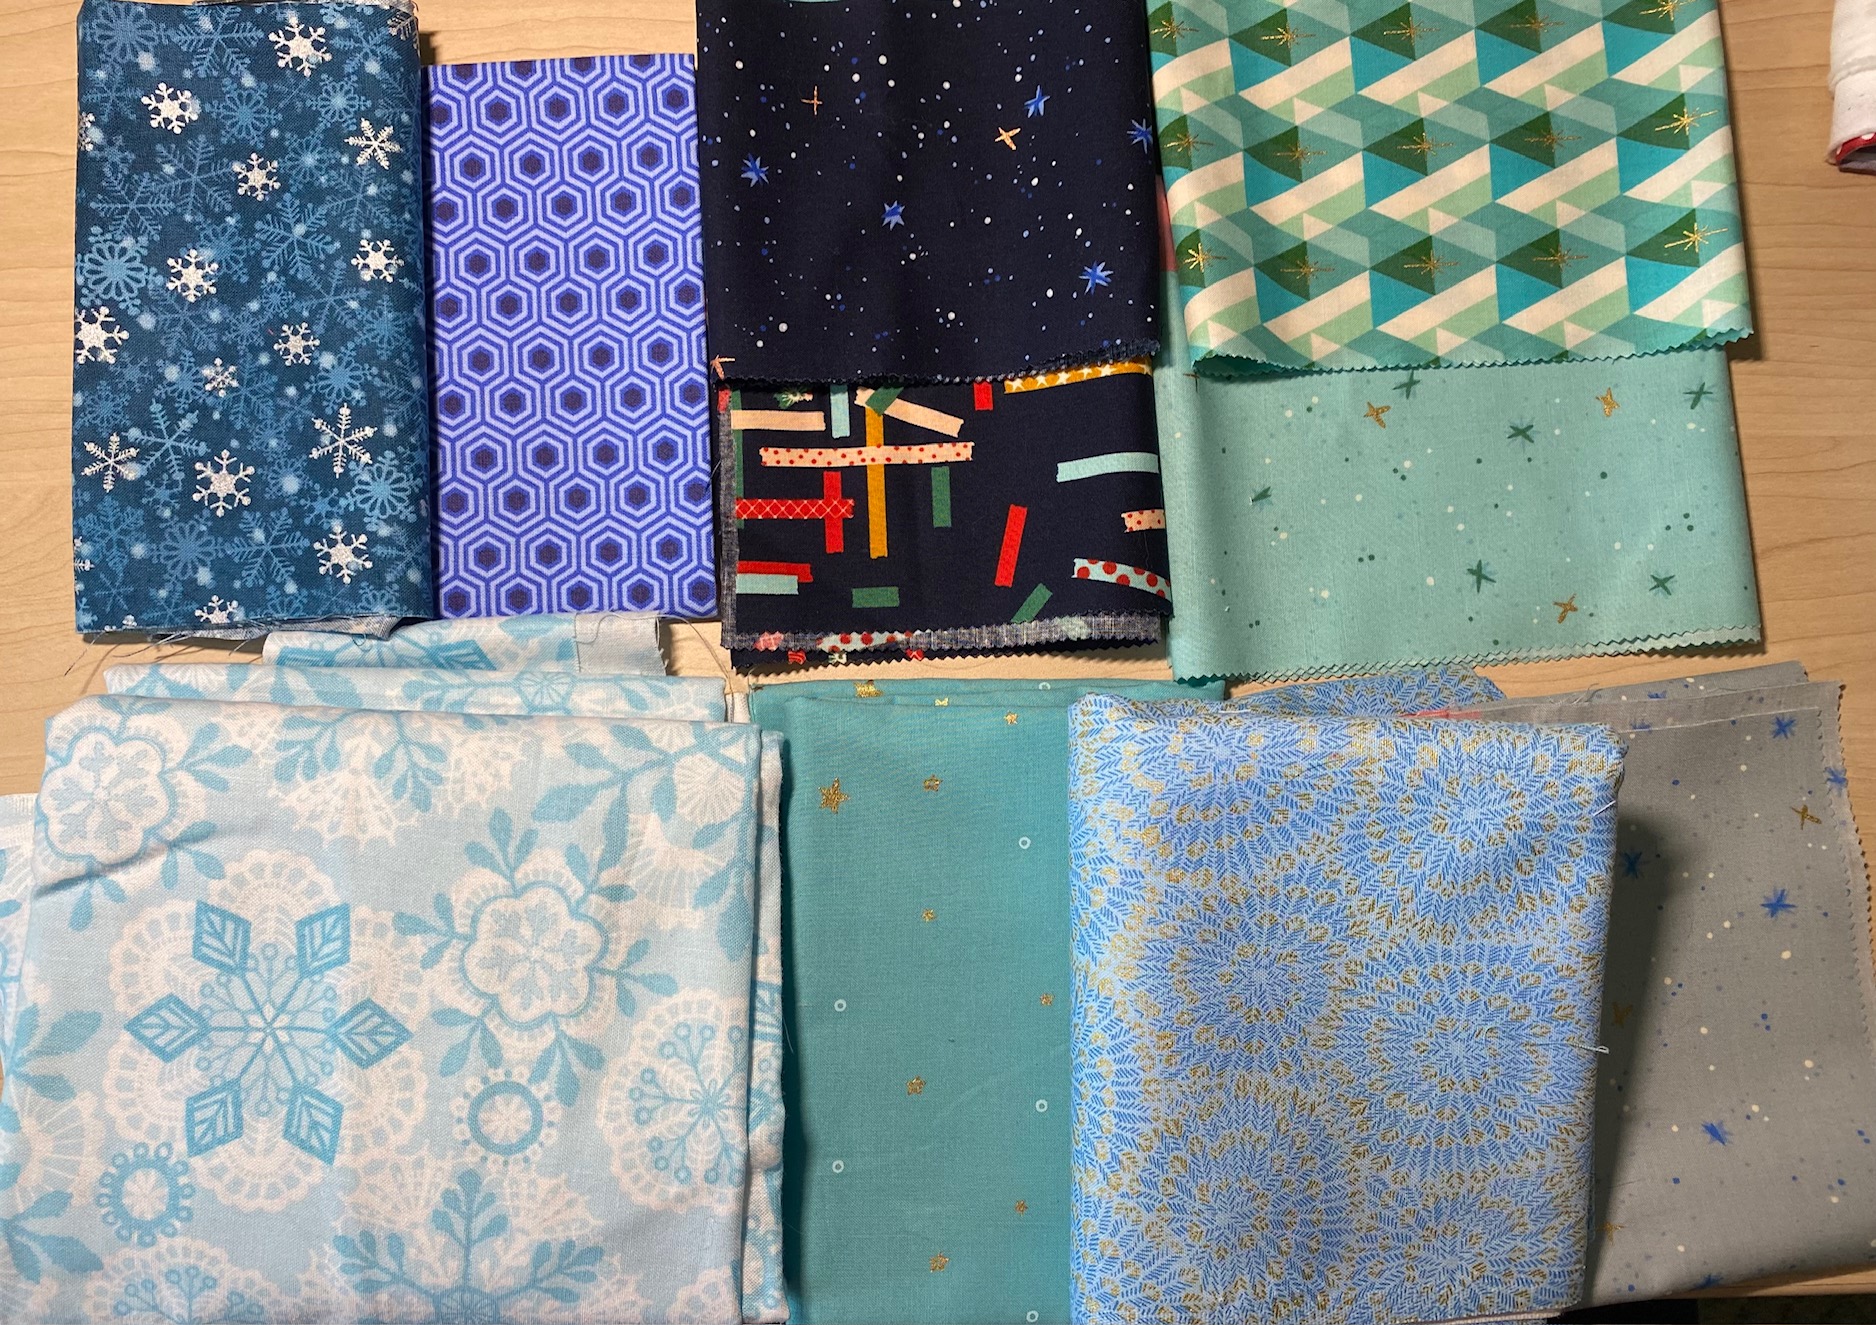

Red: White:


For the nose, I sized down the template that comes with the tutorial. I basically sized the pattern down 25% but I just winged the nose. If you are concerned about sizing the nose down on the fly, I am happy to add the noses to final squares myself. I have enough Heat n Bond to do that and lots of different skin type fabric. So, feel free to send them without the noses! See below for the difference between the two sizes - the grey oval is the nose that I sized down:

Cuts:
- Background (white fabrics)
- 2 squares, 5" x 5"
- 2 squares, 2" x 2"
- Body or Shirt fabric (red in the tutorial)
- 2 rectangles, 2" x 3.5"
- 2 squares, 3.5" x 3.5"
- 1 rectangle, 2" x 9.5"
- Hat fabric (blue in the tutorial)
- 1 rectangle, 5" x 9.5"
- Beard fabric (white fabrics)
- 1 rectangle, 3.5" x 6.5"
Thank you in advance for helping me to put this together. I am excited to see the varied fabrics and color combinations that you all come up with. Again, if you have questions, please let me know.
Thanks, and happy quilting!
Beth
Monday, June 30, 2025
Hive 4 - Scrappy Stripes Block July Tutorial by Pam


This is my 8th year taking part in Stash Bee, and for the first time, I’m repeating myself on a tutorial. Last year I created my tutorial for Scrappy Stripes blocks, and received a dozen or so beautiful blocks, some of which are pictured above. I made three blocks myself for the tutorial, so I have a nice pile of blocks already. I'm re-sharing the tutorial for my July 2025 turn as Queen Bee of Hive 4, so I'll end up with an even bigger and more beautiful quilt, thanks to all my talented Hivemates.
HOW TO MAKE THE
SCRAPPY STRIPES BLOCK:
The block will end up a bit more than 12-1/2 inches square,
but because it’s improvisationally pieced, it won’t be exact, and the edges won’t
be straight. That’s fine! When you’re finished with the sewing, don’t
bother trimming the ragged edges or squaring up the sides. These blocks are going to be all slightly
different sizes, so I’ll take a look at them all before deciding what size to
trim them down before sewing them into the quilt top.
FABRIC SELECTION:
- · For the background square, one 13” or slightly larger square of any very light solid or low volume print will work.
- · For the scrappy stripes, two strips of any bright solid or print fabric, about 1-1/2" to 2-1/2" wide and at least an inch longer than the height of the background square. Note that the strips do not have to be an even width, they can be wider at one end and narrower at the other.
- · Small scraps of various prints or solids to make the pieced stripe.
Background of the block:
To get the approximately 13” size of background I wanted, I
laid my 12-1/2" square ruler over a piece of fabric, then roughly cut
around about 1/2' from the sides of the ruler. Don't worry if the edges
aren't straight!

Inserting the stripes:
Cut across the background square, either vertical or
slightly diagonal--just eyeball it.

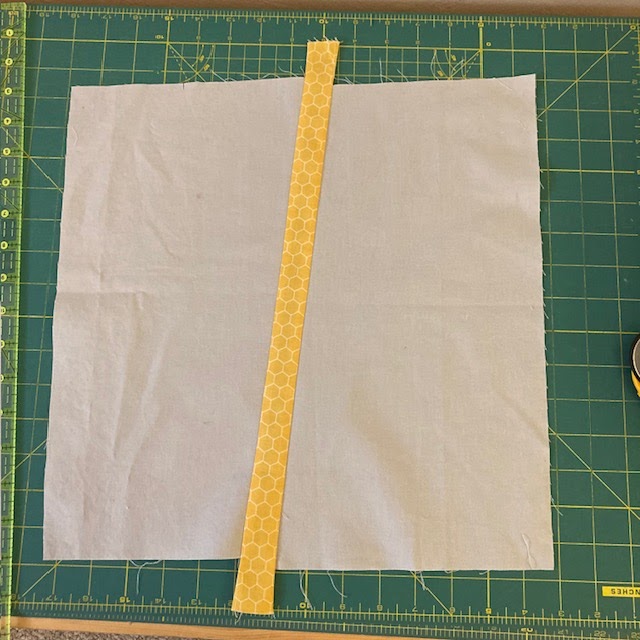

I pressed the seams toward the stripe, but how you press
isn't important for this kind of block
Next repeat to add another stripe to the block.

Adding the scrappy stripe:
To make the scrappy stripe, take the small fabric scraps
that you like and sew them together into a piece long enough to go across the
background square, then cut a strip from that long piece.


Sew the scrappy stripe into the block same as before. For the pieced stripe, it was easier to press the seams toward the background, because of all the seams on the stripe.
Subscribe to:
Posts (Atom)