
Hello Beautiful StashBees,
This month I'm thinking about being cozy and warm. Despite living in the south, it has reached low temps that require nice warm quilts. I hope you find the construction to be challenging enough, because I'll be doing most of the sewing!
Each section you make (4) will finish at 5 3/4" and I will be sewing them together to make my finished quilt. All the work is in cutting, pressing and securing a mitered corner. Please do your absolute best to make a perfect mitre and a consistent finished size so I can fit them all together when I construct.
I can't wait to have them all on my design wall to choose placement!
When choosing fabric, please use a good contrast. As for the batting, I'm not fussy about poly/cotton/blend. This quilt will be made for snuggling, so if you have cotton batting, that's great. If you run into a situation where you either need batting mailed to you, or you omit the batting altogether, I will mail you a piece and/or I will make do without! Thank you for agreeing to the extra bulk this may add when mailing.
My fabric "no thanks" are: religious, political, licensed or batiks.
My fabric "yes please" are: contrasting colors quilting cotton that you already have in your stash. I chose some scraps that were both on the bright side and somewhat muted. Prints or solids, it’s Your Choice! If you like the two colors together, I probably will too!
I found this block as a free tutorial on Jo Avery's Blog here:
 |
| Jo Avery's Folded Patchwork Quilt |
Fabric Requirements:
(4) 9" Squares (back)
(4) 4.5" Squares (center)
(4) 5.5" Squares of batting

Let's get started. A quick word about glue: if you don’t have a glue stick (generic school glue, Elmer’s, fancy) you can use a dot of liquid school glue and set it with the iron to dry quickly.
Fold and press 1/4" up on center pieces. I used a dab of glue stick to help them stay flat. Perfection is not needed here, but it's a good warm up for the next 1/4" fold/press which requires precision.


Then fold each corner over toward center so that the overlap is 1 1/2" square. Jo's tutorial instructs to stay 1/8" away from point of batting before folding/pressing. I marked a dash but forgot to photograph it here.


Now press in a perfect 1/4" fold on the raw edges of your back fabric. I used a glue stick to keep them in place which greatly aided me when lining up and pressing a perfect mitered corner to finish!
Note: you don't need the center piece to be here yet, I just happened to forget to take my picture without it!

Now place your center piece on top making sure it's evenly spaced on all 4 sides. You can pin it in place if desired.

This is where you will fold, press, then pin your sides toward the middle to form perfect mitered corners. I found that without using glue in the previous step, my corners did not want to play nicely and I kept having to re-fold and press. The result was that my finished size was off so I re-made it using a glue stick.

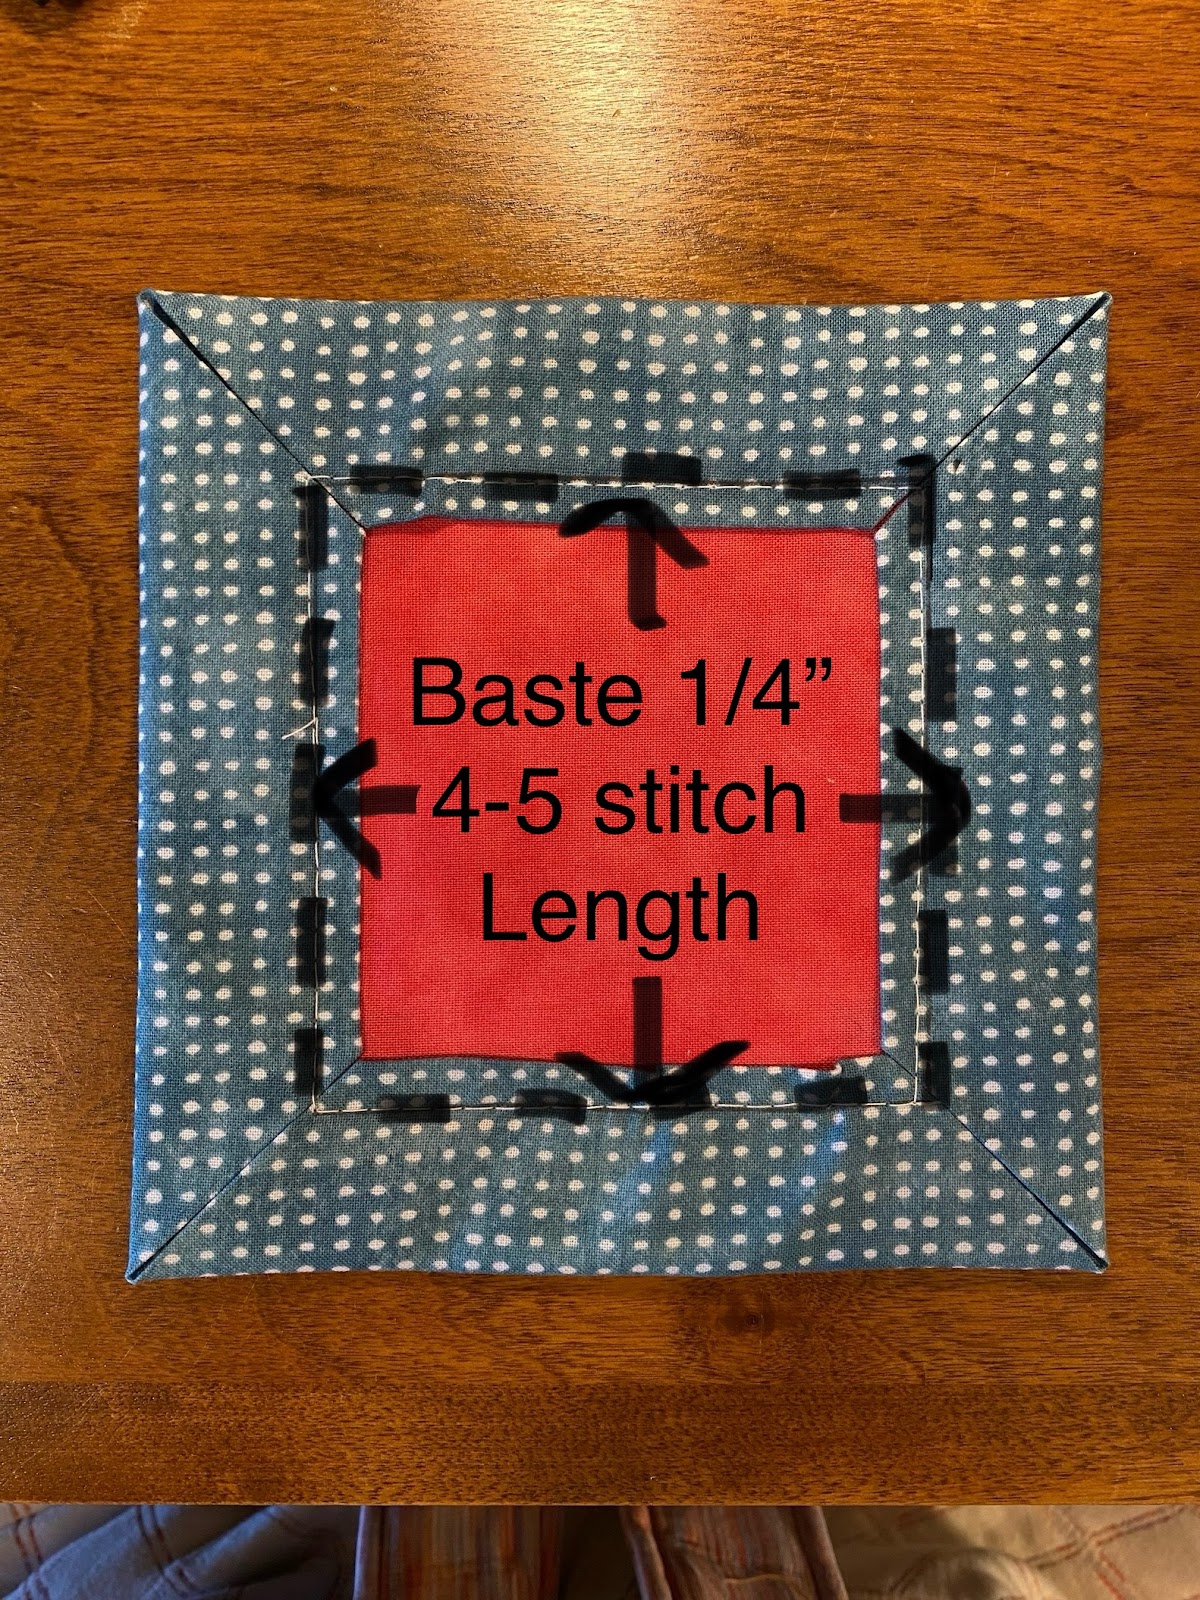
Machine Baste (3-4 stitch length) 1/4" from edge of center fabric to tack it all down. Ignore my photo stitch length that says 4-5. I think 3-4 works better! Any color thread will do because I'm going to pull it out once I hand quilt my two lines next to your basting. Note: please make sure to press before basting so that your mitre is YOURS and not something I'll need to fiddle with to achieve finished size. Sounds easy, but I found this part challenging.
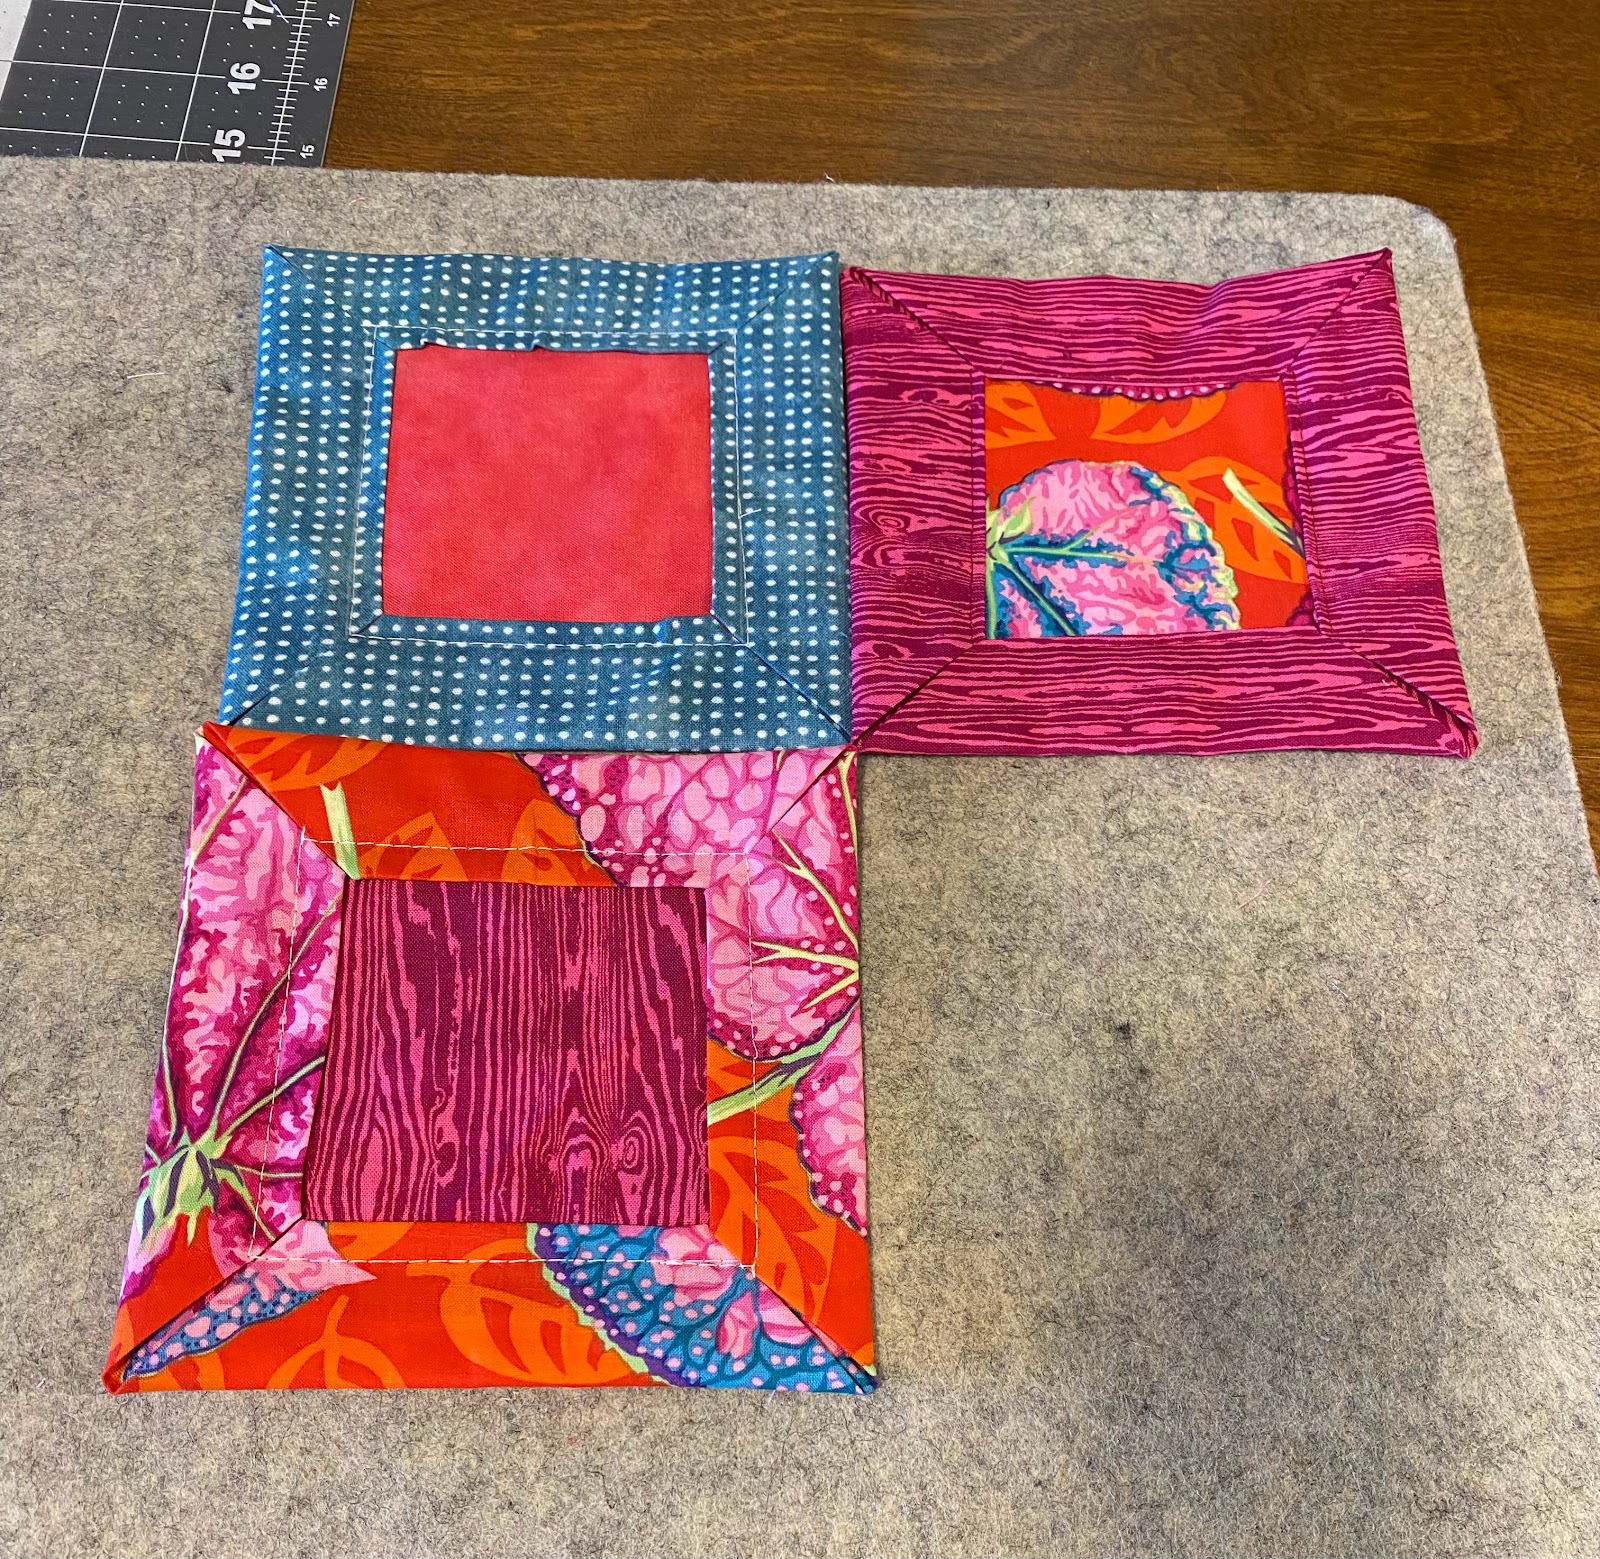

Here is a picture of Jo Avery's lovely quilt in solids.

Thanks for allowing me to step out of the box for this block. It all started when a friend gifted me a whole set of lovely hand quilting thread! She had no idea I've never hand quilted anything, so I decided to try it at least once in my lifetime. These small blocks can be carried around with me and quilted easily on the go when I have time to fill. Wish me luck!
Chris
No comments:
Post a Comment