Hello everyone from Washington, DC where we are experiencing cherry blossom fever and spring has sprung! I can't wait to go outside again with my dog for a long nature walk and see what else is blooming.
This year, I wanted to do an Irish chain block that lended itself to a scrappy mix of backround fabrics like this quilt I saw in an older Stashbee inspo post:

I really loved this pattern, with two different colors that creates a plaid look, but the block was pretty time consuming.
I found this cute little Irish chain pattern in a bunting style that I thought might create a similar effect from
www.blossomheartquilts.com!
My colors: dark dark inky navys and pastel or coral oranges. Also, if you have a lighter slate blue, then one of the 2.5" squares can be a slate blue color for a little interest! Please no primary color oranges or blues. Multiple fabrics are great if you have multiple that fit the bill, but if you only have one, that's fine to repeat.
For the background, I would prefer a mix of low volume white, minor patterns are fine. One or two squares with a near-white are also fine, but I want mostly white squares.
I love novelty fabrics, just nothing that is for kids/babies/holiday/licensed characters. If you want to fussy cut for something interesting to show up in the buntings, have at it! I tried to get a bird and leopard face in mine.
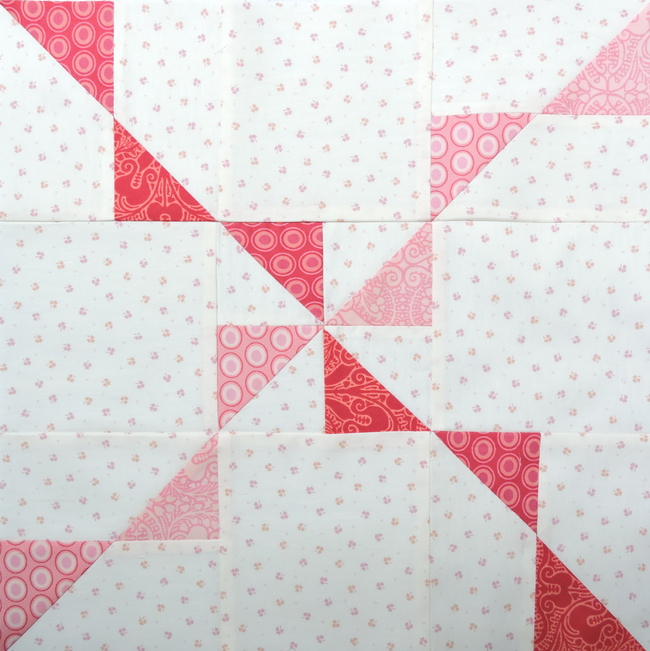
I always work on my blocks at night, so I feel like the lighting is not great, but I think you can get the idea:
Here I am trying to use the 45 degree marker to work out how the block might look after stitching... I love this fabric, this is my color inspo.
Cutting:
Print 1 (dark navy):
1 – 3″ x 3″ (will form center pinwheel with two triangles)
4 – 2.5″ x 2.5″ (one of these squares can be a slate blue if you have one)
Print 2 (pastel orange/coral):
1 – 3″ x 3″ (will form center pinwheel with two triangles)
4 – 2.5″ x 2.5″
Background whites:
2 – 3″ x 3″
8 – 2.5″ x 4.5″
4 – 4.5″ x 4.5″
All seams are 1/4″ and press as directed. I used a scant 1/4"
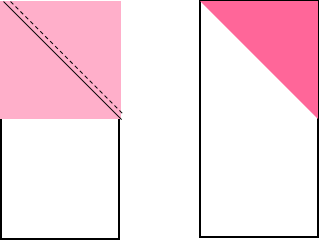
Step 1. Draw a diagonal line on the back of all print squares.
Step 2. Pair each print 3″ square with a background 3″ square to make two standard HSTs from each pair. Sew 1/4″ away from the line on each side of the line. Trim along the line and press the seam towards the print.
Step 3. Arrange the HSTs to form a pinwheel. Sew them together in rows, pressing seams towards Navy. Sew the rows together and press the seam open.
You'll probably need to trim this block down to a 4.5" square. I measured 2.25" from the center line and trimmed the excess off each of the 4 sides to ensure the pinwheel stayed centered.
Step 4. Place one print 2.5″ square right sides together with a background rectangle and sew along the line. Trim 1/4″ from the seam and press the seam towards the print. Make 8. Make sure all the stictch lines are oriented the same way.
Step 5. Arrange all units and background 4.5″ squares to form the Bunting block. Sew together in rows and press the seams away from the background squares. Sew the rows together and press the seams open.
Your block should be 12.5" square :) Thank you and can't wait to see your blocks!! I might try to get better photos and update this blog...


No comments:
Post a Comment