
Hello friends! My name is Em, and I live in St. Charles, MO. I've actually lost track of how many times I've participated in Stash Bee, but I think I've only missed one since it started?? How many is that. Anyway, I've put together this 16-inch finished (16.5 inch, unfinished block) that should make a really cool secondary pattern when I put the quilt togther.

I wrote this block in a way that I felt would keep things simple. If I had been writing the pattern to put a whole quilt together, I would have done things a little differently, but it would result in multiples and more than you need for a single block. If any of these construction methods don't work for you, please feel free to use a method of your choice as the block components are very simple.
The block consists of one 8.5-inch (unfinished) quarter square triangle unit, four flying geese of different colors that will measure 4.5 inches x 8.5 inches and four half square triangles that are 4.5 inches (unfinished).
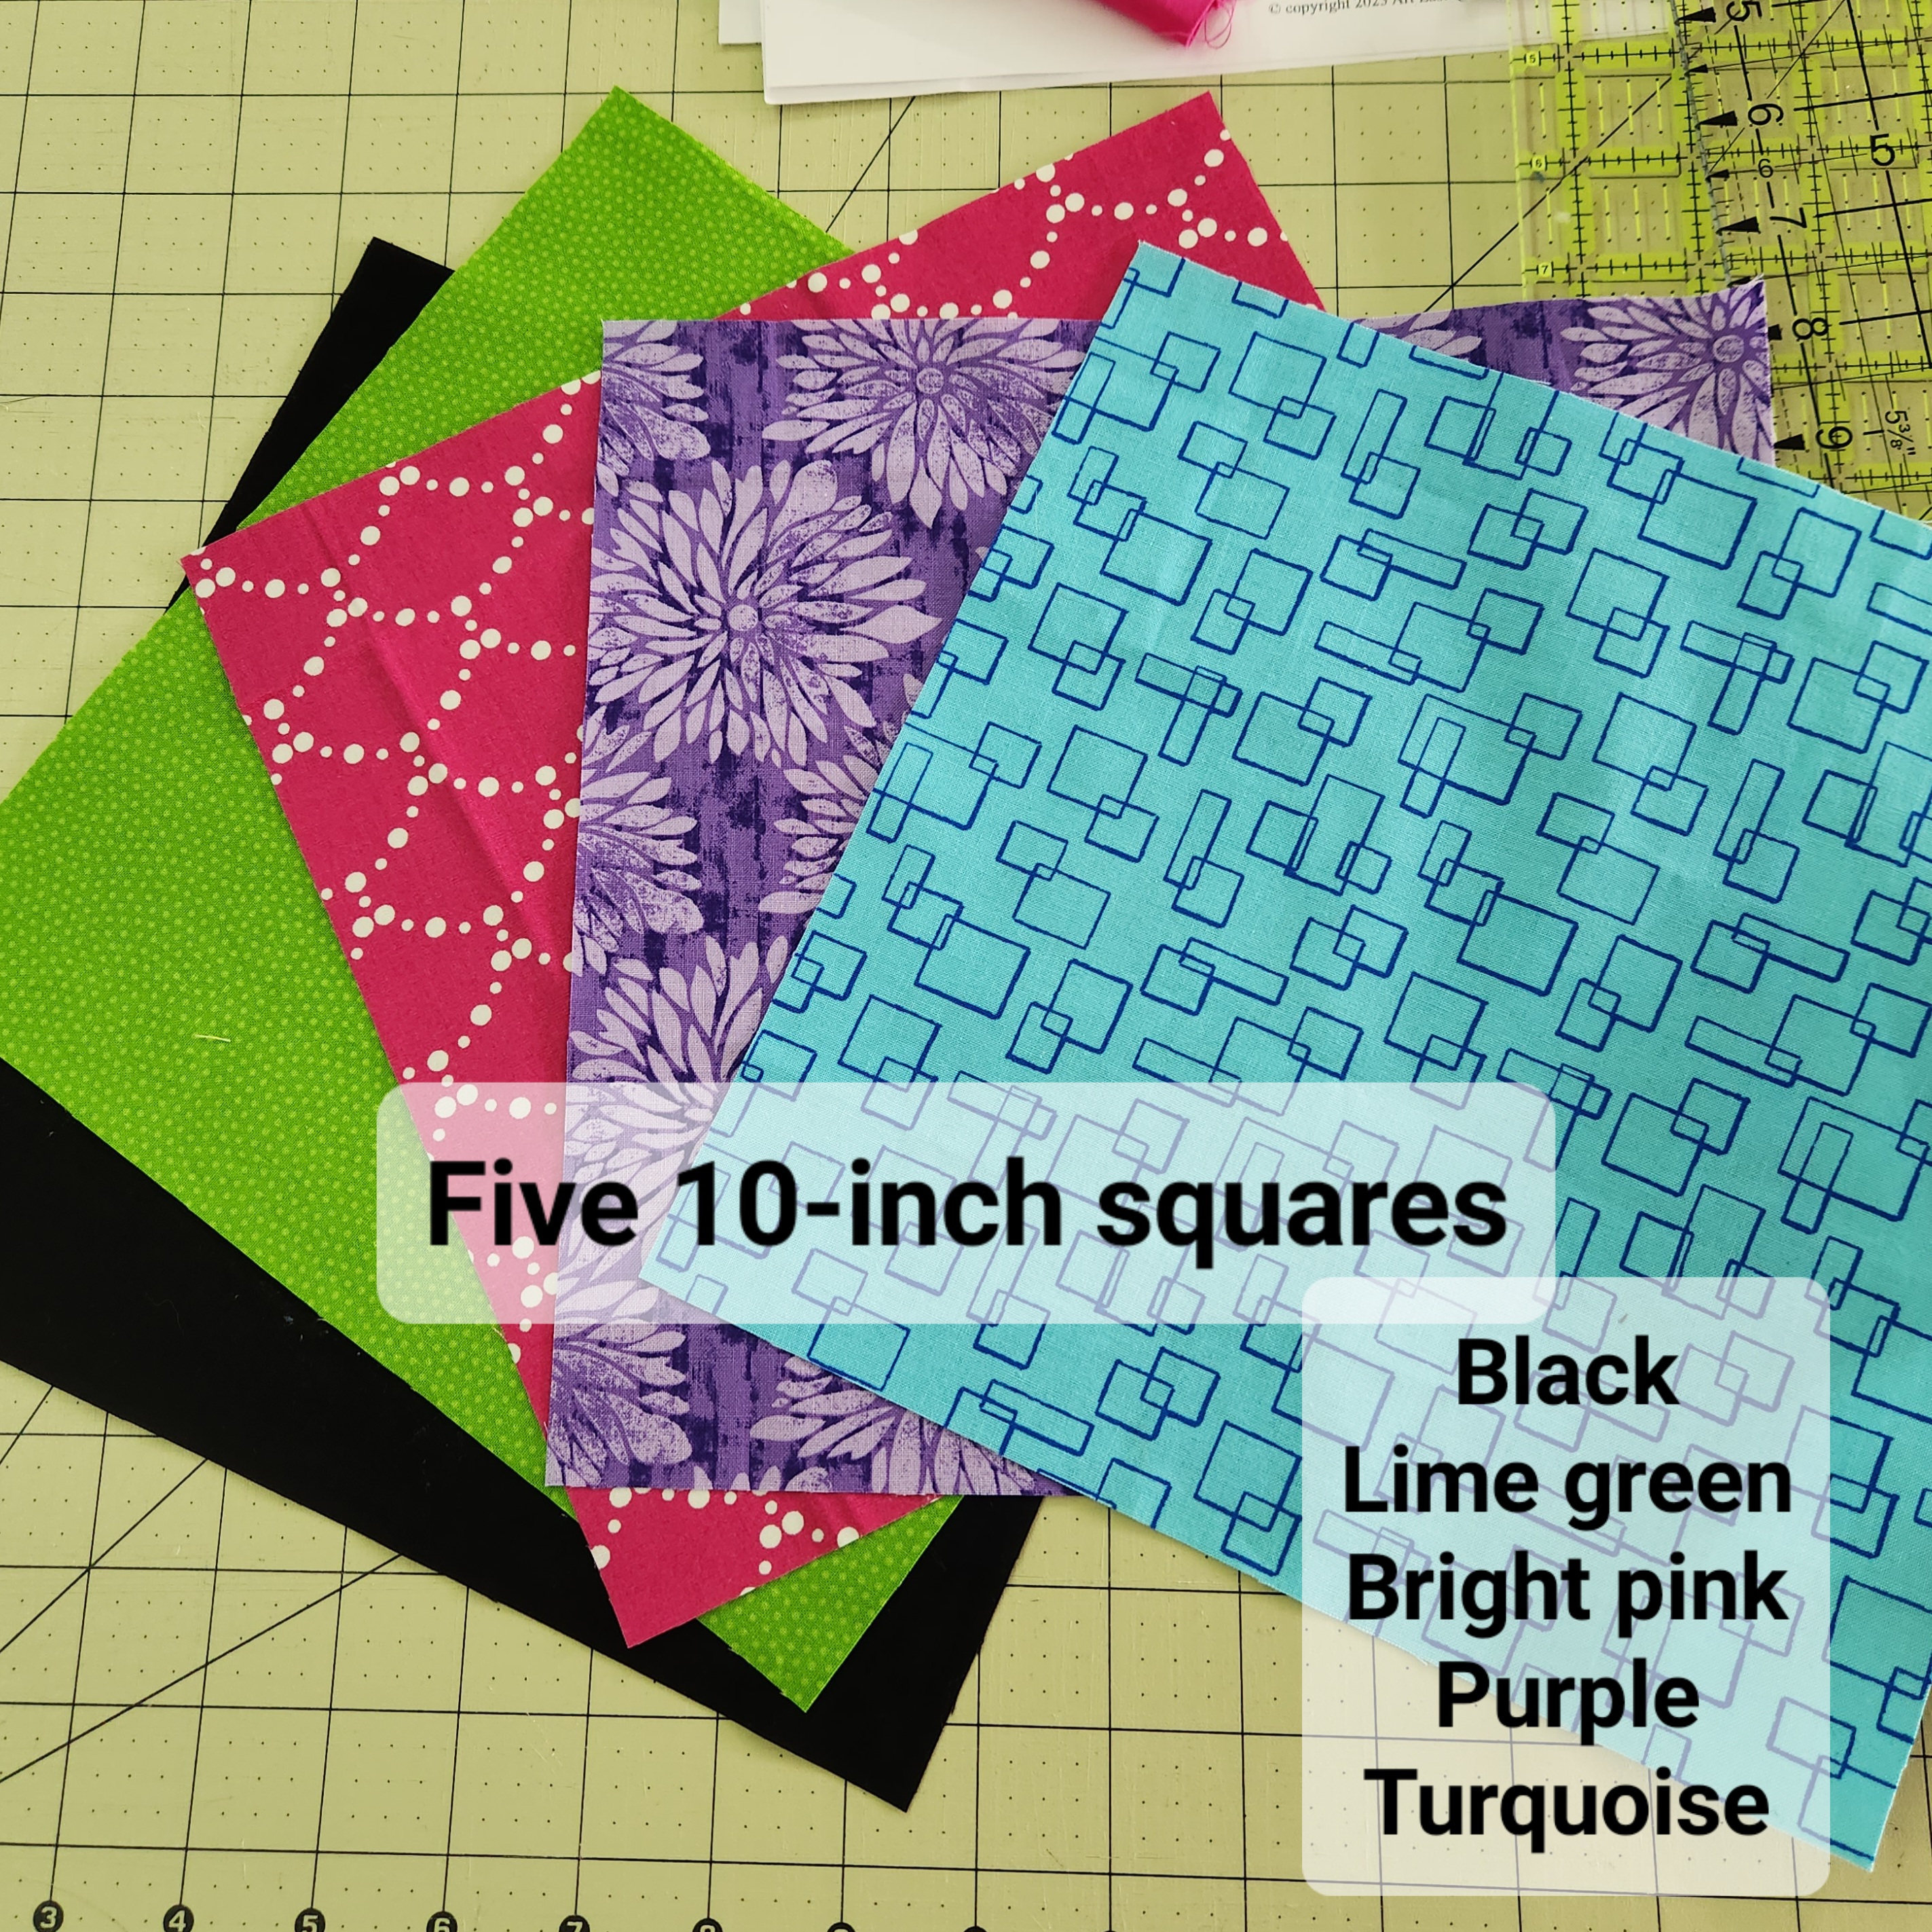
FABRIC SELECTION:
Cut five 10-inch squares of the following colors
Black (solid, or black on black print)
Lime green (more green than yellow)
Bright pink
Purple
Turquoise

1. Cut all five squares TWICE on the diagonal, creating four rectangles.

2. Select TWO of the triangles you just cut in the following four colors: green, bright pink, purple, and turquoise. Cut those in half again to creat smaller triangles.

Using the larger triangles, place purple to the left of pink and sew along a short side to make a larger triangle. Place turquoise to the left of lime green and sew along a short side to make a larger triangle.


HOWEVER, the part that extend over the tip of the black triangle will be slightly more than ¼". The reason has to do with where the seam allowances will end up on the colorful block. Imagine a line for the seam allowance ¼" in from the edge all the way around the smaller triangle. The point of the triangle after it's been sewn has to leave enough of a seam allowance for the flying goose unit to be sewn into the block. If that doesn't make sense, just disregard this entire paragraph.
All you need to know is that you should extend the tip of the colorful triangle a bit more than ¼" past the top of the unit before you sew it, say 3/8". If you don't, you won't have enough seam allowance above the tip of the black flying goose to preserve the tip when you sew the block together. I had to un-sew this one:


Trim your flying goose unit to 4.5 x 8.5 inches. I find this easiest to do by lining up the 4¼ mark along the top of the ruler at the tip of the goose on the long edge, and then checking that the 4.5 and 8.5 marks on the short edges touch as close as possible to the line where the two colors meet.
REPEAT FOR THE REMAINING COLORS OF FLYING GEESE.

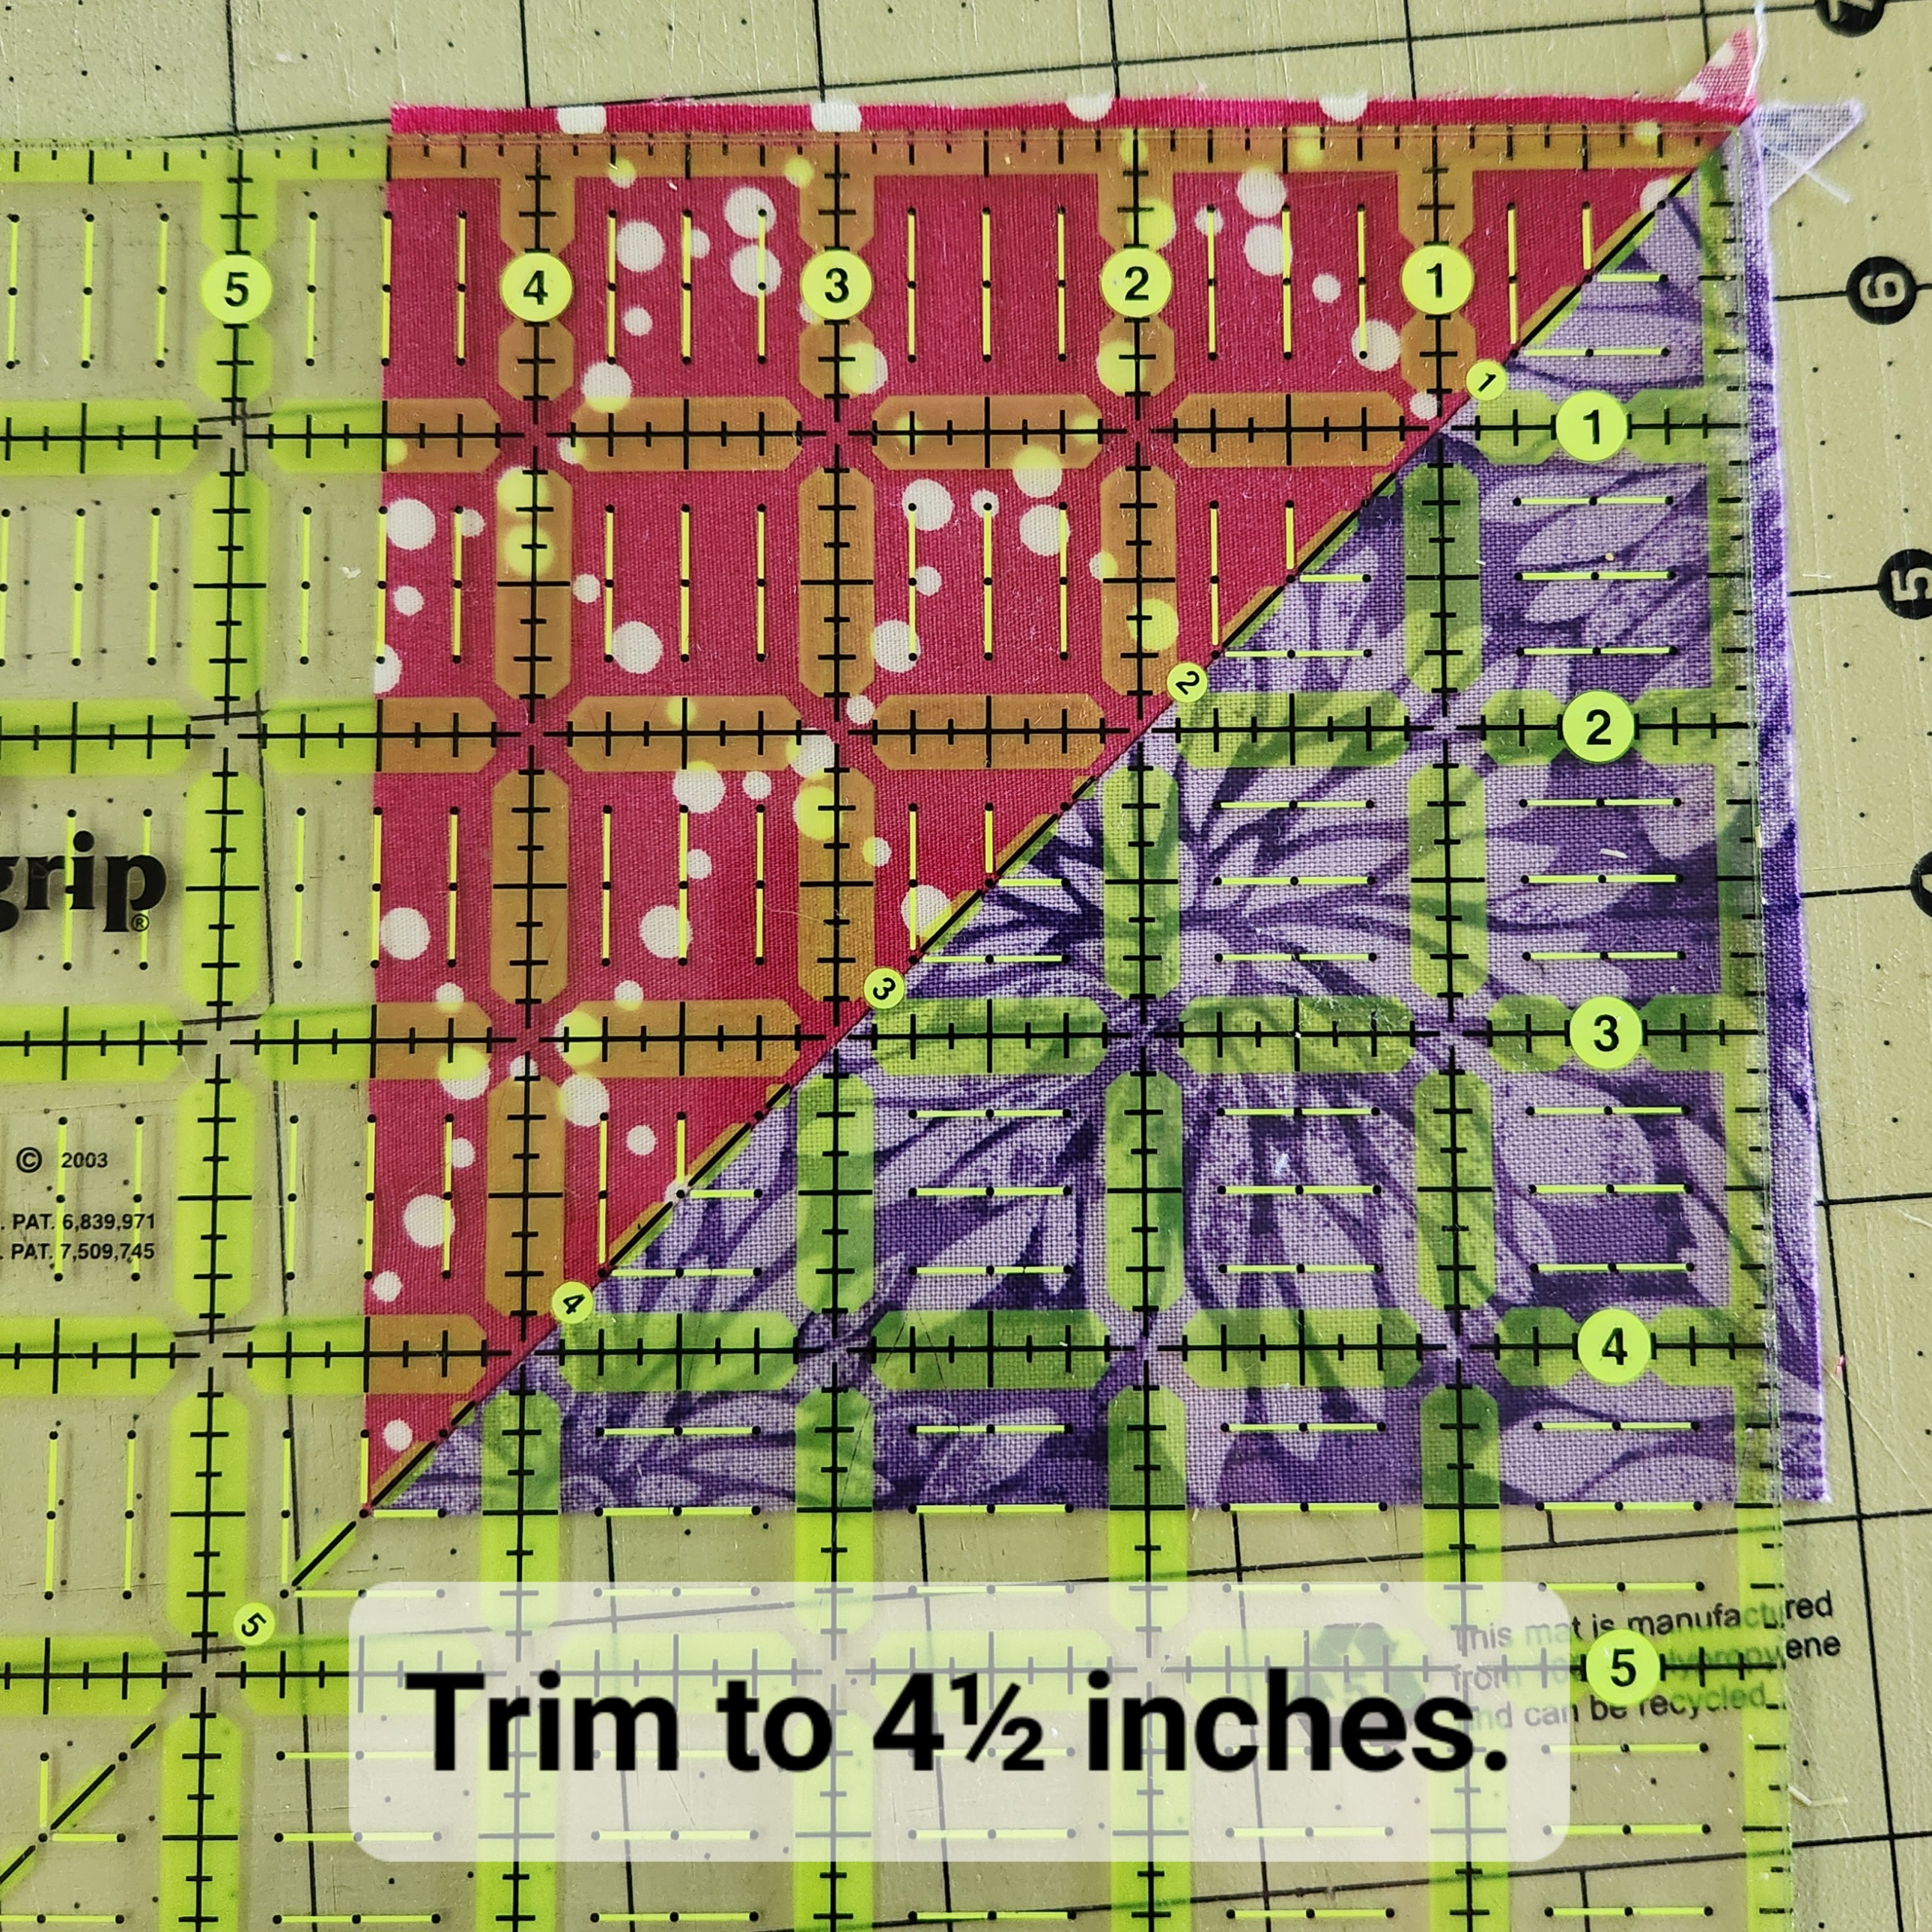
Trim half square triangles to 4.5 inches.

Ta da! You did it! Thank you!!

No comments:
Post a Comment