
Hi All
Much like my block last year, this too is inspired by my daughter, Melanie Ham, who at 36 died of a rare cancer. I think all you know that she was an online content creator and left us many videos that provide great instruction and memories. Last year I mentioned one of her videos that I like to call, “You don’t have to know, just sew”. It tells the story of how when she needed inspiration, sort of stuck, she just found some fabric and started sewing. I find myself in that space often while dealing with grief and just the challenges of life. If you want to know more about her offerings or her journey, her website is: www.melaniekham.com, or join her community on Facebook at Melanie Ham’s Happy Stitchers.
Melanie loved tulips! I can’t wait to see all of the beautiful tulips you all will make! My pattern is a slightly modified version of the one on Missouri Star Quilts YouTube Tutorials. You can refer to that video for construction, but please follow my fabric and cutting instructions.

Here are the details for my block:
The Tulip bulbs will be pinks, raspberry, fuchsia, strawberry, rich
reds and should be tonal prints or clearly read as those colors, please no solids,
character, juvenile – batiks are fine.
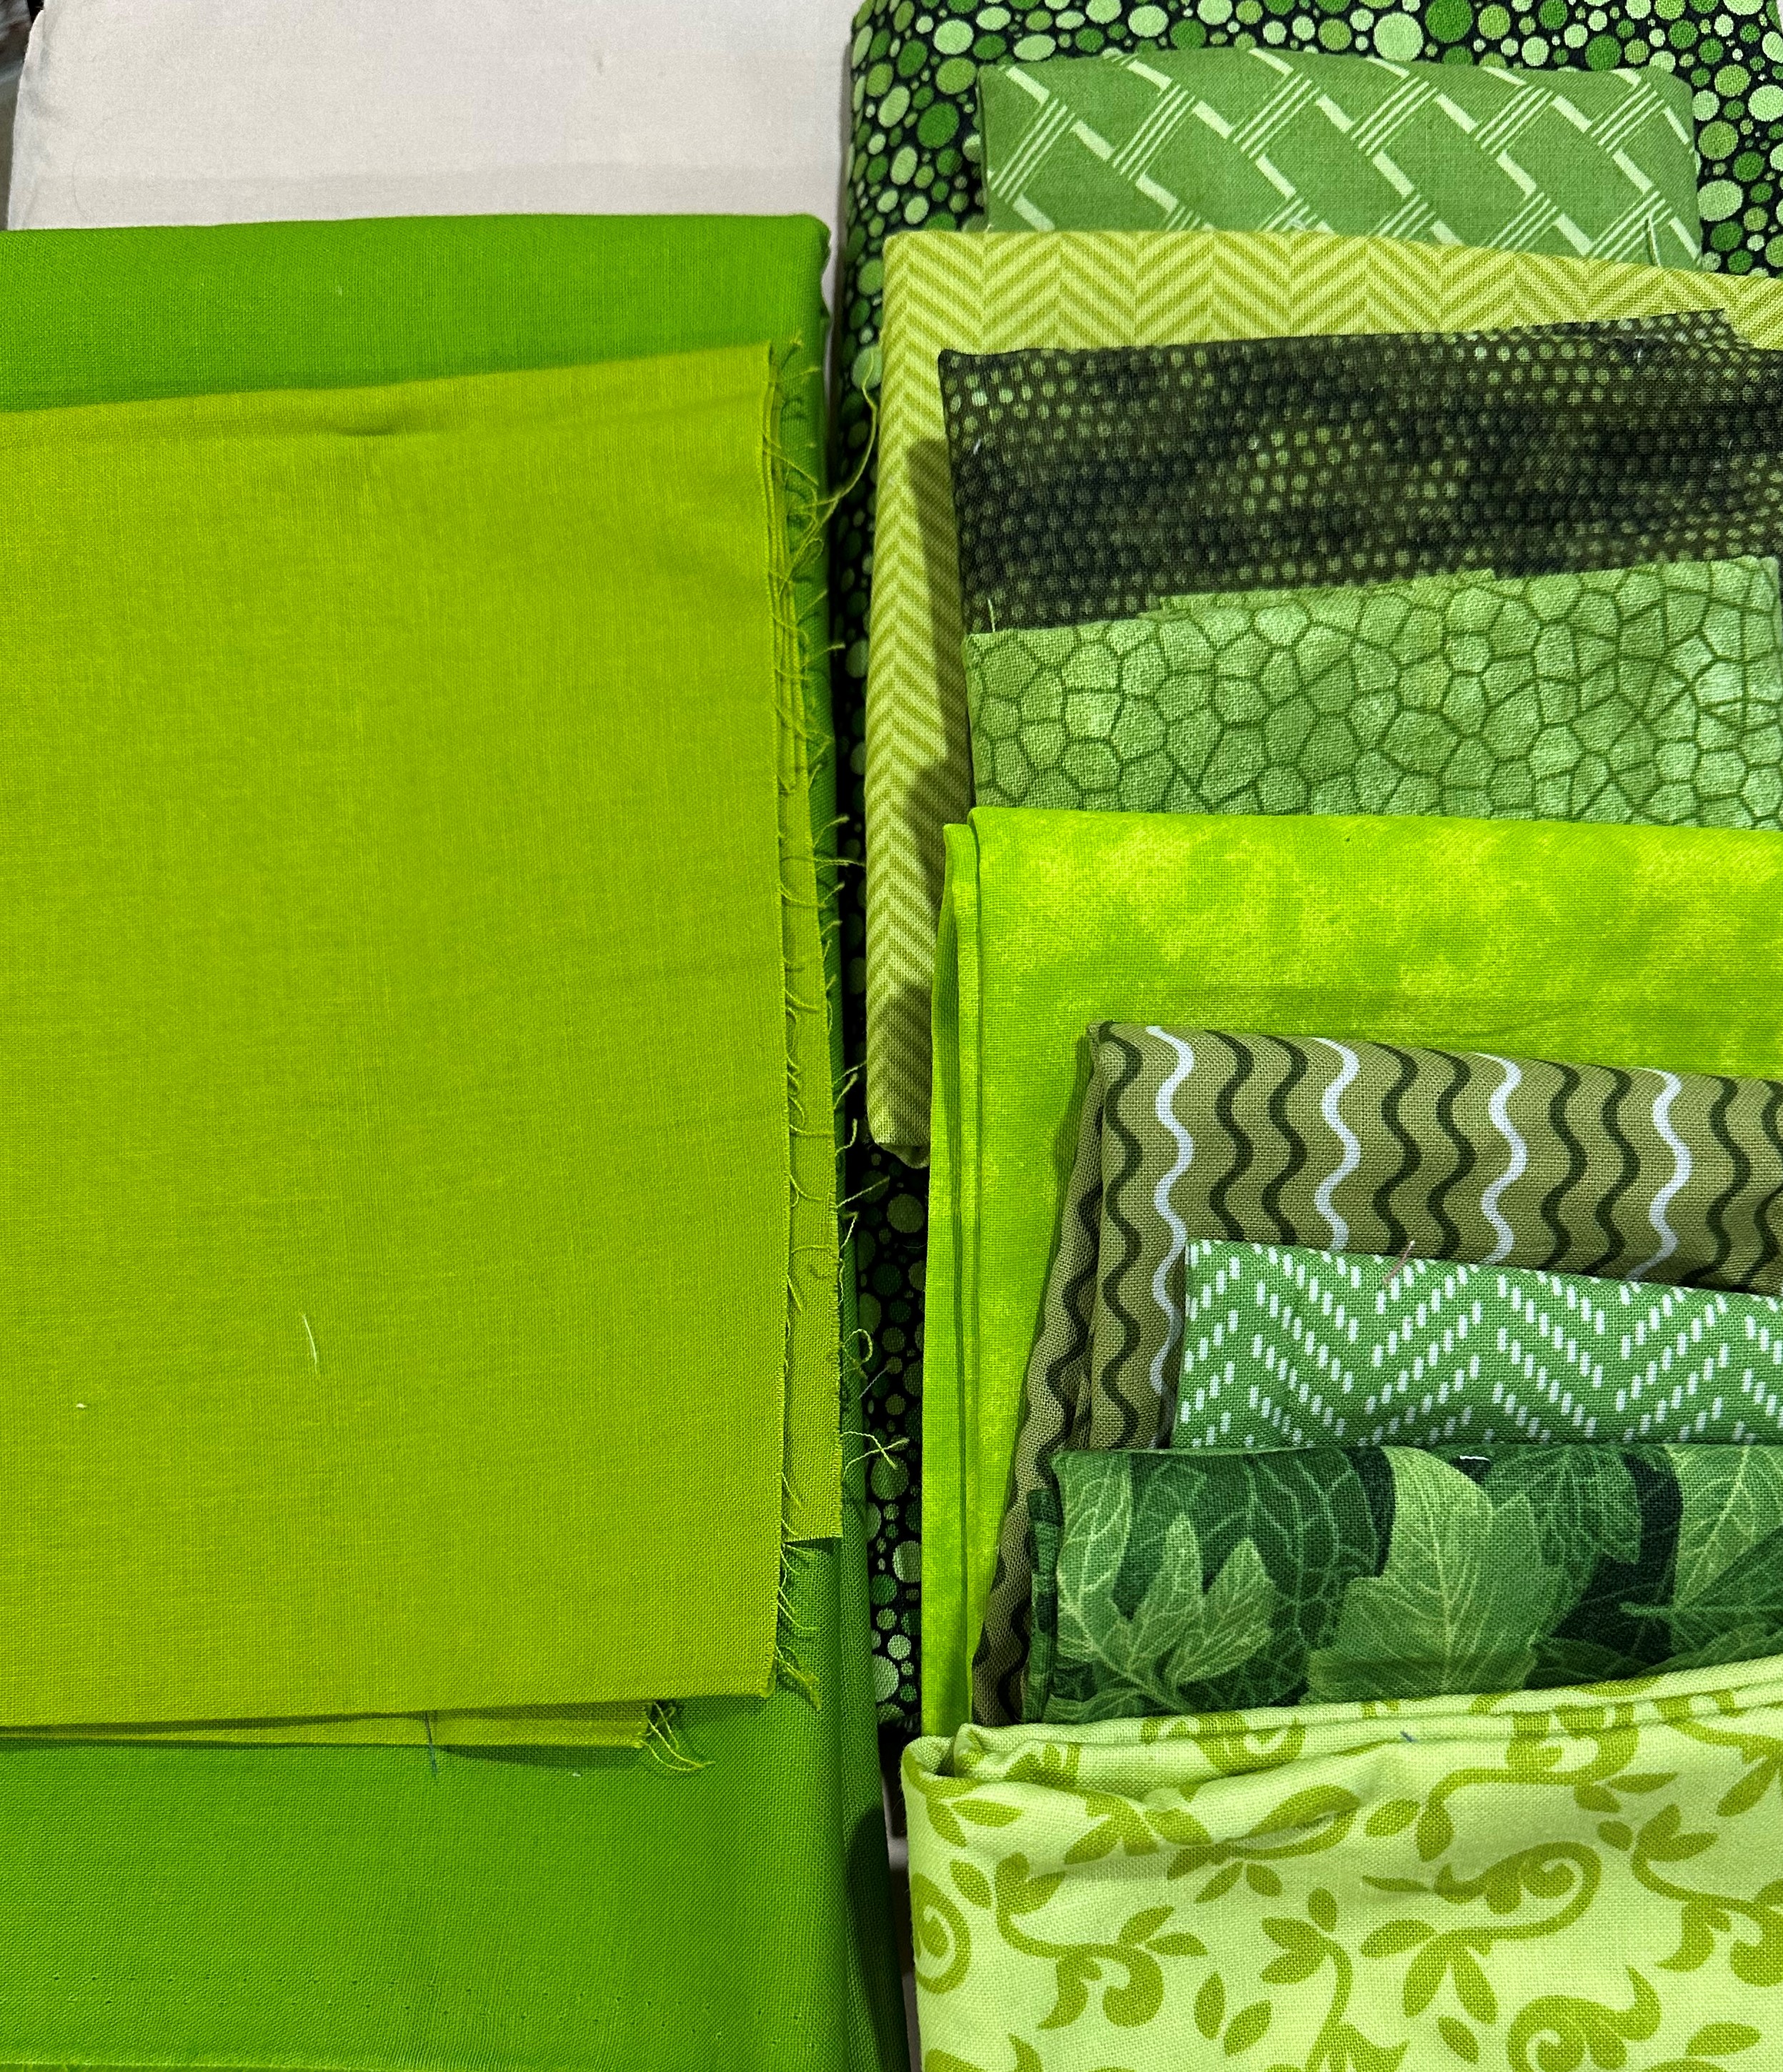
The leaves and stem are various green prints that are tonal or clearly read as green. Please no solids for the leaves, no character prints or juvenile – batiks are fine. Solid green may be used for the stem.
Background is white solid – like Kona Snow, Kone White or similar that is white not leaning to ivory or beige.
Bulb Prints Leaf
and Stem fabric

Tulip Bulbs Instructions:
4 – 5” squares of the same bulb fabric
2 – 2.5” background squares
2 – 3.5” background squares
Draw a line diagonally from corner to corner on the wrong side of
the 4 background squares. Place the 2 - 2.5”
squares right sides together with the upper 2 - 5’ bulb squares as shown on the
inner / upper corners.
Place the 2 - 3.5” squares right sides together with the lower 2 – 5” bulb squares as shown on the outer / lower corners.
Sew ON THE LINE corner to corner - Roll the corner back and make sure it covers the corner and is square before trimming the excess ¼” away from the sewn line.


Press the corners back and square to 5” and sew 4 patch together pressing seems opposite each other so they will nest tightly together. Press horizontal seem open.


2 – 5” squares of different green prints
2 – 5” squares of background white
1 – 1.5” x 8.5” strip solid green for the stem
Pair 1 Green Print with 1 white 5” square, right sides together – draw diagonal line corner to corner.


Sew the half square triangles together top to bottom – watching placement
Sew these to the center stem piece. Pressing horizontal seems open.


Any questions, reach out on Instagram or email.
Lisa…
No comments:
Post a Comment