
Hello!
This is my third year in StashBee, and I've enjoyed meeting and collaborating with other quilters so much!

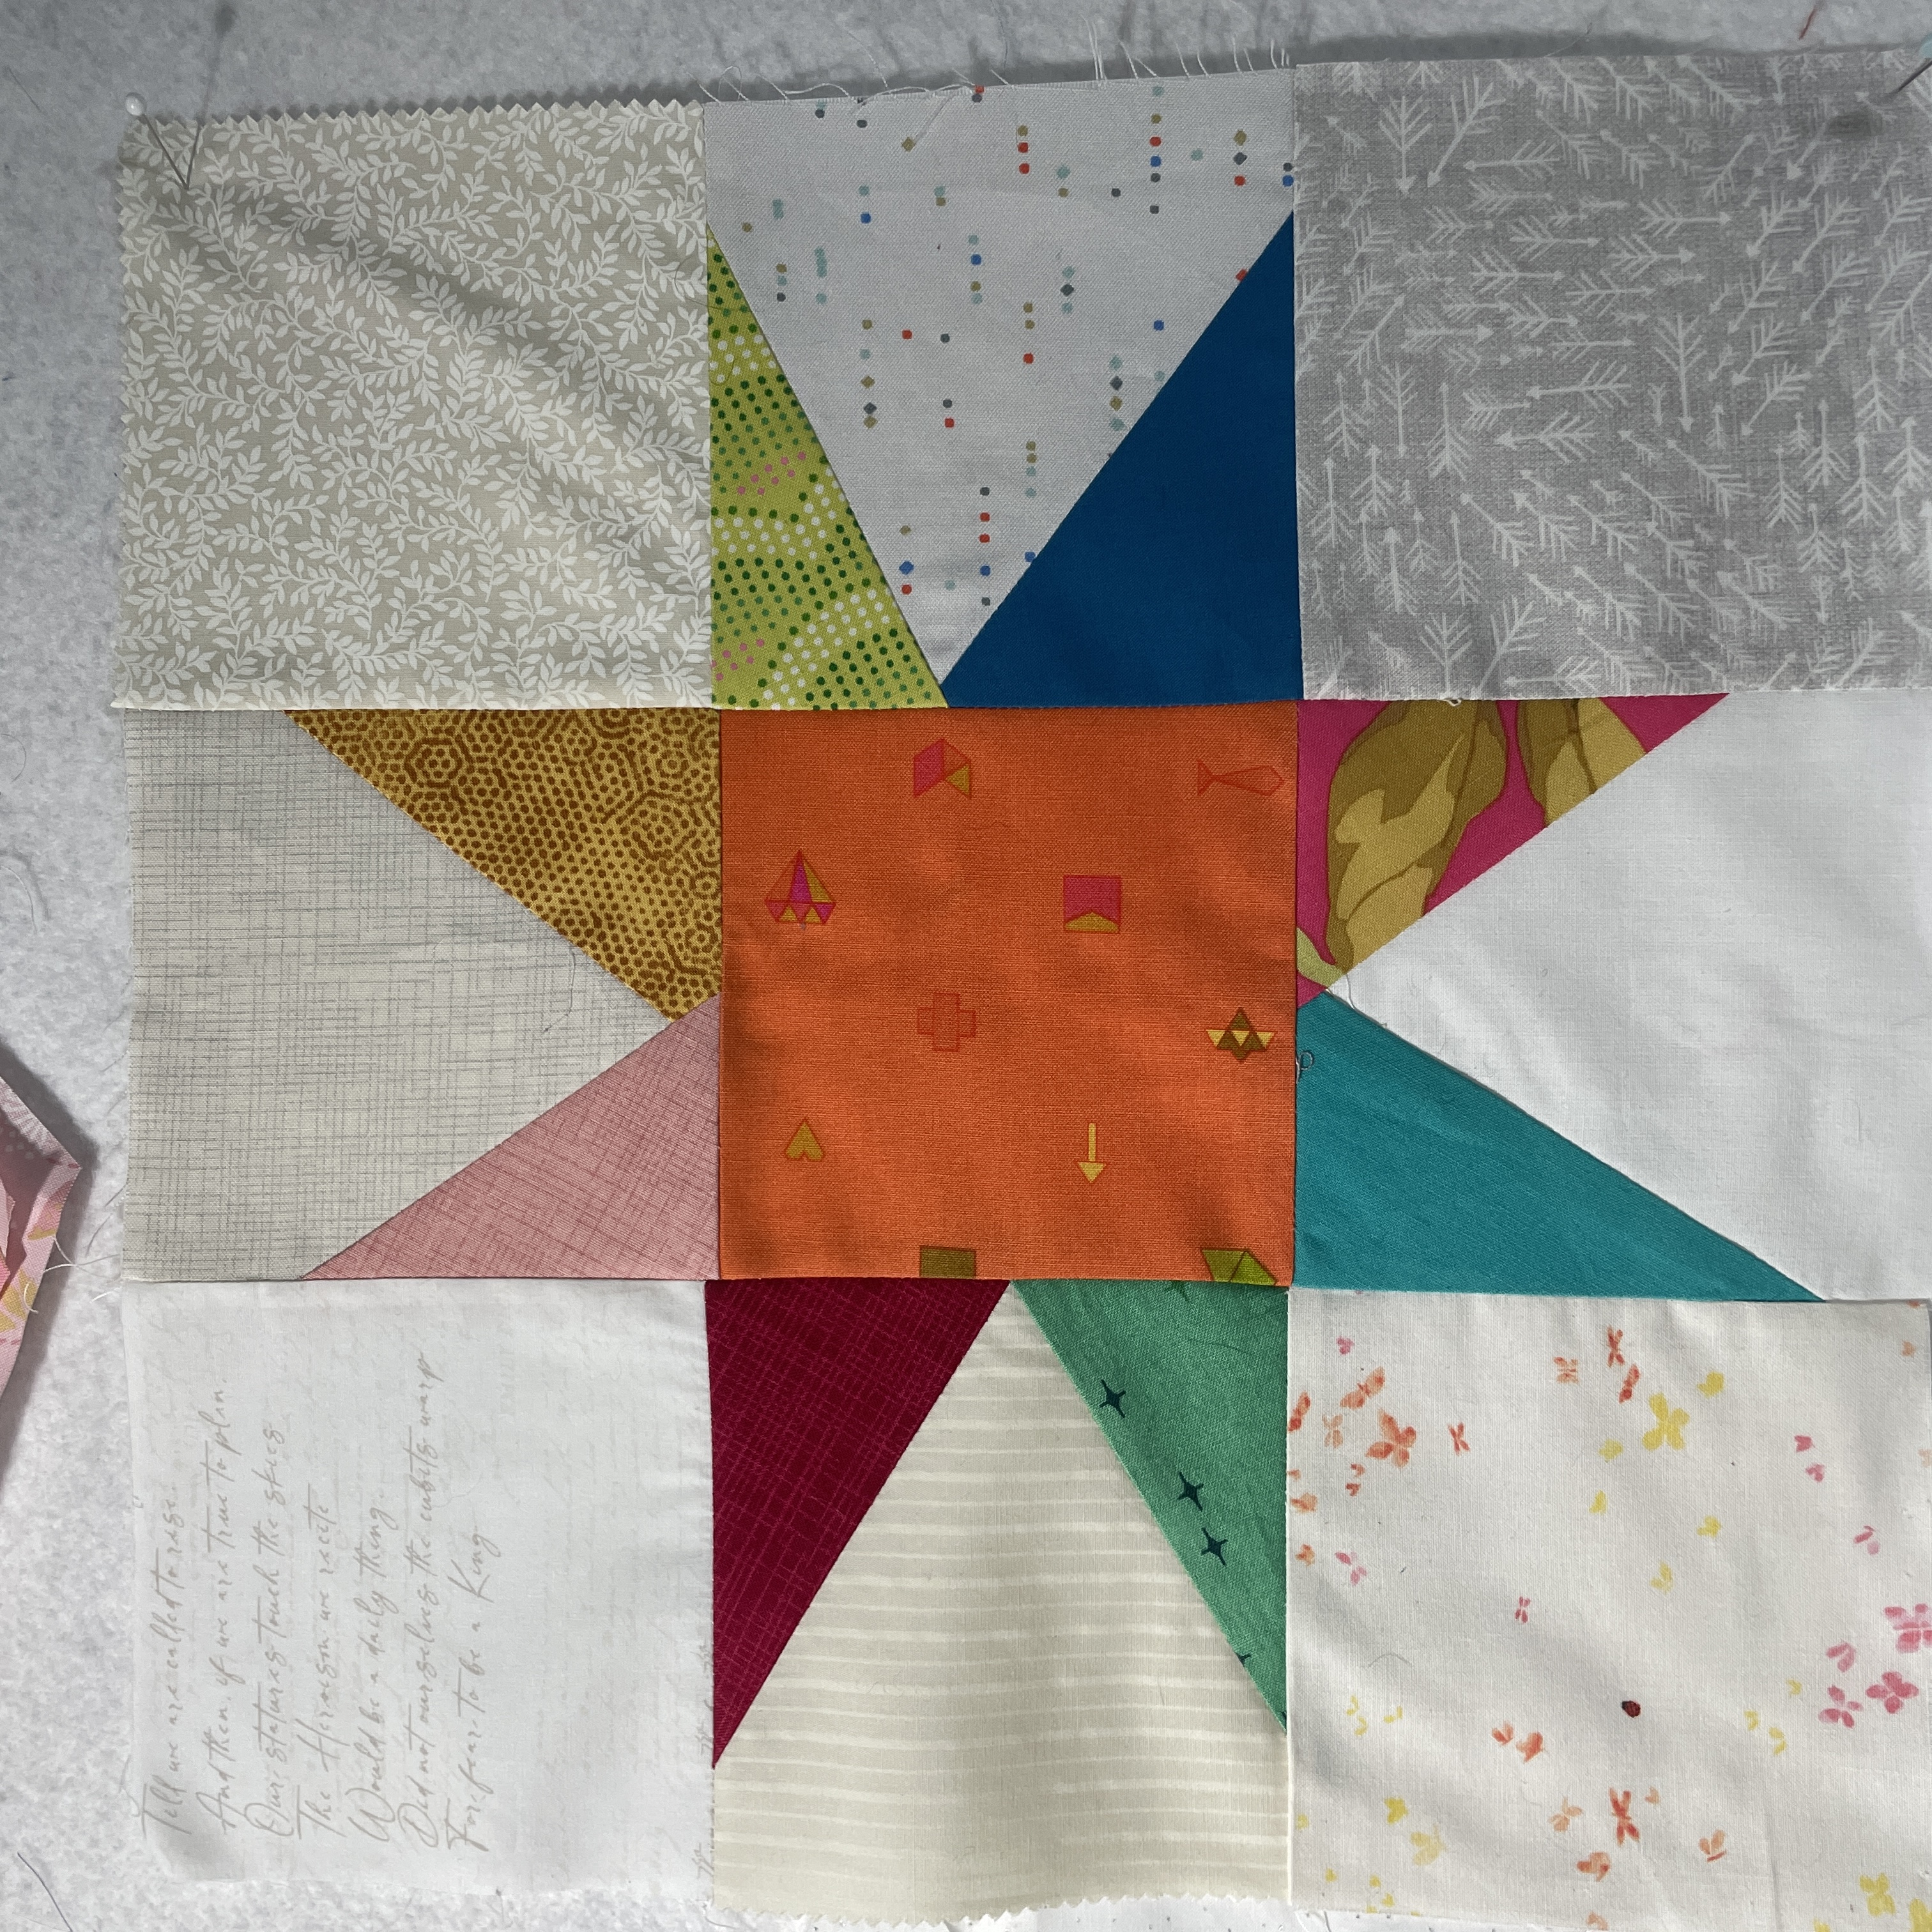
I'd like my Hive 5 members to make me a 13.5" improv Wonky Star block this month. I made one for a Hive mate in my first year, in 2021, and loved it so much that I want a whole quilt of it!
There are lots of tutorials out there for the basic techniques of this simple improv block, which is a 9 patch with improv elements.
Michelle's 2021 StashBee Wonky Star Tutorial is perhaps the best - her finished size is 12.5 (she starts with 4.5" blocks instead of the 5" blocks I'm requesting) but the construction is identical otherwise. A nice, clear, simple tutorial.
In that tutorial, Michelle reommends Scissortail Quilting's Wonky Star tutorial with a downloadable pdf. I also like HQ Stitch's Make a Wonky Star
Or if you like a video tutorial, you can check out: Jenny Doan's Tutorial
CHOOSING FABRIC
I'd like the background to be scrappy low volume and the star to be scrappy bold colours.
Background
Any low volume fabric in white, off white, pale grey -- blenders, solids, prints.
Star
I'm looking for super scrappy bright colours -- a variety of colours in each block! Brights can be blenders solids or prints that read mostly one colour. As long as you have a good contrast between the low volume background and the elements of the star it'll look great.
CUT LIST
You'll need
8 x 5" squares of various lowvolumes
1 x 5" square of a bold, bright colour, print or solid
8 scraps of brightly coloured fabric, prints or solids
Please follow Michelle's Wonky Star Tutorial for the method.
Your finished block will measure 13.5" -- don't worry about squaring it up if it's a little over or under :)
Here are some photos I took during my own block construction:


Now add the second star point on this square. Take another colourful scrap with a straight edge -- angle it from the bottom of the the square up the side in the other direction.


1 comment:
This looks like a fun block! I may have to crash it. :)
Post a Comment