
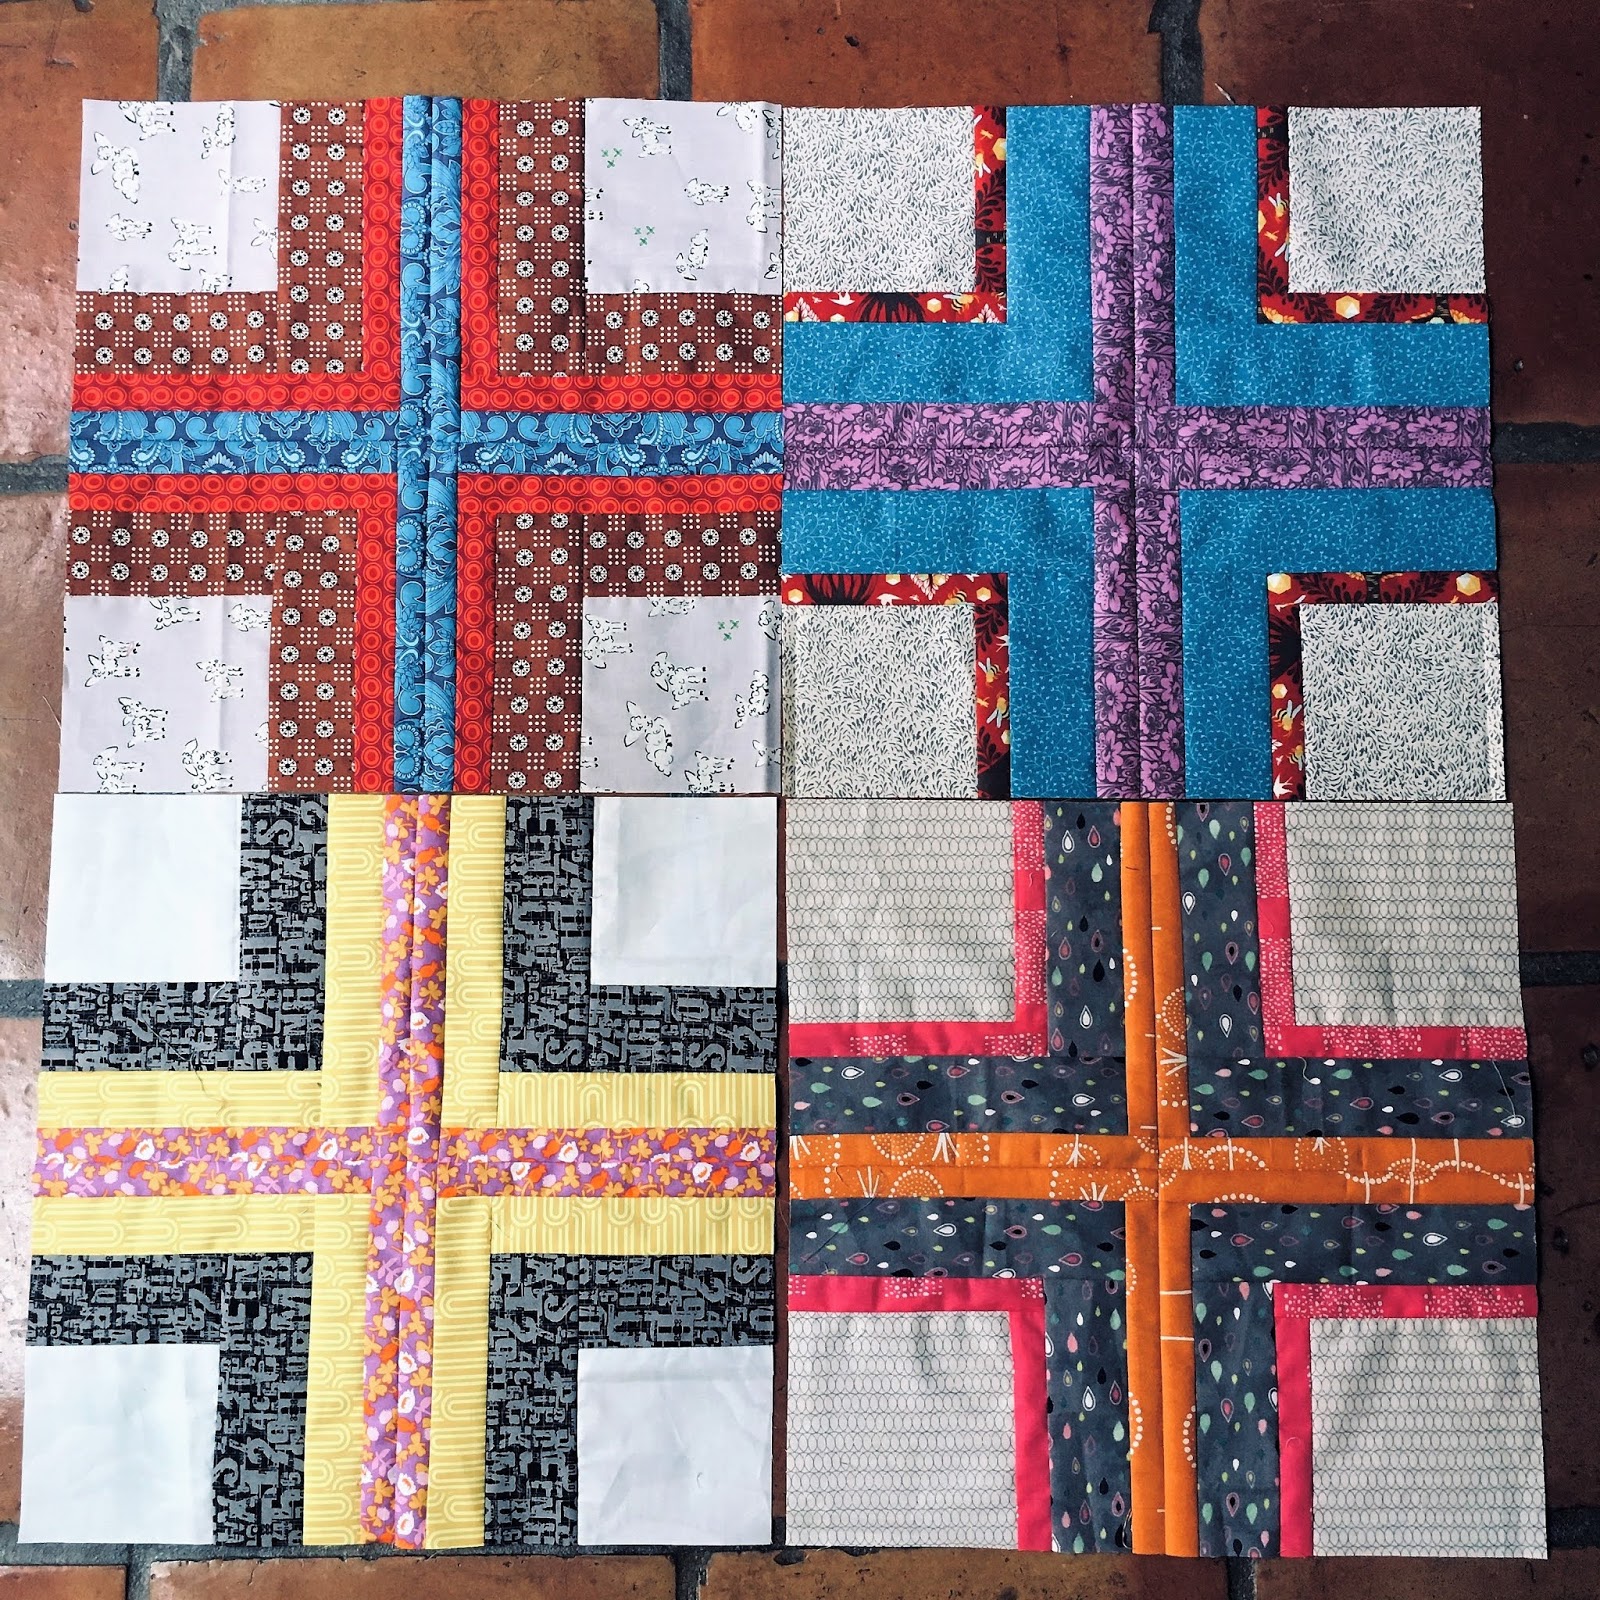
This block is basically a big framed square, cut in fourths, and the units rearranged and sewn back together. My variation is a big block--16-1/2"--and has a neutral/low volume background to tone down the unrestrained scrappiness of the intersecting strips. Instead of specifying the size of the background square and widths of the strips, I use a range of sizes. Here are the steps to follow to make my Intersection Variation block:
1. Pick and cut your fabrics. You'll need one square of a light neutral or low volume print for the background. The square can be from 10" to 11". For the strips, you'll need several different bright or dark prints or solids that will contrast nicely with your background square. The strips can be anywhere from 1-1/4" wide to 2-1/2" wide, in lengths to go around all four sides of the square. Depending on the size of your center square and the widths of your strips, you'll need from two to four sets of strips to make your square big enough--use a variety of different-width strips to make the block interesting.
2. Make a big framed square. Start with your center square, and using a stitch length of 2.0 or smaller, sew two strips to either side of the square. Press towards the strips, then trim up the ends even with the sides of the square. Sew two more of the same strips to the other two sides of the square, press, and trim up.


3. Add more rounds of strips to get to desired size. Repeat with additional sets of strips until your square is at least 17-1/2". I added three sets of strips, and my block turned out to be just shy of 18" square. This will give room for cutting and sewing and trimming to size later.


4. Pressing tip. On the last pair of strips, press one of the seams towards the center rather than towards the strip. This will allow the seams to nest when you get to step 8.


5. Create pressed lines for cutting. Fold your block in half and iron a crease down the center, then fold the other direction and press a crease. This will give you your guidelines for cutting the square into four units.

6. Cut your square into fourths. Using the pressed lines as your cutting lines, cut your big square into four units.

7. Rearrange the four units. Flip your four units so the strips are towards the center.

8. Sew the four units together to create the Intersection Variation block. Arrange the four units so that those seams on the last round of strips will nest when sewn together--that's why we pressed one of those seams towards the center. We're making a big four-patch now, so sew the two pairs of units together, pressing the seams in opposite directions, and then sew those two halves together, nesting and matching the center seams.


9. Yay, your Intersection Variation block is done! It should be a bit larger than my desired size of 16-1/2", and it may look a bit shaggy around the edges, but don't trim it down. I'll trim all the blocks to the same size before assembling the quilt top.

THANKS FOR MAKING MY INTERSECTION VARIATION BLOCKS, STASHBEE FRIENDS!
Happy quilting 💖
--Pam
No comments:
Post a Comment