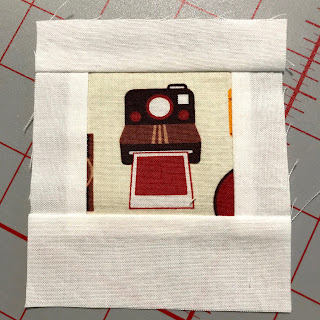
I love fussy cutting and fell in love with these cute polaroid blocks the first time I saw one. Look how fun this one is that I made! This is the basic block but I'm wanting a solid sashing put on too. I'm planning on making these into an I Spy quilt for a child.
The blocks aren't very big so I'd love two. 😊
With the solid added they look like this:
I'll show you how to make a block but you can always google polaroid blocks to find many good tutorials and examples of quilts made. I like this basic tutorial.
You will need:
2.5 inch fussy cut squares from a cute novelty print for the center (any print a child would like)
1 inch strip of white solid (solid only, no white on white)
1.5 inch strip of same white solid
2.5 inch strip of solid color (again, only solids. Think kid colors)
Begin by sewing a 1 inch strip to both sides of the fussy cut center. You can wing it and then trim after or cut your strip to 2.5 inches first. I pressed away from the center.
It will now look like this:
Next add a 1 inch strip to the top.
Then the 1.5 inch strip to the bottom.
Again, you can eyeball this or cut to length - 3.5 inches.
I continued to press away from center.
I continued to press away from center.
Now you have the basic polaroid block that look like this:
Square it up to 3.5x4 inches if you were eyeballing:
Now add your 2.5 inch strips of color all around the block....pressing away from the center. I would prefer these to be added log cabin style. Meaning, start with one side...say the top...then move around clockwise. This will help me not have much seam bulk when joining blocks as many seams won't butt up against each other. You can see what I mean below:
There you go! You are all done! They should be 7.5 x 8 inches. Don't worry about trimming or anything. I'll be squaring these down to 6 inch blocks. The extra gives me room to square down wonky like this:
Thank you so much in advance.
PS. These little blocks are so addictive and easy to chain piece. Look what happens...LOL!!!
Happy sewing.


No comments:
Post a Comment