
September Greetings from the Nashville area! As I type this, we’re having an unexpectedly cool day. I’m sure by the time you read this, (and even before I’ve finished this!) it will be full on summer again! And, due to some strange technology glitches, I’m not able to post this directly to the stash bee blog. Cathleen, our Hive Mama, has graciously offered to help me out here. Thank you, Cathleen!
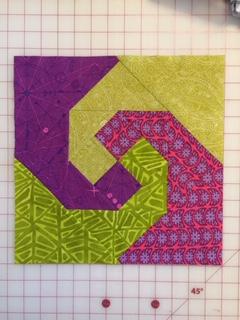
I’ve chosen the Snail Trail block for this month. I previously had not made this myself. I was pleasantly surprised at how quickly it goes together and how striking the end result appears.
You will need fabrics in two color families. I’d like blocks in purple and lime green/chartreuse or whatever green you have that’s close. You’ll need two different purple fabrics and two greens. You’ll make 1 block that is 12.5” once all sewn together.
Please note: the cutting directions below will yield enough pieces for 2 complete blocks. I’m asking you to sew and send 1 block to me. You can make a block for yourself, or send the additional pieces to me and I’ll sew them.
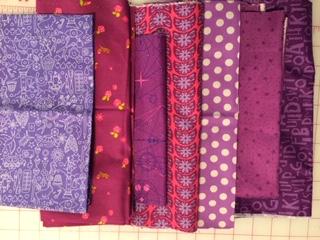
Here is a suggested fabric pull:
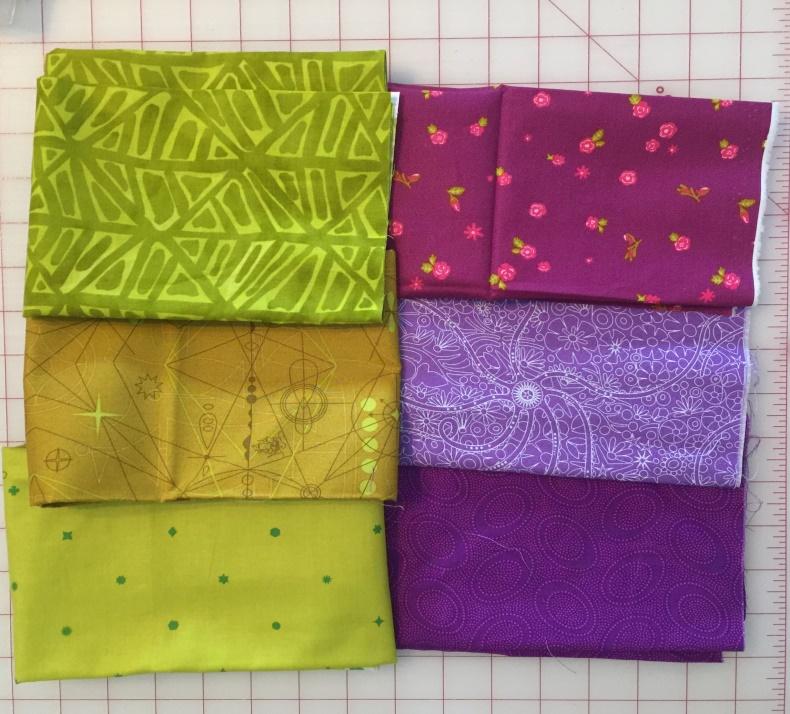
Please make the following cuts from each of your 4 fabrics:
1 – 7 ¼” square (A)
1 – 5 ½” square (B)
1 - 4 ¼” square (C)
2 – 2 5/8” squares.

Cut each of the 3 larger squares on the diagonal
Note: A is the largest, B middle and C the smallest.
Note: A is the largest, B middle and C the smallest.

Set aside one half of each triangle and one square from each of your 4 fabrics. (These are for the extra block as mentioned above.)
Separate the remaining pieces into 2 piles: a purple pile and a green one. You should have 8 purple pieces (4 each of two different fabrics) and 8 green pieces (4 each of two different fabrics).
Start by sewing the 4 squares together.
- Press the seam toward the purple (darker) side.
- Press the center seam open.

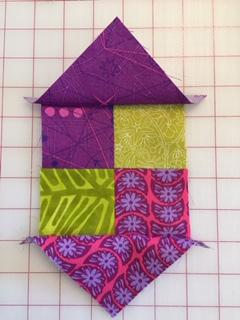
Now sew the C triangles to your 4 patch, paying attention to placement.

Sew the C triangle that matches the fabric in square #1 to the top of the 4-patch.
Sew the C triangle that matches the fabric in square #3 to the bottom of the 4-patch.
Press seams to the outside.

Next, sew the C triangles that match fabric in squares 2 and 4, respectively, to the right and left sides of the 4-patch.
- Note: once you’ve sewn the triangles on, each fabric should appear to make a small arrow; the square from the 4-patch should be to the left, underneath the triangle of the same, matching fabric. (As you add triangles, the spiral should move clockwise or outward to the right. I know this from not having sewn my first block correctly!)
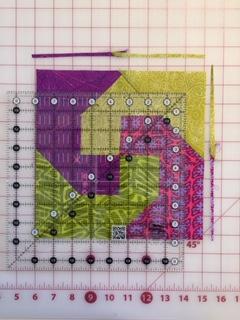
Round 1 should measure 6 ½” square. Please trim if necessary.
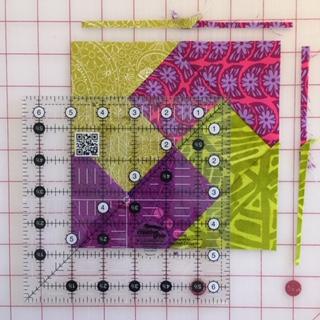

Continue in the same manner for round 2, using the B triangles. Please note fabric placement in picture below:

Press seams to the outside.
*Add Green “B” squares.
Trim block to 9” square.
For the final round, please add A triangles.
Press seams to the outside.
Trim block to 12 ½” square. (It is ok with me if you skip this final trimming.)
Please take a peek at my local friend and prolific quilter, Tracy’s blog: “Tracy’s bits ‘n pieces”. I’ve directly plagiarized—with her permission! Tracy has a picture with 9 blocks together. That picture gives a great perspective of what this quilt will look like when complete!
Please feel free to contact me if you have questions or concerns. IG: @maryfromvaintn or maryEsiemen@gmail.com. My Instagram is private since I work at a public school (and want to keep my job!) If you haven’t yet requested to follow me and would like to, please do so!
(I think you can send a DM regardless of following status.)
Other random info: A member of my local modern guild referred to a green I selected recently as “the most horrible green color ever…”. So I understand if chartreuse isn’t in your stash. Please use what you have that’s close yellow–green, even gold if needed. ☺
No comments:
Post a Comment