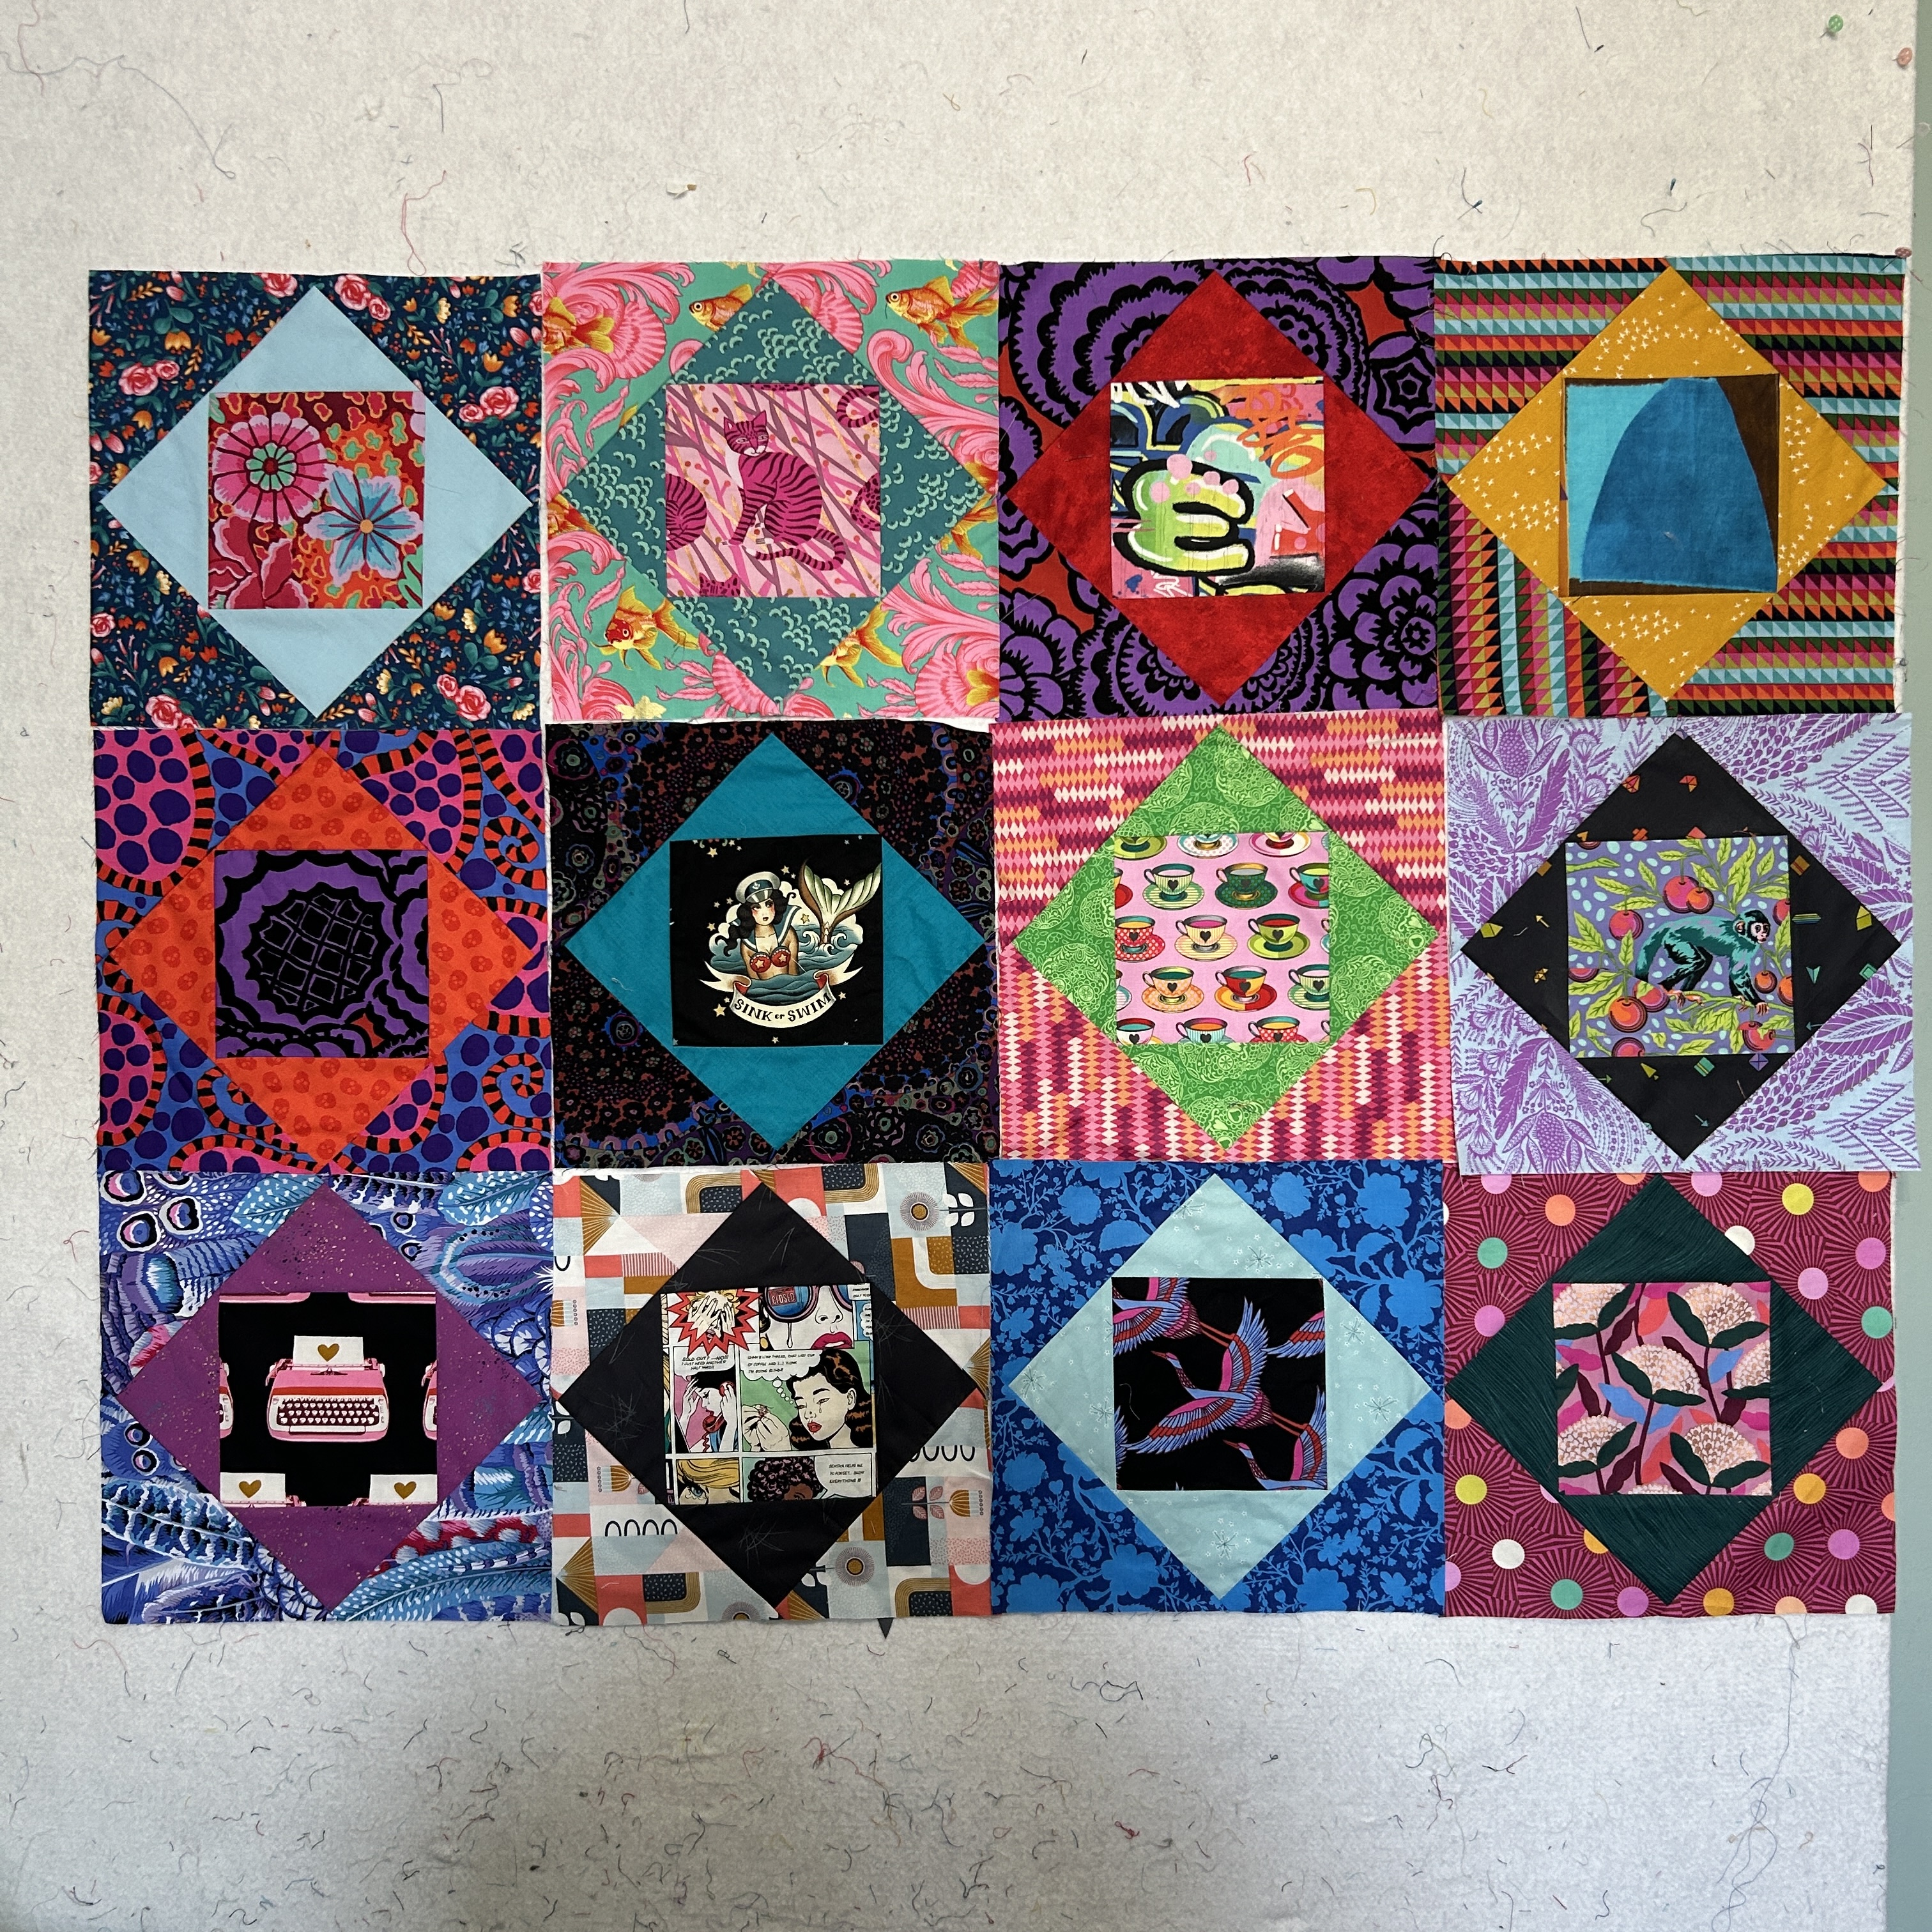
I have a stash of big, loud prints that I love but that have been hard to place in the context of a quilt. So this is the project and it's all about loud!
I'm looking for big, loud, vibrant economy blocks made from your most saturated and busy modern fabrics. The blocks will be 12.5" unfinished or 12" finished.
There's a great tutorial here for traditional piecing: https://www.diaryofaquilter.com/economy-quilt-block-tutorial-and-inspiration/
You can also make this block using foundation paper piecing which many people find easier because it guarantees precision. I pieced all mine because I'm not super fussy, but I know that paper piecing economy blocks is very popular. I don't have access to a free 12" finished economy block printable template, but you can purchase one from Etsy for instant download quite cheaply here if you think you might use it again: 12" ECONOMY BLOCK
Here are some I made myself: There's some Kaffe in there, and Tula Pink and Libs Elliott skulls and Alexia Abegg and an Alexander Henry print and others I can't remember :)

 |
| Cotton Candy Fabric's quilt |

 |
| Fabric Pull examples |

centre: 1 x 6.5" square - this can be a fussy cut of a motif but doesn't have to be. The fussy cut should be square on -- not on the diagonal.
first round of triangles: 2 x 6.5" squares (contrast to centre) - cut in half diagonally into triangles = 4 triangles
second round of triangles: 2 x 8" squares (contrast or patterned) cut in half diagonally into triangles = 4 triangles

CONSTRUCTION
There's a great tutorial here for traditional piecing: https://www.diaryofaquilter.com/economy-quilt-block-tutorial-and-inspiration/
If you've made an economy block before, the basic steps to piecing this are:
1. Fold your centre square in half each way, so you have a little crease to mark the centre on each side. Fold each triangle, creasing the centre.
2. Sew one of your first round triangles onto each side of the square, centering it. Press away from the square. Then trim off the dog ears of the triangles even with the edges of the centre square. This will help keep the block flat and true. Make sure you trim keeping the 6.5" width of the centre block.

3. Sew the other two first round triangles onto the other sides of the square, centering them. Press them away from the square.


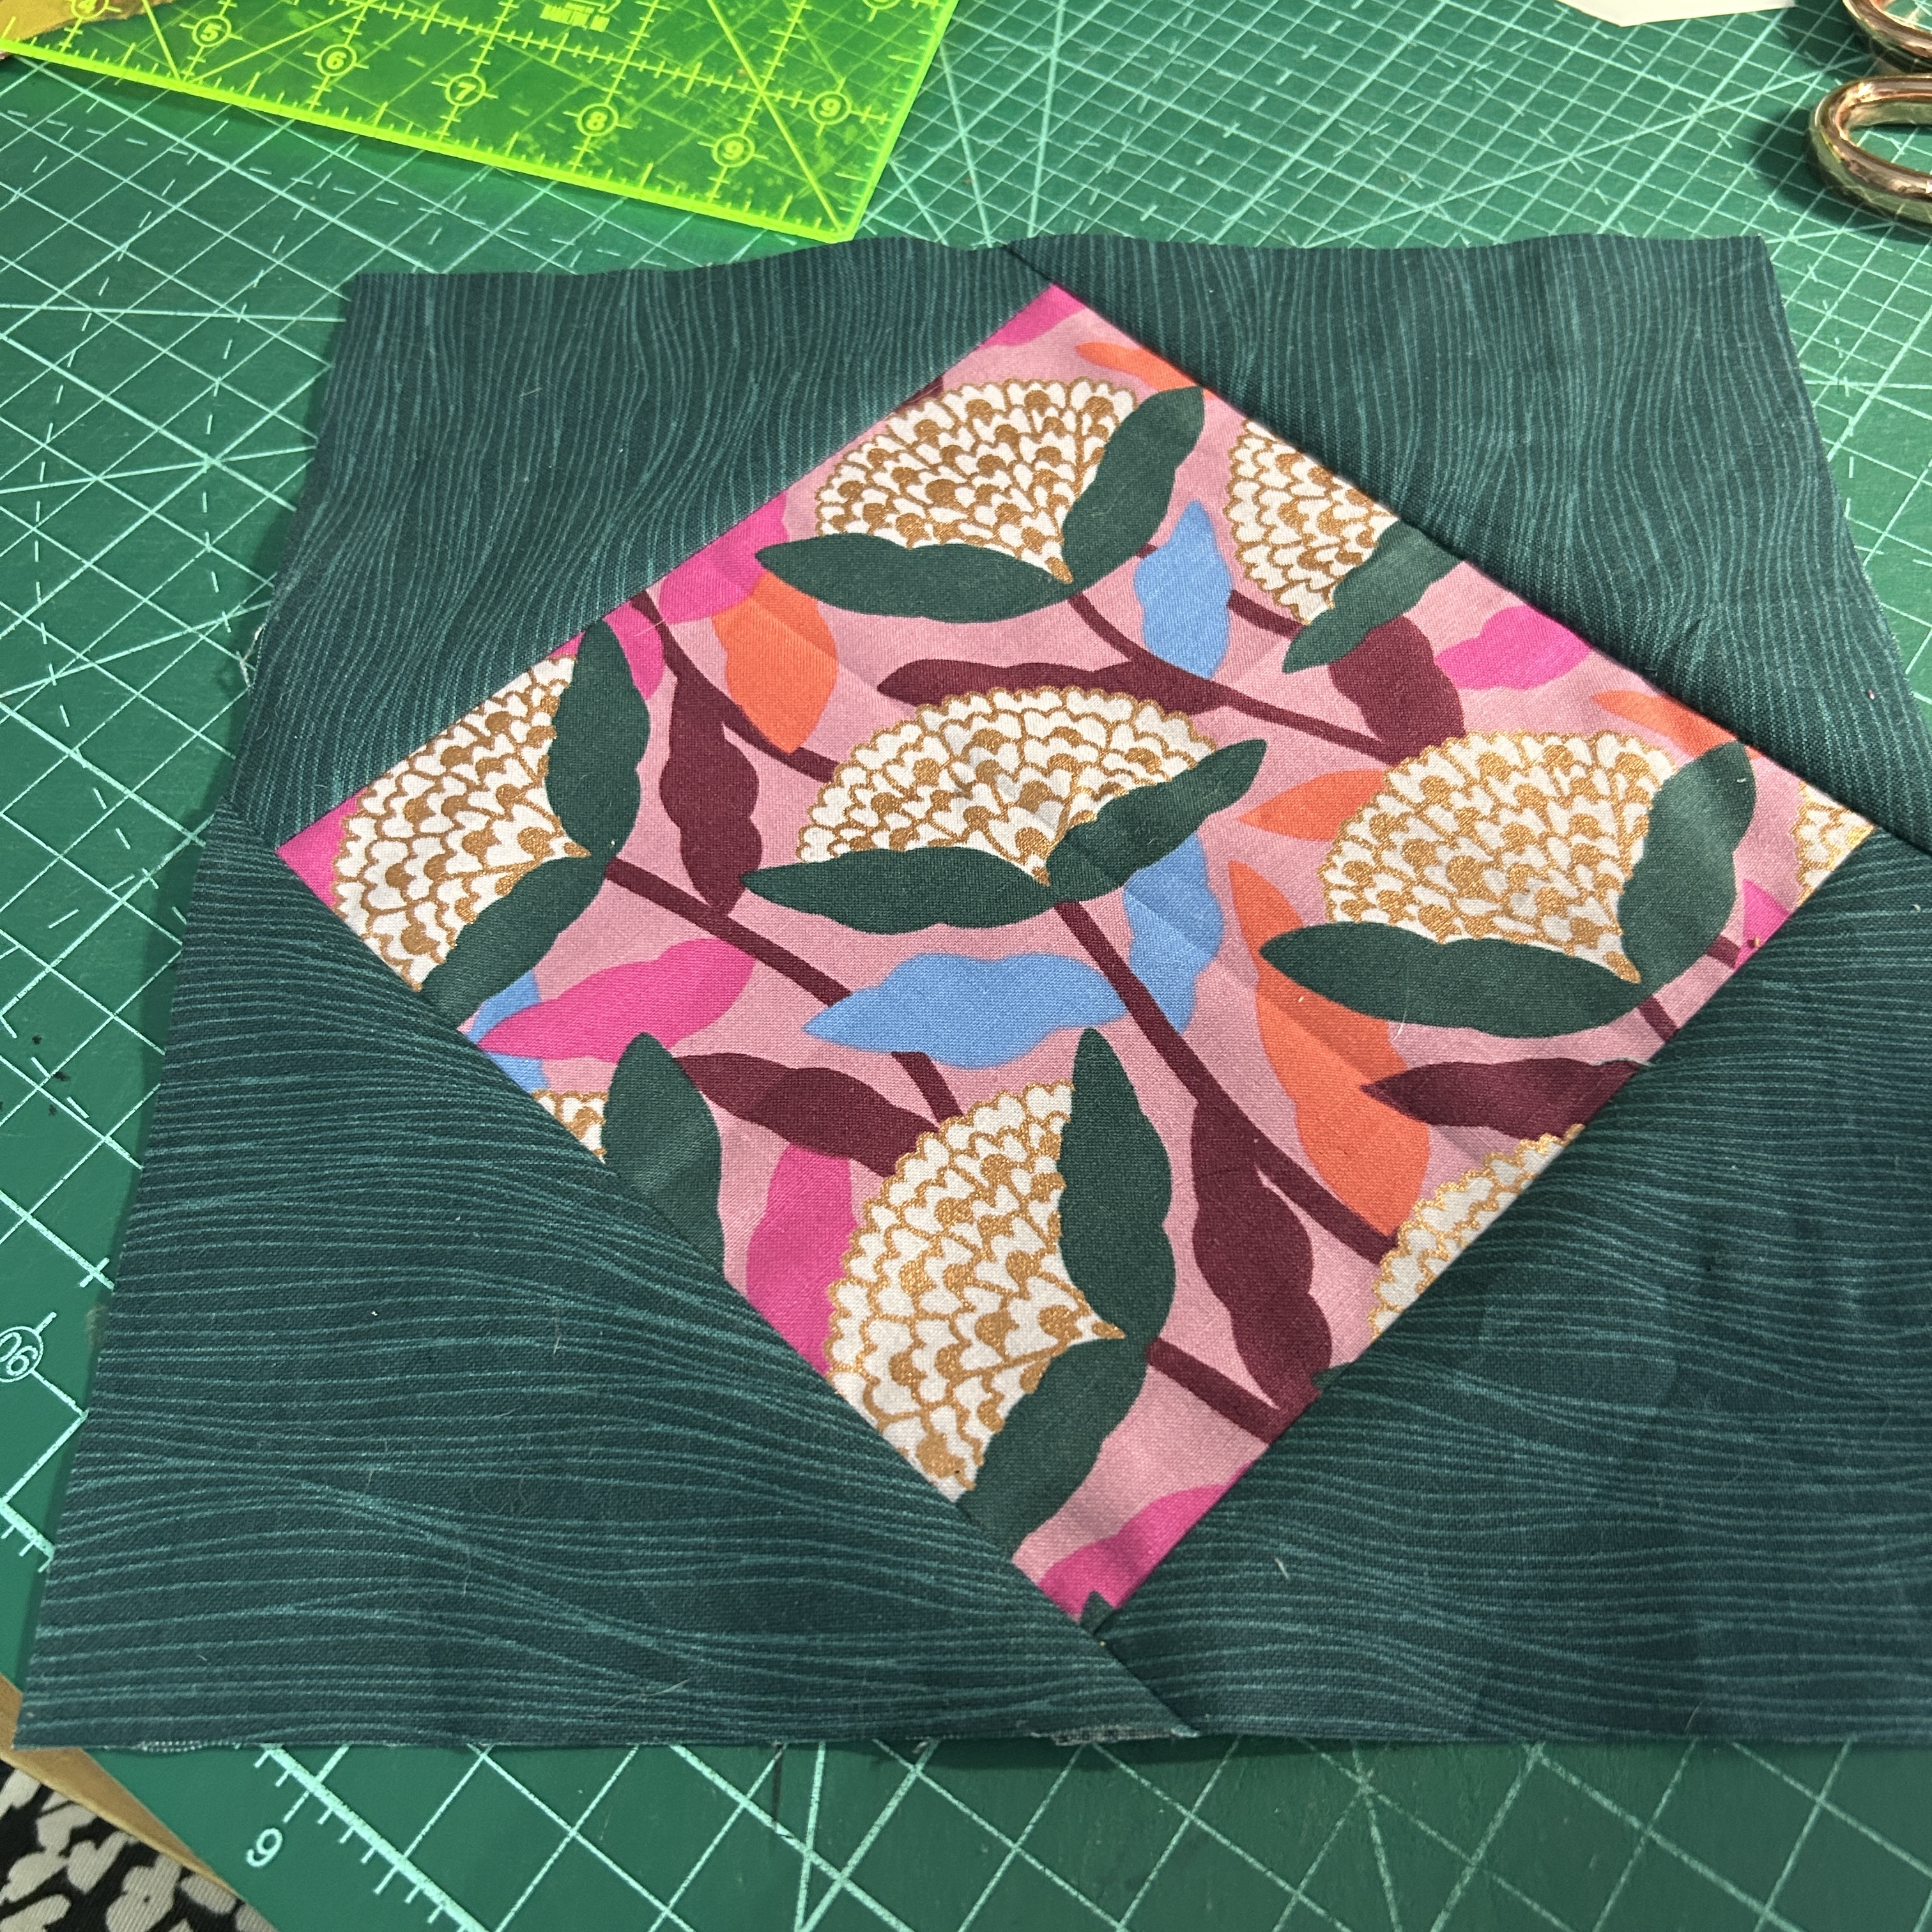

Square to 12.5 inches (leaving a quarter inch beyond the points so the points won't be cut off when the quilt is assembled. (NB: the block above doesn't leave enough room after squaring up to preserve the points of the second round -- I adjusted the sizes of the triangles so the one below is better, and those are the sizes I give in the cutting list above).