
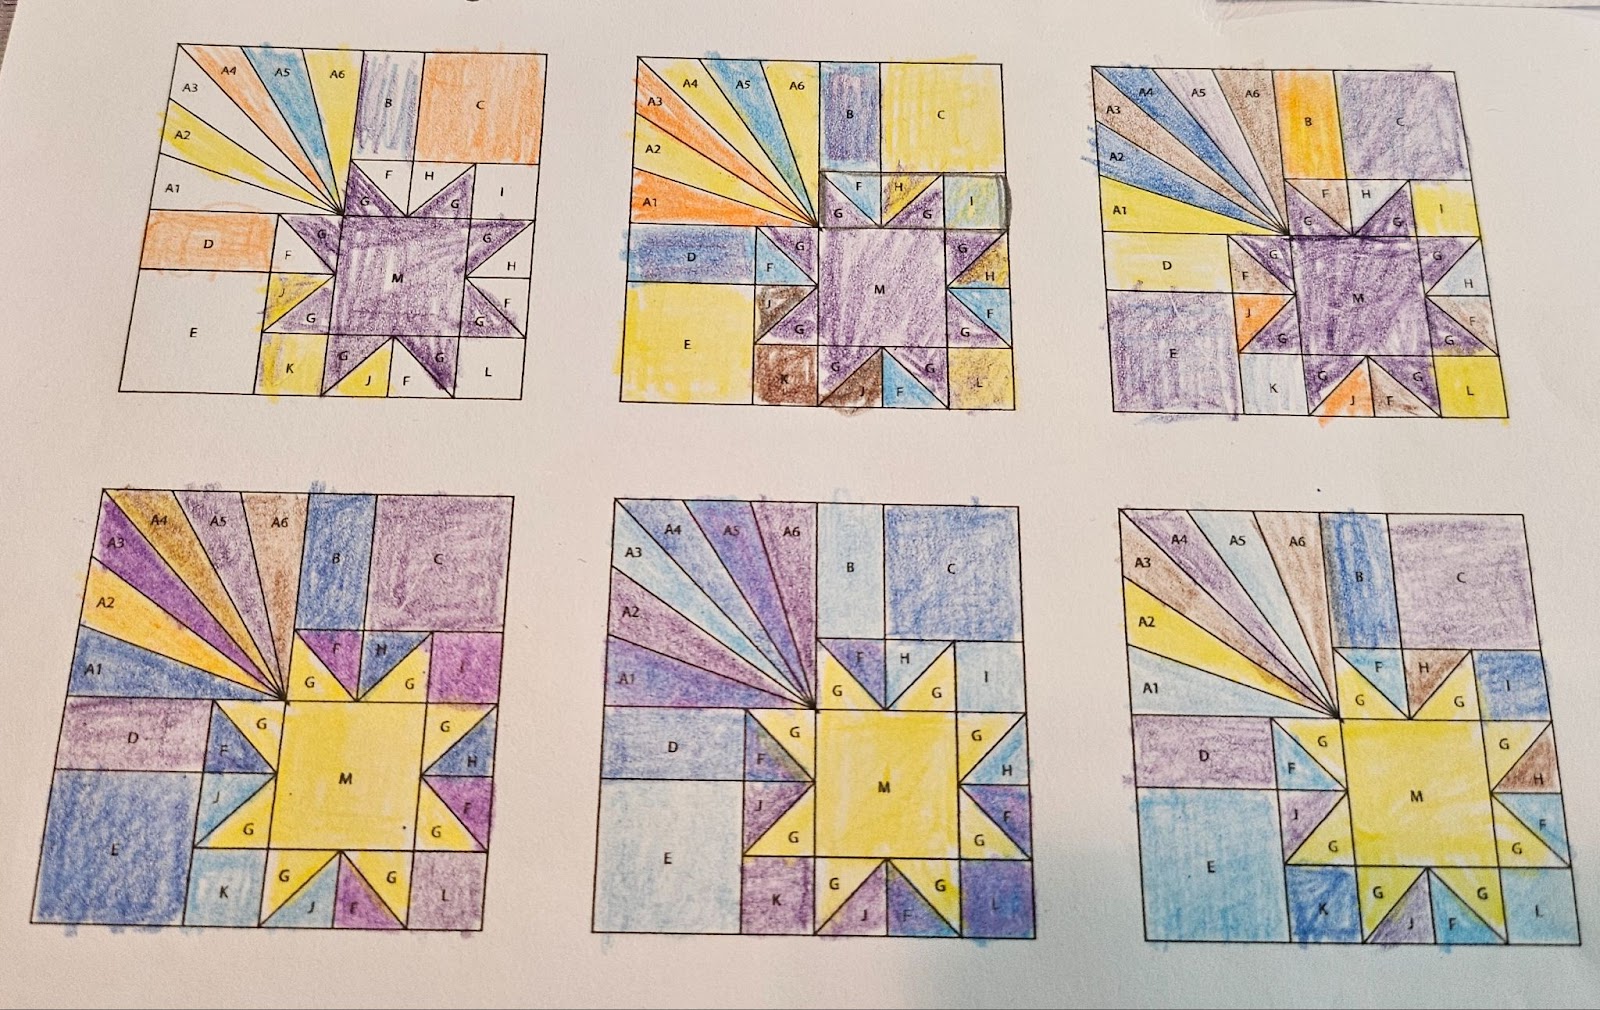
2024, October, Hive 2
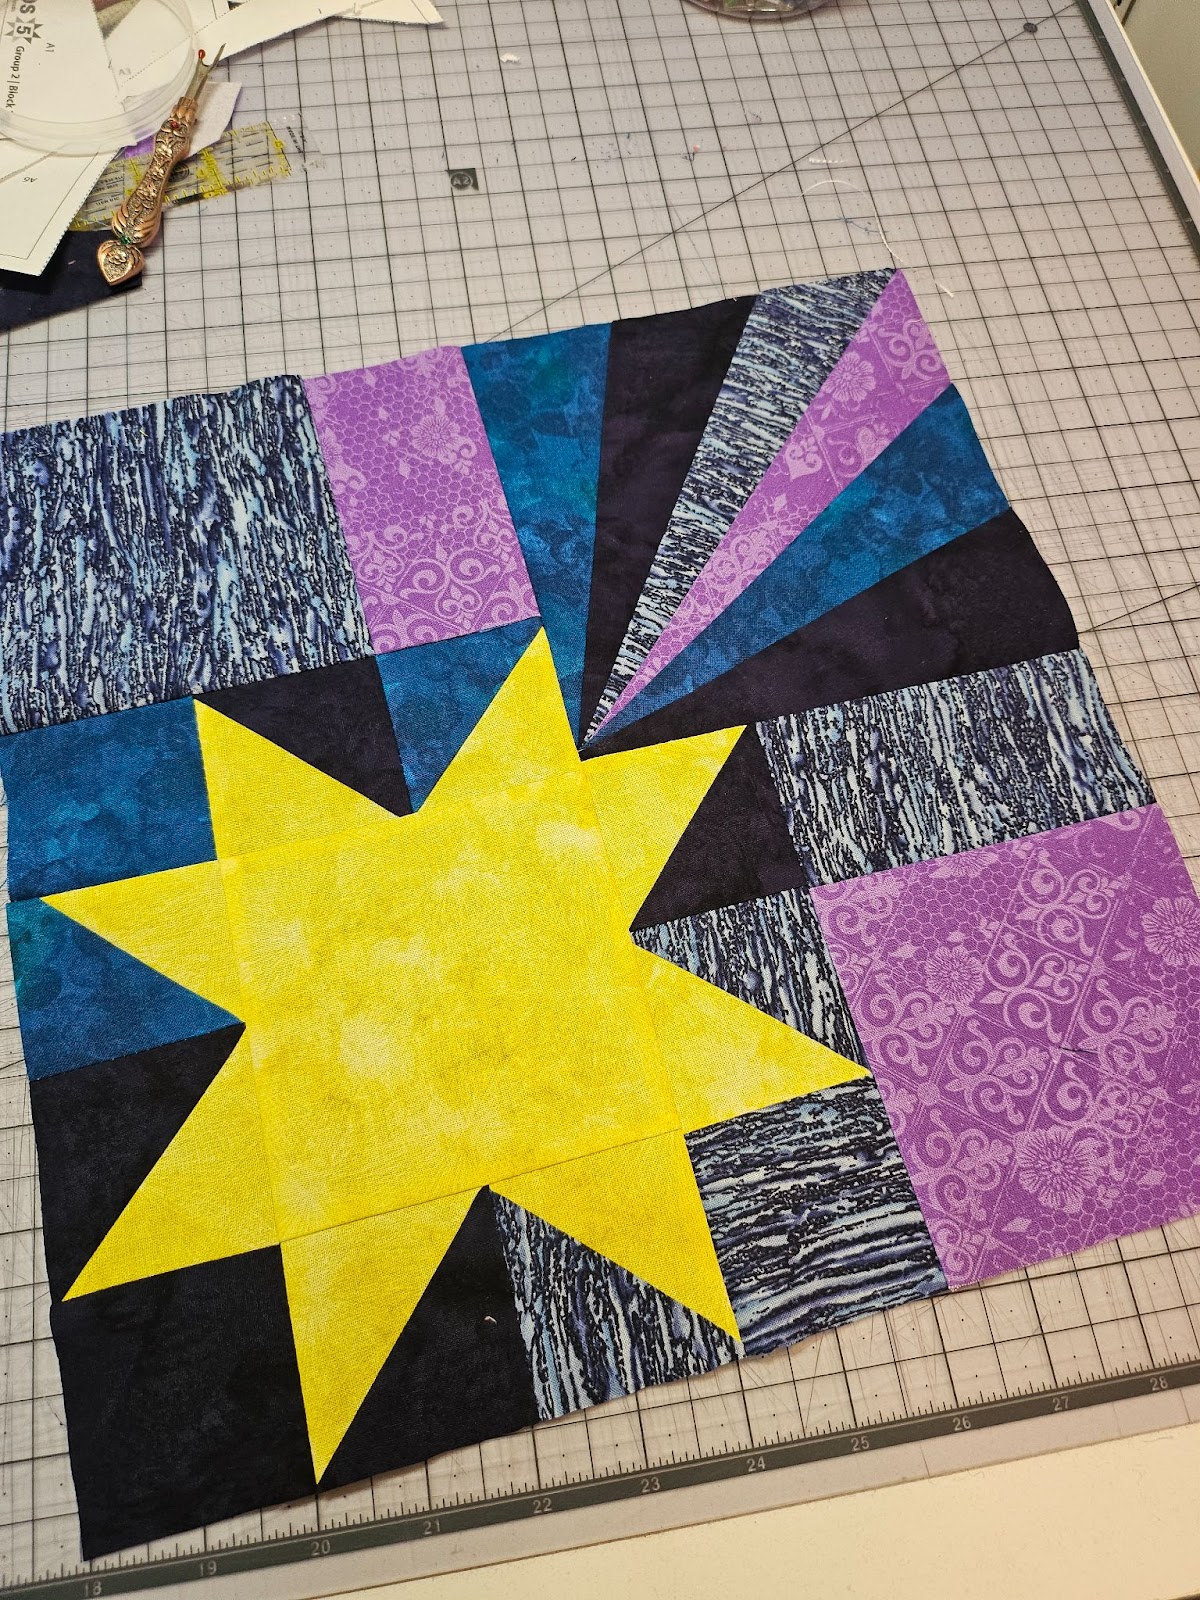
12” finished block
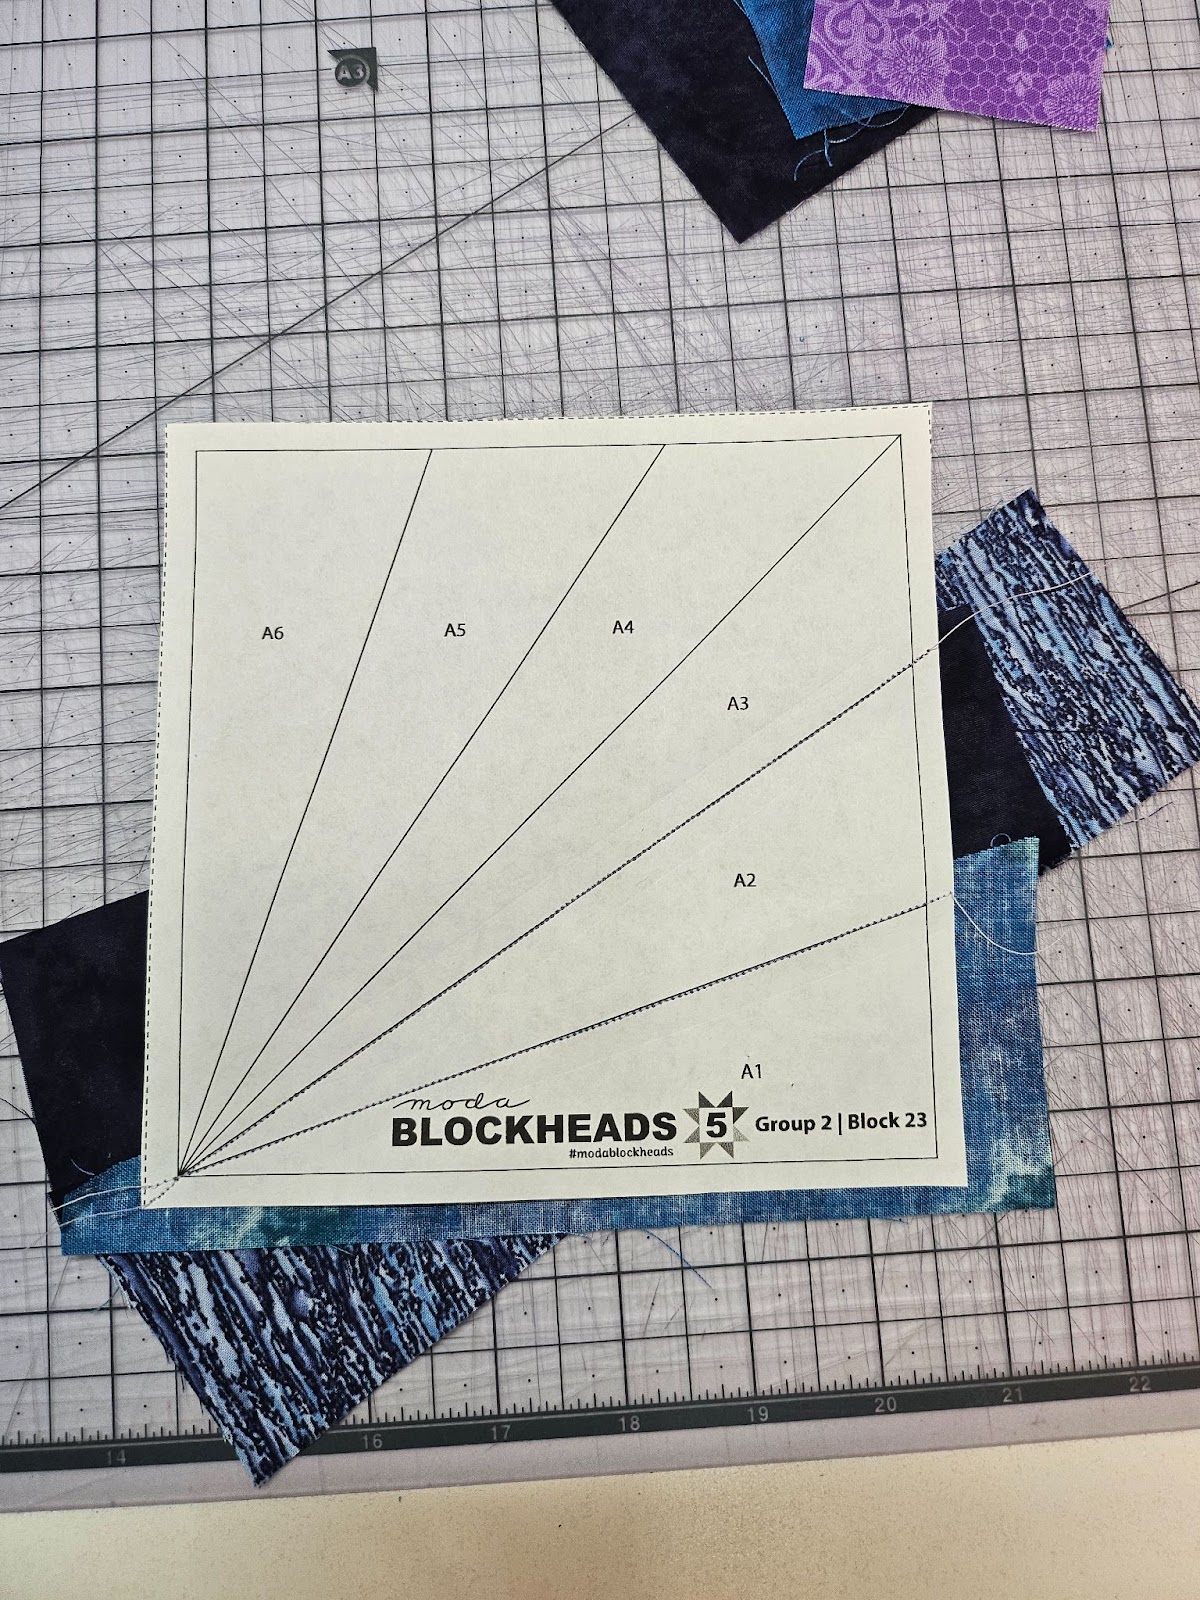
This is from Moda Blockheads 5 by Sarah Watts of Ruby Star Society. Group 2 Block 23.
https://modafabrics.com/inspiration-resources/bh5-group-2-block-23-sarah-watts
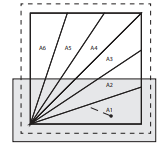
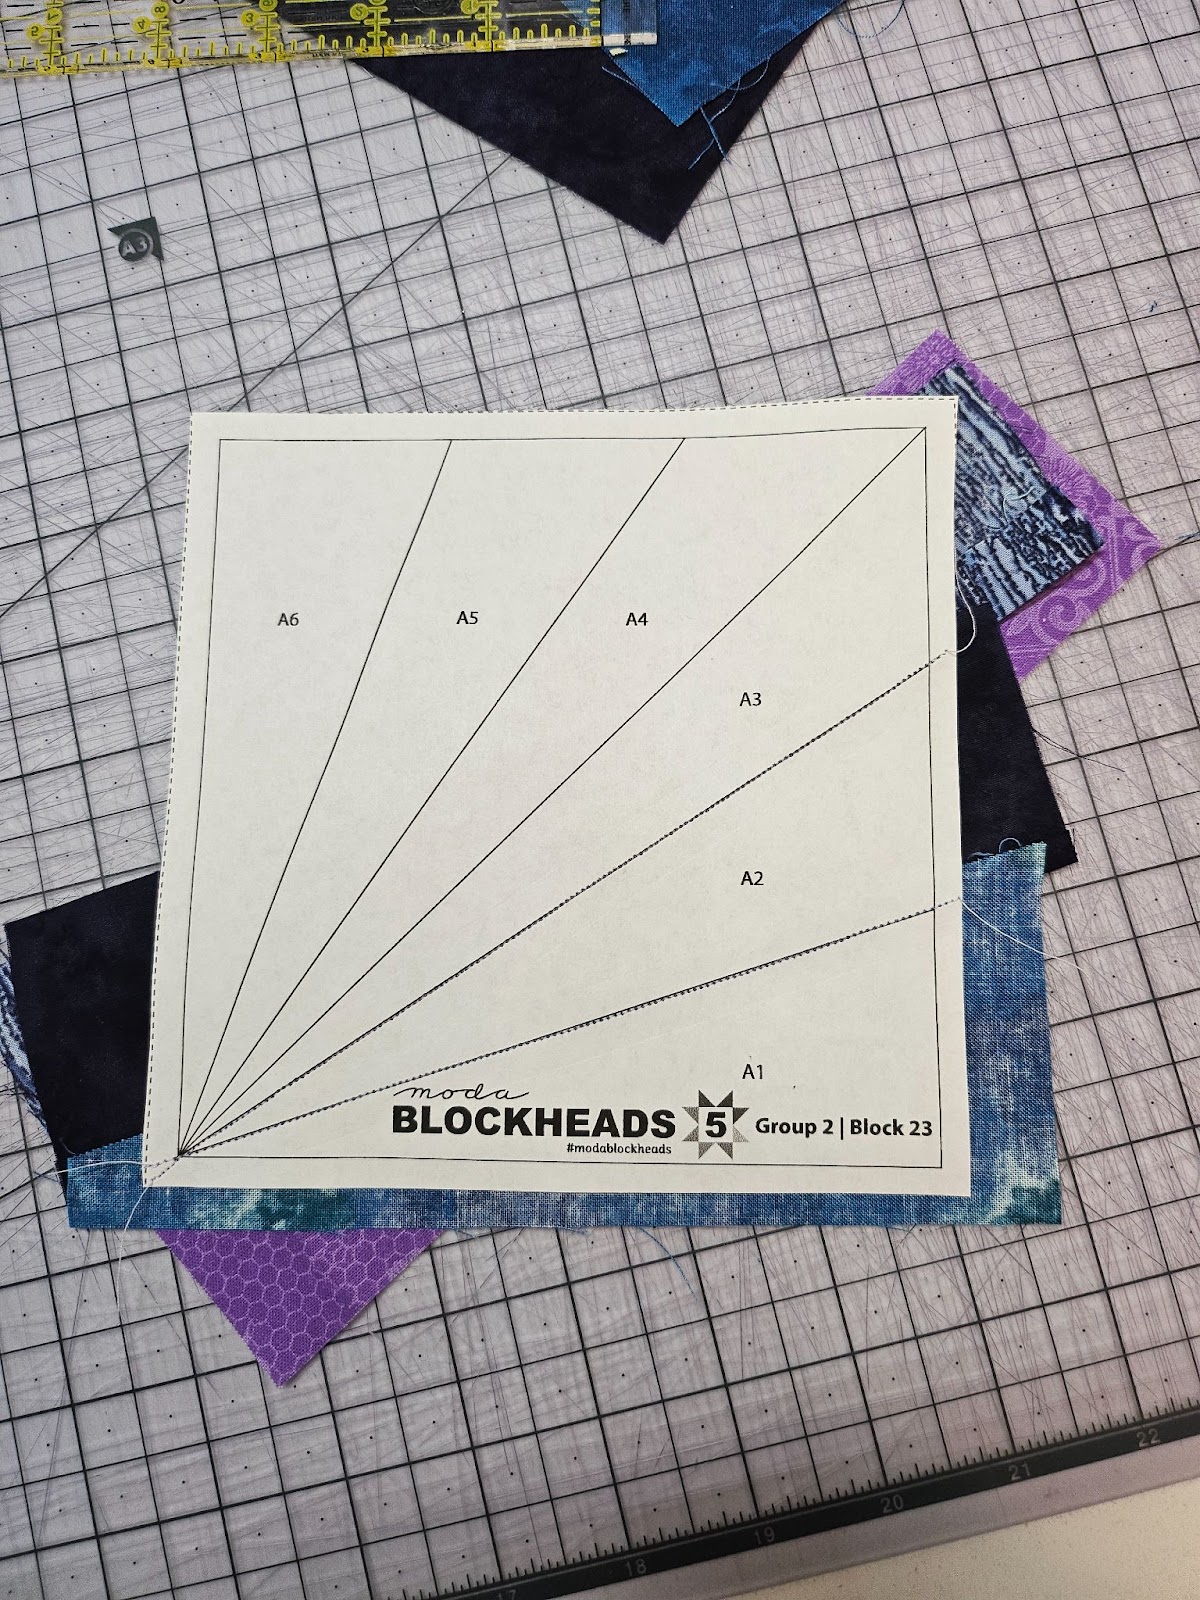
TEMPLATE FOR PAPER PIECING:
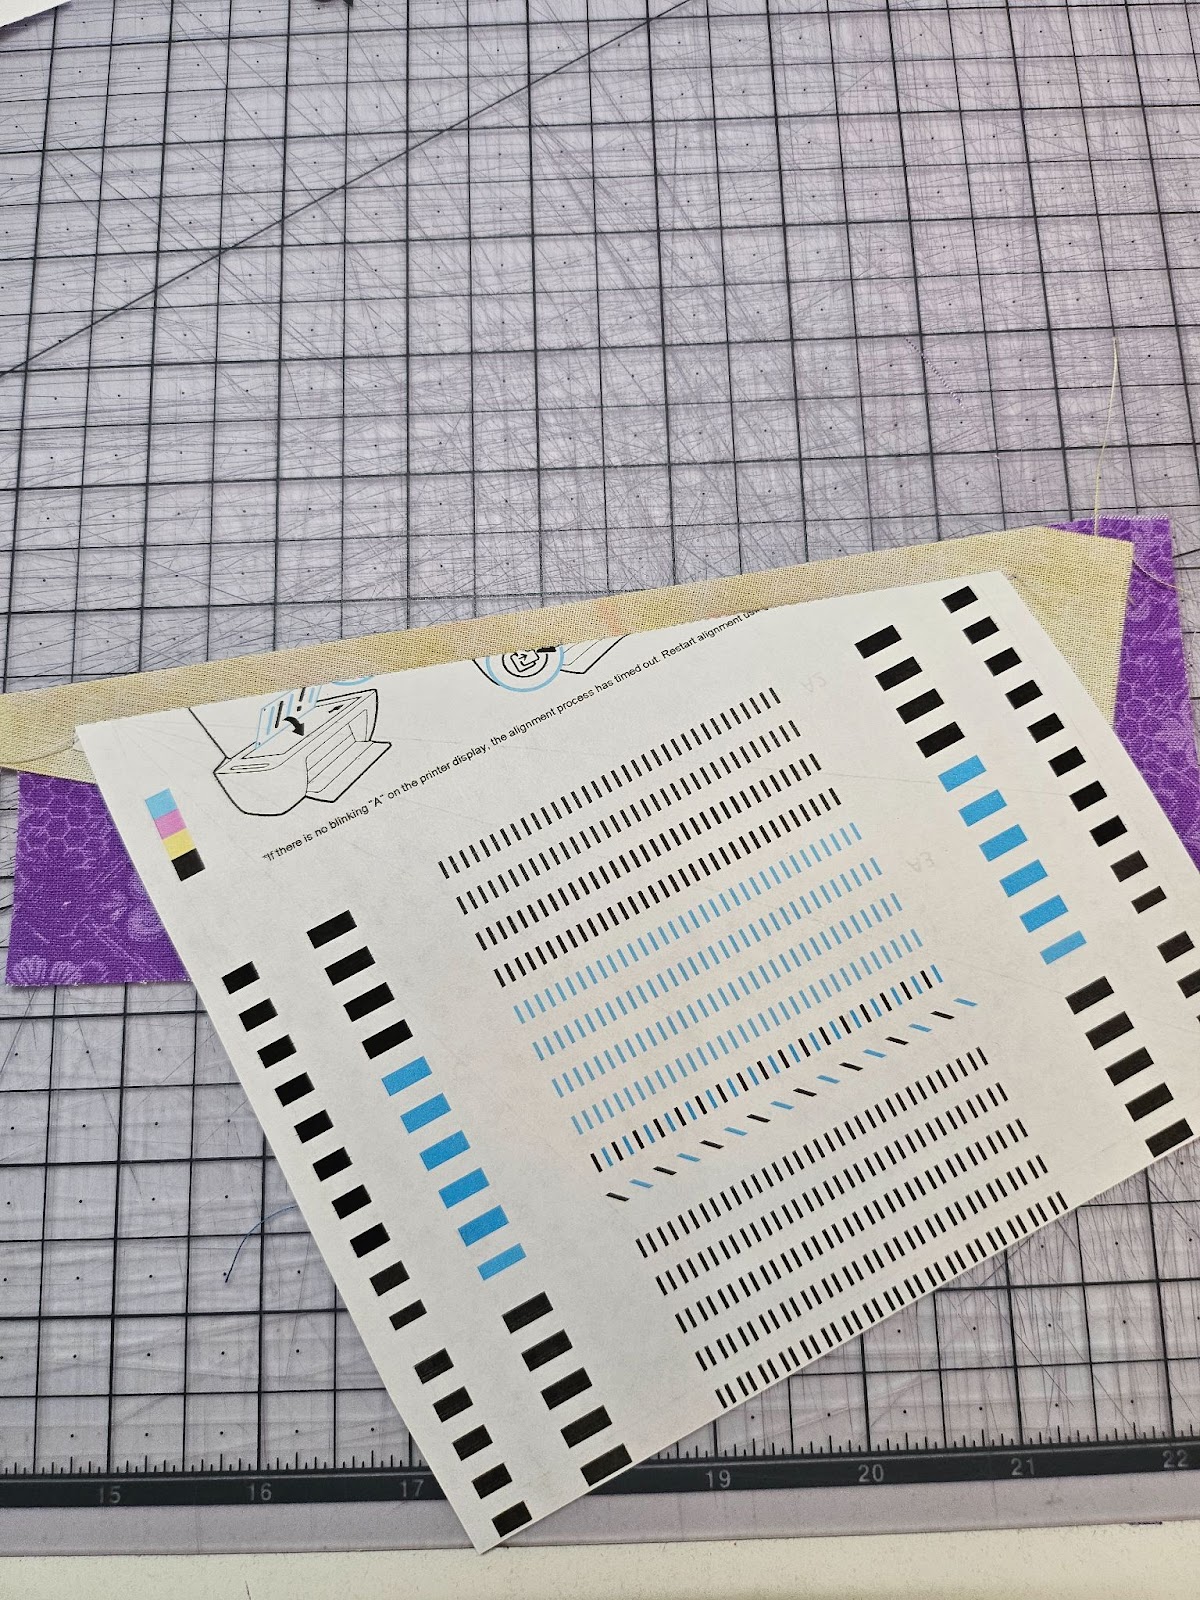
The PDF link has the right print sizing - Make sure you print using ‘actual size’ and measure the 1” square on page when you print it. Don’t print to fit or anything.
If you want a coloring page for planning there is one on the PDF, and also a swatch key that I found helpful.
FABRIC
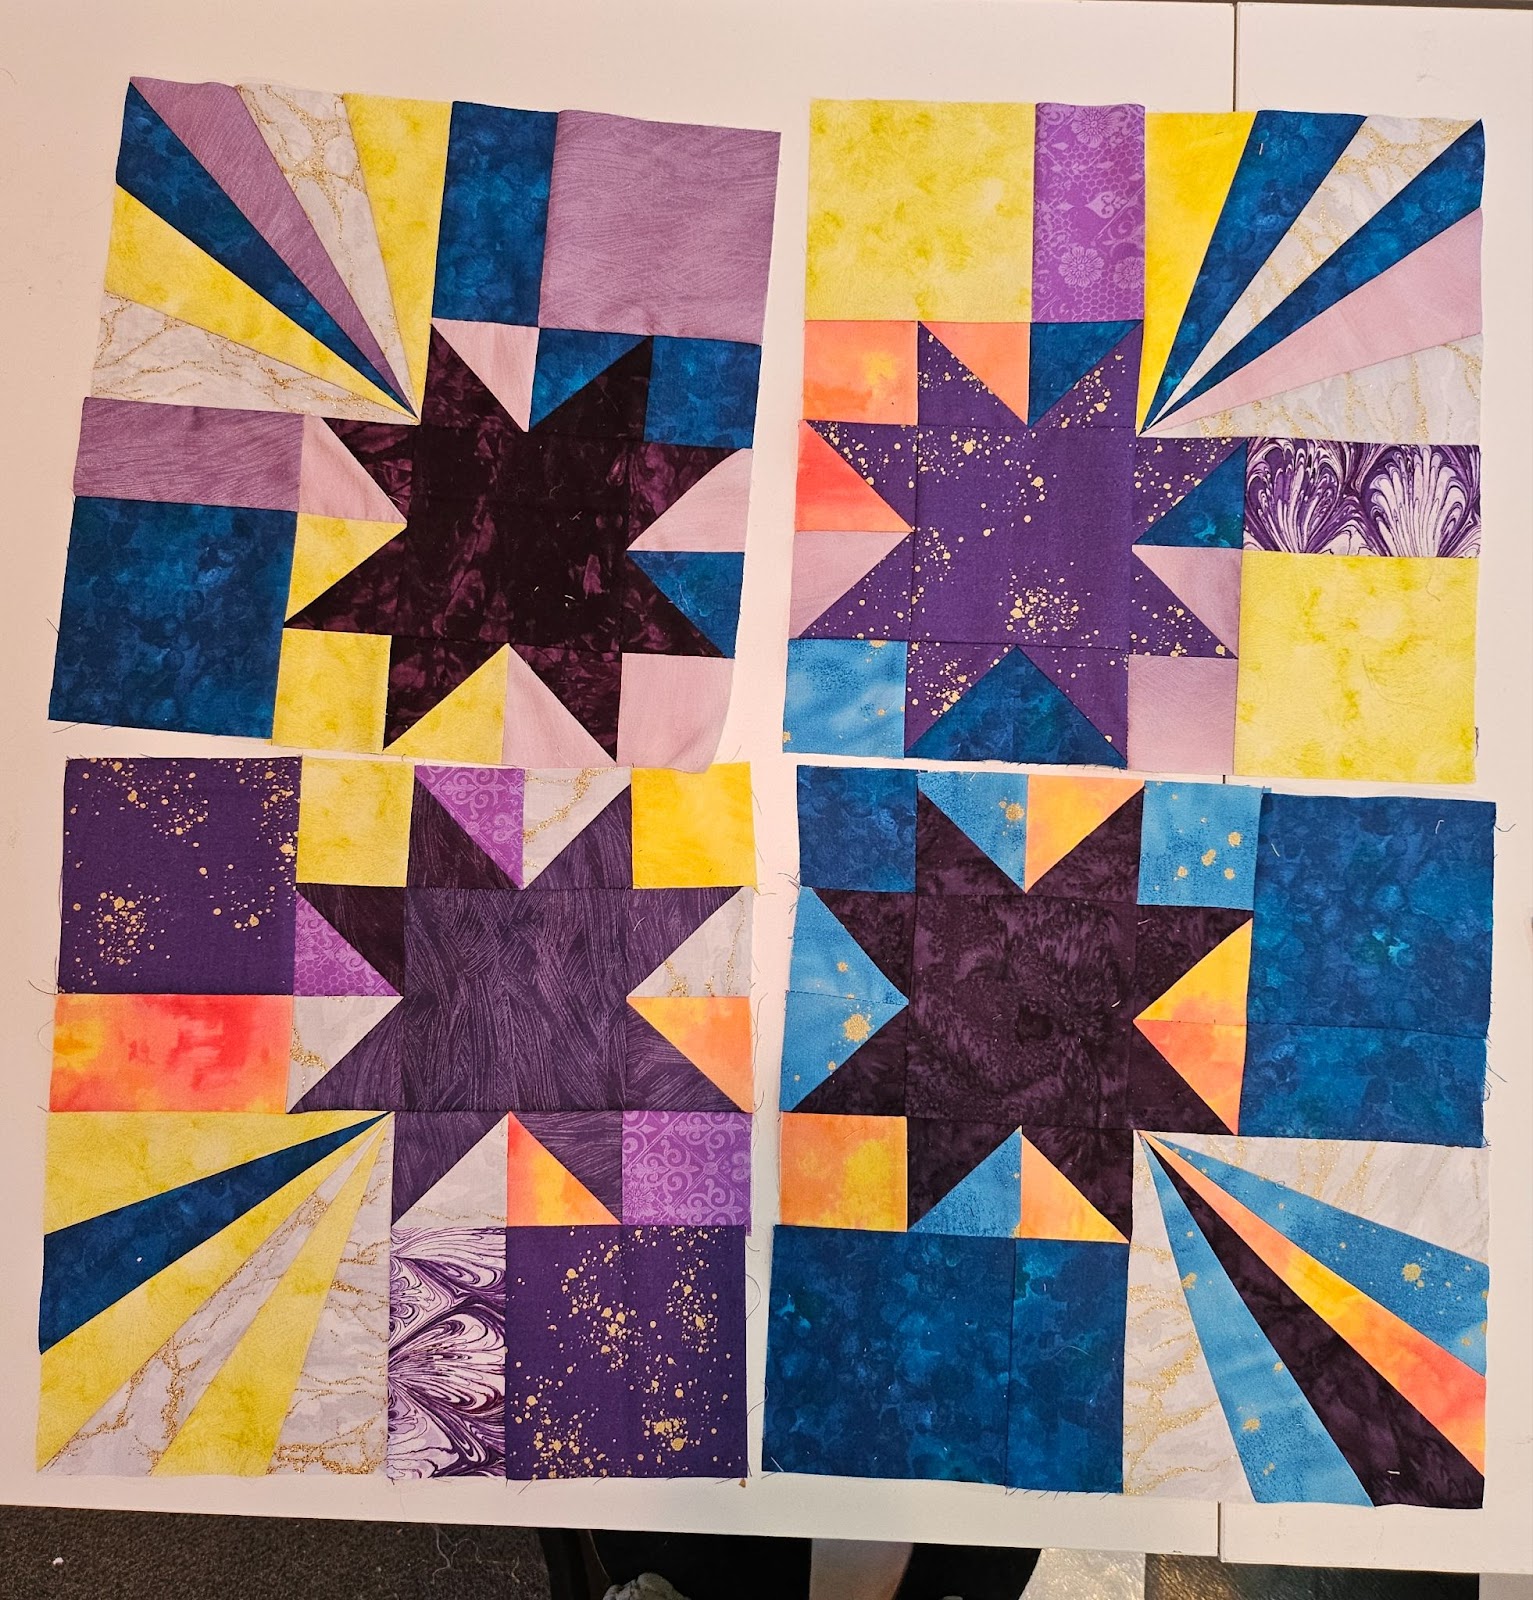
I’m looking for a yellow star with purples, blues, grays. White or yellow can be used in the star trail. Fabrics should be batiks, tone on tone, abstract print or celestial patterns are ok, glittery/shiny are great. No novelty or holiday prints. No solids! Feel free to mix it up: not use the assigned Fabric #s, or mix in other/more fabric choices, so long as the star is yellow and that yellow or white are only used in the trail. You know what looks good! In the fabric pull here I have a hexie design that I think would work in moderation. The one white looks solid in the picture, but there’s a light pattern in there.
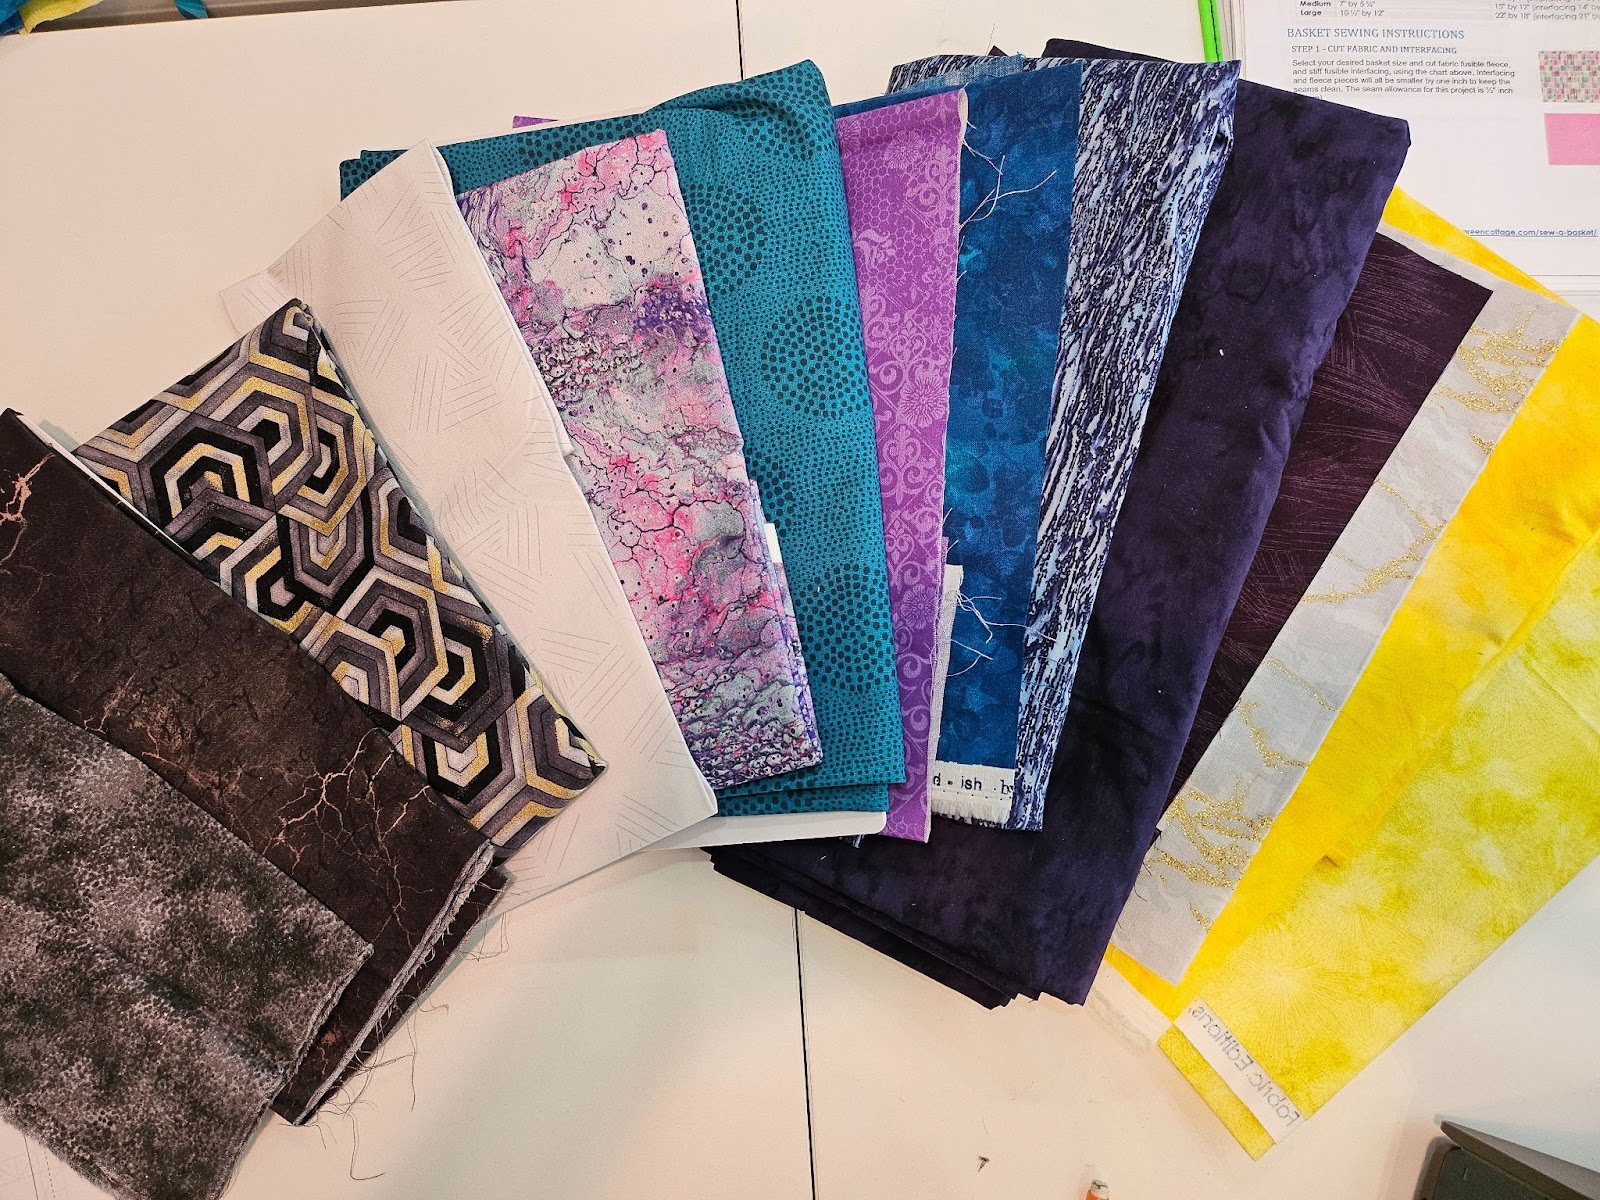
NOTE: if you cut the wrong matched fabric number/letter, don’t feel the need to redo it, just use that color, it’s fine (unless it’s yellow or white)
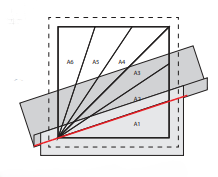
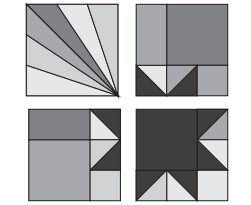
This template helped me out the most:
(I tried it with purple stars first and didn't like them)
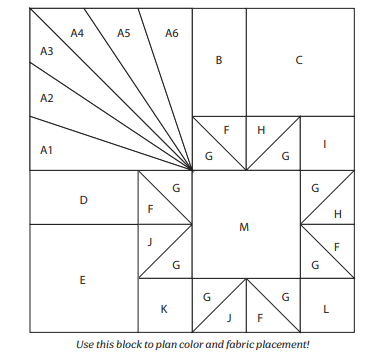
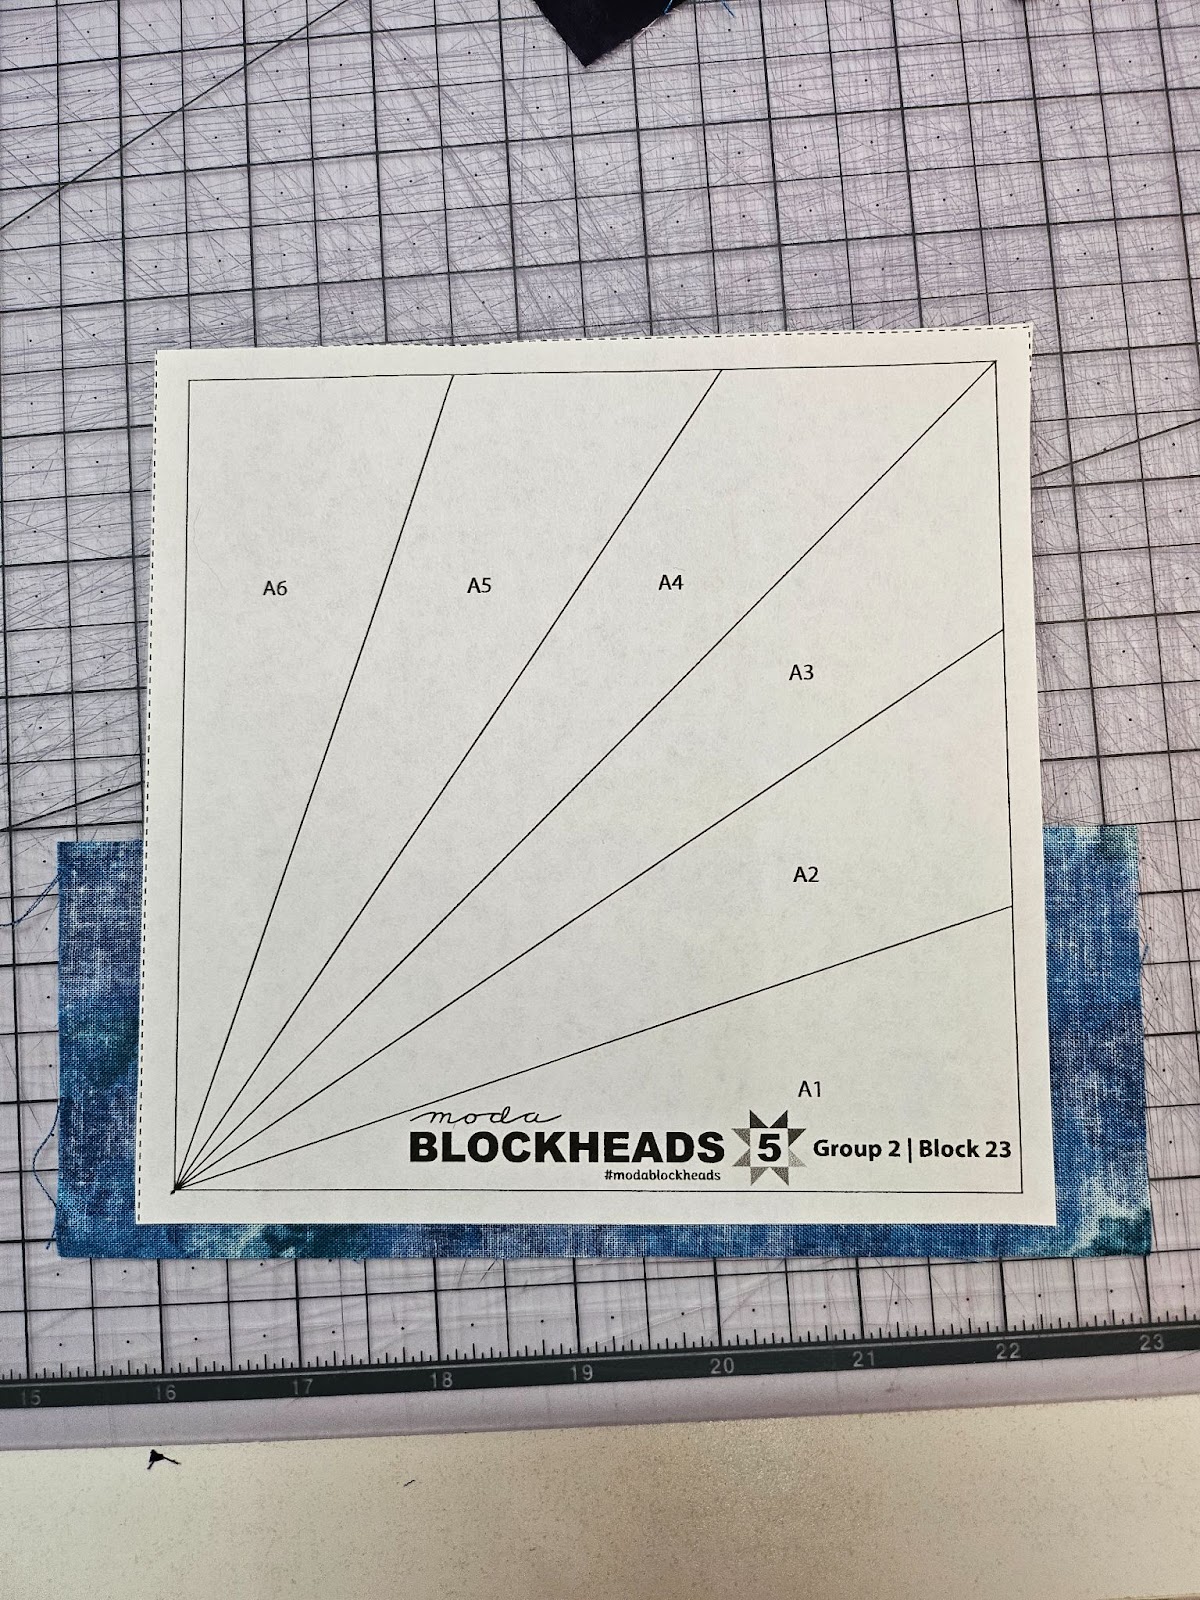
STEP 1
Place your cut A1 fabric so that it covers section A1 on the back of your paper template, wrong sides together. (You might have to hold your fabric and template up to the light to ensure the fabric is lined up properly.) The printed side of the paper should be facing up.
A1 will be the only piece that will be wrong side up.
Ensure that the piece of fabric covers all neighboring printed lines by at least ¼” and a little more. All cut pieces should allow for plenty of trimming room and seam allowances.
If your fabric piece is short or seems too small, recut a larger piece. Once the fabric is positioned properly, secure it with a pin or a bit of glue.
STEP 2
Place your cut A2 fabric on “top” of the A1 fabric, right sides together and edges aligned along the seam allowance. Make sure that your A2 fabric will extend beyond the A2 section by at least ¼" and a little more after sewing and pressing out. Pin in place.
With the paper template facing up, sew along the printed line between A1 and A2 using a short stitch length and backstitching at the beginning and end of the seam.

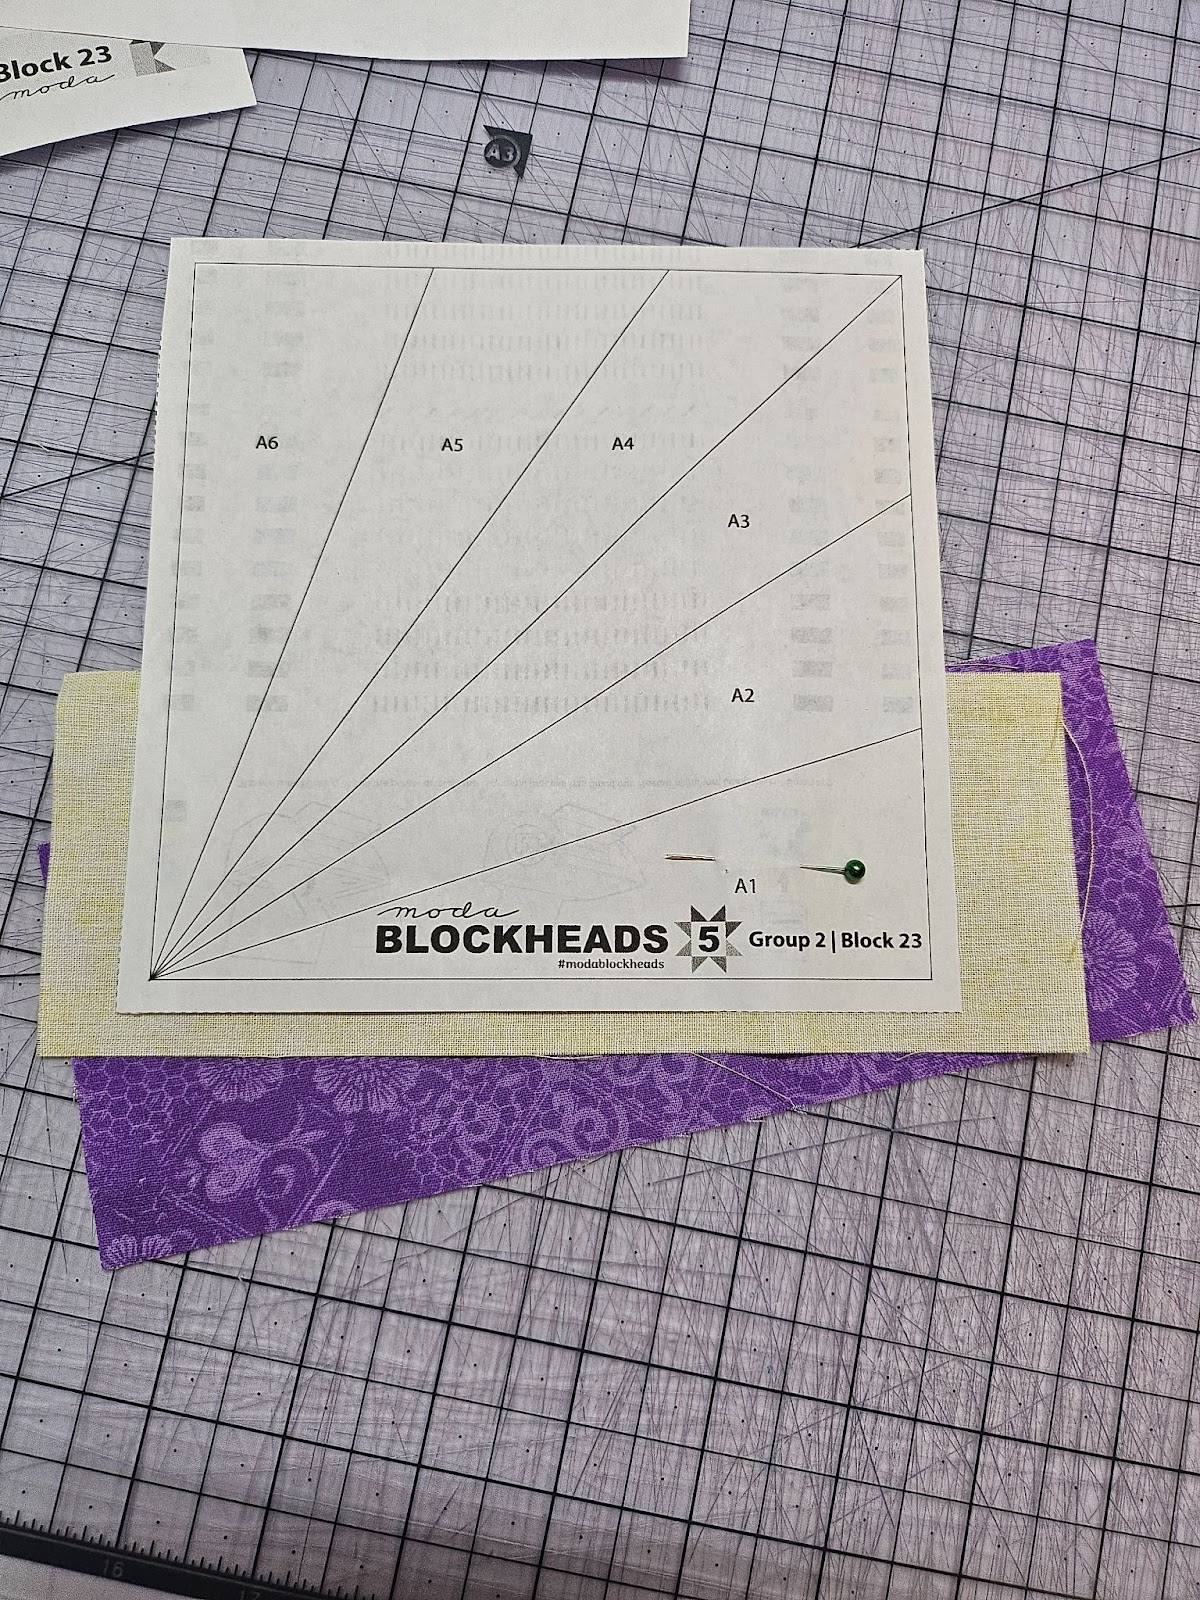
With the printed side facing up, fold the paper top part down/towards you and onto itself along the stitched seam to expose the fabric underneath and trim to a ¼" seam allowance.

Press the A2 fabric out and away from A1:
STEP 3
Repeat the previous steps to join A3 to A2. Continue adding sections in order numerically until the unit is complete.
Trim sides of the unit along the dashed seam allowance line, making sure not to cut into the 1⁄4” seam allowance.
Carefully remove the paper from the completed unit and set aside.
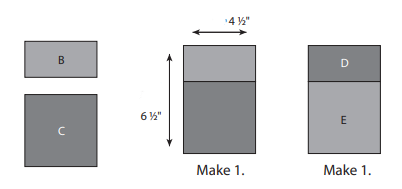
STEP 4
Join the B rectangle to the C square as shown to make a B/C unit measuring 4 ½” x 6 ½”.
Using the D and E squares, repeat to make a D/E unit measuring 4 ½” x 6 ½”.
STEP 5
On the wrong side of each F square, draw a line from one corner to the opposing corner as shown.
Place F and G squares right sides together. Stitch a scant ¼” seam on both sides of the drawn line. Cut the square apart on the line to yield 2 HSTs and press the seams to the darker triangles (G).
Repeat to make 4 F/G HSTs, 2 H/G HSTs, and 2 J/G HSTs.
Trim all HSTs to 2 1⁄2”.

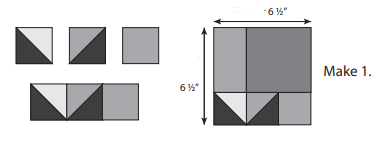
STEP 6
Sew one F/G HST, one H/G HST, and the I square together into a row. Join row to the bottom of the B/C unit to make a unit measuring 6 1⁄2”.
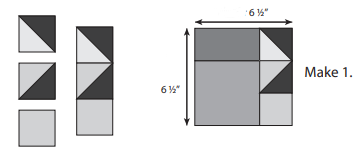
STEP 7
Sew one F/G HST, one J/G HST, and the K square together into a row. Join row to the right side of the D/E unit to make a unit measuring 6 1⁄2”.
STEP 8
Join one F/G HST to one H/G HST as shown and sew to the right side of the M square. Next, sew one J/G HST, one F/G HST, and the L square together into a row as shown. Join row to the bottom of the M unit to make a unit measuring 6 1⁄2”.
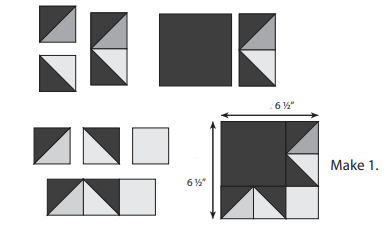
STEP 9
Lay out the FPP unit and the units made in Steps 6-8 as shown. Join units to make the full block. 12 1⁄2”.
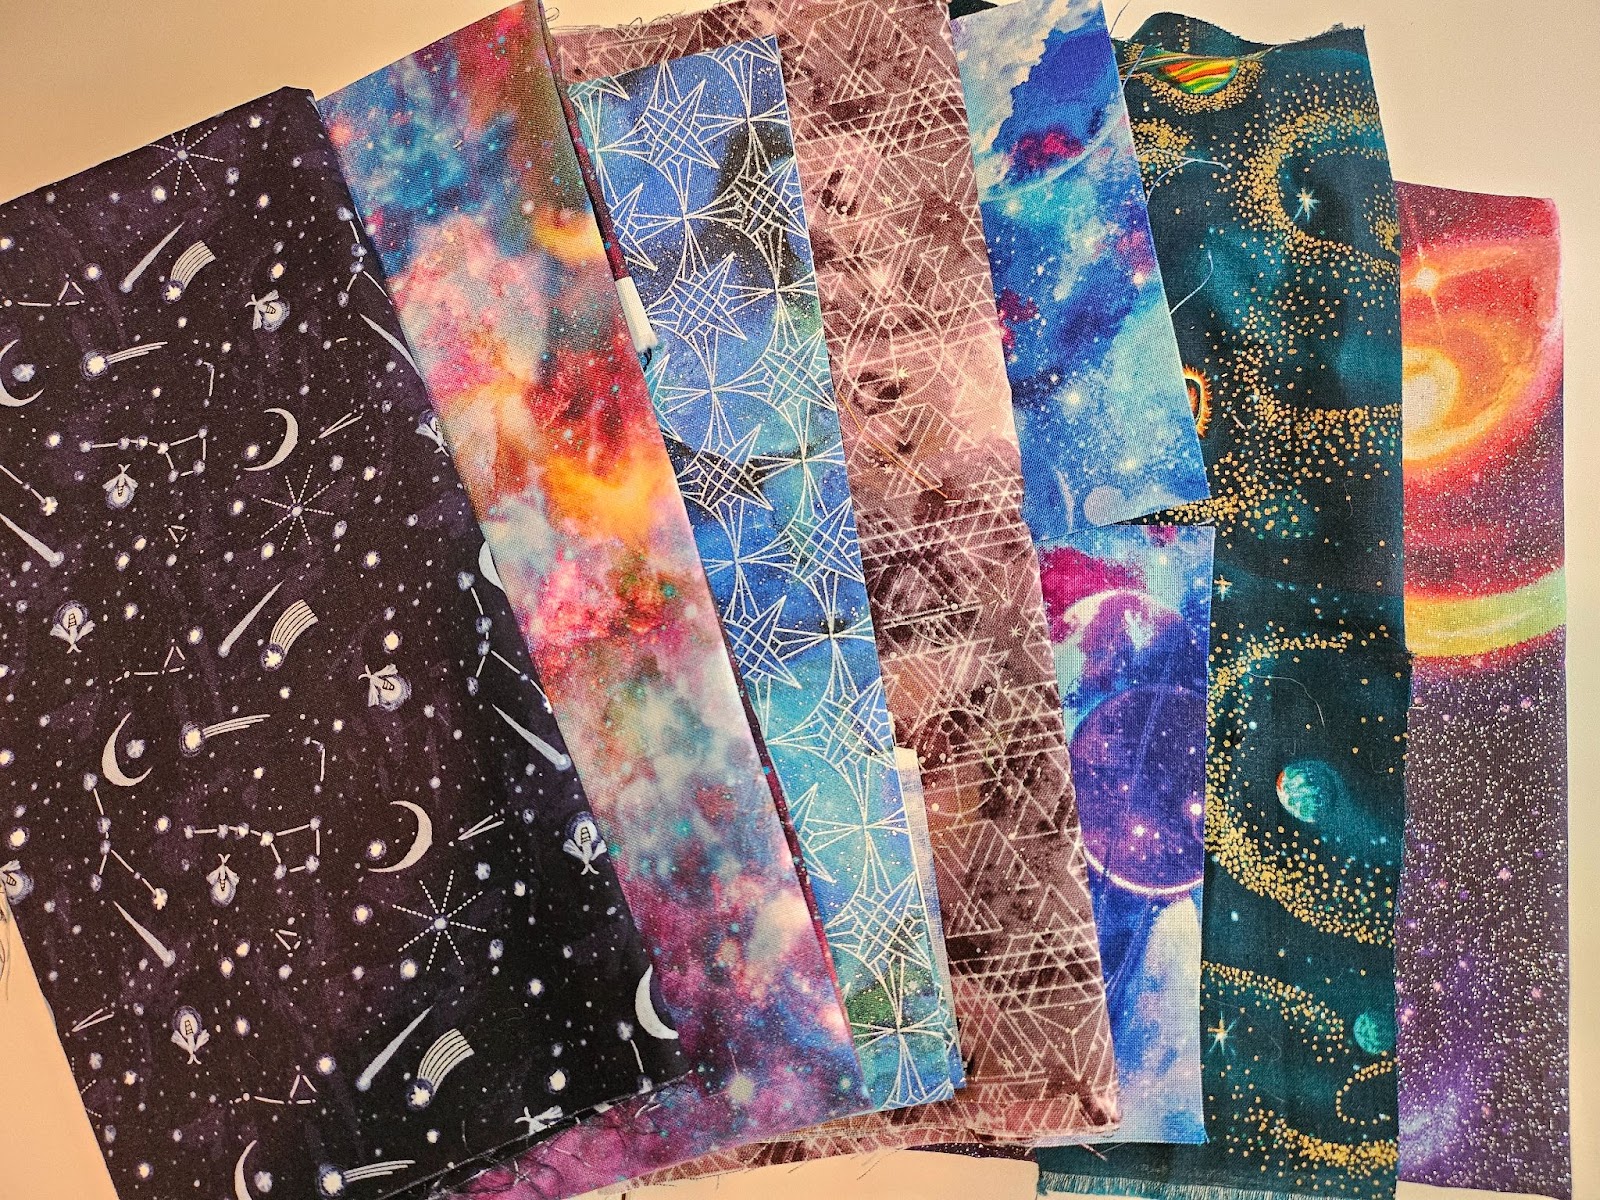
These are ones that I decided to use for the corners since I liked the yellow star better, but these are some other fabrics I’ve pulled:
No comments:
Post a Comment