
LOVE Block

I would like you to make a L O V E block inside a frame of random borders.
For colors, you can be real scrappy. Just a few guidelines for choices of fabrics. Please go through your bag of scraps!
Letter backgrounds (BG) need to be same fabric within each letter. Choose a fabric that is either a small scale print, texture, solid or fabric that is not too wild.
For the letters themselves, pick a contrasting color. Then use any scrappy choices. I guess the big thing to think about is contrast. Here is an example of how I picked some fabrics and laid them out. I think my E was not as good in contrast as the others. You can view your fabrics in a grey scale to double check to see if you want to change anything. You can vary each part of the letters, but keep them in the same color family. I am not a fan of browns, and avoid solid whites and black.

There will be two ways to make the LOVE block. Either by foundation paper piecing method or cut and assembled with simple pieces. A FPP sheet will be mailed to you, if you would like. And I am offering an alternate block if you feel that the letters will be too difficult or time consuming. I don't want anybody to stress about it. See below for the alternative block. Finishing the blocks with strips to make it full size will be the same.
Each letter will measure 4 inches (3 1/2 inches finished). The four letters after sewn together will be a square of 7 1/2 inches. And strips will be added as a frame to make the block measure at 10 1/2 inches (10 inches finished).
Hints for FPP:
There are many online tutorials and videos you can watch if you are unfamiliar with the method.
Either tape or pin the first piece of fabric. Start with pieces 1 and 2 and sew seam on printed side of block. You can fold back the the paper on the sewn seam and trim the seams at 1/4 inch - just make sure you are only cutting the seams and not the fabric for the block. Remember to shorten your stitch length for easier paper removal.

For the center part of the E, I think it is easier to pre-piece the background (BG) and letter part and place those in center with the seam in somewhat the same place as the line between 1 and 2. Then proceed as usual. Remove paper and sew the L and O together side by side and then the V and E. Then sew the pairs together. I ironed toward the O and then with the lower pair towards the V. Then they could be nested. Block at this point should measure 7 1/2 inches square.
 |
| This paper is shown in the wrong side, the printed side is the sewing side. |
Second choice for letter blocks:
Note these sizes will work, but if yours vary a bit, that is totally fine. Do not worry! If each block can be read as the letter, I am happy with it!
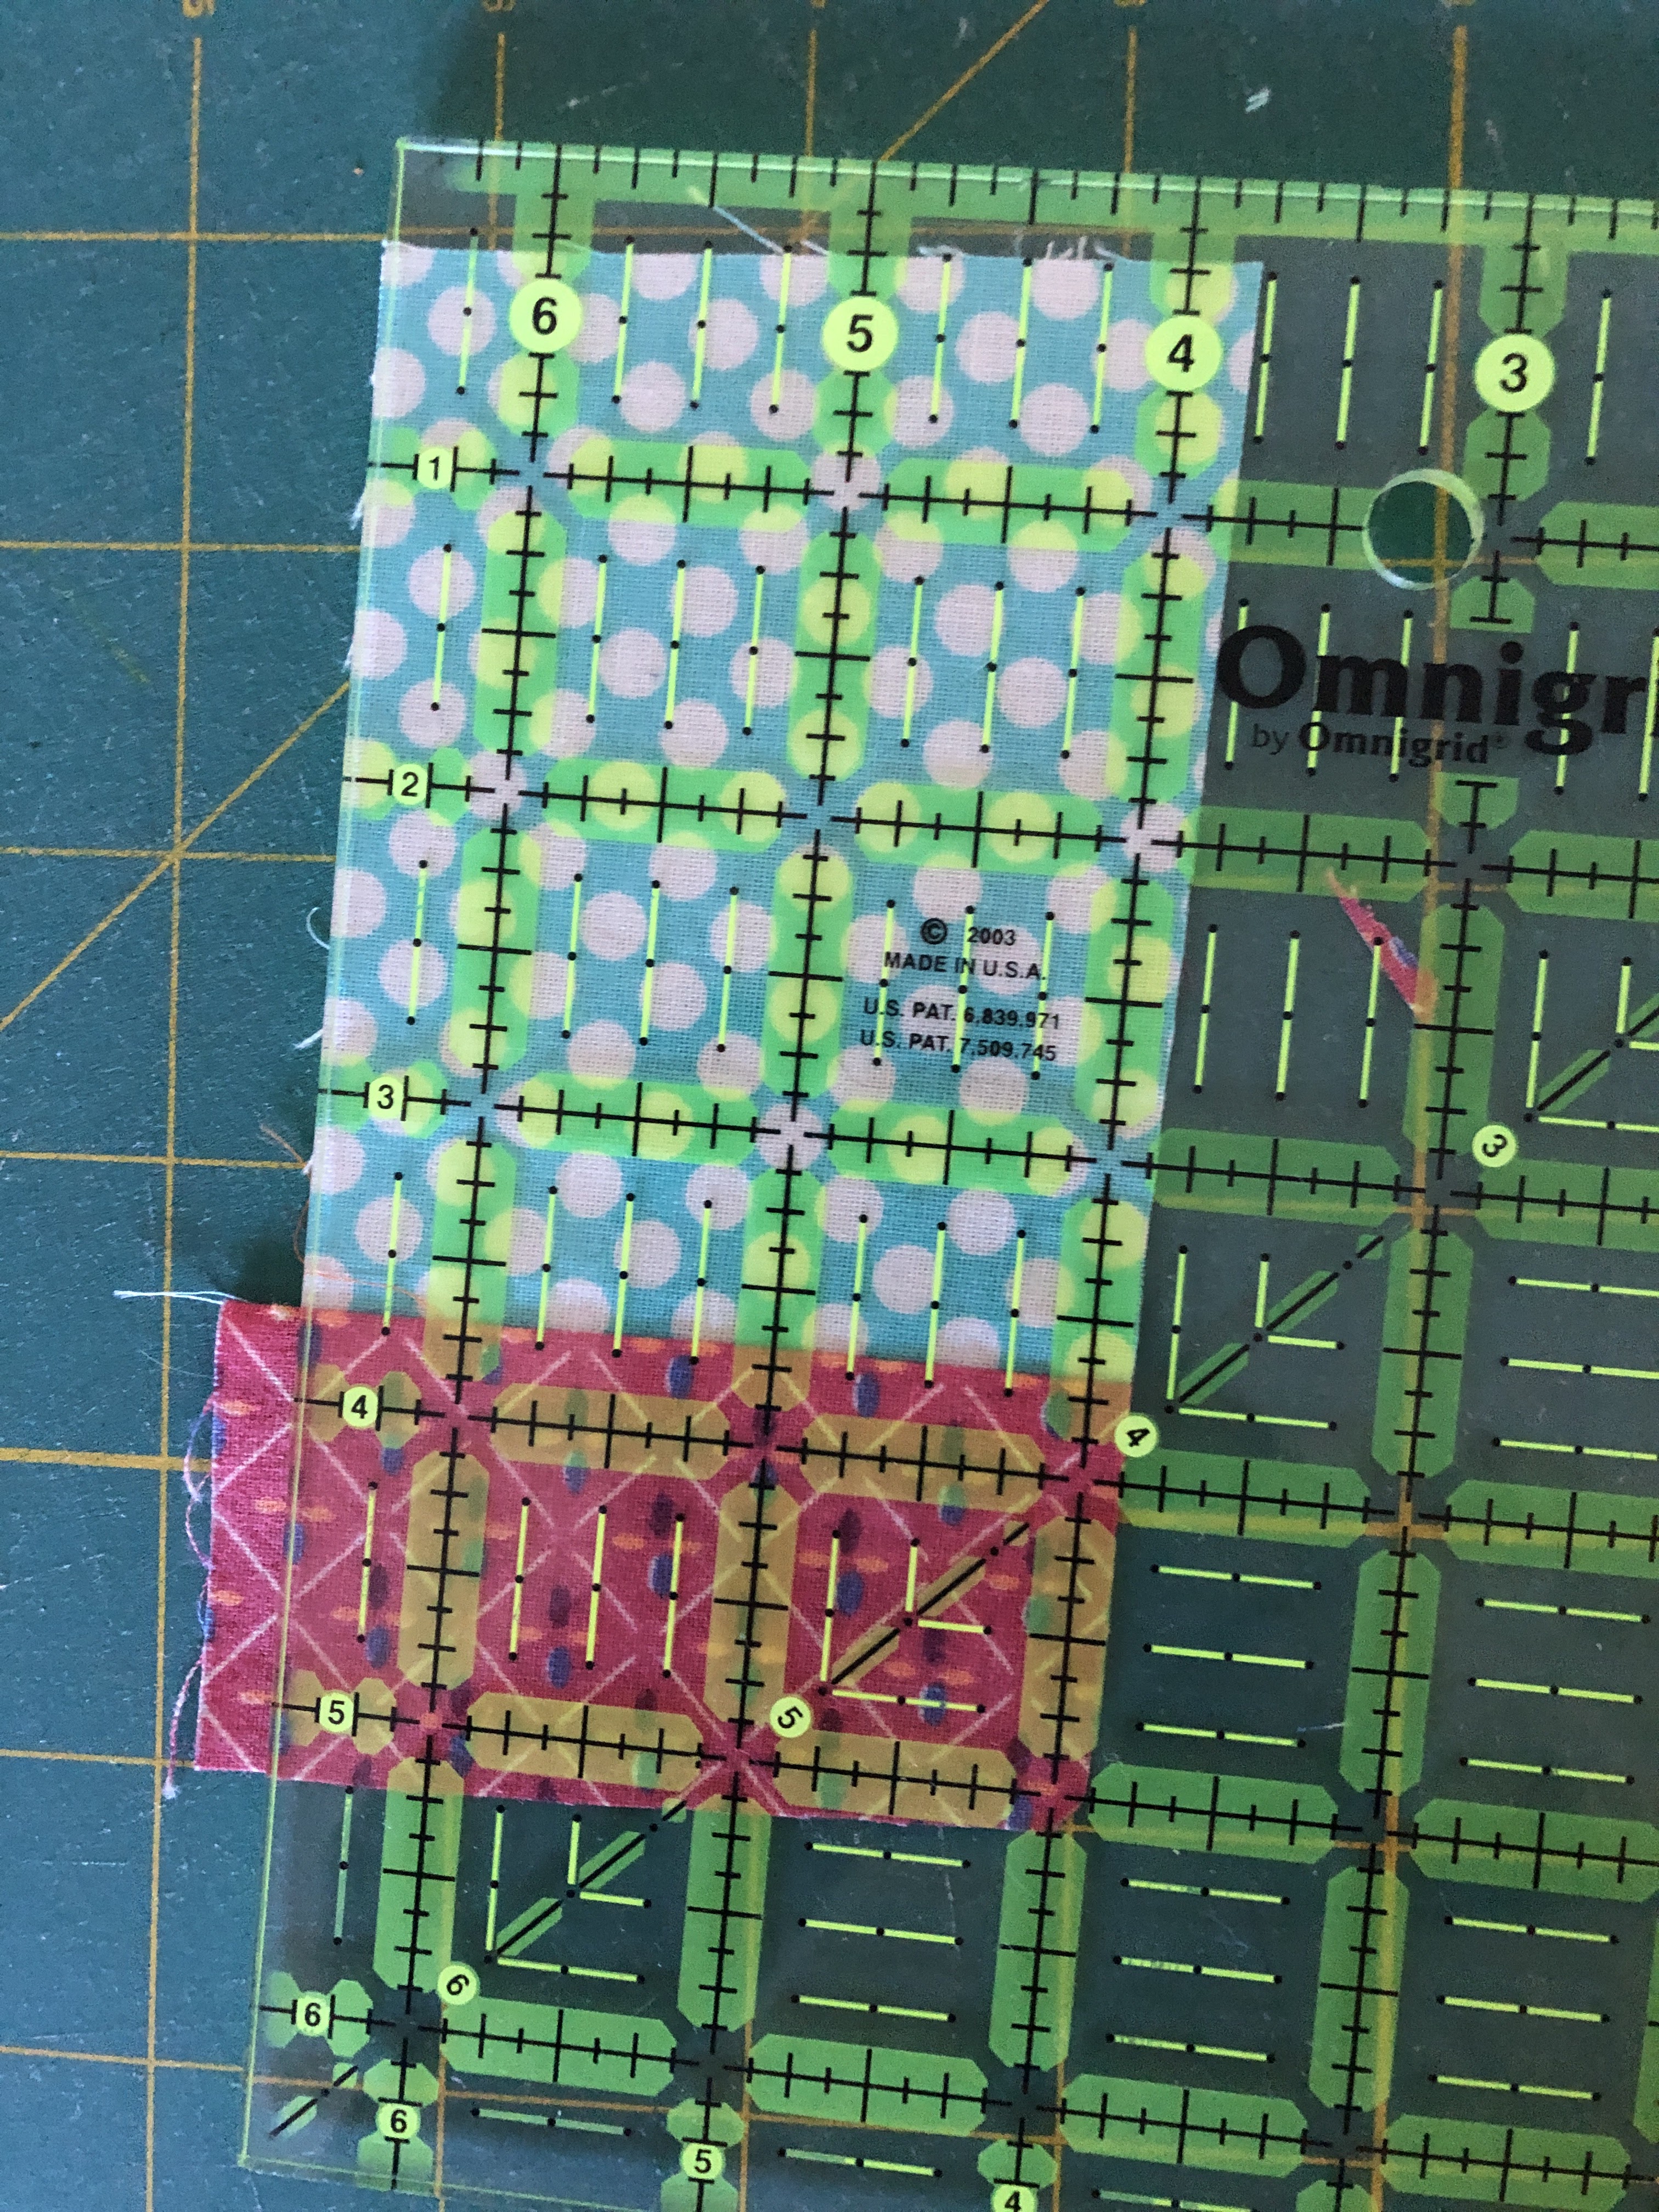
For L, cut a BG square/rectangles around 3 by 3 1/2. Cut the bottom L part at least 1 3/4 strip and a little wider than the BG square. This can be sewn at a slight angle, if so just cut the strip a little longer. Trim edge on left and put the left hand L part on, at least a 2 inch strip. Trim block to 4 inches square.
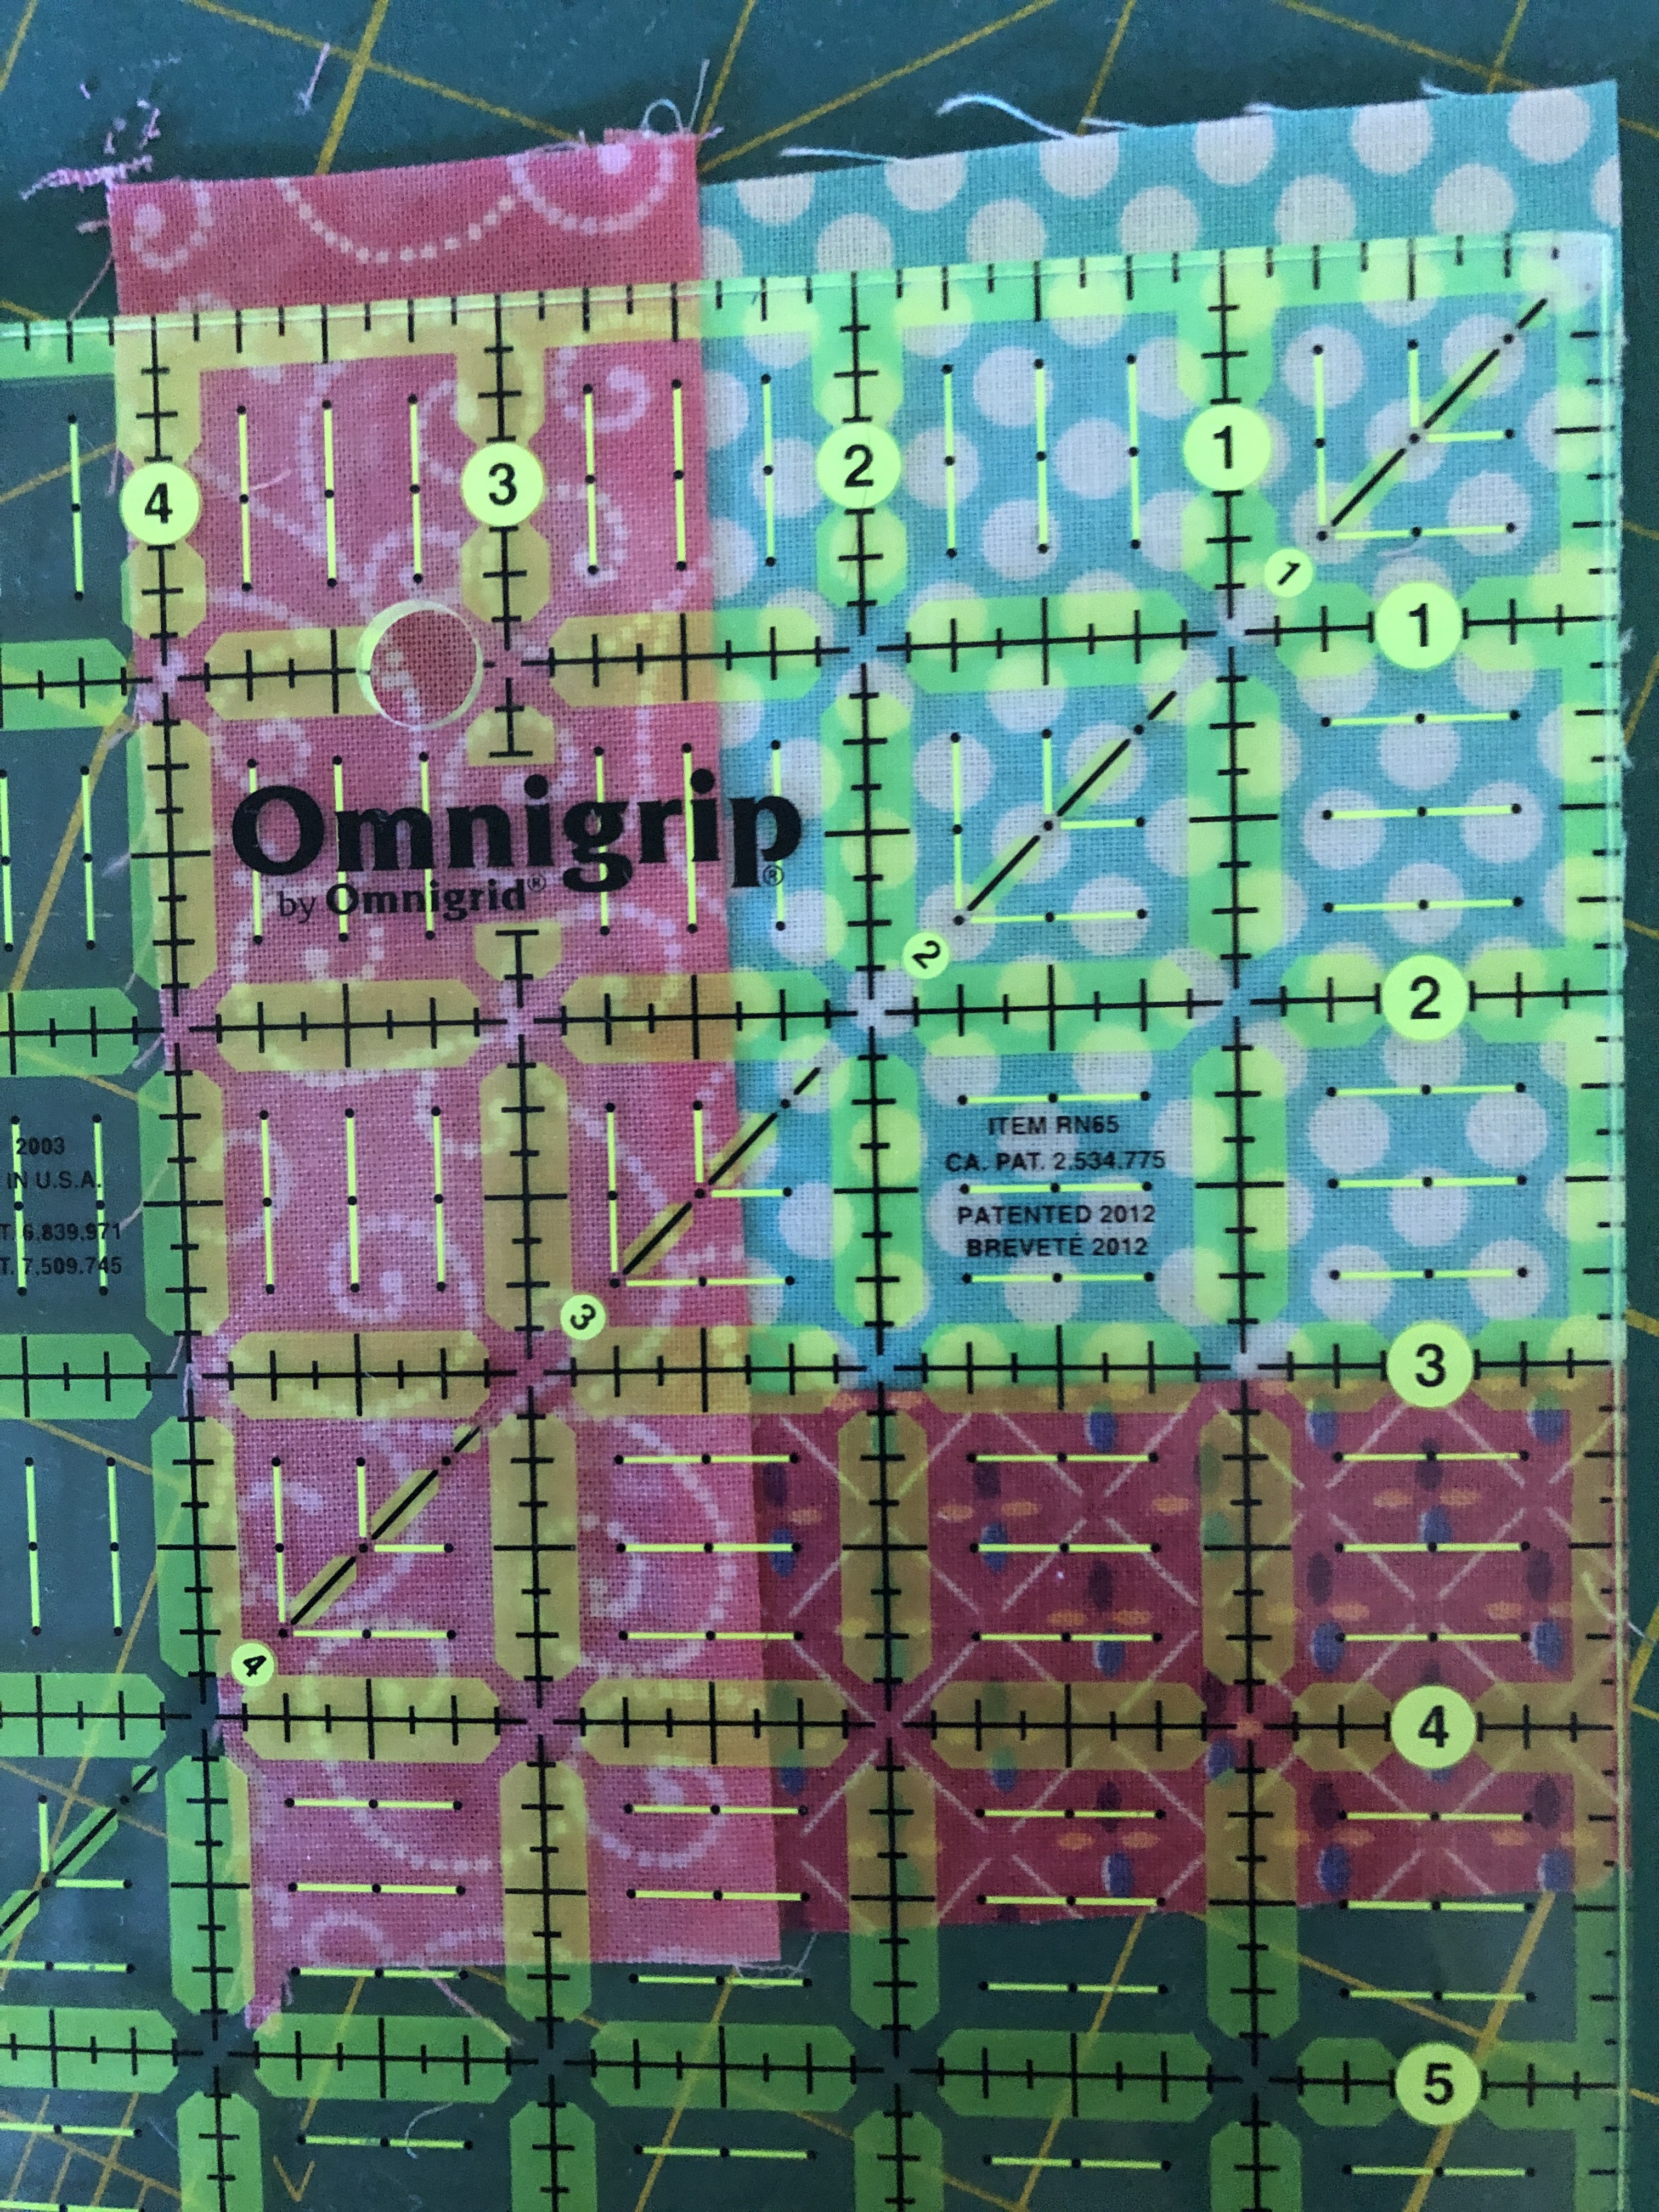

For V, cut a BG tall triangle with a base of 1 3/4" and a height of 3". Cut two letter strips around 1 inch (or a little wider, one side could be slightly wider) by 5 inches. Sew one on one side of the triangle with excess going past the tip (bottom of the V) of the triangle. Iron toward the triangle and trim the excess off in line with the triangle. Note: 2nd photo below should have the ruler to the edge of the yellow fabric before trimming.

 |
| Ruler should be lined up with outer edge of background yellow piece before trimming. |
Sew the other V letter strip to the other side. For the outer edges I laid the V part on top of the BG fabric and slid it over to make an echo cut but bit wider and taller than needed. This allows for trimming down, so the BG won't be too small. Do this for both sides and then trim to 4 inch square.


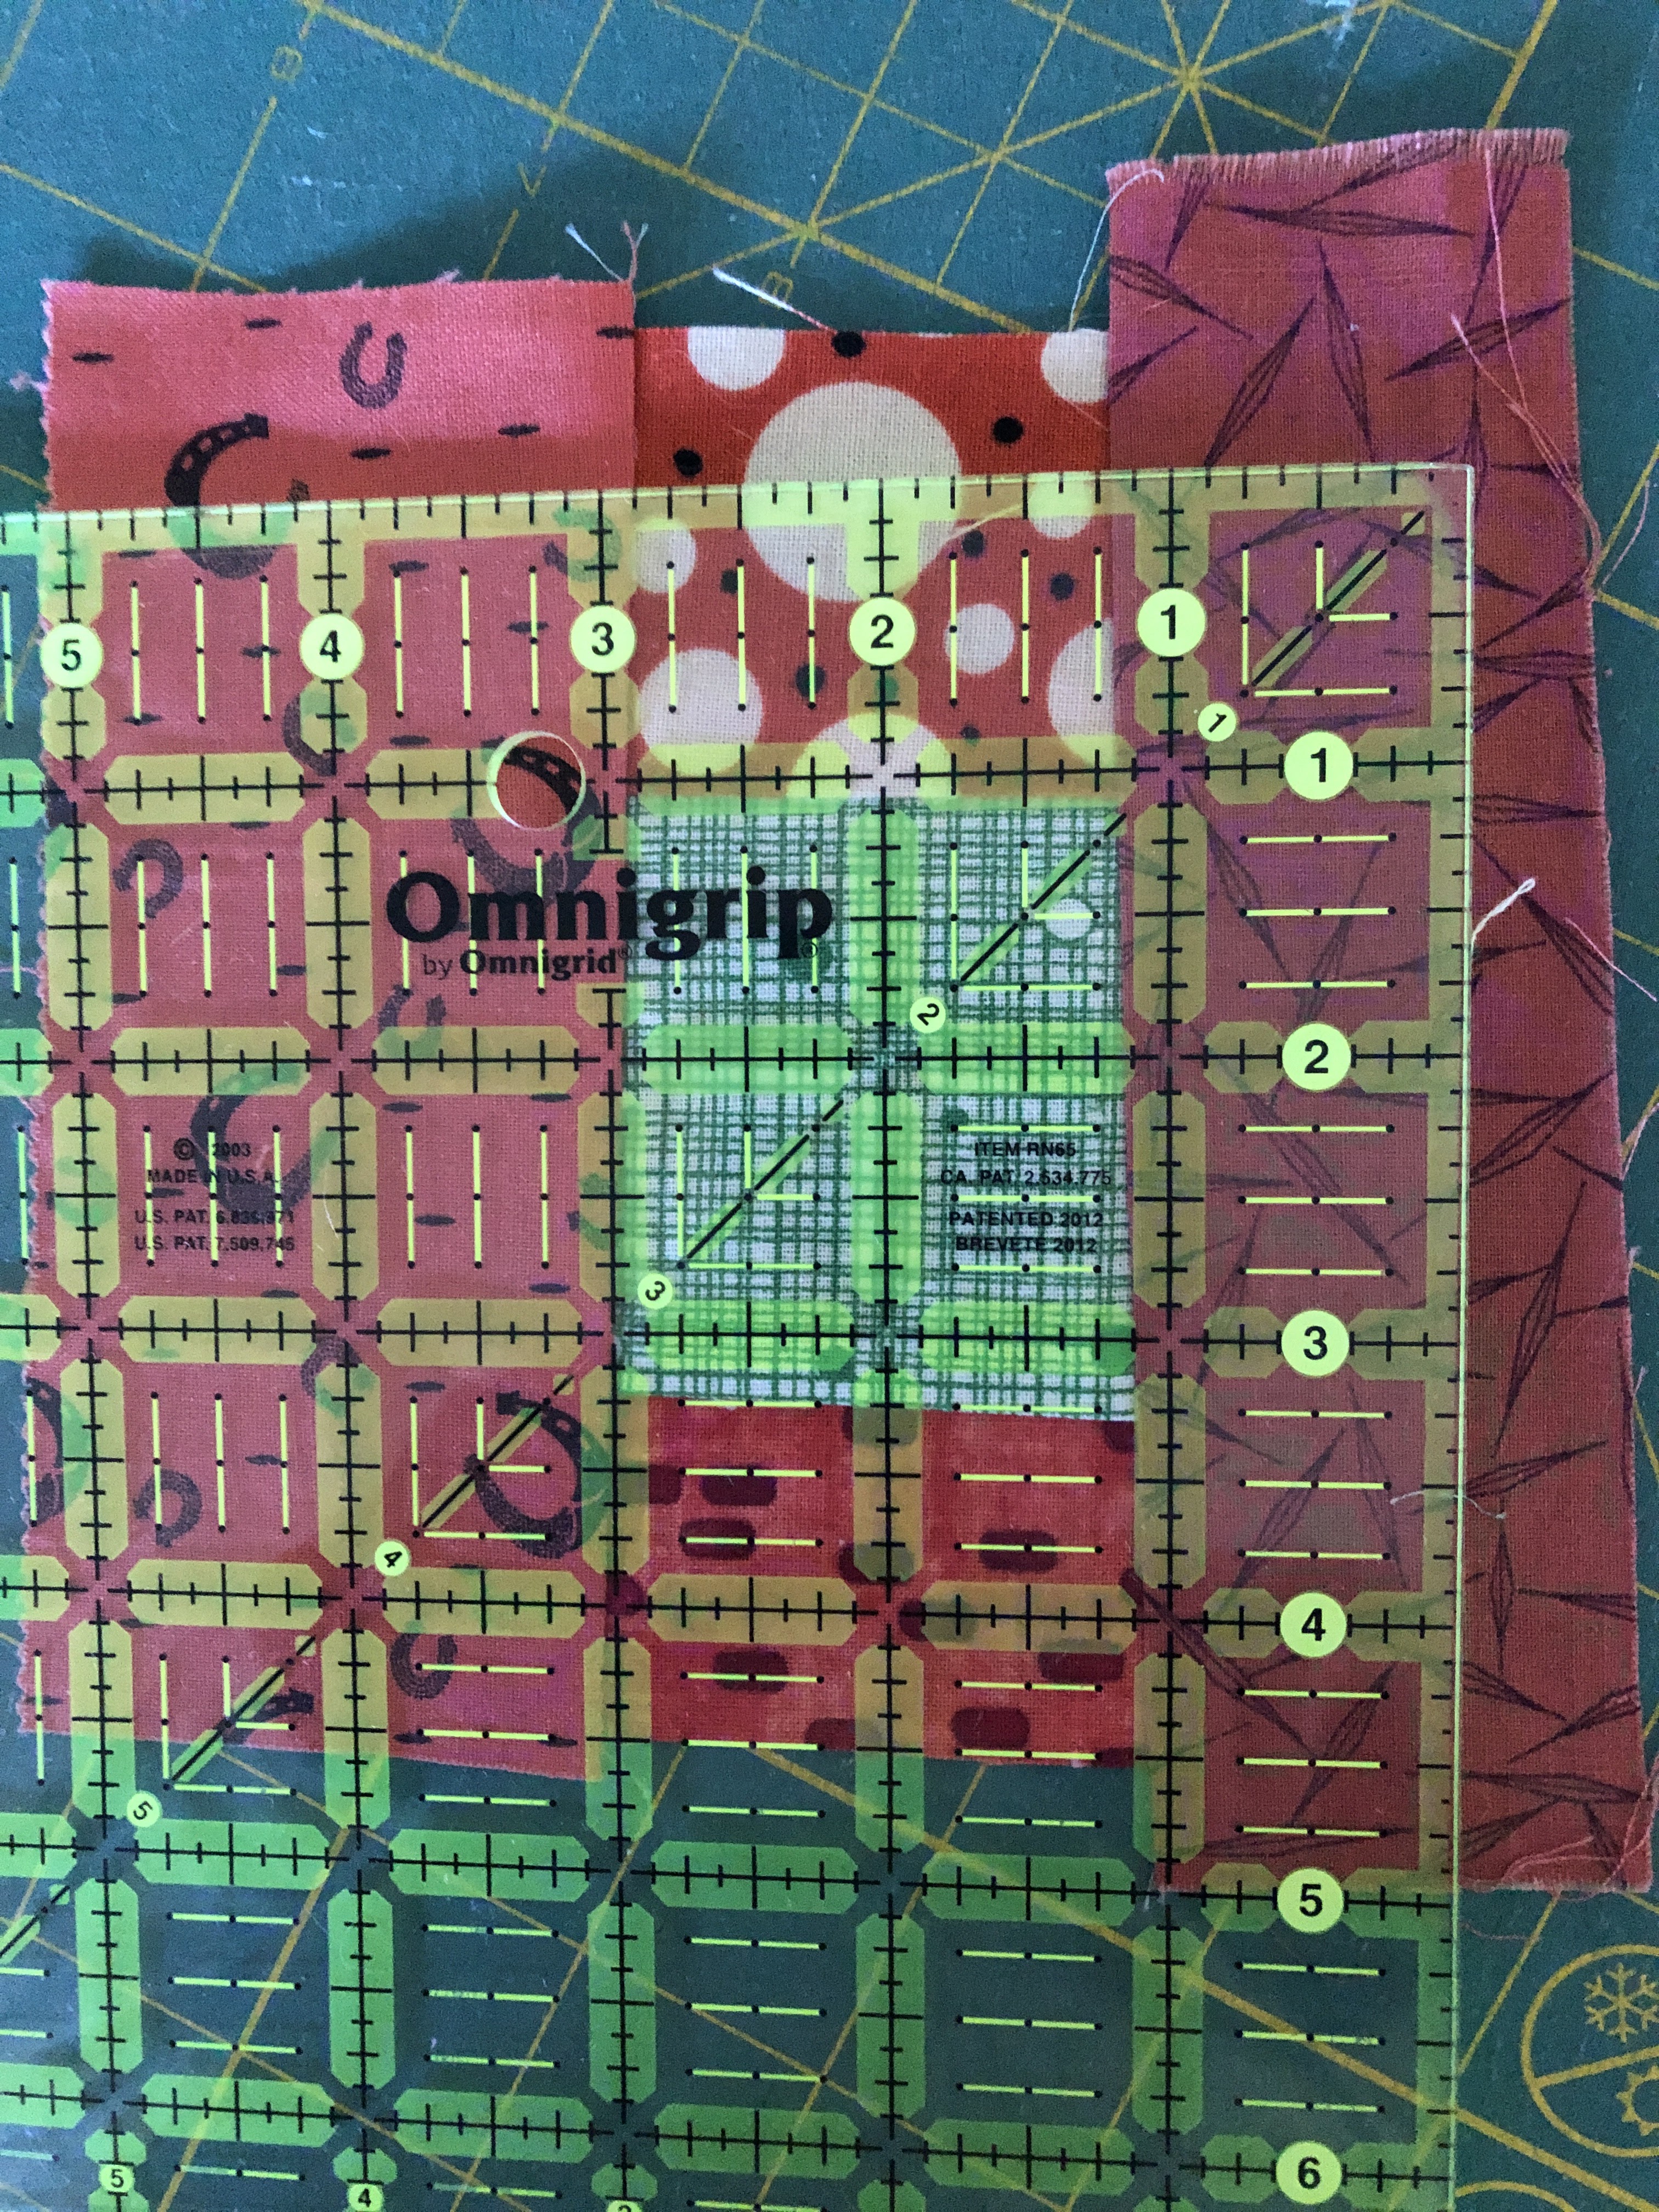
For the E block, start with a BG and a letter piece cut at 1 by 1 1/2 inches. Sew together on the 1 inch sides. Next cut 2 BG pieces of 1 inch or slightly less by 2 1/2 inches. Sew one each to top and bottom of center E piece lining them up with the left side, don't worry about the right side, it will get trimmed later. Then add the top and bottom E parts of cut at about 1 1/4 by 2 1/2 inches. Add the left side E of about 1 3/4 by 4 1/2. Then trim the right side, add about an inch strip of BG on the right side. then trim to 4 inches.
Here are the 4 sewn together.
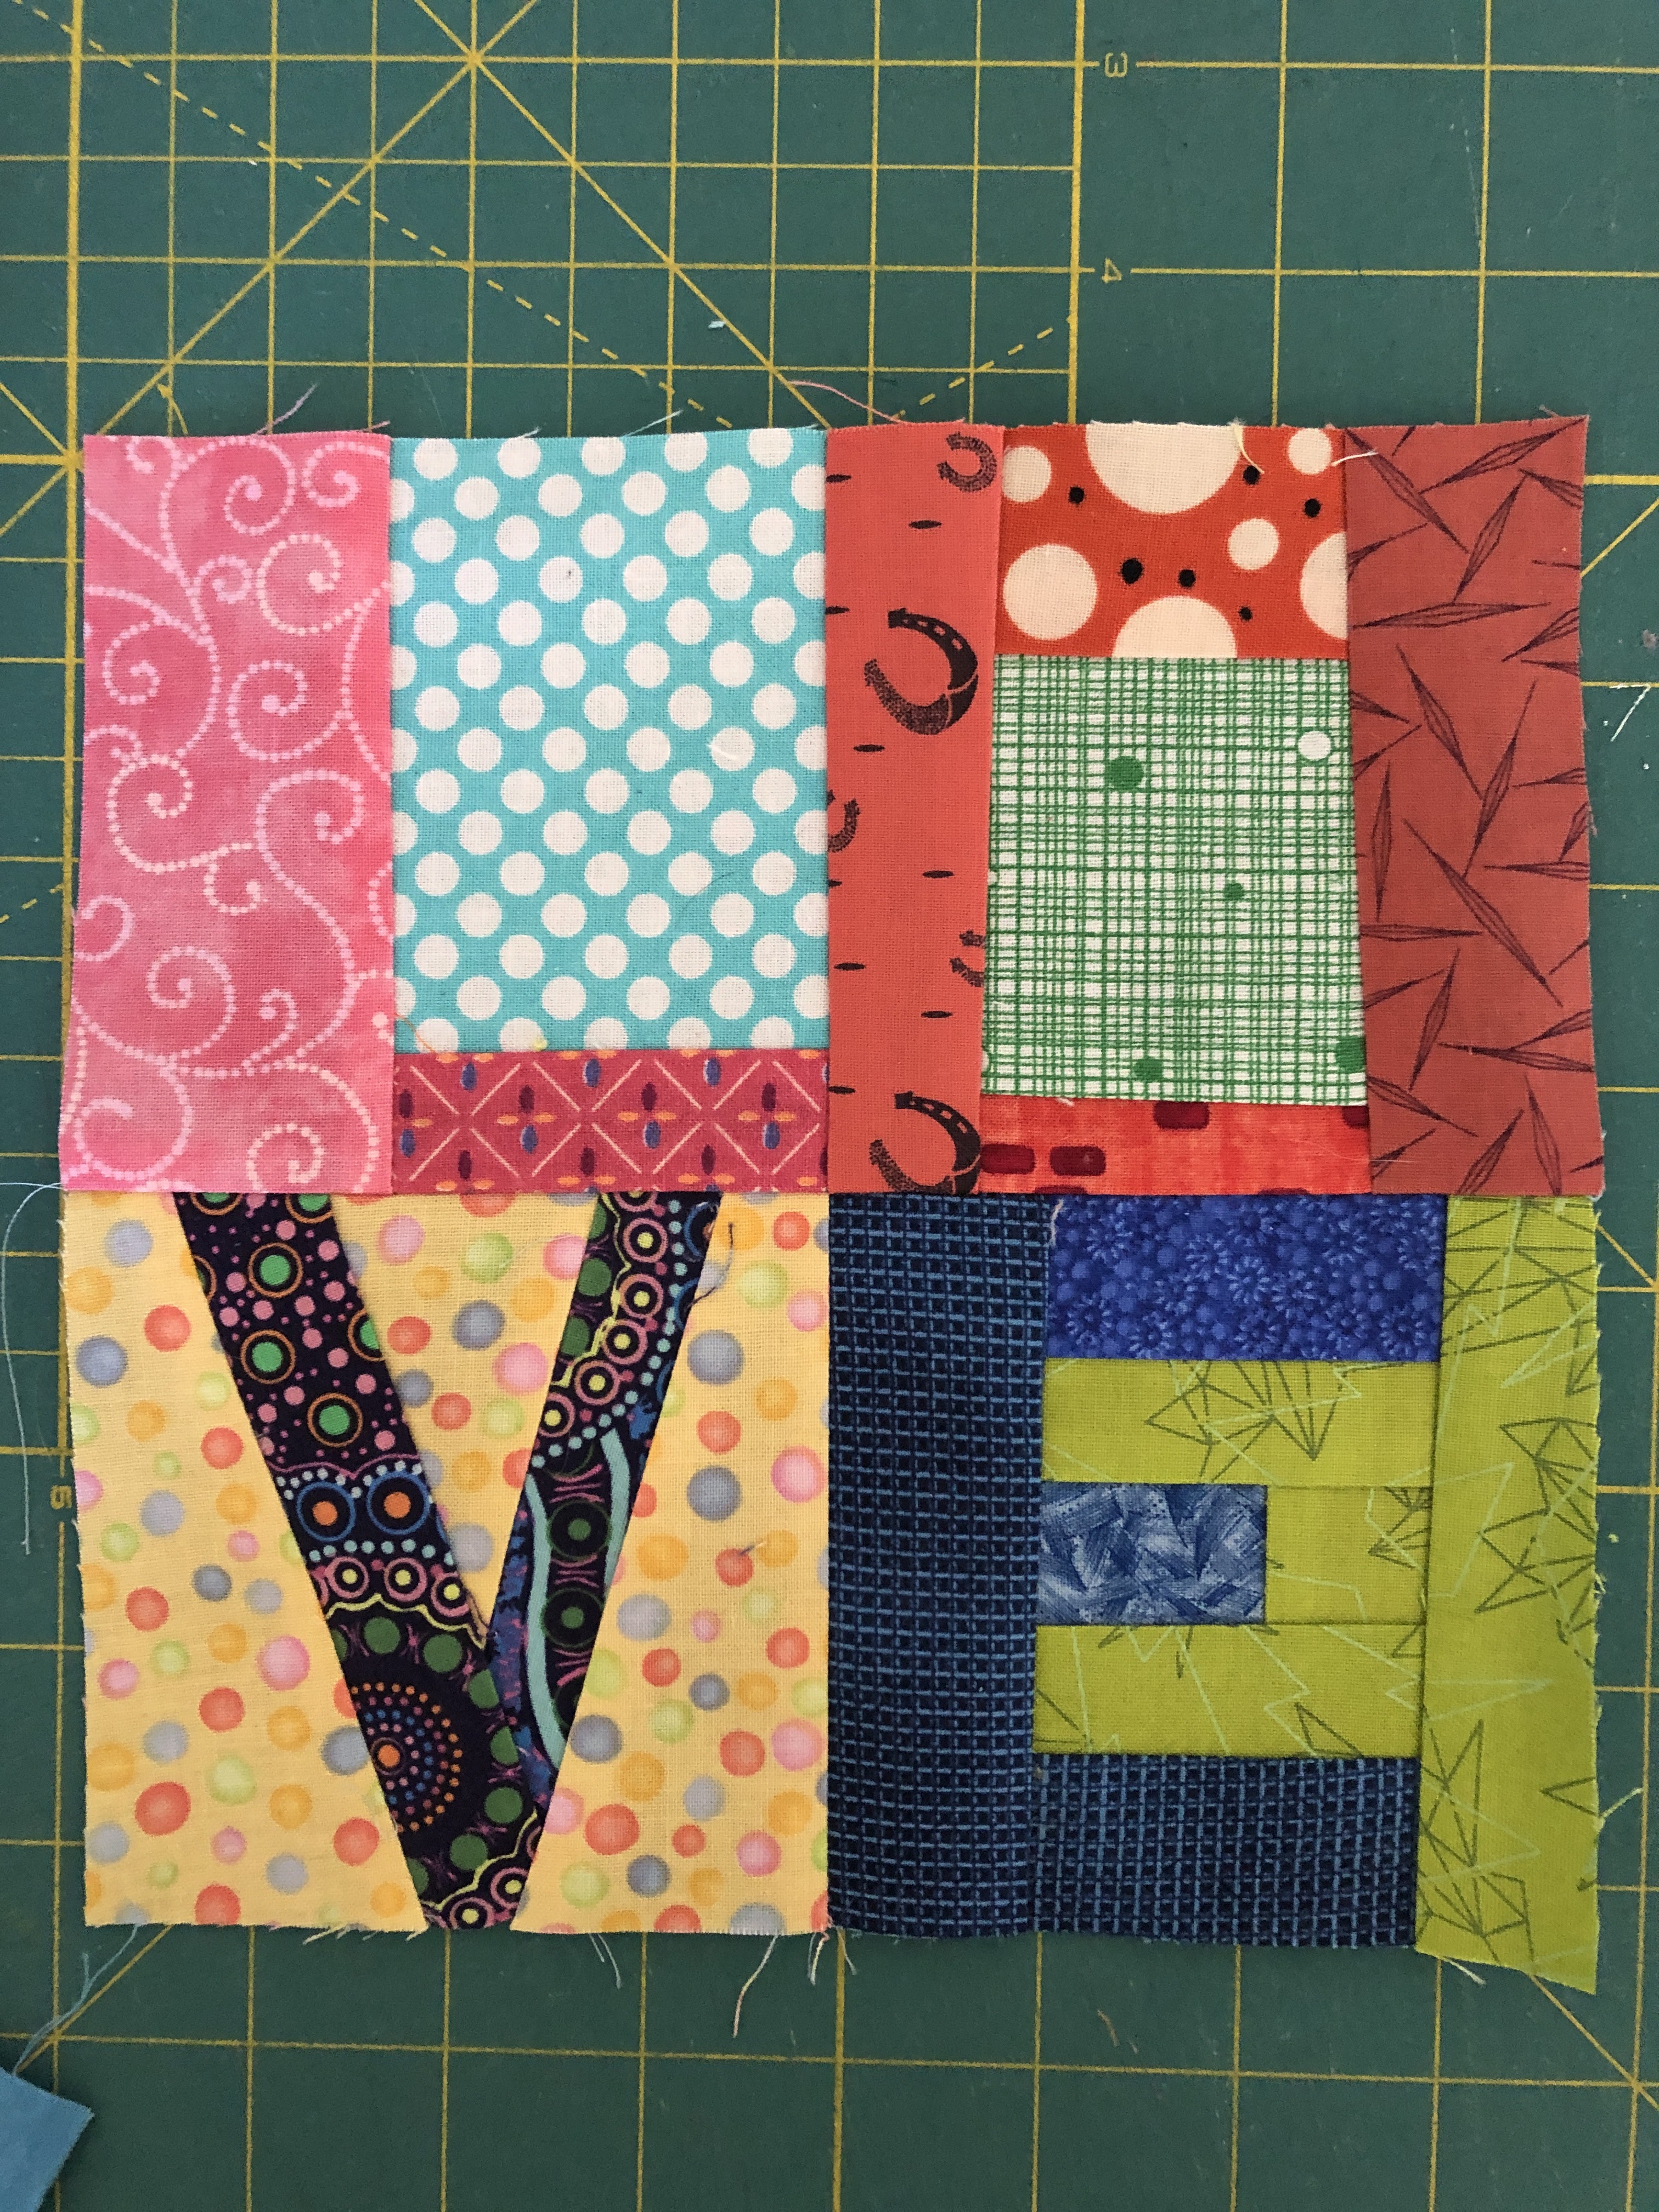
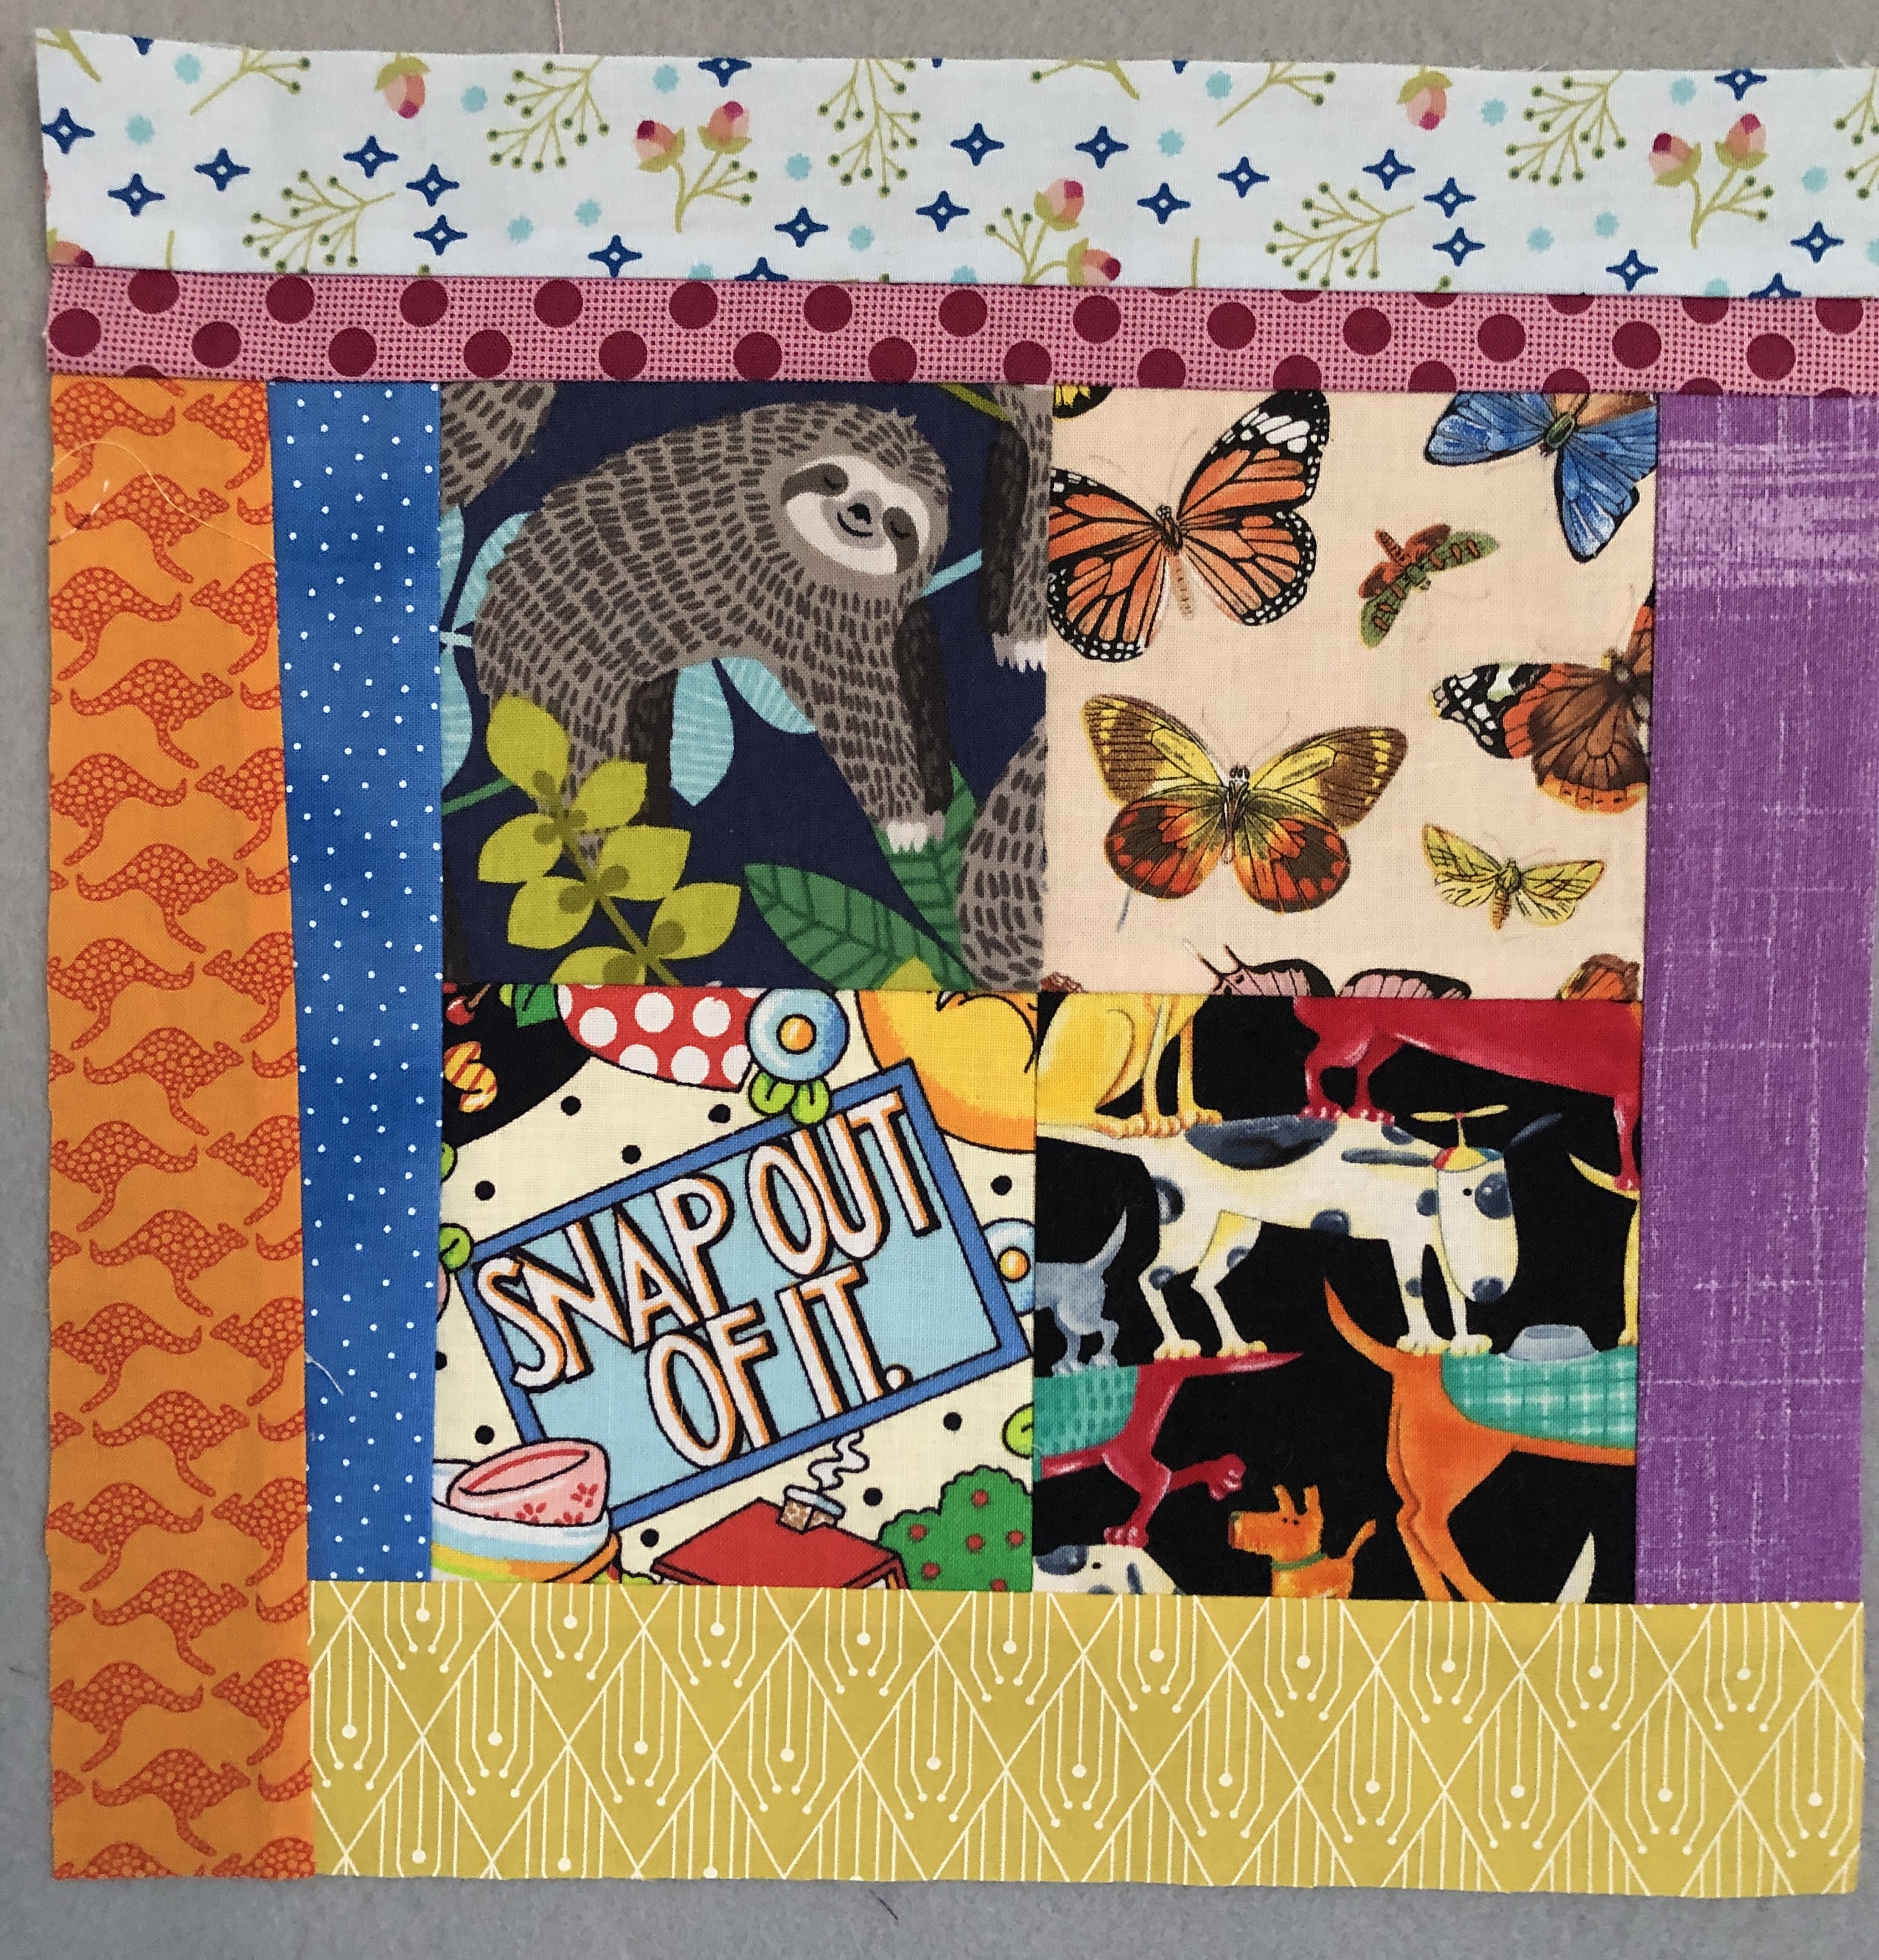
Next cut some strips 1 1/2 to 2 1/2 wide and add to the 4 sides. You can add 1 or 2 strips to a side. Then can be cut slightly angled if you want. You can add top and bottom first and then sides or go around like adding for a log cabin. Anything goes, just needs to end up at least 10 1/2 square in the end. I made them larger and then trimmed down to the final square. Here are 2 finished blocks. The left one was FPP and the right one was regular pieced.

Now for the easy alternate block. Feel free to make this if you have any qualms the letters are not for you. Go through your novelty fabrics and fussy cut 4 - 4 inch squares you like. They can be animals, flowers or what ever you find interesting. Just avoid anything too juvenile or babyish. Finish the border in the same way.
Sorry if this seems like a lot, please just have fun!
Thank you, Gayle
No comments:
Post a Comment