
Hello Hello Everyone!
It’s been so much fun making everyone’s blocks. I cannot believe how quickly this year went by and that it’s already my turn! There were some pros and cons to going last, and both of them were the amount of time I had to decide which block I wanted to do. I thought about it several times a month, the whole year. I finally settled on something I think y'all will find pretty easy and it’s really beautiful. With the color combination it’s probably one of my favorite blocks (so far anyway!)
For my block I chose a double sawtooth block.
If you look them up you can see a bunch of examples of different color combinations that make the star stand out in different ways. I really like the double star look that comes together when you block the colors as shown.
1) you’ll need awhite, or white on white patterned. If you don’t have a basic white or white on white the next best option would be a white with a small pattern. But my preference is a white solid or white on white pattern.
2) You’ll also need some navy, dark blue, or a navy/dark blue in either solid, or with a small pattern. For my example I choose a print that will give you an idea of what I’m looking for in terms of "small patterns" if you don’t have solid navy or dark blue.
3) Lastly you’ll need a light blue. Again, if it has a small pattern that’s fine, or solid is a good choice.
My big particular is that all the whites, all the navy, and all the light blues are of the same fabric so I can get that pretty double start effect I’m looking for (so please just choose one fabric for each of the three colours, rather than scrappy).
My idea for the quilt is along the winter-y blue scale and not so much vibrant rainbow blues. So think of winter wonderland while you’re digging through your stashes.
Here are some examples of my fabrics I’m drawing inspiration from.
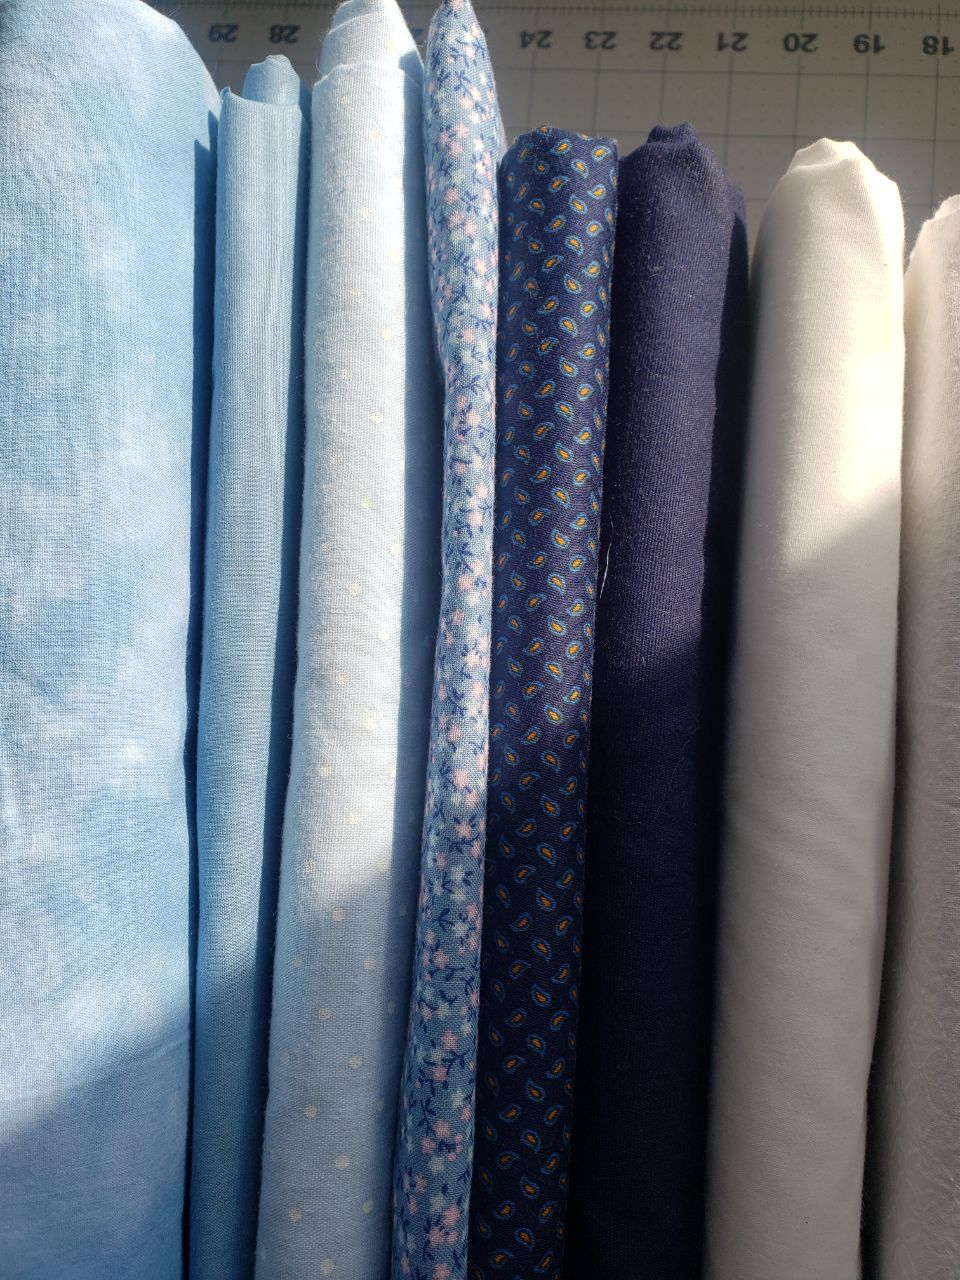
(I am so sorry about the photo quality. I'm working off a phone that's pretty old and cracked. I thought they looked great until I went to upload them!)
Alright let’s get to work! This will be pretty quick and easy for everyone I’d imagine. And I am by no means a perfectionist. I really don’t mind a point that isn’t perfect or what have you. So no stress, just enjoy the last block of the year.
You’ll start by cutting the following:
Light blue
- 1 square 3 ½” x 3 ½”
- 8 squares 2”x2”
Navy
- 8 squares 3 ½” x 3 ½”
- 4 rectangles 2” x 3 ½”
- 4 squares 2” x 2”
White
- 4 rectangles 3 ½” x 6 ½”
- 4 squares 3 ½” x 3 ½”

The first thing I did was draw diagonals on the back of my (8) 2” light blue squares, and on the back of the (8) 3 ½” squares. I just used a pencil, no need to fuss. Please also note that you’ll be stitching on this line.

I did the inside and the outside of my star at the same time. But if you like to take it a step at a time I included a link to another tutorial at the end.
Place your marked light blue squares on the corners of navy rectangle (2” x 3 ½”) so that the diagonal runs from bottom left to top right.

Then place your marked navy squares on the corners of the white rectangles (3 ½” x 6 ½”) in the same direction (bottom left to top right)


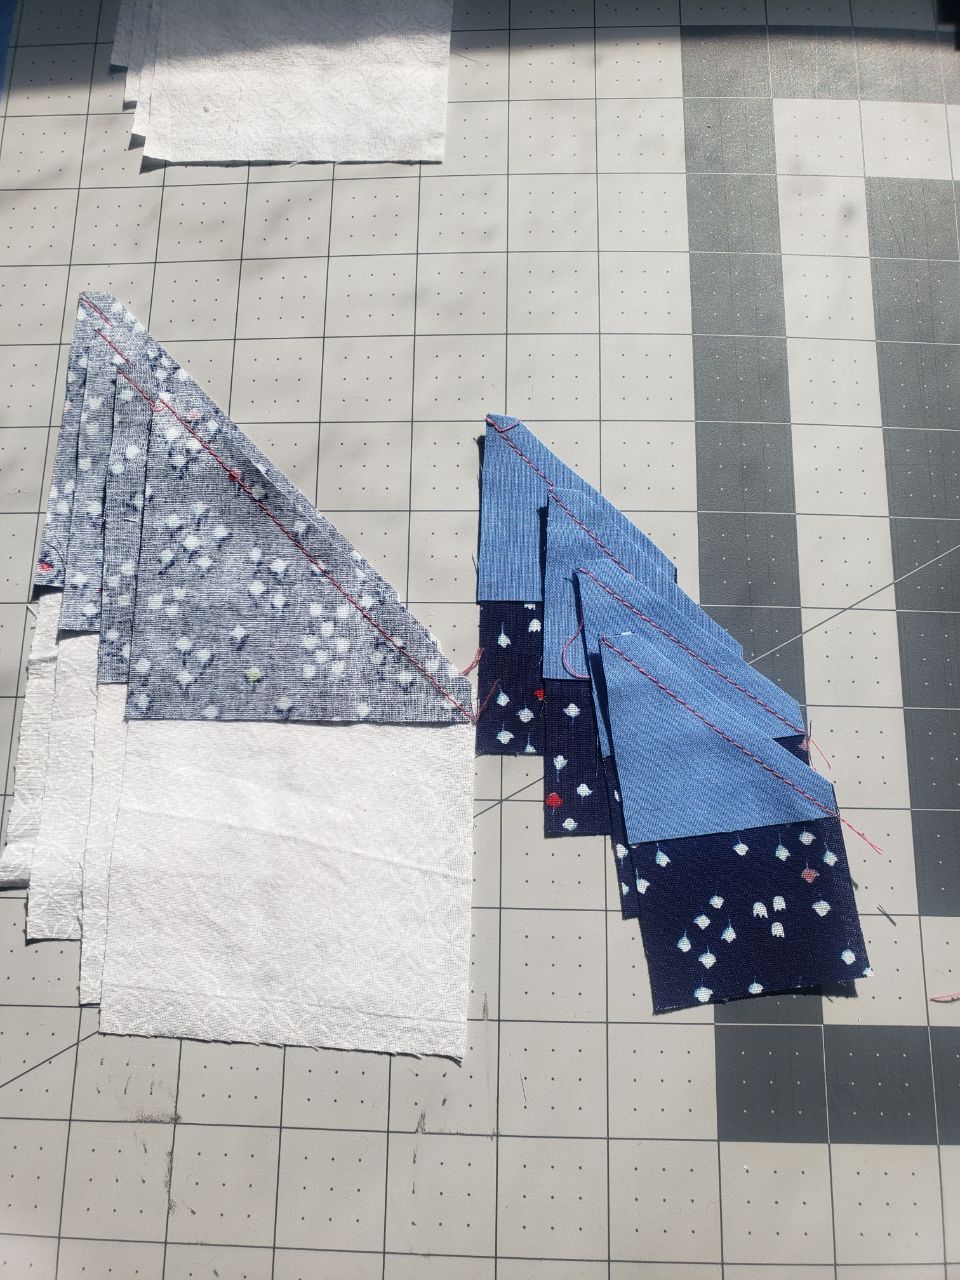
Then, you’ll repeat this step with the opposite side. Make sure your diagonals run in the opposite direction- Top left to bottom right this time. (Like I'm showing in the picture, that you can't see because the potato quality of my camera!) It's going to look like a flying geese situation when you are done.


From here it goes super quick!
You’ll want to start with the small star, and you’ll attach two of the star points you just made to the top and bottom of the larger light blue square. (mine in the photo is flipped so I did the sides first instead of top and bottom, makes no difference)
Take your other two star points and you’ll use the 2” x 2” navy squares and sew those to both sides of the star points. Then just sew those suckers onto the other side of your larger block.


To add the outside of the star, you repeat the process.
Sew two of your navy/white star points to the top and the bottom of the smaller star. Sew the 4 white squares to the other two star point. Then sew those onto the block.


Thank you all so much for your time, and thank you all for picking such fun blocks. I really feel like it was a good practice to test some of my skills. I wish you all the very best and I hope to see you next year for the bee!
 |
| I took in a stray cat this year, who turned out to be pregnant! In her litter she had two polydactyl cats! This silly extra toed cat ended up finding a home with us. She is sitting her fat cat butt on the other double sawtooth star project I'm working on. |
No comments:
Post a Comment