
Happy October!
For this month, we will be sewing a Night & Day block (deconstructed) from Quilting Daily.

But first, colors! You can basically use any colors except for brown/beige, whites, and black/grey. I prefer saturated colors, and bright ones! The catch is that you need two of the same color, one light and one dark. See photo below for examples. If you don't have a light and a dark, at least pick two fabrics that are easily distinguishable by sight (see the reds in the photo below... I wouldn't call one "light" and one "dark", but they are easily distinguishable). I prefer patterns over solids, but solids are okay if that's what you have. No novelty prints, but anything else goes!

Here is a link to the instructions: https://www.quiltingdaily.com/pattern-night-day/
But I also wrote out instructions with pictures below!
First, you need to cut the following:
- One light 7 1/4" x 7 1/4" square
- One dark 7 1/4" x 7 1/4" square
- One light 4 1/4" x 4 1/4" square
- One dark 4 1/4" x 4 1/4" square
- Four light 2 5/8″ x 5 1/8″ rectangles
- Four dark 2 5/8″ x 5 1/8″ rectangles

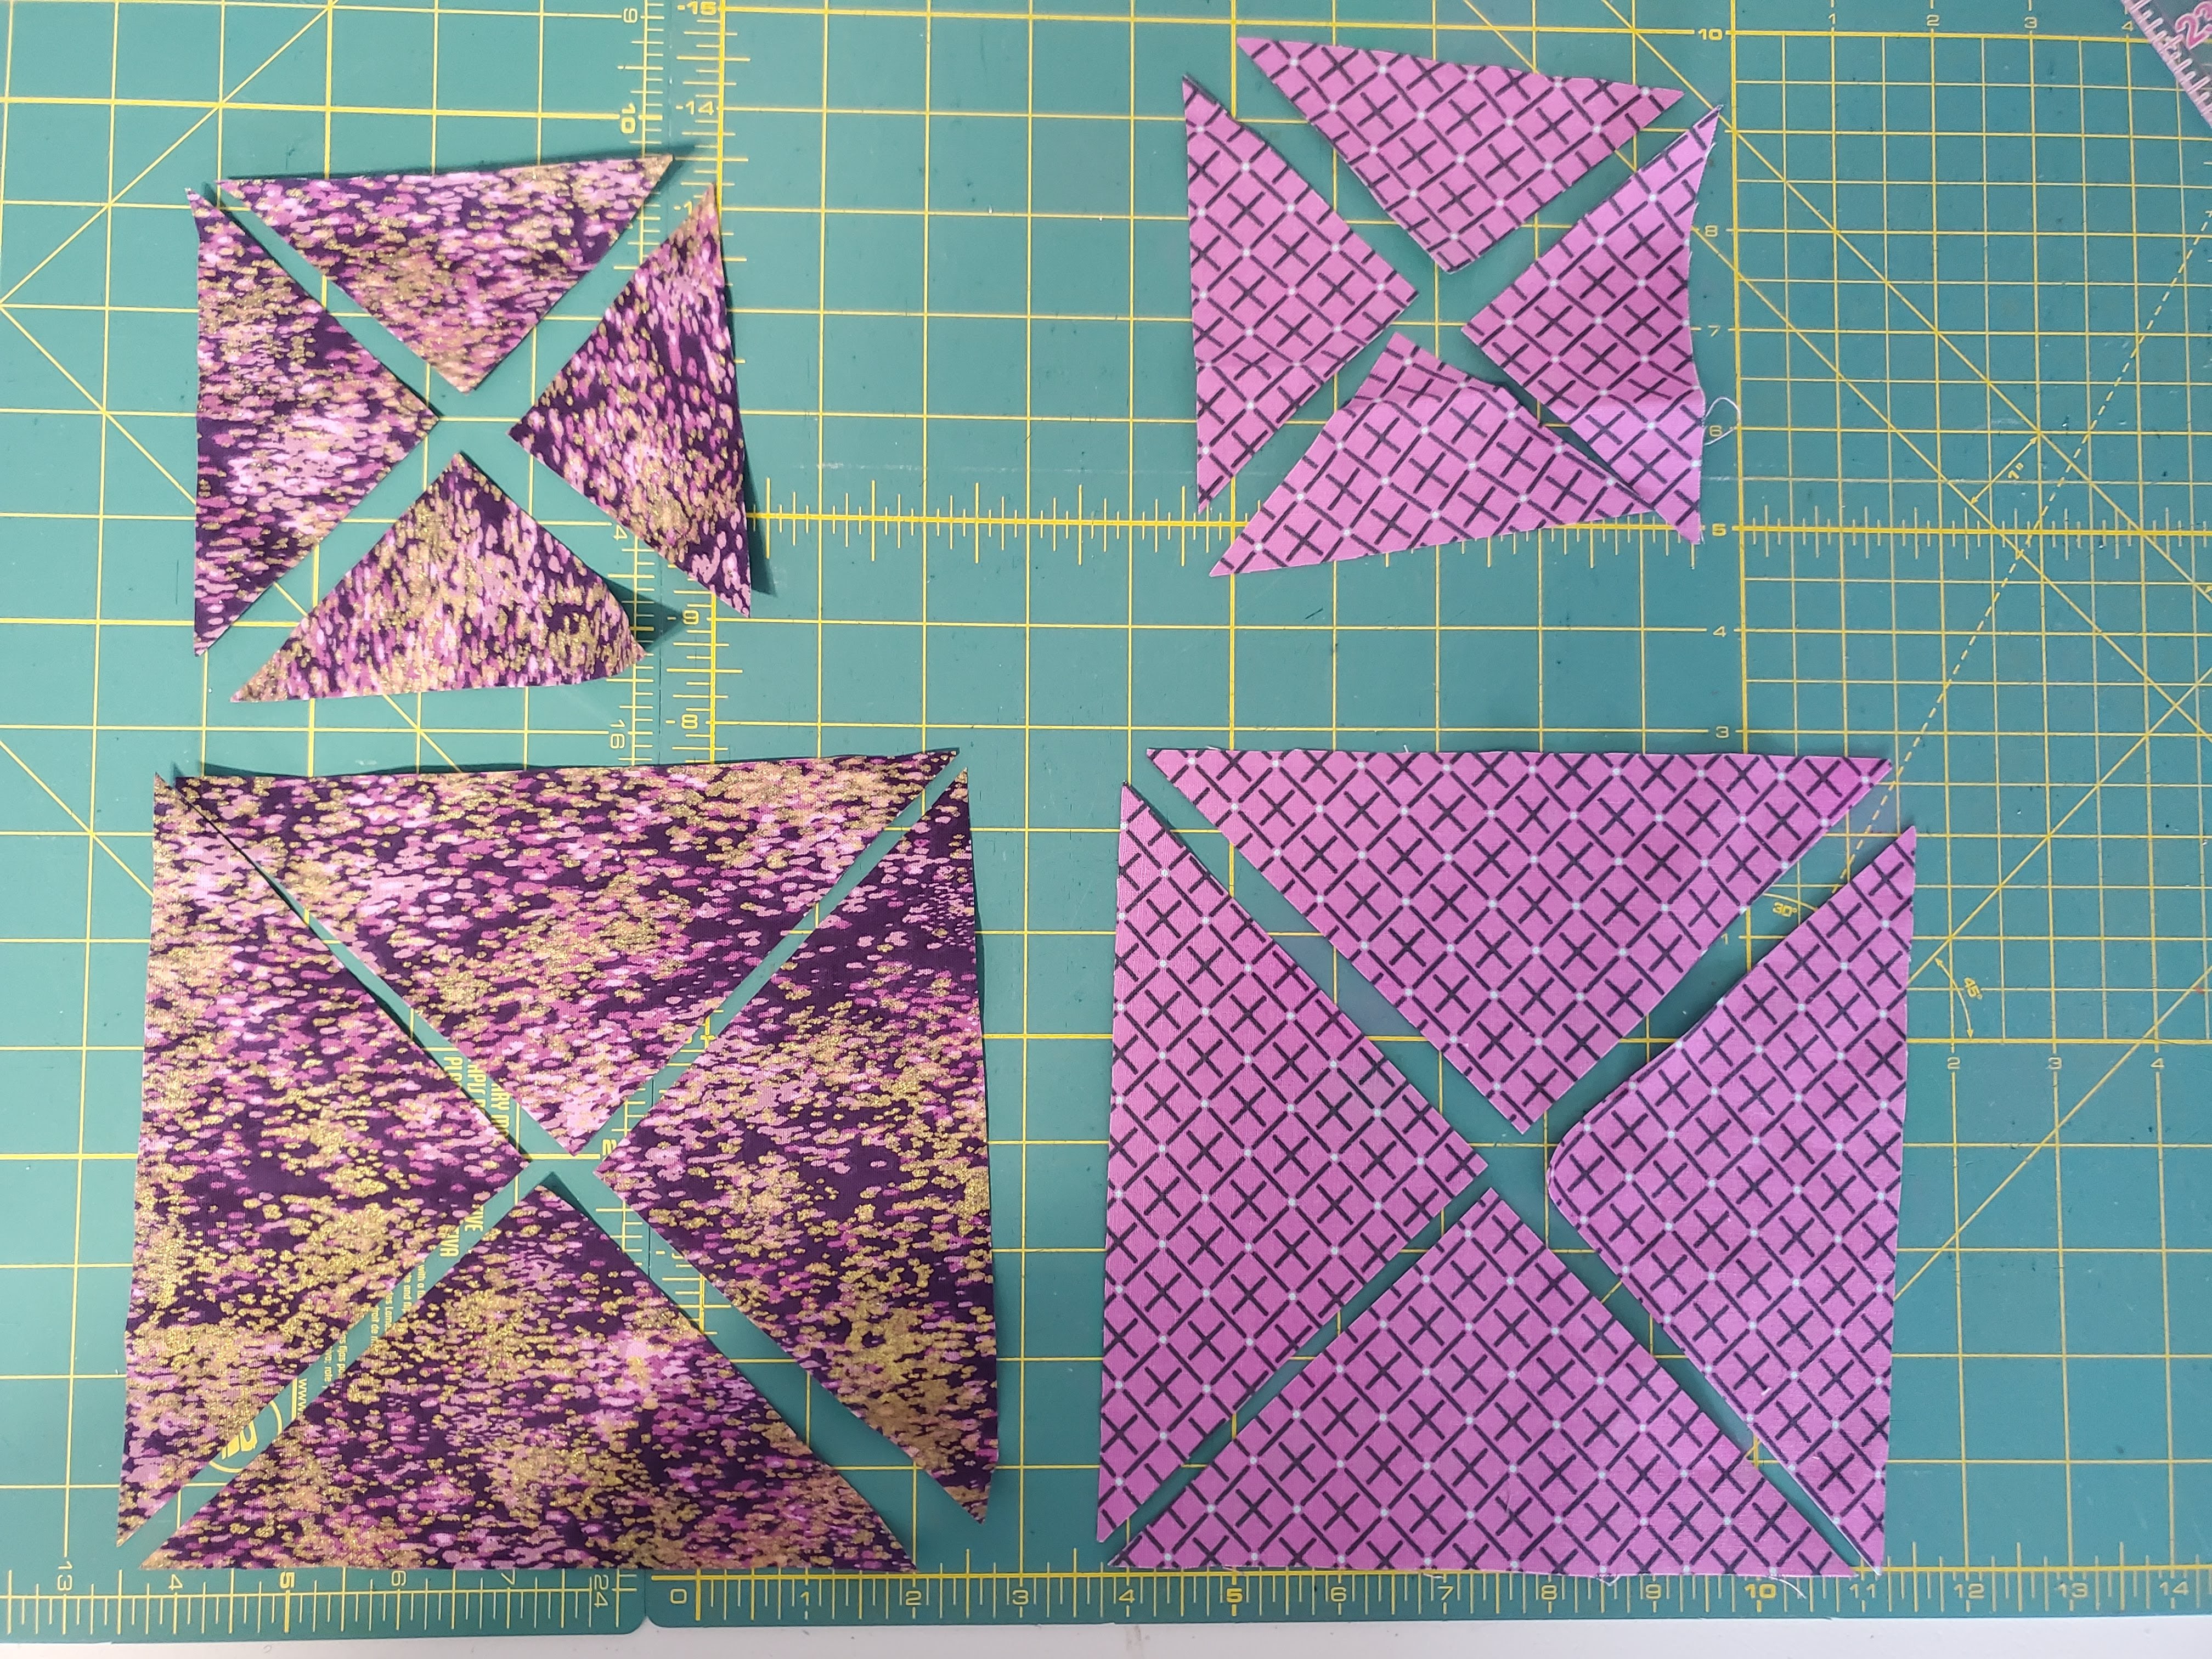
Next, you need to cut each if your squares into four triangles
Here's the most complicated part (in my opinion). Each of the rectangles needs to be cut into a half trapezoid. Basically, you're cutting a triangle off the end. There are a few ways to do this. You can measure 2 5/8" along a long edge, and then draw a line between this measurement and the opposite corner.

You could also fold one corner up, matching the short edge to the long edge, and press. Then cut along the fold.


Or, you an use a quilting ruler with a 45 degree line.

The hardest part for me to remember here is that your light and dark fabrics need to be mirror images of each other. So if you cut off the lower right corner of the dark, you need to cut off the lower left corner of the light.

Throw away the corners you cut off. You don't need them!
Now to assemble! This is how the pieces will go together, and you'll have four sets.

The easiest way to assemble is to sew the big triangles together, the half trapezoids together, and the small triangles together. Use a scant 1/4" seam allowance. To make the pieces fit together nicely without any gaps, please press all your seams to the same fabric (I pressed all mine toward the light purple fabric).

Then sew all of these sections together!


As I said, you'll end up with four identical mini-blocks. The last step in the linked tutorial is the sew the four pieces together into one 12" square block, but I'm going to ask you to not do this last step and to send me all the pieces. I'll mix them up when I put the quilt top together!
Please let me know if you have any questions!!!
No comments:
Post a Comment