
Hey team! My apologies for the late posting of this tutorial, and many thanks for being patient with me. Most of you have already since this on Instagram (since we are an Instagram hive) but here it is in blog format for posterity sake. Or something. Ha.
My family and I were on vacation in Florida, and I'm going to go ahead and count it as a huge win that I finished and mailed my June blocks and finished all the photos for this tutorial before we left. We took the kids to Disney World for the first (and probably ONLY) time -- that place is expensive! Regardless, we had a blast. Walked over 20,000 steps every day we were there (kids probably more: small legs, you know), hit as many rides as we could, explored, ate, and had a blast. Then we went to the beach for 3 days to recover from our vacation. Ha!
Seems weird to be making Christmas blocks in July, but maybe, just maybe, this might ensure I have a Christmas by Christmas. Though, honestly, we're probably talking Christmas 2023 at the earliest. This is an easy, peasy block, and goes together really quickly. It's improv, so really, do NOT over think it!!
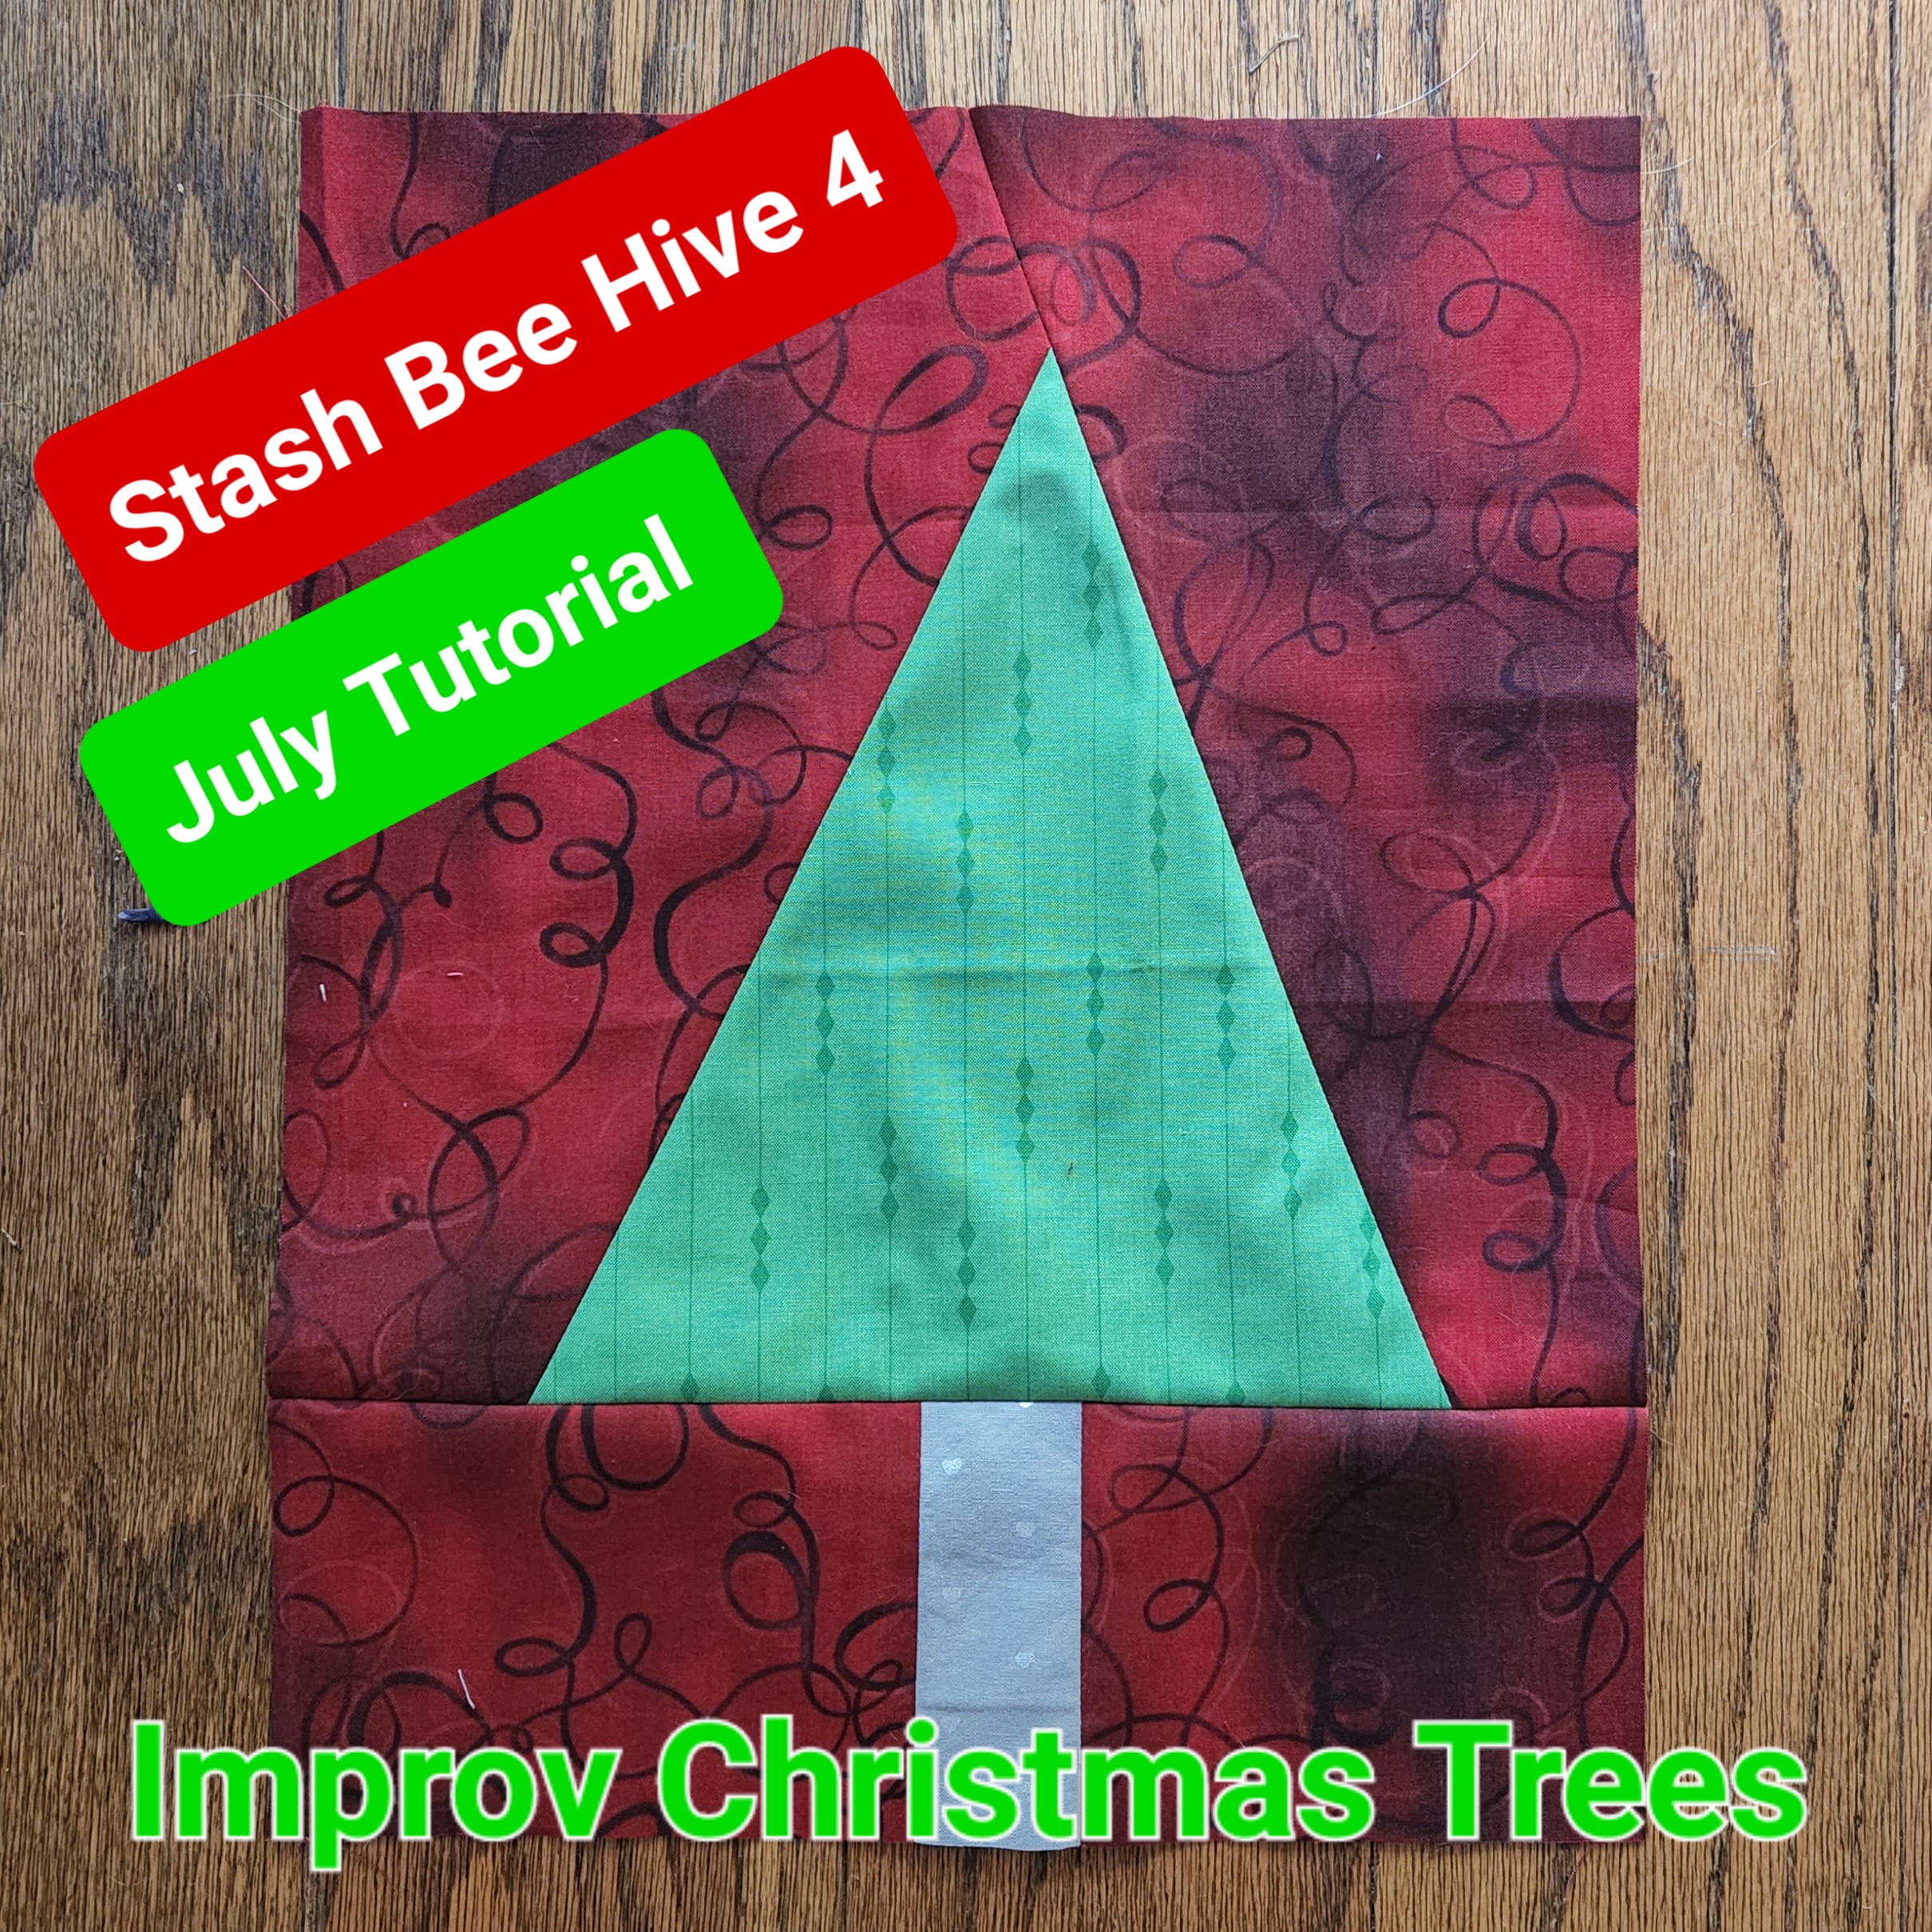
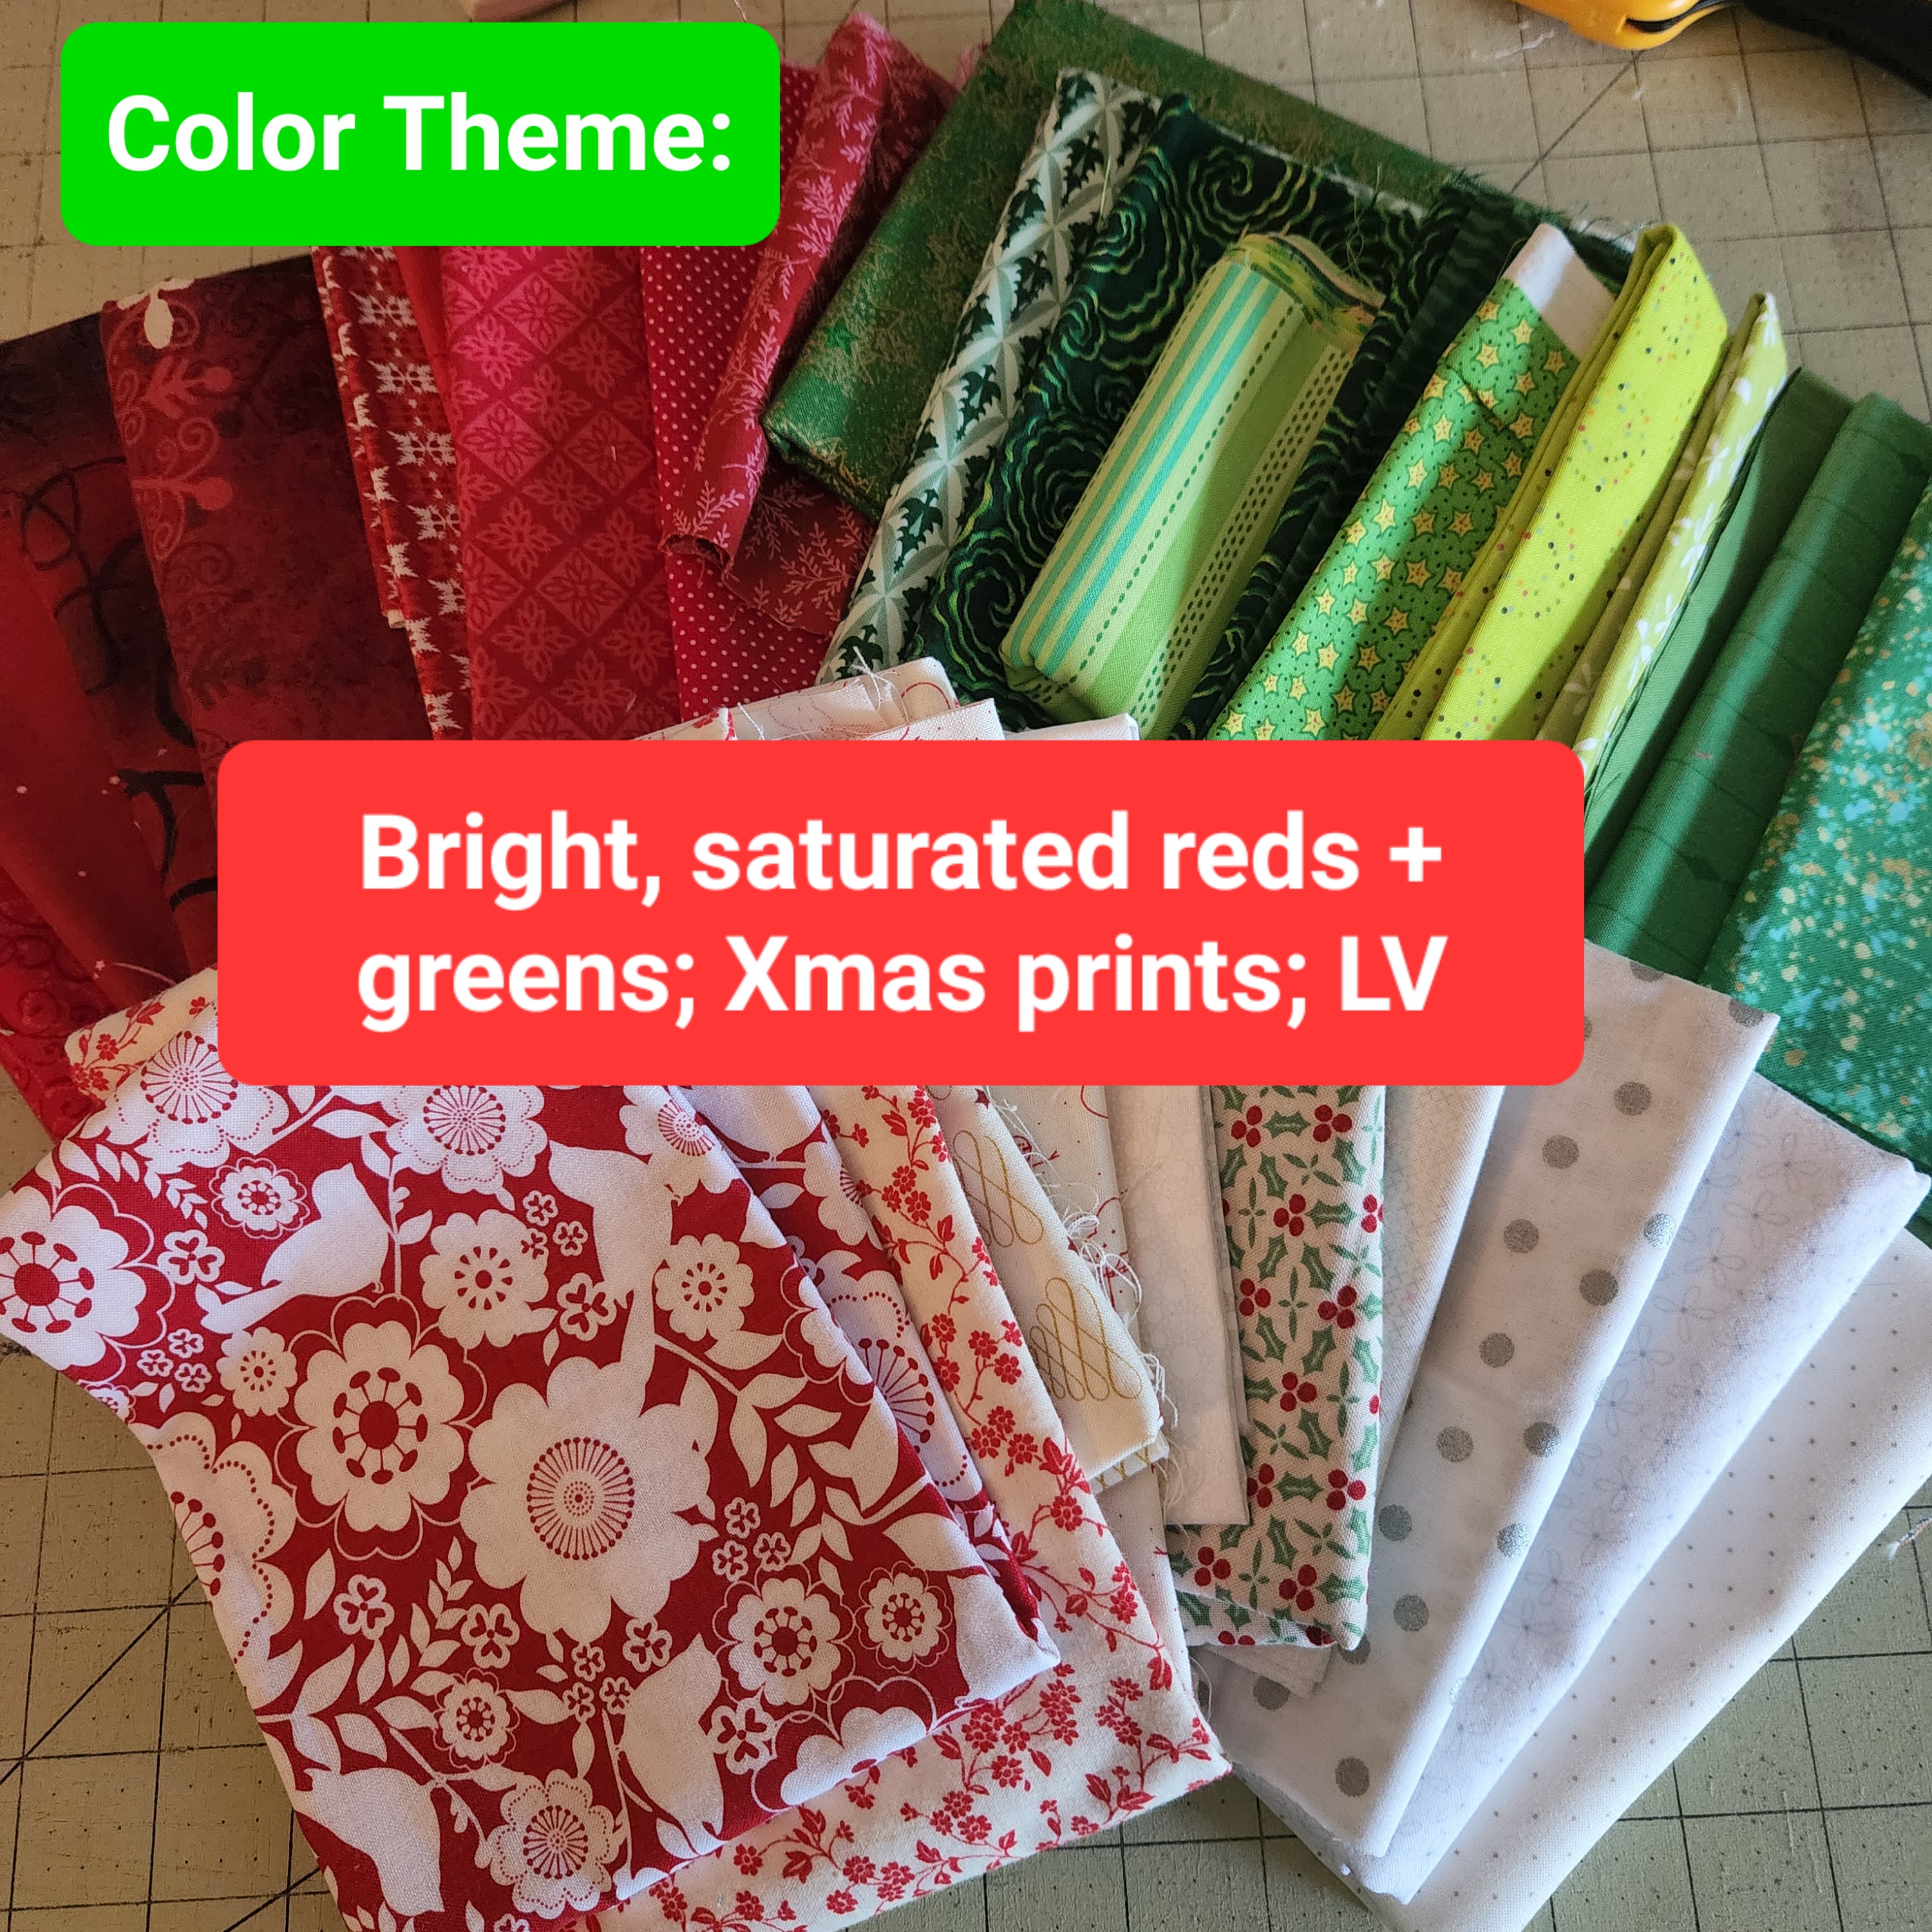
This is a Christmas quilt, and I'm sticking with classic Christmas colors. Please choose bright, saturated reds and greens as well as Christmas prints in those color and low volumes. Reds should be "true red" not burgundy or trending towards orange. Greens can veer toward the yellow end, but please stay away from olive/army or dark spruce greens.

Add a strip of gray or brown to the middle of the bottom background pieces for the tree trunk.

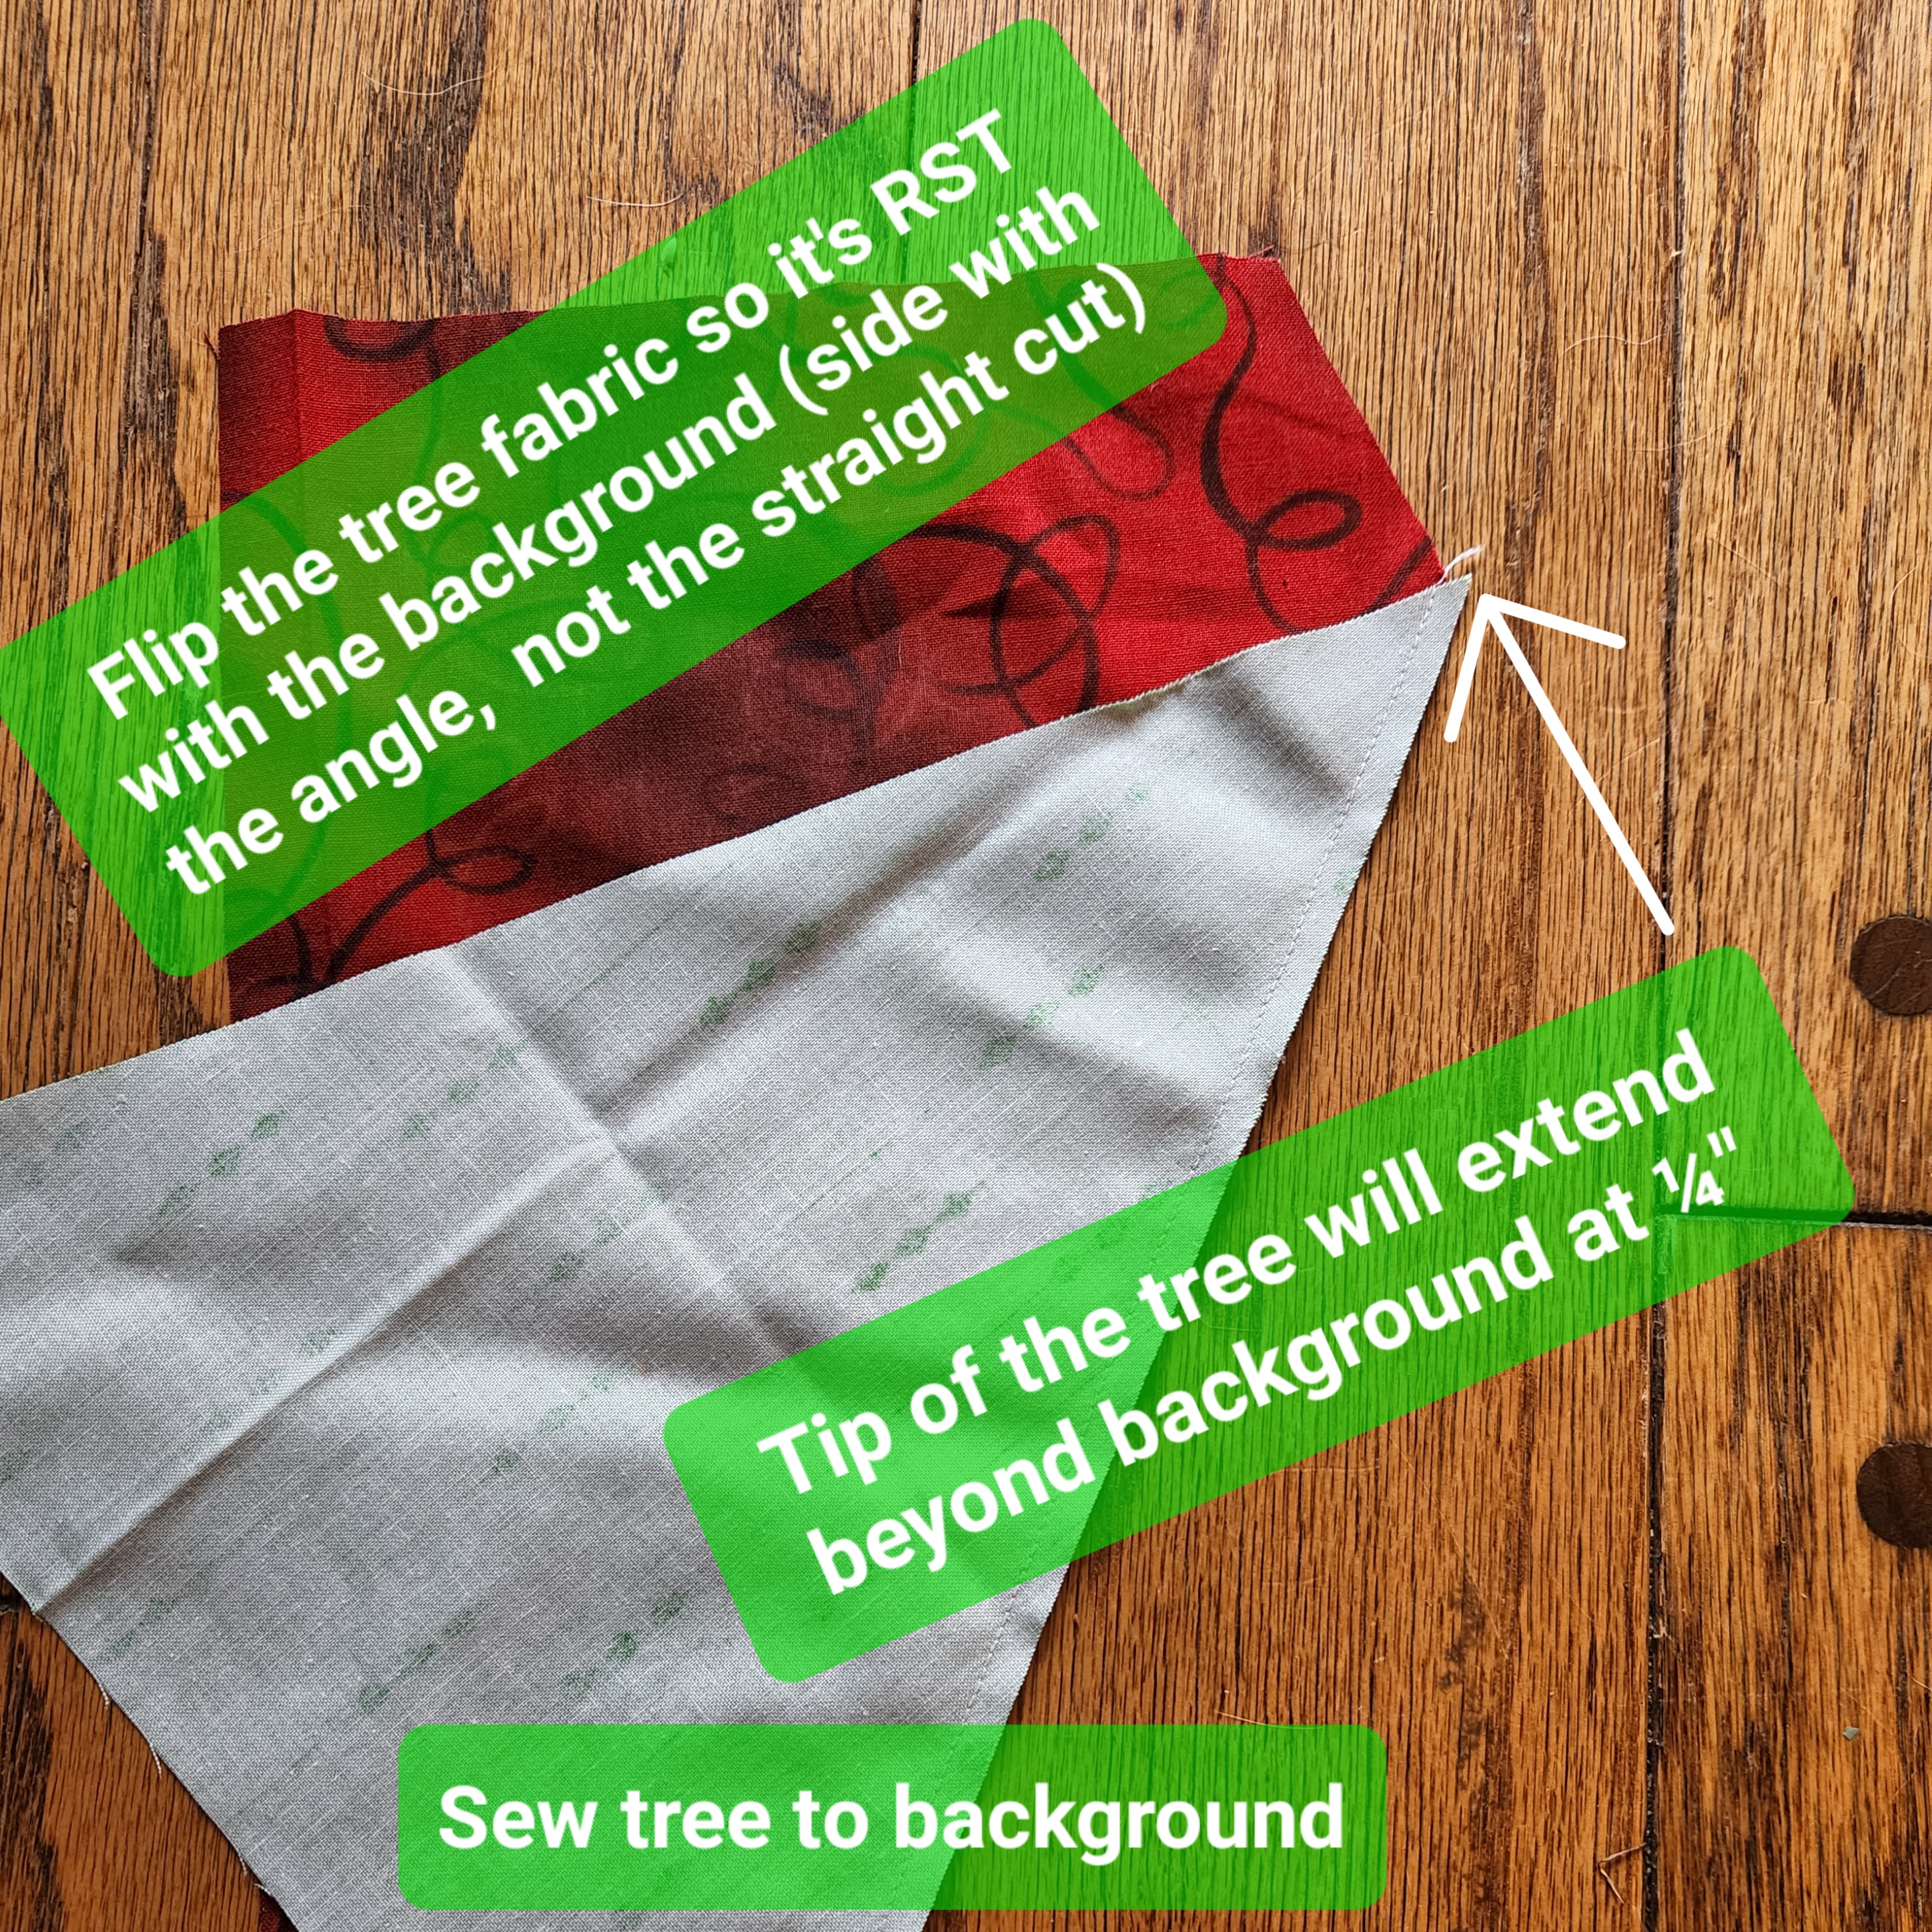


Repeat for the remaining trees. Square your blocks to any size.

No comments:
Post a Comment