Curved Block
10.5 inch by 10.5 inch block made out of solids or batik solids (or something close to a solid). I would prefer jewel tones and colors that compliment them (blues, purples, pinks, teals, dark reds, dark oranges - basically not primary colors and not black, white, or gray -here's a sample: https://www.etsy.com/au/listing/732286625/jewel-tones-procreate-color-palette).
I will be cutting these blocks down to 9.5 inch blocks.
I created two short videos (links on bottom of this post), but here are some photos. NOTE the block in the photos is different than the block in the videos (it's the same fabric but the reverse block since you get pieces to make two blocks out of the two squares).
You only need to make one block but if you want to send in the other one that's great too!
Note - if curves freak you out, just make a straight line cut or a very slight curve - whatever you feel comfortable doing. Remember - this is just a quilt block. The purpose is to have fun and do something different. :)
 |
| step one |
Step One: Get two pieces of contrasting fabric 10.5 inches by 10.5 inches (you could use layer cake squares). Stack them right sides up on top of each other. Note that with solids there isn't a right side. There might be one with the batiks though so stack them both rights sides up.
 |
| step two |
Step Two: Make a gentle curve with your rotary cutter through both squares at the same time while they are on top of each other. I suggest that at the bottom or the top of your curve you have about an inch that is straight or close to being straight. This will help you line everything up when you go to sew.
 |
| step three |
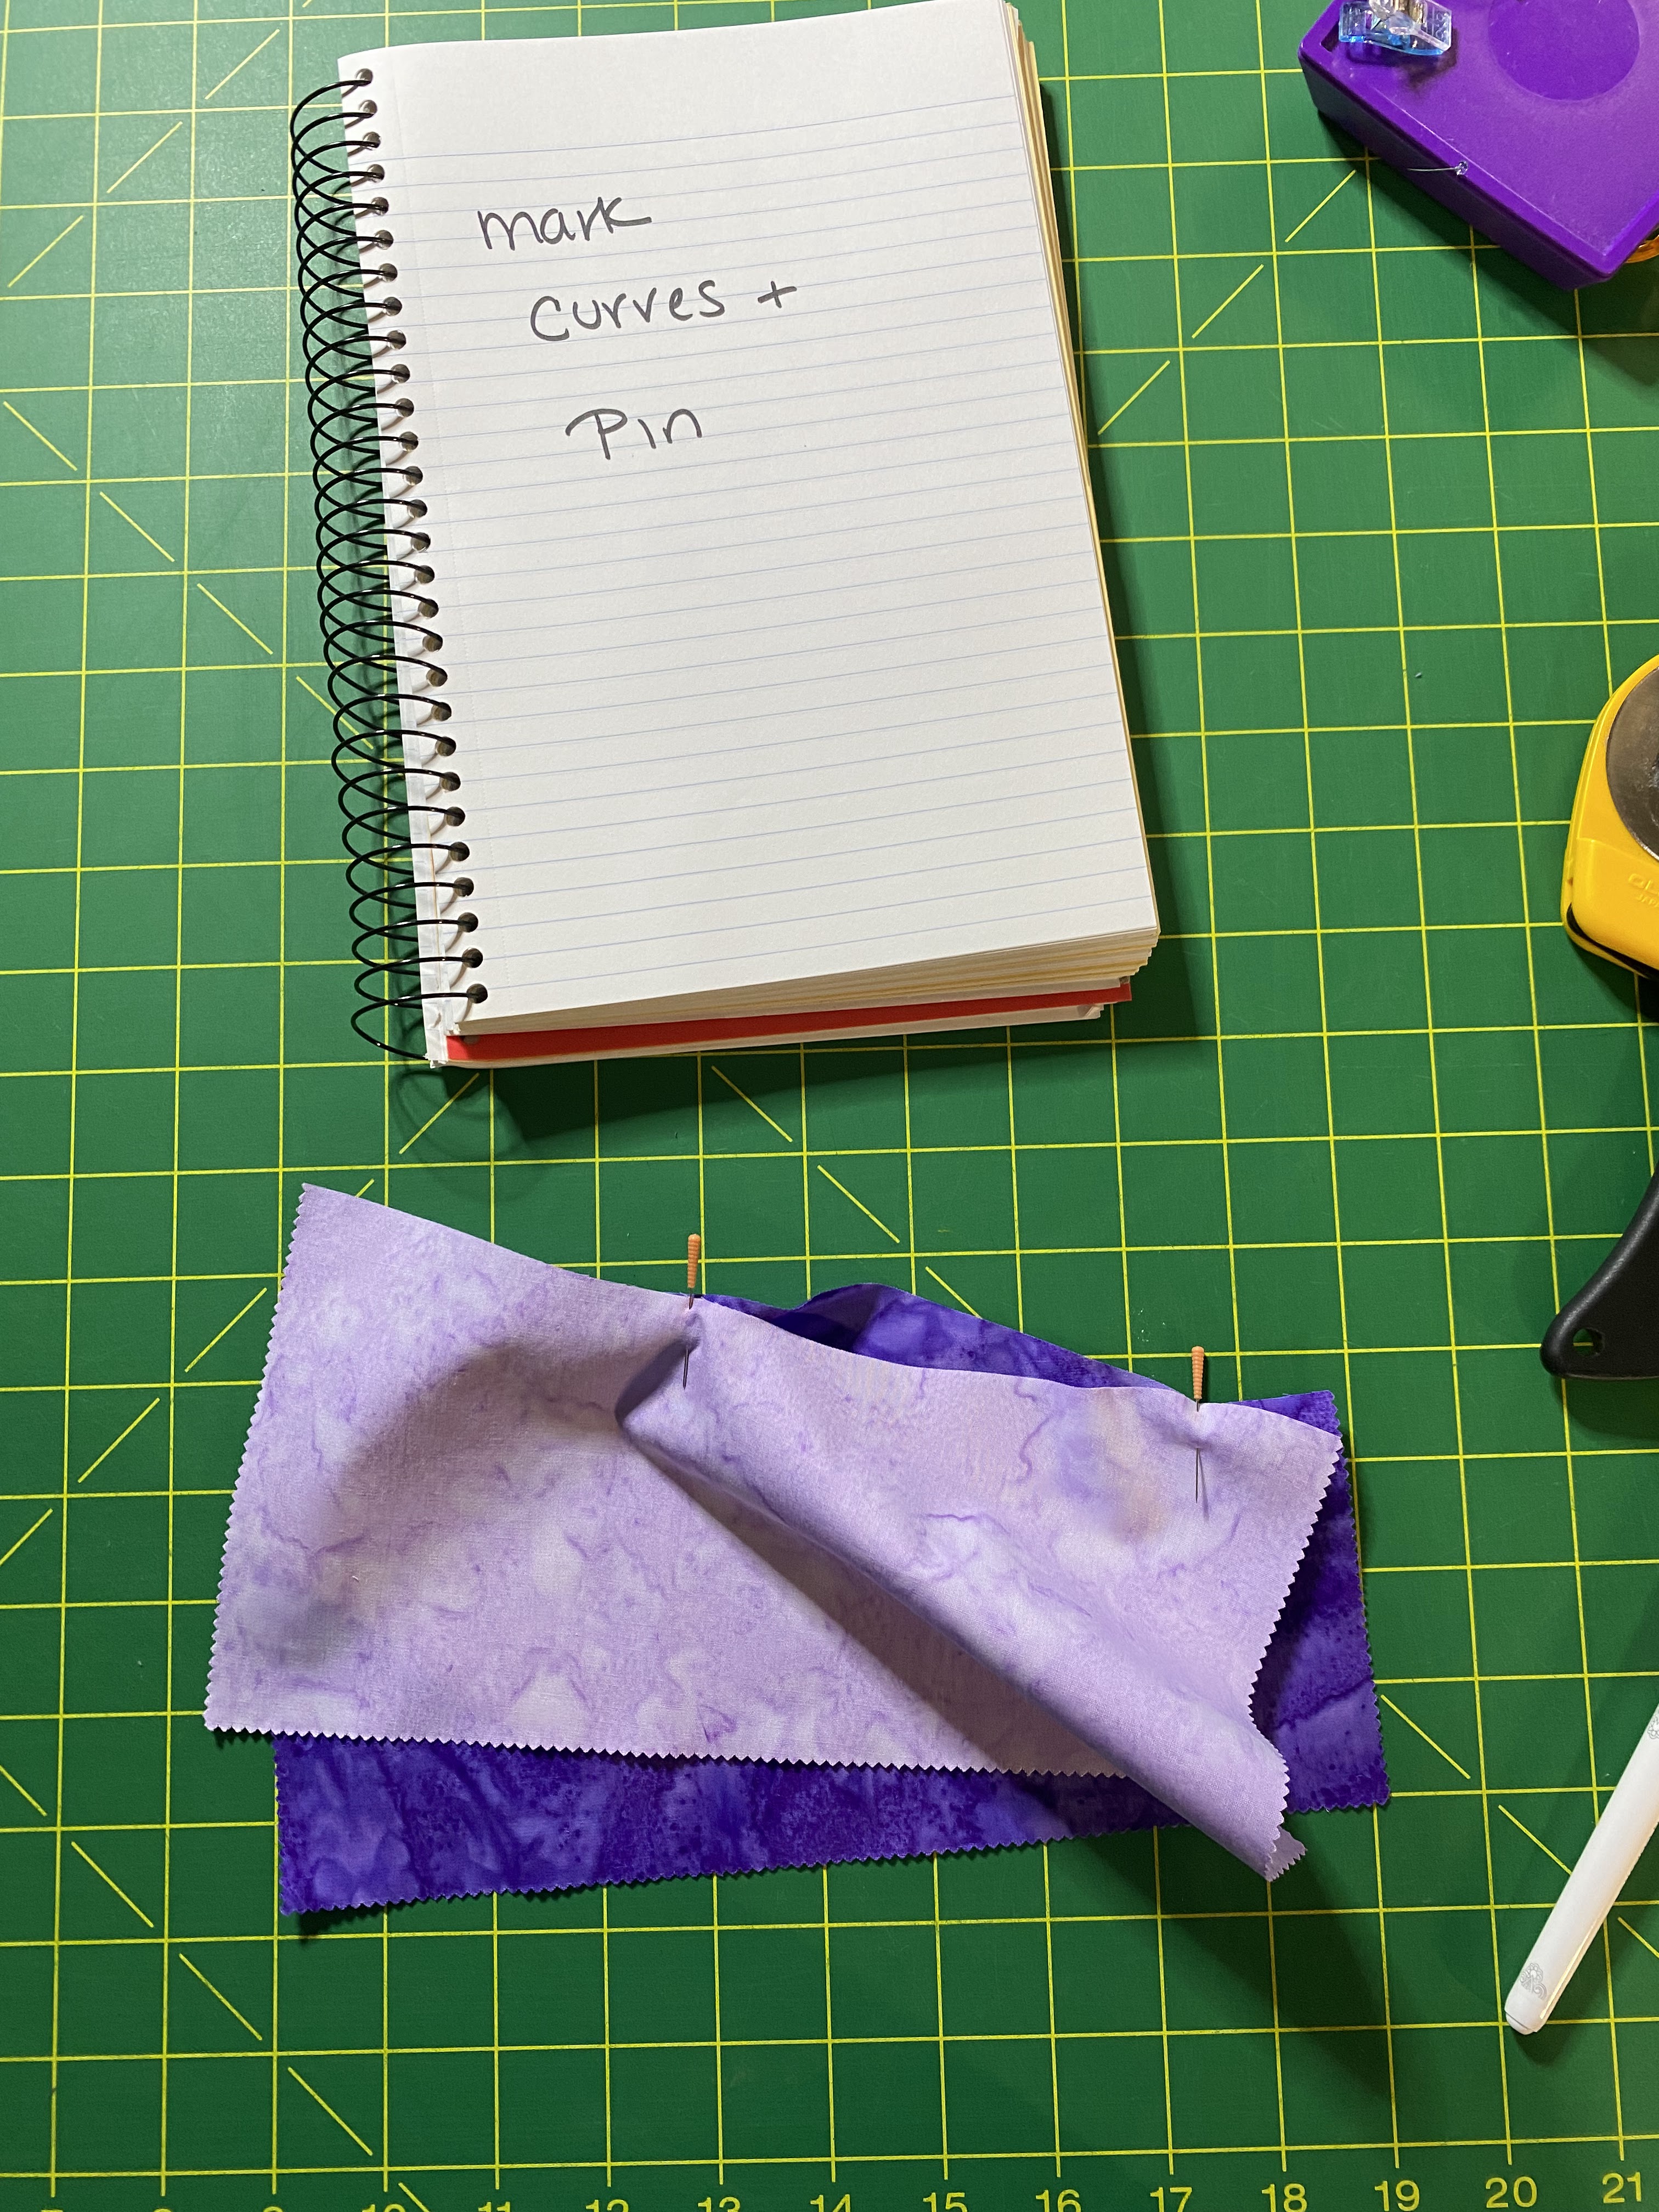
Step Three: Remove two pieces so that you only have one of each (so remove one bottom and remove the opposite top). This is your block! :) Mark your curves - see the two lines I made- one is in pink on the light purple and the other is in white chalk on the dark purple - just those two curves are marked.
 |
| step four |
Step Four: Flip the fabric so they are right sides together. They are NOT going to line up. This might make you anxious, which perfectly normal. Line up the lines you made on each curve and pin your two marks and then also pin the top part where it is straight. This helps you get started - once I get a few stitches in I usually take out the pins but you can keep them in until you get closer to them.
Here are the two videos I made. There are more professional videos on YouTube for piecing curves that you can check out as well. If you have ANY questions at all, please let me know and don't stress about this - quilting is art and there are literally no rules in art. You can email me at dmcutaia@gmail.com or send me a message on instagram:
https://www.instagram.com/ms.hanna.barbera/


No comments:
Post a Comment