
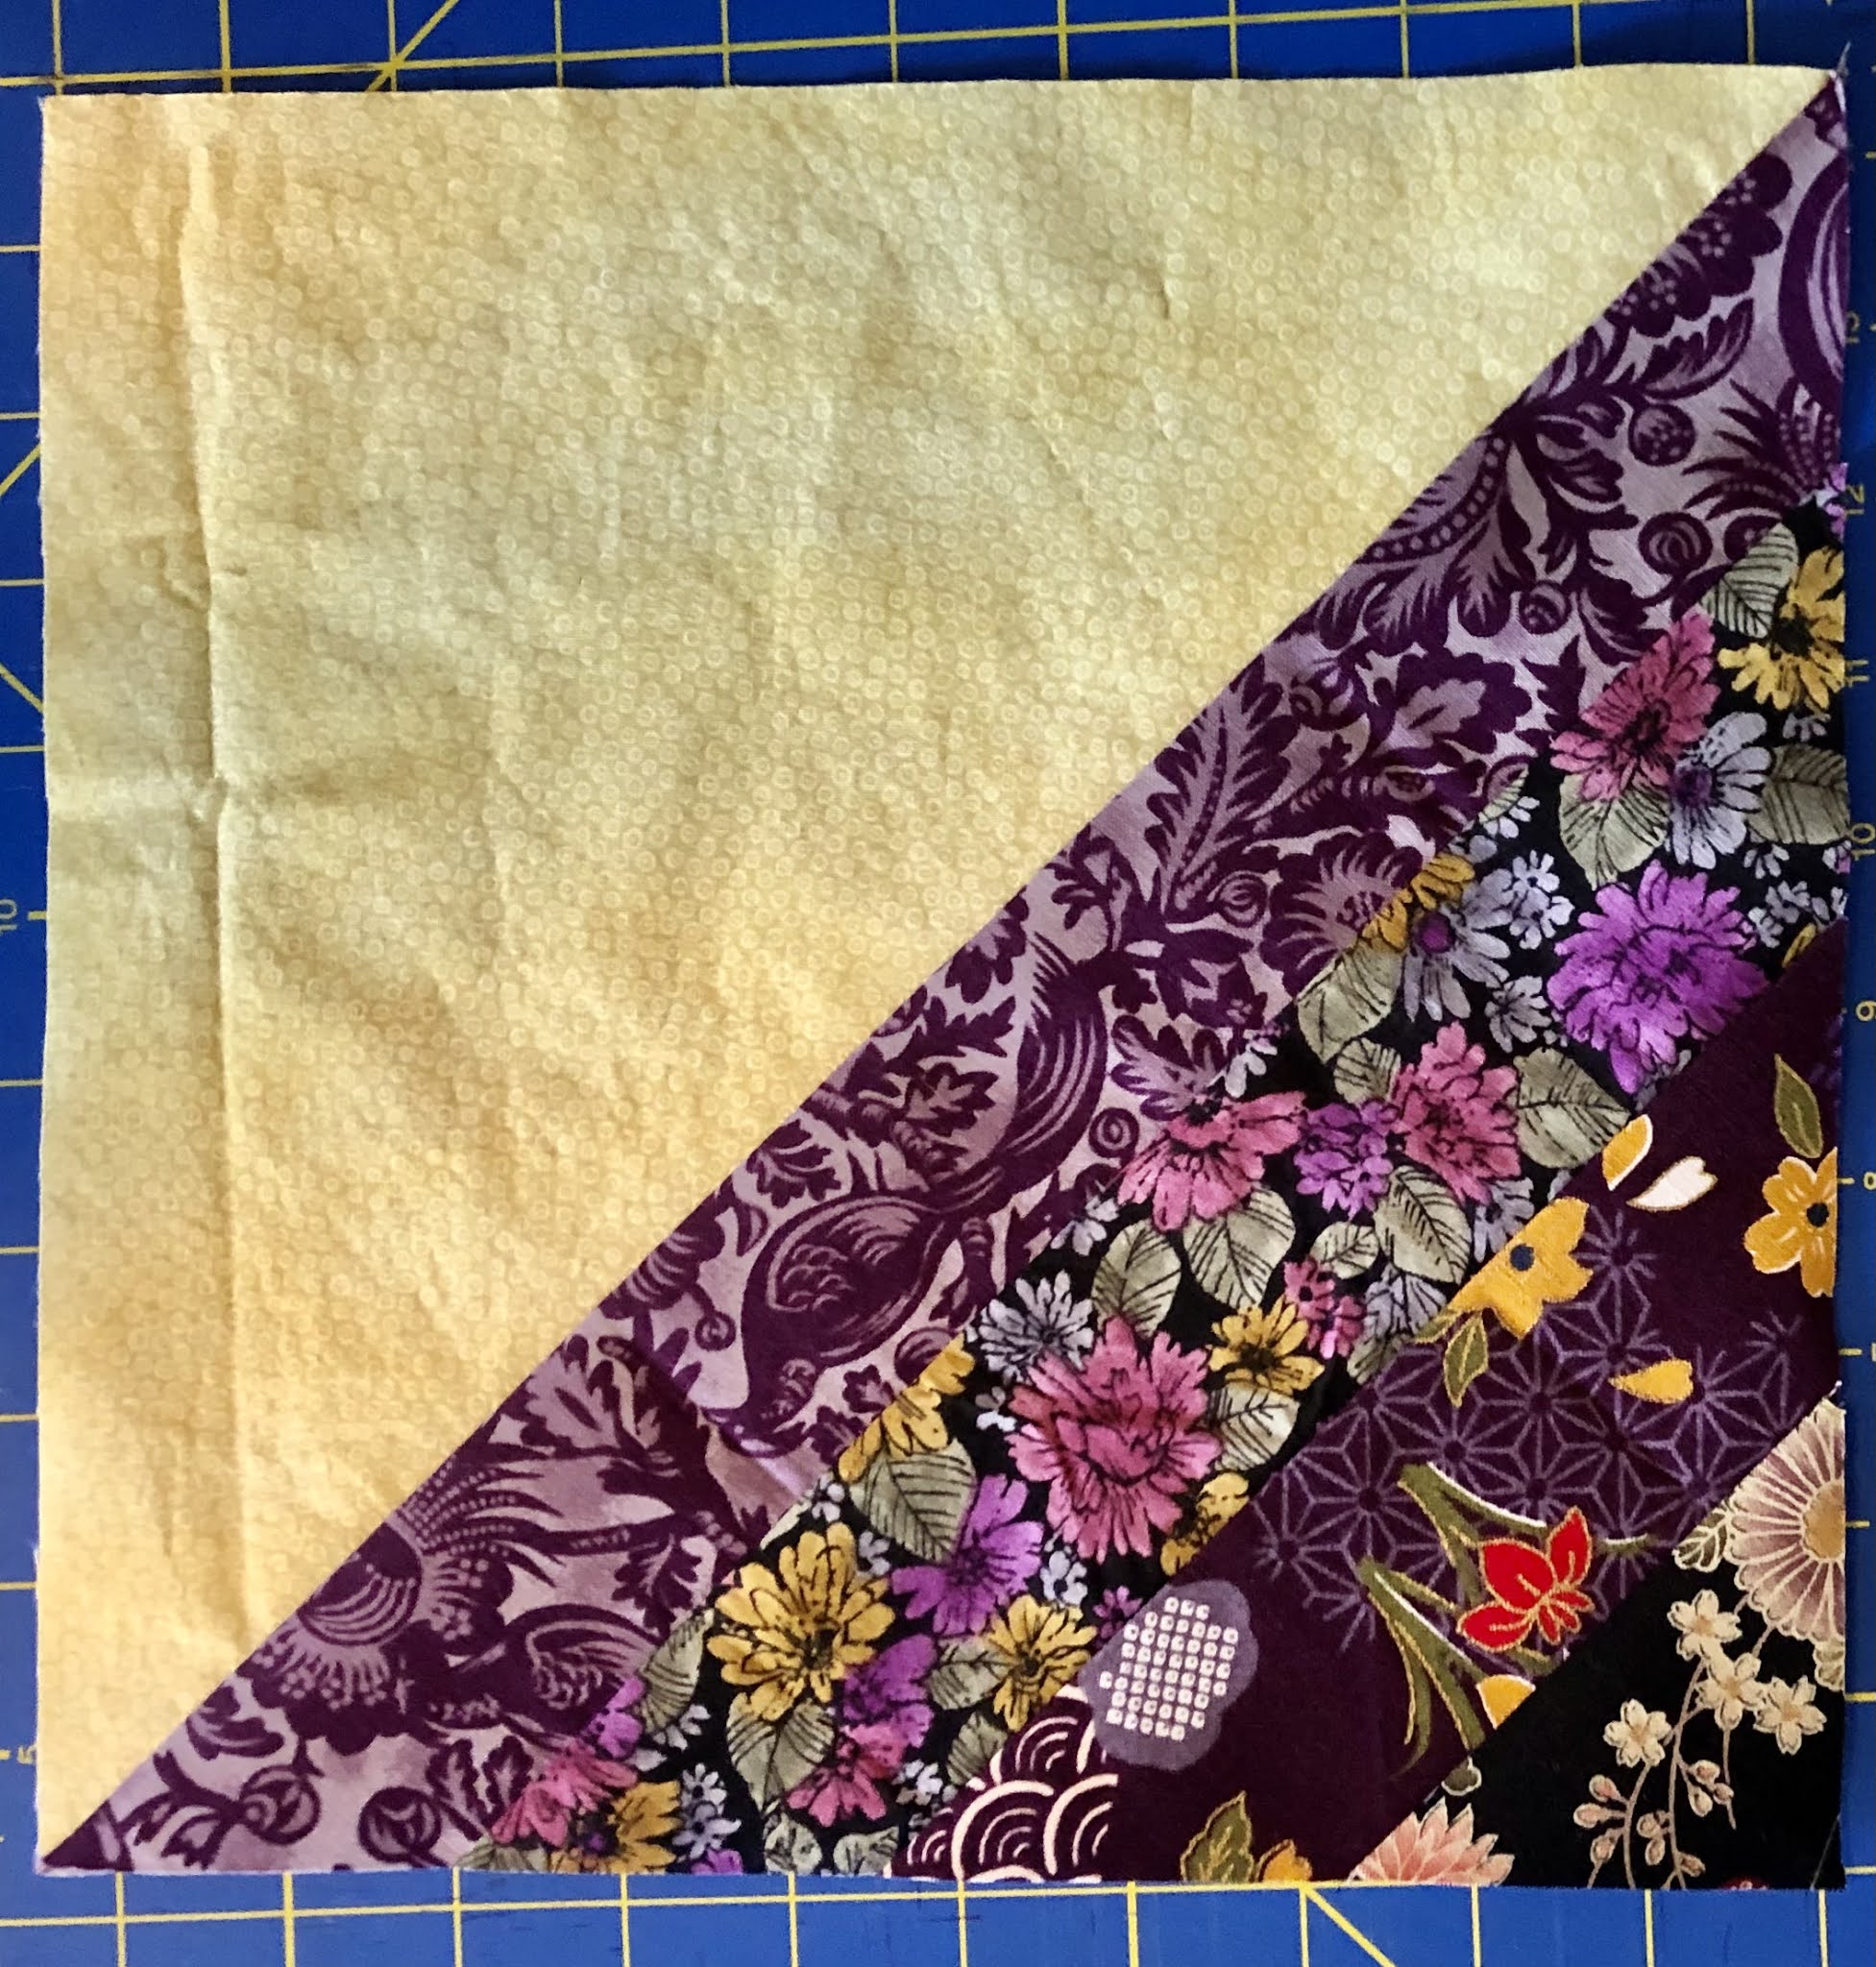

The April block that I have chosen is my take on the Amish design, Sunshine and Shadow. Some call it Sunlight and Shadow. This quilt block is comprised of an 11” square, cut on the diagonal. One half is one piece of fabric and the other half is strips of fabric. Very simple and easy to make. It will be Sunshine in the large triangle half, and Shadow in the striped half.
This quilt will be for me. I made this quilt before for my daughter but it was Shadow on the large half and Sunlight on the striped half. I am coming out of a dark time in my life. I want this quilt to be coming out of darkness into the light. My life recently has been topsy turvy, culminating in a divorce after 25 years of marriage. I joined this quilting bee to keep busy and inspired. A new block every month for friends I have never met sounded perfect to give me something to look forward to. And it’s going to be exciting to see what you send my way.
Please pick out:
1) four different darker fabrics for the “shadow” striped dark side. No solids preferred.
And
2) one sunshiney fun (no neon brights) subtle-patterned fabric for the “sunshine” light side. No solids please, tone on tone is fine though. (I used a buttery yellow tone on tone for some of mine already.)
PALLET:
For the dark Shadow side: purple, gold, burgundy, rust, lavender, navy, blue, brown, black. Something with stars is good on the dark side, but it’s not necessary. Any dark patterns in those colors. The dark fabric can be fun and colorful with a little bit of light accents just so long as it reads dark.
 I’m
I’mAnd for the light Sunshine side: buttery yellows, cream, light tan, cream and a little accent color will be fine so long as it’s not neon bright. It’s ok to use a printed fabric with a bit of dark on it just so long as it reads light. No neon brights please! a little softer colors here.


Tutorial-
1) cut a Manila envelope (or parchment paper or some stiff paper you have) into an 11” square, draw a line on the diagonal and cut it in half diagonally.


2) For the light fabric lay the triangle on the light fabric and cut with your ruler and rotary cutter, or draw around the pattern with a pen and cut with scissors.

3) For the dark fabric pick 4 fabrics.
Cut strips in 4 different lengths:
16 1/4” long x 2 1/2” wide
12 1/2” long x 2 1/2” wide
9” long x 2 1/2” wide
5 1/2” long x 2 1/2” wide
the longest 16 1/4” strip will be at the wide base of the triangle, and the shortest 5 1/2” strip will be at the point of the triangle.

4) Lay the 16 1/4” strip on your ruled mat. Take your 12 1/2” strip and line it up and center it to the longer strip. I use a ruled mat to lay this out so that you can easily find the middle as you are joining the pieces. Once you have found that your strips are meeting in the middle, turn it over so that right sides are together and sew on the top so that when you open it you have them stacked up so as to start creating the triangle. Then do the same with the 9” strip and the 5 1/2” strip. Iron towards the large edge. You will end up with a triangular piece that steps up on the sides


5) Lay your paper triangle pattern on top of the strips. Cut along the pattern with either a ruler and rotary cutter, or draw around pattern with pen and cut with scissors.


Join the 2 triangle pieces together, iron towards the light triangle.
Finished block 10.5” square. Do not trim, no need for that, I’ll do that if it needs it. Thanks.


You are done. Thank you for your quilty goodness coming my way.
Carolyn
No comments:
Post a Comment