
This month we are going to make some Bear Paw blocks!
I had never made a Bear Paw block before, but it has been on my to-do-list for quite some time. We live in Northern British Columbia and we have black bears and grizzly bears in the region. My partner is Indigenous from the Haida First Nation, and our son’s name is Taan which means bear in Haida. We obviously have a love for bears, so it’s about time to make one of these blocks.
Have you made a Bear Paw block before?
Do you have bears where you live? Do you have any bear encounter stories?
I want to make a baby or throw size quilt for one of my closest friends who is expecting her first baby this summer- a baby boy! My friend is Canadian, her husband is British and they currently live in Boston. They moved there for his job at the beginning of last year, and due to the pandemic they have been pretty isolated and haven’t made many new friends. I want this quilt to be like a big friendly bear hug for them and their baby, so I love that we have members from Britain, Canada and the US.
So lets get started.
I used a tutorial from Tara Reed as the foundation for my block.
https://tarareed.com/bear-paw-block/
We will be doing the 14” size (Your block will measure 14.5”, so they will be 14” when sewn together)
The hardest part of the block are the Half-square-triangles (HSTs). I generally struggle getting HSTs accurate, so if you have any HST tips, please include them when you post your block to IG.
I found that her measurements did not allow me much room for trimming the HSTs so if you struggle with accuracy like me, I recommend cutting the squares for the HSTs larger. I will include measurements for both.
Fabrics
You will need 4 different fabrics- solids or prints are okay.
Novelty fabrics are okay too, as long as they are not licenced fabrics (i.e. no Dr. Suess, Disney, etc.)
My friend loves florals so if you have a floral that you think would work for a baby boy quilt, feel free to include it. Her husband is a scientist and plays the violin, so any science/math or music fabric is a bonus!
No batiks please.
Background: White
This can be solid white, tone on tone, or a white fabric with a black or grey print or text so long as it reads as white from afar.
Please no creams
Bear Paw: 2 fabrics- Teal/Turquoise OR Apple/Yellowy Greens
Please choose 2 different fabrics in one of the colours. They can be solids or prints.
Teal/Turquoise- nothing too blue or aqua.
Yellowy green- think chartreuse, lime, apple green- any green that is more on the yellow side than greens like kelly green, emerald green, forest green
Center square: 1 fabric- Teal/Turquoise OR Apple/Yellowy Greens
Use the opposite of whichever colour you used for the Bear Paw.
I.e. if you do a turquoise bear paw, the cornerstone would be green.
This is a small square so dig through your scraps!
Here are some photos of my fabric pulls.
 |
| Whites |
 |
| Teals and Turquoise fabrics |
 |
| Yellowy Green Fabrics |
Cutting
There are 2 methods for making HSTs that I will demonstrate. You can do the 2 at a time method, as per the original tutorial. Or you can do the 8 at a time method (way faster). Whichever method you choose will affect the cutting measurements.
I used Blossom Heart Quilt’s tutorial to determine the cutting measurements for the 8 at a time method.
http://www.blossomheartquilts.com/2015/05/hst-tutorial-eight-at-a-time/
 |
| Cutting for 2-at-a-time HST method |
Sewing - USE SCANT ¼” SEAM ALLOWANCE
Step 1: Create 16 HSTs
2 at a time method (as per original tutorial):
Pair up the 8 white squares, and the 8 coloured squares, right sides together
Draw a line diagonally on the back of one of the squares in each pair.
Sew a scant ¼” away from the line on either side of the line
Cut on the original drwan diagonal line
Press toward the color fabric
Trim to 2 ½” square


8 at a time method (as per Blossom Heart Quilt’s tutorial):
Pair up the 2 white squares and the 2 coloured squared, right sides together
Draw two lines diagonally, corner to corner on each pair.
You may wish to pin the squares together
Sew ¼” away from the line on both sides of each line
Cut on the drawn diagonal lines, and then cut again on the vertical and horizontal to make 8 HSTs
Press toward the colour fabric
Trim to 2 ½” square
 |
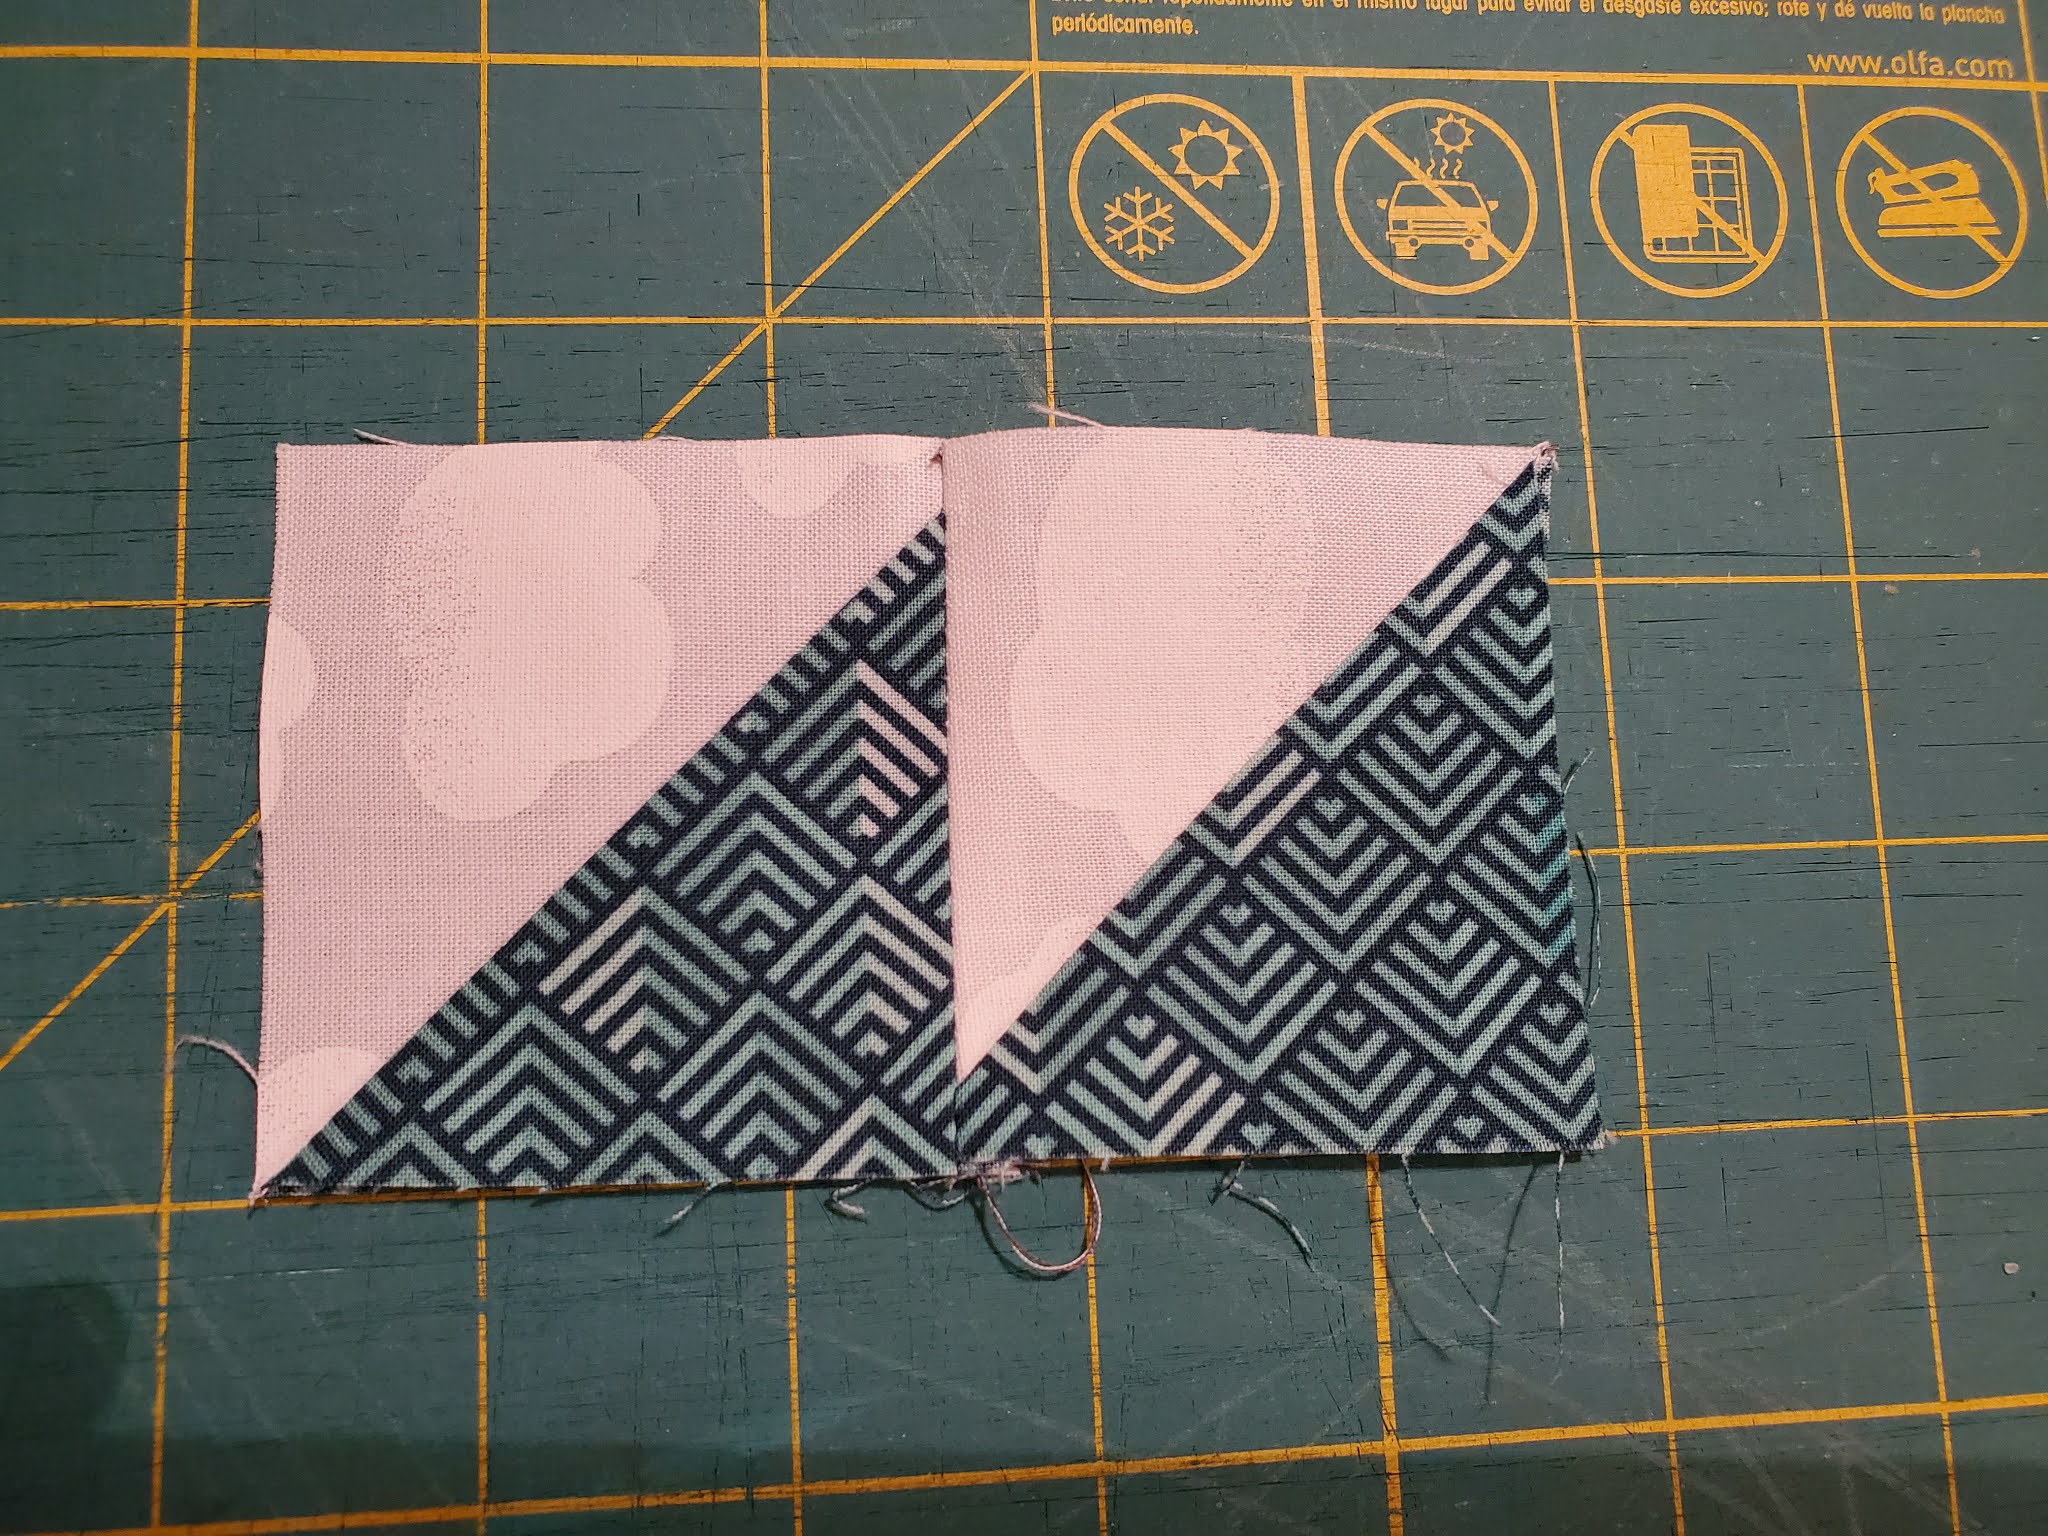
| 8-at-a-time HST method: Mark 2 diagonals |
 |
| 8-at-a-time HST method: cutting |
Step 2: Join HSTs to make the claws
I recommend chain piecing to make this step go faster.
 |
| Chain piecing |
Pay close attention to the direction of the HSTs.
Sew together 8 pairs to make 4 of the top paw units.
Press seams open
 |
| Top claw unit |
 |
| Side Claw unit |
Sew together 8 HST pairs to make 4 of these units for the side of the paw.
Then sew the white corner squares to these
Press seams open
Step 3: Assemble the paws
Sew the top claws to the centre paw piece
Press open
Sew the side claw unit to the centre paw/top claw unit
Press open
 |
| Assemble 4 bear paws |
Step 4: Assemble the block
Lay the pieces out as shown
 |
| Block Lay Out |
Sew each row together.
Press toward the coloured centre square for the middle row, and press toward the paw for the top and bottom rows. This will allow you to nest the seams
Sew the 3 rows together
Ta Da!!!!
 |
| Finished Block |
 |
| Alternate colour-way (incomplete) |
Message me on IG if you have any questions about fabric choices or about the cutting/sewing instructions.
Sending you Big Bear Hugs!
When you post your block, please share any HST tips you have!
Alanna
No comments:
Post a Comment