Hi, Everyone! My name is Bonnie and this is my second year participating in Stash Bee. As per usual, I agonized over what to do when my turn came around, so once again, I turned to my Hive for help. With all their awesome feedback, I'm now pretty excited about this one.
The Plan:
With your help, I would like to create a space-themed sampler quilt. I have found that I absolutely love samplers, because I love making lots of different types of blocks, trying new patterns and techniques, and putting them all together like a puzzle. So for this quilt, I’d love it if you could make ANY block(s) you want that fits the theme. Think stars, constellations, planets, spaceships, black holes, eclipses, suns, meteors, comets, aliens (if you can figure out how to make me a xenomorph, we will be friends forever, haha), moons, galaxies, or anything else you can think of. Use whatever techniques you’d like. Straight piecing, curved piecing, big pieces, tiny pieces, FPP, EPP, applique, crumb piecing, string piecing, seriously whatever. Be as creative (or not) as you want to be. I’d like it to be more “adult” so please avoid things like astronaut cats. Words/phrases could be okay, too, depending. The pattern itself does NOT have to be space-themed. If you hate stars, just try to aim for space-y colors and do a row of flying geese or something for filler.
Colors & Prints:
I’m envisioning BOLD, BRIGHT colors against a BLACK background for maximum “poppage.” I made that word up, but you get it, yeah? Take a look at my inspiration collage below. Notice that there is not any green, which is shocking because green is my favorite color. Please avoid green (😭).

While I also LOVE botanical prints, I don’t feel they are in keeping with the theme, so please avoid florals, leaves, trees, and the like. Blenders, geometric designs, stars, dots, etc. would all be appropriate prints for this. Novelty science prints COULD be okay, but please use your best judgement re: whether they read adult or juvenile. If you think you have something really fitting, but worry about the appropriateness, feel free to send me a picture, because I often bend rules. Heh…
Background: Please use white on black prints, black on black prints, bold colors on black prints, or solid black prints for the background. Please make sure they read black and not gray or navy. SUPER dark grey is okay.

Celestial Spacy Stuff: I’m super eloquent. Please use Maroon,
Firey Orange, Yellow, Teal, Blue, Purple, Magenta, White, etc. Please NO green.
Teal/turquoise OKAY. If you’re doing something made of metal, like a spaceship,
please stick to realistic greys. As you can see below, I have too much fabric
I like basically everything, including batiks, metallics, etc. So don’t worry yourself overmuch-- Just avoid
florals and other botanical and novelty prints.

Pressing
Please press
to one side. It's just my preference. Thank you!
Go Forth and Create...
...If you feel inspired. If you're not sure what you want to do and could use some ideas, scroll to the bottom where I've listed tons of free theme-y patterns and tutorials. If you hate this, keep reading and make one of the blocks from my two tutorials below.
Tutorials
Now for those of you who prefer to not be given free reign and would like to just be told exactly what to do I have written up a couple of simple star block tutorials. I envision lots of stars in this quilt, so stars of all sorts are welcome.
OPTION ONE – FRIENDSHIP STAR
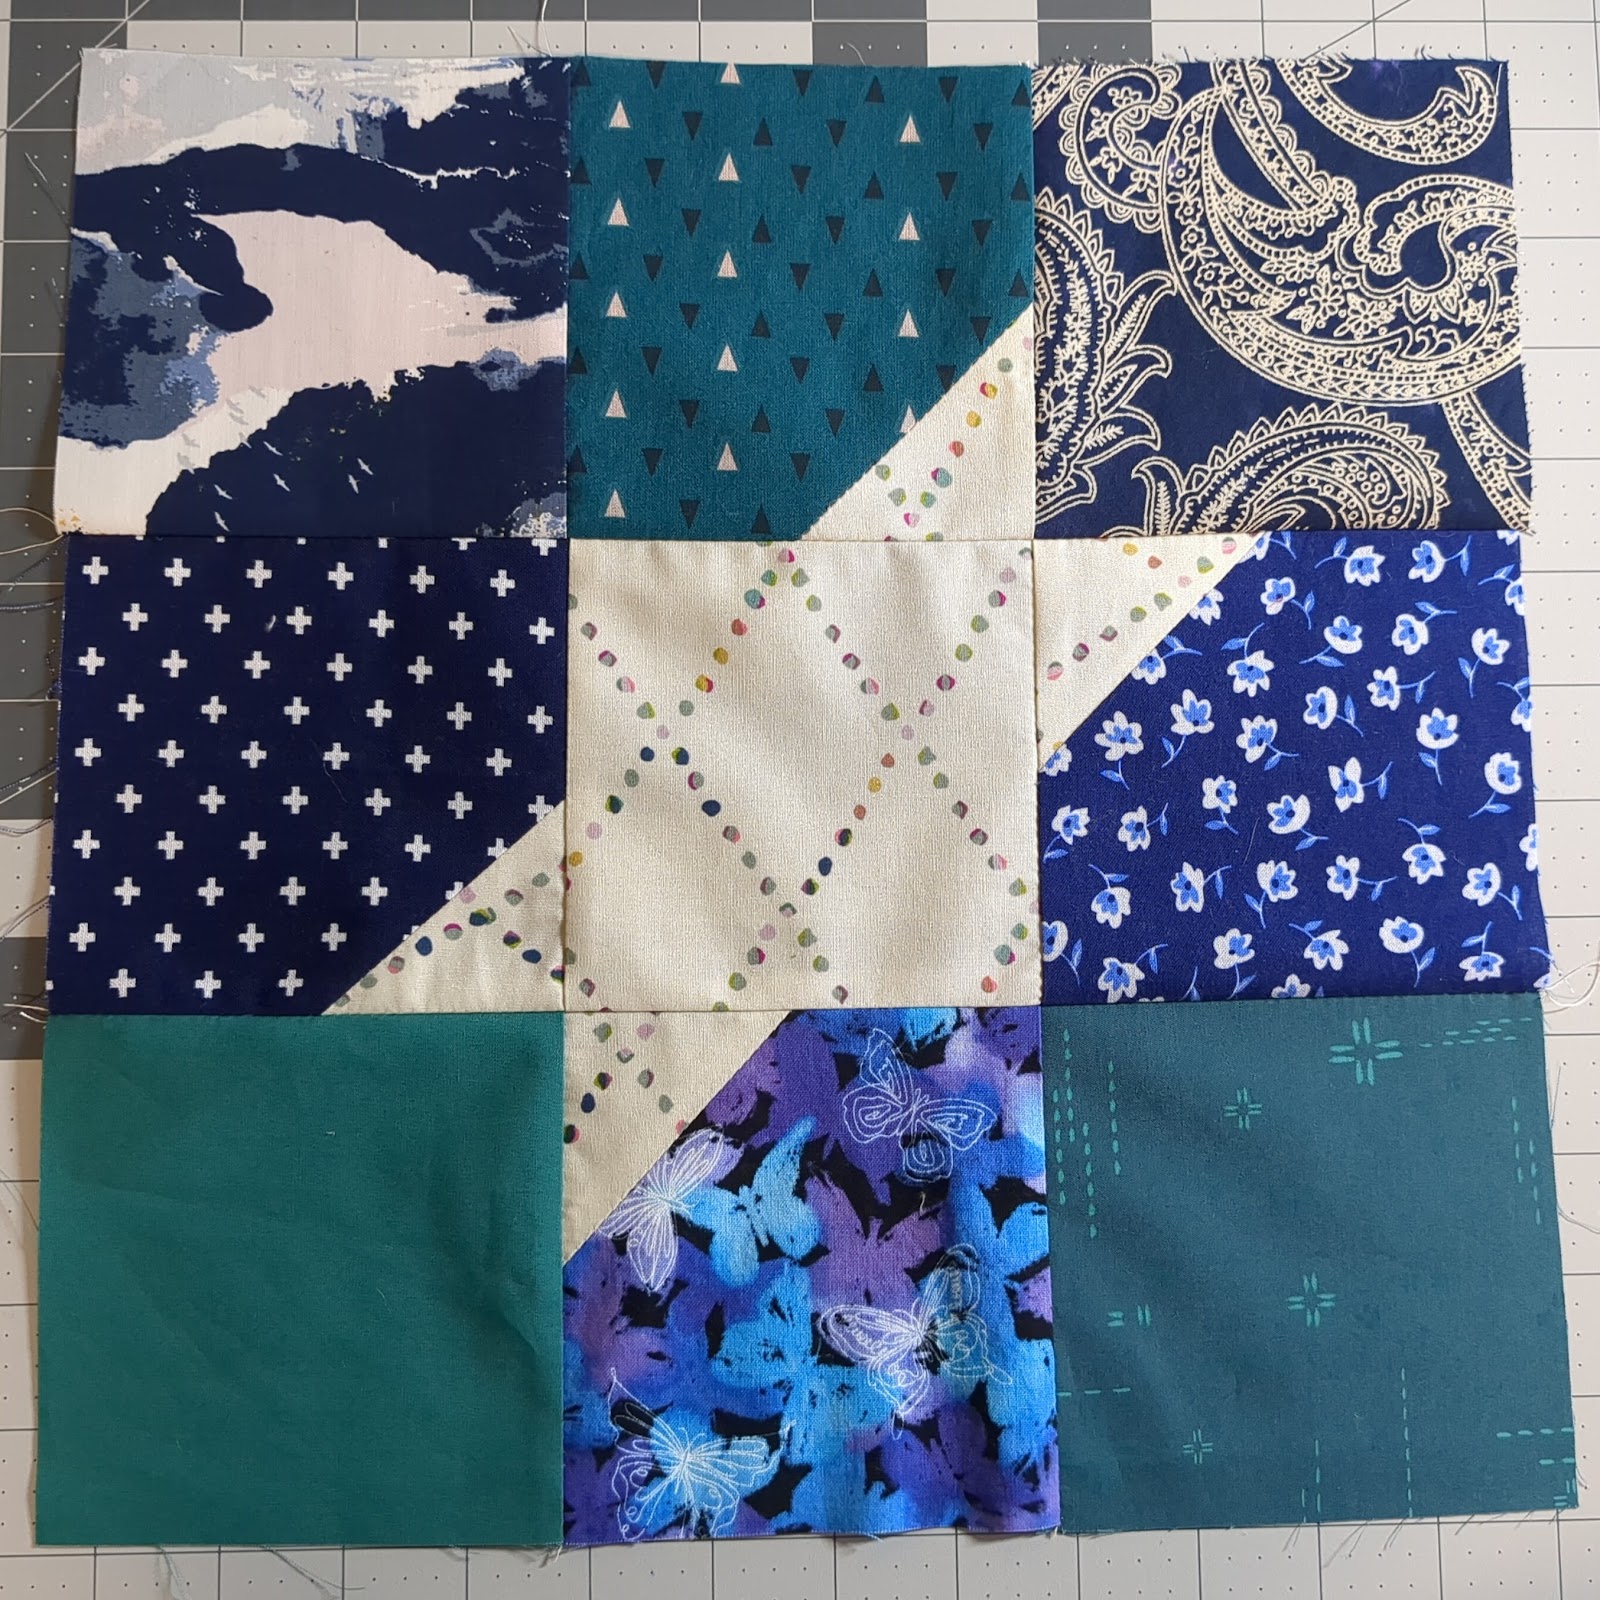
This is just a nine-patch with a few Half Square Triangles (HSTs).
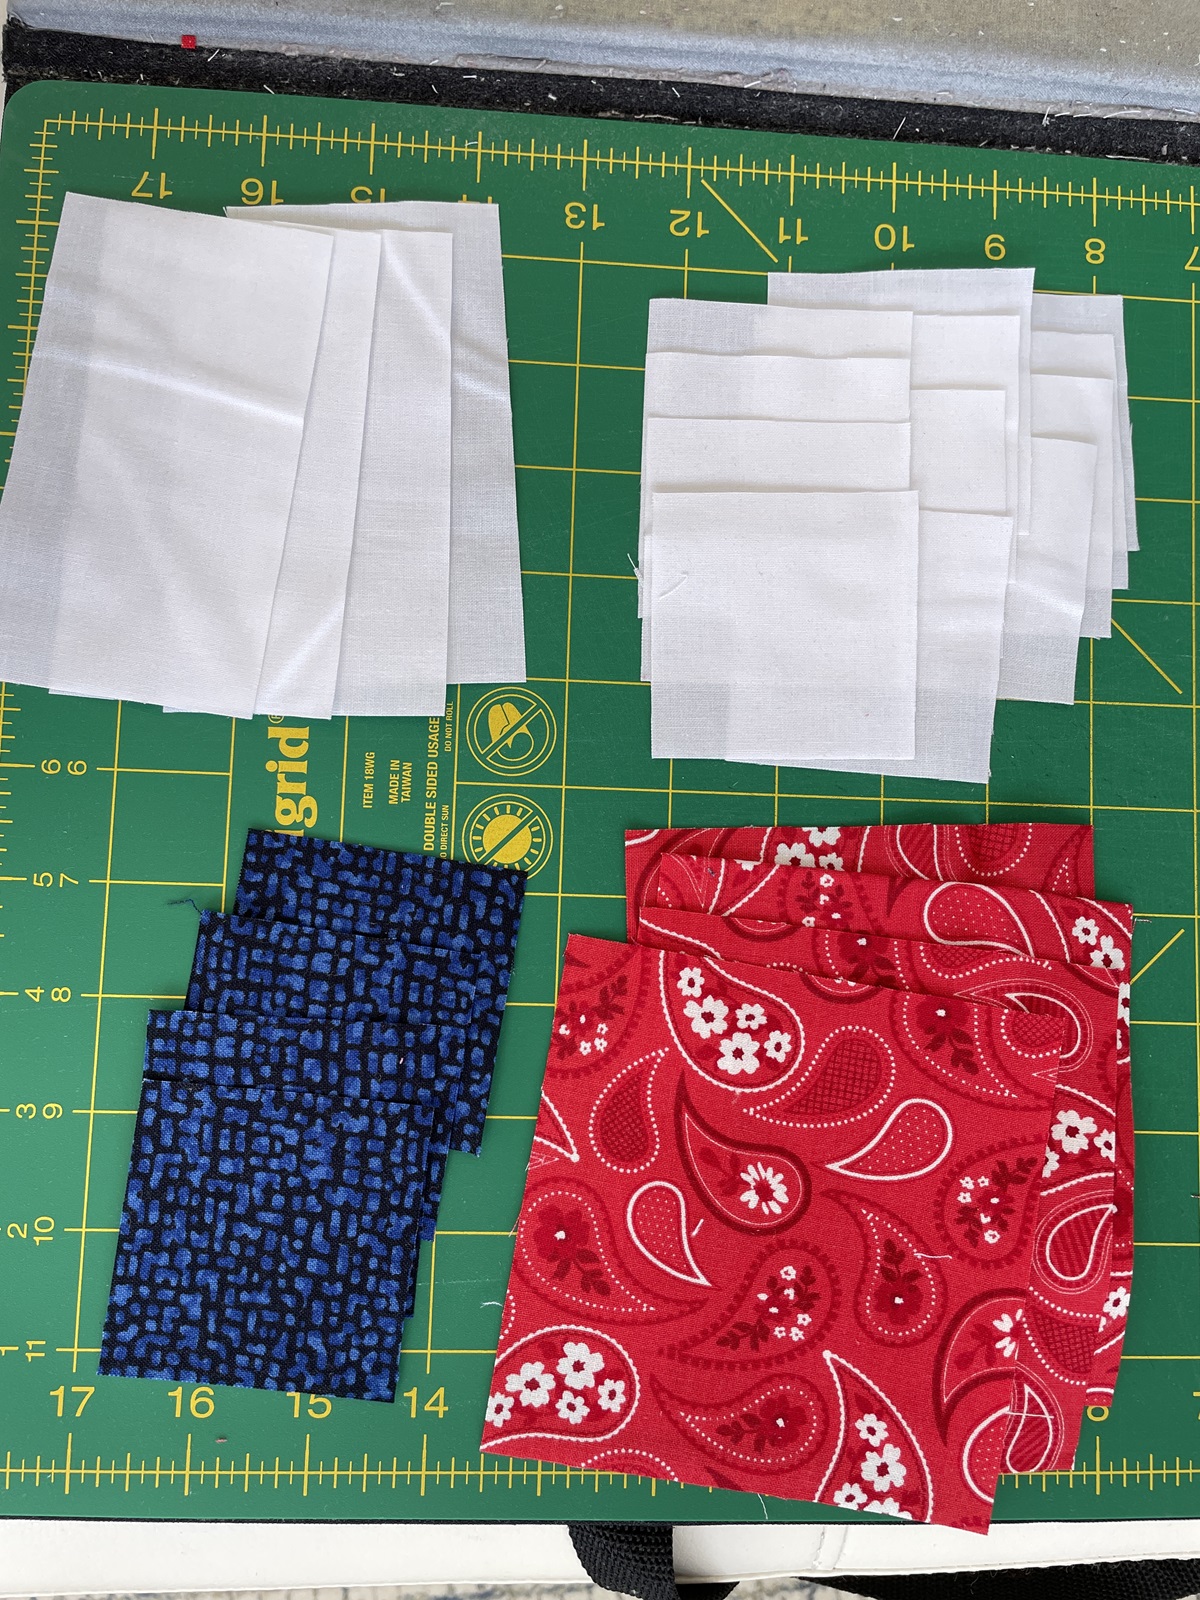
Cutting:
|
|
FINISHED SIZE |
|||
|
SQUARES |
3” Block |
4.5” Block |
6” Block |
7.5” Block |
|
BLACK background |
(4) 1.5” |
(4) 2” |
(4) 2.5” |
(4) 3” |
|
COLOR or WHITE |
(1) 1.5” |
(1) 2” |
(1) 2.5” |
(1) 3” |
These instructions use the traditional method of making HSTs, but many stars use multiples of four, so the 4-at-a-time technique where you sew all the way around the square and then cut on both diagonals or the 8-at-a-time method that I’ve personally never tried may be more your speed. You can also make the HST Squares 1/8” larger and just trim more if you don’t mind the waste. My favorite method is to use the essential triangle tool by Bonnie Hunter. Use whatever method you’re comfortable with!

Make the HSTs:
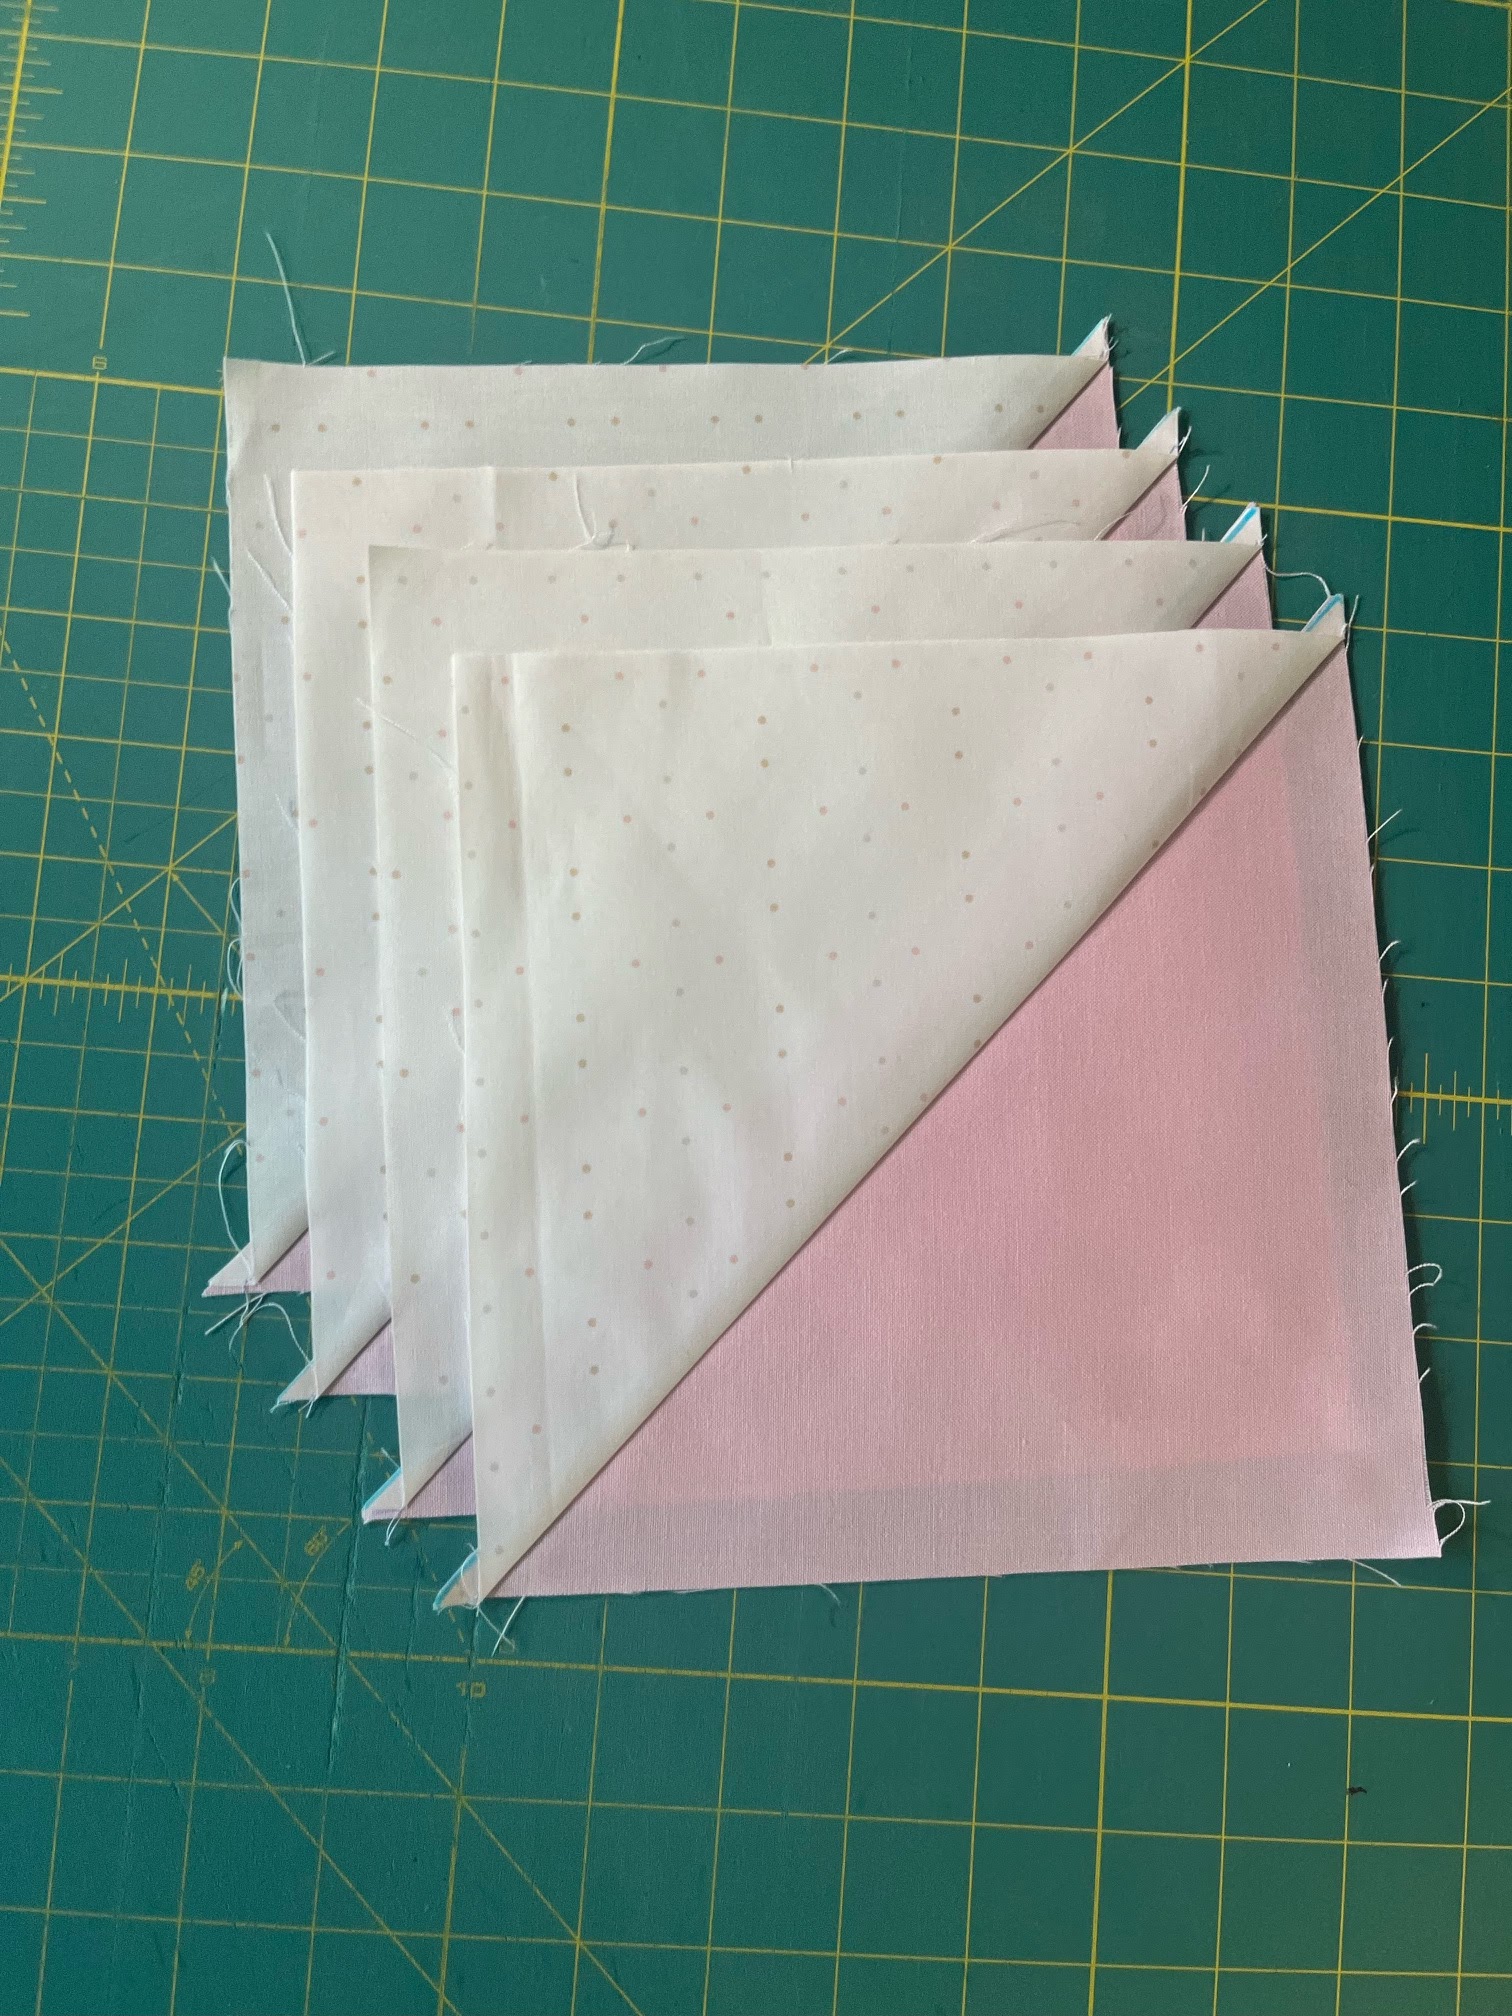
Put two squares right sides together. Draw a line from corner to corner. Or be super rebellious like me and just lop those babies in half and risk bias stretching when you sew them. I hate taking my seam guide off my machine if I don’t have to.


Trim to the appropriate size, which is the same size as the plain square blocks.

Lay out the squares and HSTs and then sew into rows. Please press toward the squares (away from the HSTs).
Sew the rows together with nesting seams. Please press away from the center.

OPTION TWO – OHIO STAR
This is just like the friendship star, but with Quarter Square Triangles (QSTs) aka Hourglass units instead of HSTs.
Cutting:
|
|
FINISHED SIZE |
|||
|
SQUARES |
4.5” Block |
6” Block |
7.5” Block |
9” Block |
|
BLACK background |
(4) 2” |
(4) 2.5” |
(4) 3” |
(4) 3.5” |
|
COLOR A |
(1) 2” |
(1) 2.5” |
(1) 2.5” |
(1) 3.5” |
|
COLOR B |
(1) 2 7/8” |
(1) 3 3/8” |
(1) 3 7/8” |
(1) 4 3/8” |
|
COLOR C |
(2) 2 7/8” |
(2) 3 3/8” |
(2) 3 7/8” |
(2) 4 3/8” |
See my spiel on HSTs (also relevant for QSTs) in the option 1 tutorial.

Make the HSTs:
Follow the method listed above in Option 1. You should be pairing a black background square with a C Square and a B square with a C square.

Press toward COLOR C or away from Color C, just be consistent with all of them. In this case I pressed AWAY from Color C.

Put two HSTs right sides together. So that the seams nest and Color C triangles are opposite each other.

Again draw a line from corner to corner, perpedicular to the seam. Sew ¼” from the line on each side of the square and then cut on the line. Or be rebellious 😉. Please press towards the side with the black background triangle or be fancy and spin the seam. Trim to the appropriate size, which is the same size as Color A squares.

Lay out the squares and QSTs and then sew into rows. Please press toward the squares (away from the QSTs).
Join the rows together by nesting the seams. Please press away from the center.

Fin!
Free Patterns/Tutorials
For those of you who are down with this challenge, but have NO idea where to start (I get it, I’m super indecisive myself), below are some FREE patterns for star blocks and theme-y stuff that might inspire you:
If you fancy STARS:
- Fast Flying Geese Sawtooth Star by Amy Smart @ Diary of a Quilter https://www.diaryofaquilter.com/fast-flying-geese-sawtooth-star/
- Tiny Wonky Star by Emedoodle of Mommy’s Nap Time http://mommysnaptime.blogspot.com/2011/02/tutorial-tiny-wonky-stars.html
- Bright Hopes Star Blocks by Fresh Lemon Quilts https://www.freshlemonsquilts.com/journal/solstice-stars-series-another-star
- Double Option Stars by Melanie Rudy @ Quilters Enjoy Color http://quiltersenjoycolor.blogspot.com/2013/09/double-option-stars.html
- Scrappy Rainbow Star by Melissa Corry of Happy Quilting http://www.happyquiltingmelissa.com/2012/12/scrappy-rainbow-star-tutorial.html
- Sun Block from APQS https://www.apqs.com/free-quilt-pattern-sunrise/
- Rocket Star Block by Sherry at Powered by Quilting https://poweredbyquilting.com/2019/05/03/rocket-star-quilt-block/
- So many star blocks here: https://www.generations-quilt-patterns.com/star-quilt-block-patterns.html#Blocks
- Several star blocks here @ Piece N Quilt https://www.pieceandquilt.com/2015/05/30-days-of-sewing-quilt-blocks-star.html
- Wombat Quilts has a TON of free FPP star patterns here and they are all SOOOO cool: https://wombatquilts.com/free-paper-piecing-patterns/
If you’re partial to PLANETS / MOONS:
- Scrappy Drunkards Path by Center Street Quilts https://www.centerstreetquilts.com/drunkards-path-scrappy-circles-quilt-with-free-tutorial/
- Simple Circles by Andy @ A Bright Corner http://www.abrightcorner.com/2017/07/simple-circles-quilt-coming-up-roses.html
- Circles & Half Moons Afire by The Quilter’s Planner https://quiltersplanner.com/how-to-piece-circles-free-half-moons-afire-quilting-pattern/
- Full Circles from Yvonne @ Quilting Jet Girl https://quiltingjetgirl.com/2016/02/09/sewing-full-circles-tutorial/
- Dance With Me Applique from Quilting Daily https://www.quiltingdaily.com/quilt/dance-with-me-free-circle-applique-quilt-block-quilt/
- Improv Circles from She Can Quilt https://www.shecanquilt.ca/2017/01/improv-circles-2016-fal-tutorial.html
- Eclipse by AGF https://www.fatquartershop.com/eclipse-quilt-free-pdf-pattern
If you’re fond of SHIPS and STATIONS:
- Star Wars ship/deathstar FPP patterns by Quiet Play – I especially love the geometric versions. https://payhip.com/b/YFVv
- Fandom in Stitches has some neat FPP Star Wars ships/stations if you scroll down a bit http://www.fandominstitches.com/2010/03/star-wars.html
- UFO Block by Monica Curry https://drive.google.com/file/d/1WOVjsMWPhip8ndUMTRoy5gt960zMqy4L/view
- FPP Rocket over at Handicrafty Sisters http://handicraftysisters.blogspot.com/2011/06/paper-pieced-rocket.html
If you’re a fan of other SPACE-Y THINGS:
- Comet from Ruby Star Society (This is obviously way too big so you’d have to be comfortable scaling down and cropping) https://www.fatquartershop.com/comet-quilt-free-pdf-pattern
- Some cool blocks here that can fit the theme: https://quiltinspiration.blogspot.com/2022/09/free-pattern-day-rainbow-quilts.html
- This twisted log cabin looks pretty complicated if anyone is up for a challenge https://www.quiltingboard.com/tutorials-f10/twisted-log-cabin-t81954.html
- Snail Trail Block from FQS https://www.fatquartershop.com/snail-trail-quilt-block-free-pattern
- This Tula pattern is neat (One of the body portions, not the head) https://www.fatquartershop.com/serpentine-quilt-free-pdf-pattern
-
Spiral Flying Geese https://www.freequiltpatterns.info/free-tutorial---spiral-geese-mini-quilt-by-janice-zeller.htm
Bonus Content
And finally, if you're still with me, while searching for all those tutorials above I found this cool article for about Karen Nyberg: http://quiltingdigest.com/one-of-these-blocks-was-made-on-the-space-station/
More about retired Astronaut / Artist Karen Nyburg: https://karennyberg.com/artist/
THANK YOU ALL, I AM SO EXCITED FOR ALL THE HAPPY MAIL!
💚 BONNIE aka @gingerbreaddscraps
P.S. I missed half my address in the address file when it was first sent out, so if you downloaded it BEFORE I corrected it, just an FYI that it is now correct. Also feel free to just PM me and I'll give you my address.