Hi! My name is Meg, and this is my second year participating in Stashbee. I had so much fun last year and made amazing friends in my awesome hive, and this year has been just as enjoyable so far 💕💕! This month I am asking my hive mates to make a herringbone unit for me using 4 half square triangles. My inspiration for this block is from this tutorial: Easy Herringbone Quilt Tutorial with Half Square Triangles (scatteredthoughtsofacraftymom.com). I really loved the ombre pink layout featured in that tutorial. My tutorial is going to be a little bit different from the inspiration tutorial, but that link will give you an idea of what the final product may look like. Here is a photo of 4 of my practice blocks together:
Fabric Selection:
I want my final product to be springy and girly 💅💮. I am looking for bright pink, pastel pink, lavender, pastel blue, and bright blue in prints or solids. I especially love small floral prints! I am laid back about your fabric choices, and I love seeing everyone's first choice of fabric, rather than your first choice within really tight guidelines. So, I have tried to make the pull encompass a wide range of fabrics. Here is a picture of my fabric pull:
You will need to pick 2 fabrics - one colored fabric (pink, lavender, or blue), and one background fabric (white or cream: low volume, white on white, solid, pretty much anything goes!). If you would prefer, you can pick 2 different colored fabrics that coordinate like I did in the practice blocks above. For one of them I used a pastel blue and a bright blue, and for another I used a bright pink solid and a bright pink blender.
Cutting:
Cut two 8-inch squares (go with 8.25 inches if you like to have wiggle room in your HSTs) from your colored fabric(s) and two 8-inch squares (again, bigger if you want wiggle room) from your background fabric. Here are mine, I chose a pastel pink solid and a low volume background:
Sewing: You're going to make 4 half square triangles that each finish at 7.5 inches square.
1. Draw a line from corner to corner on the wrong side of your background fabric squares:
2. Place each background square right sides together with a colored square and sew 1/4 inch or a scant 1/4 inch on each side of the line. Cut on the marked line:
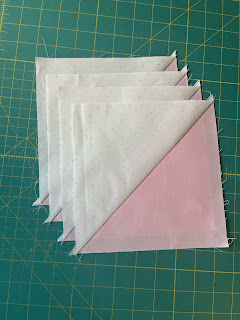
3. Press in whichever way you prefer. I am a weirdo and I like pressing towards the light side. I love to see that perfect quarter inch showing through the lighter fabric. But you should press your favorite way, whatever that may be :) Here are my HSTs before squaring up:
4. Square to 7.5 inches and arrange like this:
5. Sew together in a 4 patch. Your final block should measure 14.5 inches square, but no need to square up! I pressed my first two seams to the side so that I could nest, and then pressed the final seam open to reduce bulk. You can press your seams however is most comfortable for you though! Here she is:
Wahoo!!! I think it will be pretty easy, but if you have any questions, please reach out, as I would love to help and chat. Thank you so much for sewing for me! I can't wait to see what you all create. 💗
With much love,
Meg from Alabama 💓


No comments:
Post a Comment