Happy New Year Hive Three!!!
It has been really fun getting to know each of you through our email chain over the holidays. For those that have not yet shared, please reply all and tell us about yourself (using the four questions as a guide) before the end of the month.
For those that at aren't in Hive 3- Hello, I am Alanna. I live in Northeastern BC, 14 hours from Vancouver, with my dog Indi. She is a pitbull mix and I adopted her from the same organization that Dawn in Hive 1 (hi Dawn) got her dog from!
As Hive Mamma I am first up for January. Choosing a block is often the hardest part of Stash Bee, so this year I am not overthinking it. At my local quilt guild's holiday party we each had to take a random magazine, then turn to page 36 and rip out the page. Our mission, should we choose to accept it, is to make a quilt or wall hanging inspired by the page.
This is what I got:

So, taking a very literal interpretation, I've decided to make some pink and purple stars for this challenge.
I am following a pattern from CluckCluckSew, which was made available for free before Christmas. You can find it here:
http://cluckclucksew.com/2017/12/no-point-stars-a-free-printable-pattern-in-5-sizes.html
Step 1
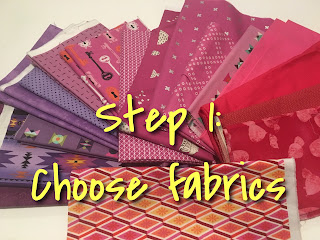
The first step is to choose your fabrics. You will need three fabrics in total, and you have two choices:
- For a pink star on purple background : two pinks and one purple; or
- For a purple star on pink background: Two purples and one pink.
Step 2
Next cut the fabric:
- The background should be the colour that you are using only one shade of (in my example its purple). Cut eight 4" squares.
- The points and the centre square should be two different fabrics in the same colour (in my example its two different links). Cut eight 3" squares of one (these will be the points), and one 4" square in the other (this will be the centre).
Step 3,4 &5
Next, make four Half-square triangles as follows:
- Mark the diagonal on the wrong side of the 3" squares.
- Place the 3" square on top of the opposite colour 4" square, placing it in the bottom right corner, right sides together (the diagonal should be placed so it touches each side).
- Sew along the diagonal.
- Trim 1/4 inches from the diagonal
- Press the corner out, with the seam towards the triangle colour.
- Repeat so you have four units
Make the second point on each of the four units:
- Mark the diagonal on the wrong side of the four remaining 3" squares.
- Place the 3" square on top of the HST unit in the adjacent bottom corner, right sides together.
- Sew along the diagonal, trim and press the corner open
- Repeat with all four units.
Step 8
Layout the blocks.
Sew the units into 3 rows as shown. Press the top and bottom rows so the seams go out toward the back ground blocks. Press the centre row inwards towards the centre square. This is so the seams will nest nicely together. Sew the three rows together.
You're done!


2 comments:
What a fun way to pick a block!
I love how you decided to go about this challenge
Post a Comment