
This was a fun one! Thanks, Marie. I can’t wait to see how these all go together.

Thanks, Marie. This block has been on my to try list. I have a feeling I'm going to be making a lot of these.

"Excel-ing" in Stashbee 2023 - Hive 4 Finished Quilt!
Thank you to all of my hive mates and crashers for helping me make this beautiful quilt that I gifted to a dear friend. She loves it : ) and said "I can't even put into words how much I love it . . . and the fact that your friends from all over the world contributed . . . it ties into so many themes for why I love red, white, and blue . . . the melting pot that is our country, shared effort for the greater good, so much represented in this quilt." Thank you, quilty friends! 💙💓


Hi Nicole,
I'm sending those chubby chicken to you this coming week.
Happy St. Patrick's Day 🍀🍀🍀,
Rita
I think I finally got this, how to post on stash bee! All I had to know was that I was posting on my site rather than stash bee! Thank you Diana Mattoni! These are my squares and I am already starting on the next.


This was fun and quick!
I actually found a print with brown, in my stash 🤣.
They go on their way to you on Tuesday.
Happy sewing,
Rita x
Dear Friend Bees,
I turn to you this month to help me prepare a quick and easy quilt, that I need "pronto" for a friend. I want a quilt that looks great and has a touch of complexity. I think the Disappearing Nine-Patch offers just that.
Fabric:
I am not too picky for the type of fabric: solids, prints, batiks...
Colors:
...but I am super picky for the colors! I know my friend's color palette, and I'd like to focus on this. Notably, I know blues and violets don't exit in her world i.e. her house😁
Therefore I am presenting different palettes for you to use, or at least get inspired by. I am aiming for:


And yes, brown is fine!
For those of you who work better with the color wheel, here are the colors I include in the "yes please" and the "no thanks" categories. Please don't introduce blue, turquoise, or violet. I will refer to these colors in the placement of the squares a little further down in the tutorial.

Note on the colors for the center square:
Out of the nine squares you will start with, one will be positioned right in the middle. I am asking that this center piece not be white. Instead, you may use off-white, cream, or any high value of any of the colors presented in the palette. The idea is to have the center as contrasting to the other fabric used in the composition, while keeping a touch of warmth in the center (I feel pure white is too "cold").
Tutorial:
The Disappearing Nine-Patch is a classic quilt pattern, loved by beginner quilters. I am sure you have done at least one already in your quilting career. Of course the pattern has been presented many times in Stash Bees. You may use this tutorial available on the blog. The tutorial dates back to July 2012 in Hive 3!
Step 1:
Gather nine 5"x5" piece of fabric. Use four (different or same) fabrics in the greens, yellow greens and yellows of the color wheel and four (different or same) fabrics from the oranges, reds and pinks of the color wheel. One block, to be used as the center square, should be high value and contrasting compared to the eight (8) other squares.


Hello there, quilty friends!
I am so happy to be back for my second year with Stashbee and to be sewing with everyone. I'm growing a bit tired of the gray weather we've been having here in Southern California, so I'm hoping to bring some bright and cheerful sewing to your space! This month we are going to be doing the Chubby chicken block by Oh, Kaye Quilting. I crashed a hive last year that did this pattern and loved it so much, I decided I needed chickens of my own. I've basically copied Emily's wonderful instructions from January of last year.
We'll be using the same pattern, just a different color palette.

Unfinished block size: 12.5”
Fabric Style: The chicken body and wing accent is a bright, cheerful combination of any 2 fabrics you have in your stash. I'm looking for saturated ROYGBIV colors in the wildest patterns imaginable. Think it's too wild? It's probably PERFECT! The beak and comb are orange; feel free to use two different oranges, any hue you'd like. The background is solid or tone-on-tone DARK, one fabric. I'm not picky about what color you choose for the background as long as it reads dark (black, blue, gray, green, and purple are all fine!) and provides a good contrast to your other color choices. The only prints not welcome are batik, branded, or cartoon character prints. To give you an idea of what I'm looking for, here's a pull from my stash:

Cutting Instructions: There are lots of moving parts, so each piece has a letter label. Keep a close eye on your half-square triangle (HST) orientations! I’ve included a labeled diagram from Oh, Kaye Quilting as well as pictures from my own assembly.
.png)
Background (one fabric, solid or tone on tone DARK)
A: 5” Square
F: 5.5” x 3”
G: 3” square
H: 2.5” x 1”
I: 3” x 2”
J: 2.5” Square
K: 8.5” x 2”
L: 10” x 1.5”
M: 12.5” x 1.5”
Main Body (scrappy or single fabric, one color and hue, quilter’s choice)
A: 5” Square
B: 6.5” x 3”
C: 5.5” Square
D: (2) 5” x 3”
E: 7.5” x 2”
Wing Accent (contrasting color to Main Body, quilter’s choice)
C: 5.5“ Square
Beak & Comb (scrappy or single fabric, orange)
G: 3”x 3”
J: 2.5” x 2.5”
Block Construction: Press your seams as you please. I'm not picky about that either. :)
1. Place 5” squares A from Background and Main Body right sides together. Sew ¼” seam around the edges, then cut diagonally to make 4 HSTs. Trim to 3”. You will have one extra.


2. Place 2.5” squares J from Background and Beak & Comb right sides together. Mark a line down the diagonal and sew ¼” seam on either side, the cut down the middle to make 2 HSTs. Trim to 2”. You will have one extra.


3. Place 3” squares G from Background and Beak & Comb right sides together. Mark a line down the diagonal and sew ¼” seam on either side, then cut down the middle to make 2 HSTs. Trim to 2.5”. You will have one extra.


Place 5.5” squares C from Main Body and Wing Accent together. Mark a line down the diagonal and sew ¼” seam on either side, then cut down the middle to make 2 HSTs. Trim to 5”. You will have one extra.


5. Sew together in a row: A HST from Step 1, then D, then another A HST together. This is the bottom of the chicken. Double-check your HST orientation.
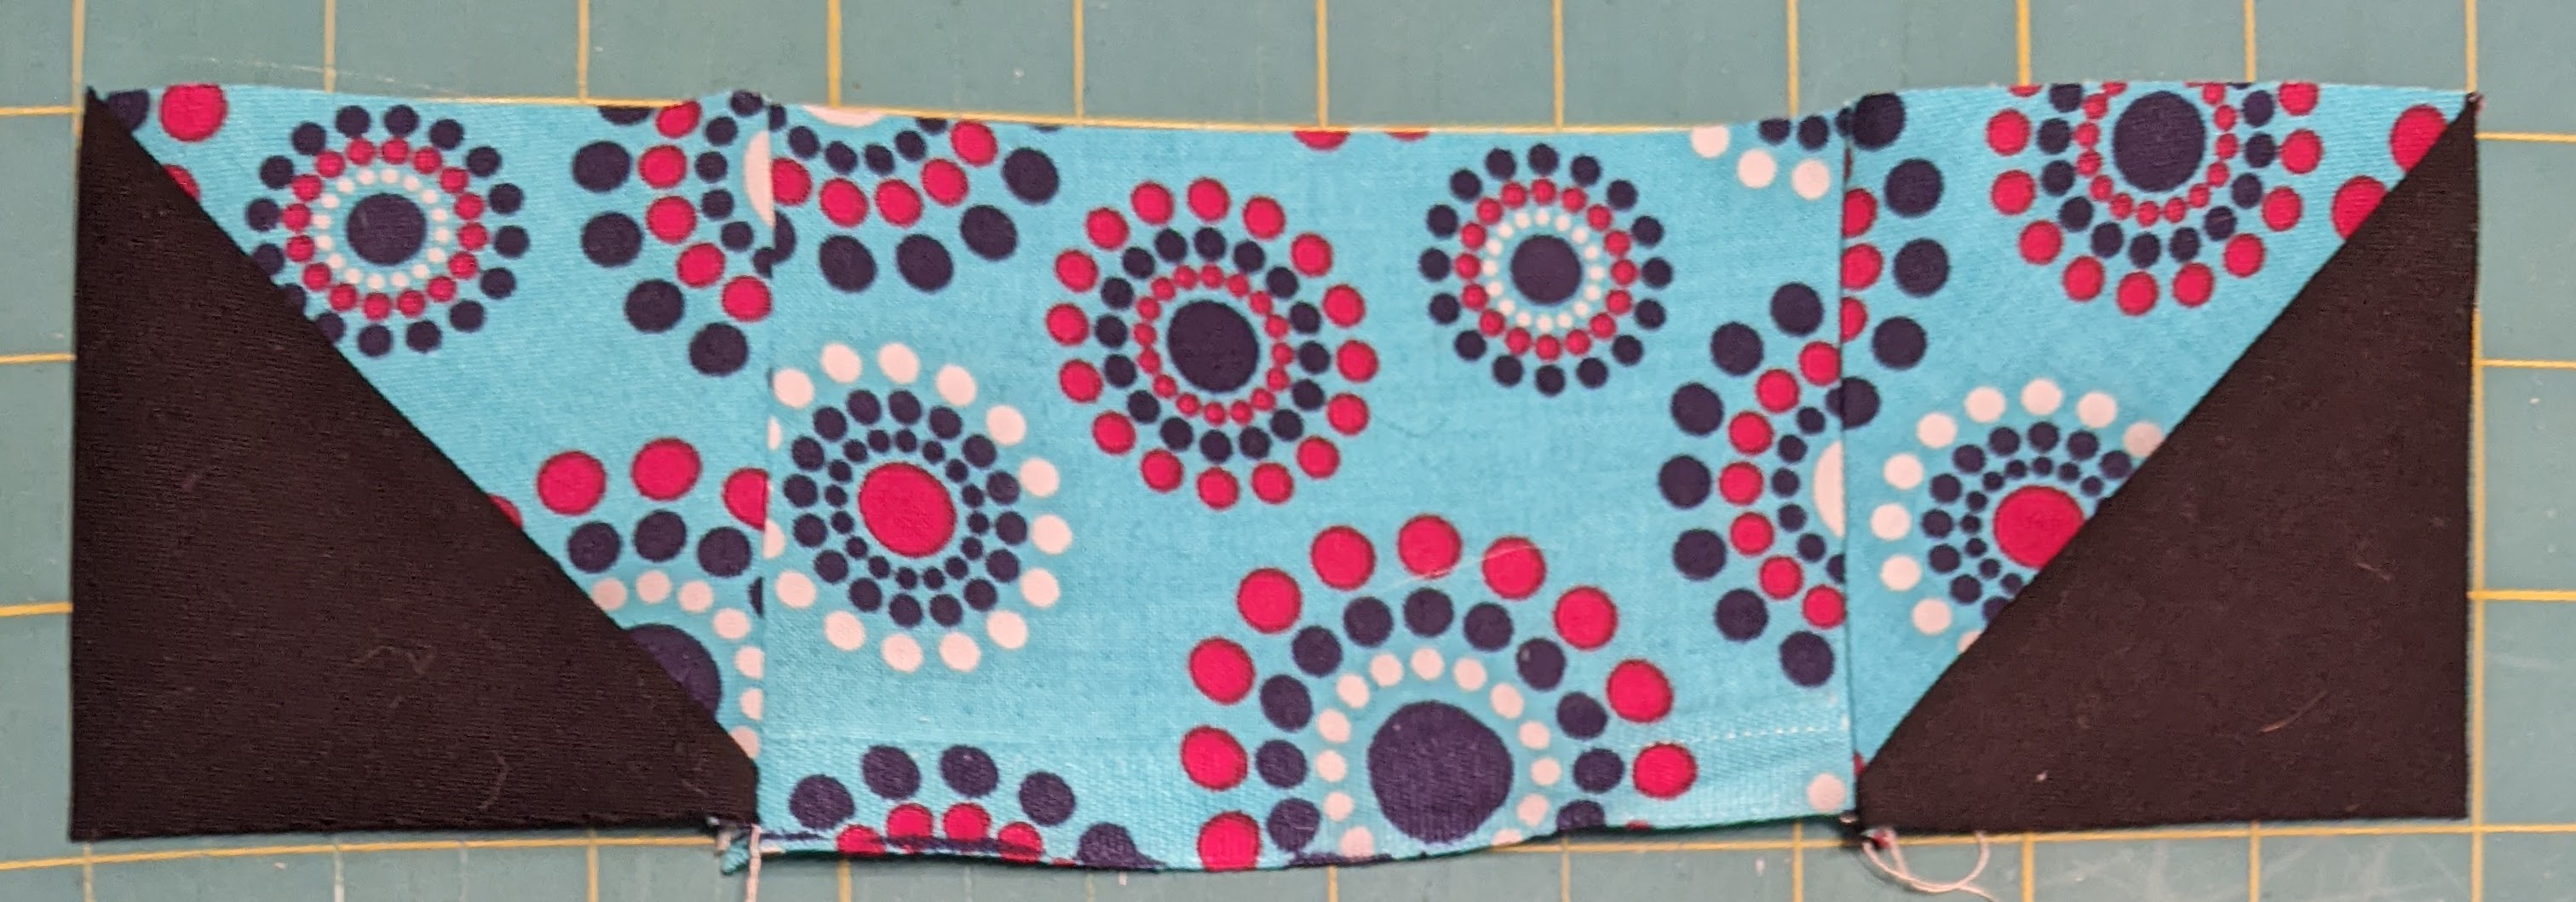
Sew C HST from Step 4 to D. Then sew E on top to make the chicken body. Double-check your HST orientation.

Sew the chicken body CDE from Step 6 to B.

Sew the chicken bottom ADA from Step 5 to the chicken body BCDE from Step 7.

Sew Beak & Comb G from Step 2 to Background H. Double-check your HST orientation.

Sew together in a row: A HST from Step 1, then Background F, then Beak & Comb GH unit from Step 9. Double-check your HST orientation.

Connect the row AFGH from Step 10 to the chicken bottom/body unit made in Step 8.

Sew Background strip L to the chicken bottom.

Sew Background strip M to the left/tail side.

Sew together in one column: Background I, then Beak & Comb J from Step 2, then Background K. Double-check your HST orientation.

Connect the column IJK from Step 14 to the right/front of the chicken AND VOILA!

Happy March Hive 7!
I love participating in Stash Bee for all the inspiration and modern quilting connections. For ten months out of the year, thanks to all your tutorials, I learn new techniques and play with color. And each year, I request something that has personal meaning.
For the last two years, I've been pondering a question and a realization.
Do the many pieces that fill my sewing space have value? We probably all have a bunch of blocks or bits that were experiments or created during technique workshops. I also have a pile of remnants from finished projects. I am reluctant to simply toss them (bad environmentally), but continuing to store them doesn't feel constructive either. I want to find new ways to use these.
I love to collaborate. Whenever I collaborate, the final product is always better than what I would have created on my own. Fortunately there are many ways to collaborate. Karen Bolan and Ellyn Zinsmeister wrote a series of blog posts that explore many different ideas and even designed a Build Your Own Collaboration guide. Here’s the link to the first blog post in the series. Stash Bee provides a way for me to continue to collaborate.
I’ve been involved in two collaborations using orphan blocks and bits.
In September 2022, three of us gathered to create a harmonious whole with orphans and bits from our collections. This is the finished top. It's a mix of experimental pieces and blocks. You might even recognize which workshops we attended. We looked for ways to create paths with color. I especially liked the whimsical cat amongst all the birds. We weren’t concerned about size of blocks and bits matching as one person is expert at partial seams.

While volunteering at a local craft thrift store, my job was to sort the many donated quilt blocks and projects. After assembling projects into coordinated groups, there were more than 50 individual blocks remaining. These were all mostly traditional blocks from the 1970s through 1990s. There was a vast array of fabrics (prints, just a few solids, even some muslin) and construction types/qualities (machine and hand, matching and wonky seams). Since single blocks often don't sell, I wanted to create a top for the shop.

The multitude of blocks was really overwhelming. A friend helped determine a design starting point by arranging all the blocks with the darkest value running diagonally. To bring some calmness to the busy center, I used about 80 4.5" squares and more than 100 2.5” squares to create rows on the top and bottom, focusing on alternating the values in the squares as much as possible.
I’d love for Hive 7 to help me create another collaborative orphan block quilt. I’ve pulled (just a few) of my orphan blocks as a starting point.

If you don't have any orphan blocks or odd bits, you can generate some half square triangles (HST) or half square rectangles (HSR) or strip sets or patch or crumb units using what you have on hand. These do not need to be squared up or trimmed. We found that black and white units (HST or patches) are very helpful in creating a cohesive composition, so if generating new units, you could focus on those colors. I enjoy all the discoveries when sewing with odd scraps. Here are some I recently generated.

If in doubt about what to send, you can message me through IG. But, really, the fun of the challenge is working with a variety of random items. Trust your instinct and sense of play.
Once I have bits from everyone, I'll send a zoom link for an optional design wall play session.
Sometimes the stories or histories of your pieces will inspire a design. Please message, email or include a note that tells me the stories associated with your contribution.
Have fun releasing some orphans or bits from your collection.
Cathleen
aka Kitch Kouture


