Sunday, January 1, 2023

Hive 2 - January Tutorial -LOVE block for Gayle

 LOVE Block


I would like you to make a L O V E block inside a frame of random borders. 

For colors,  you can be real scrappy. Just a few guidelines for choices of fabrics. Please go through your bag of scraps!

Letter backgrounds (BG) need to be same fabric within each letter. Choose a fabric that is either a small scale print, texture, solid or fabric that is not too wild.

For the letters themselves, pick a contrasting color. Then use any scrappy choices. I guess the big thing to think about is contrast.  Here is an example of how I picked some fabrics and laid them out. I think my E was not as good in contrast as the others. You can view your fabrics in a grey scale to double check to see if you want to change anything. You can vary each part of the letters, but keep them in the same color family. I am not a fan  of browns, and avoid solid whites and black.


 There will be two ways to make the LOVE block. Either by foundation paper piecing method or cut and assembled with simple pieces. A FPP sheet will be mailed to you, if you would like. And I am offering an alternate block if you feel that the letters will be too difficult or time consuming. I don't want anybody to stress about it. See below for the alternative block. Finishing the blocks with strips to make it full size will be the same.

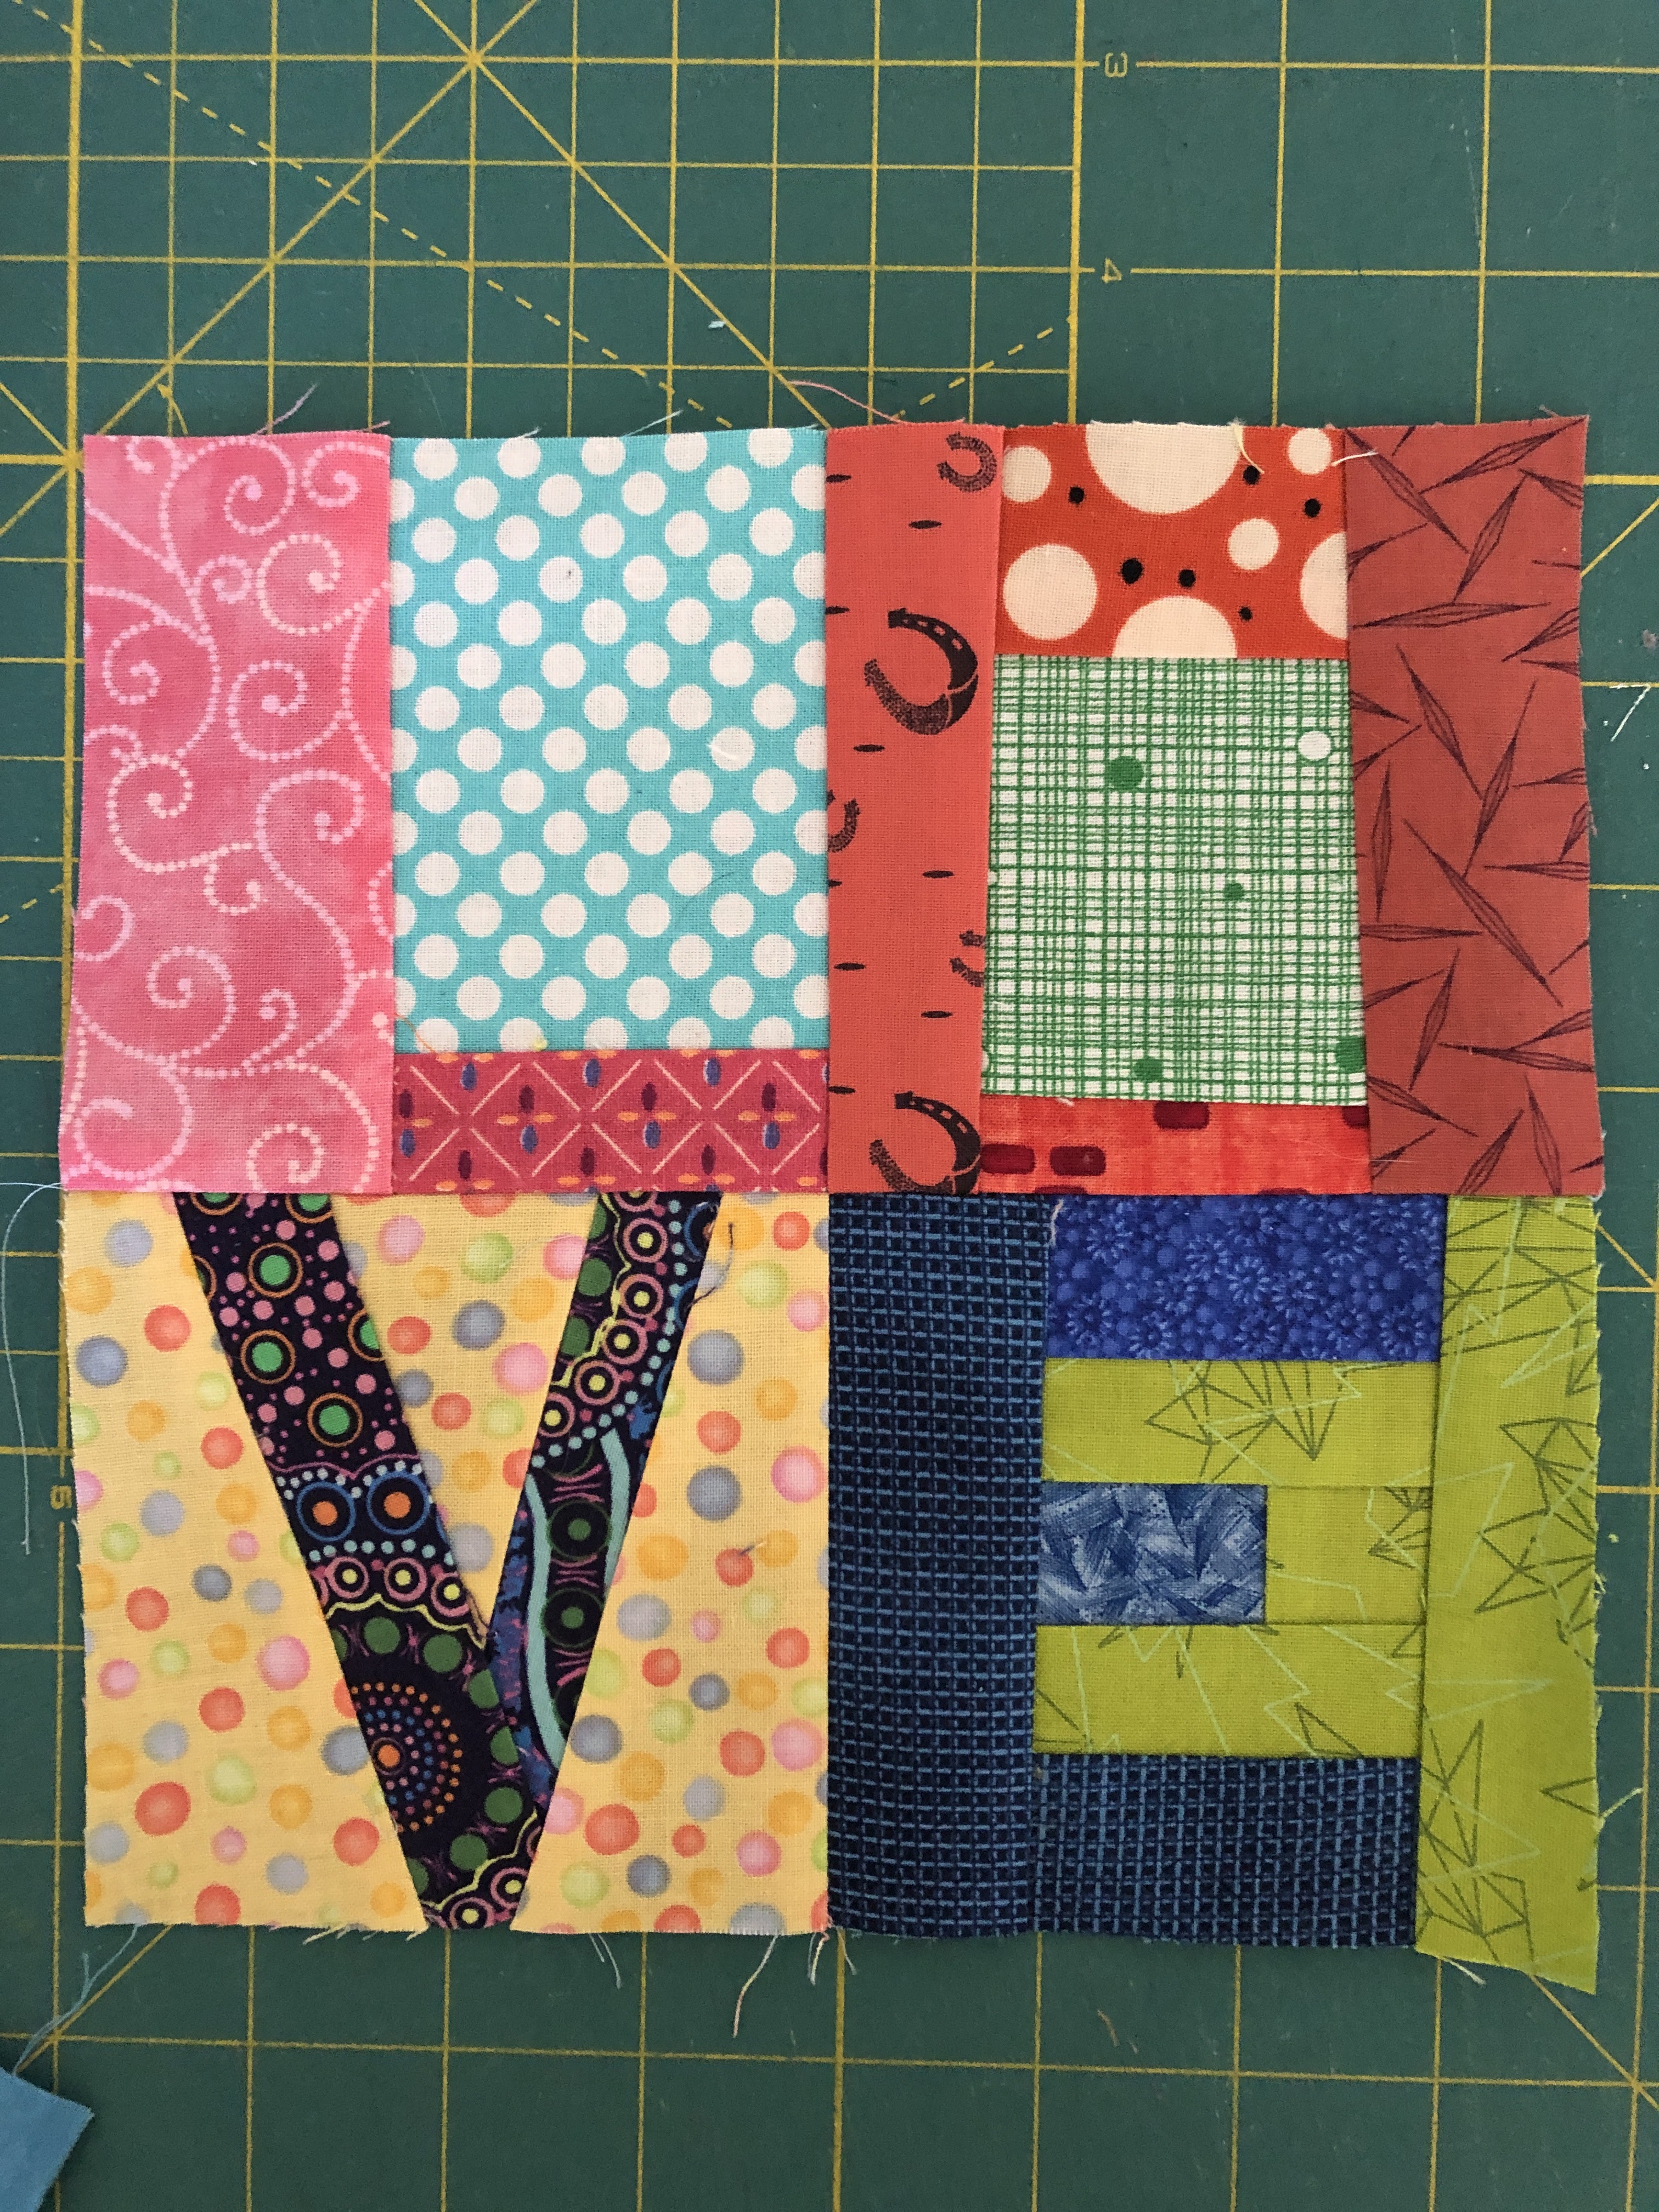
 Each letter will measure 4 inches (3 1/2 inches finished). The four letters after sewn together will be a square of 7 1/2 inches. And strips will be added as a frame to make the block measure at 10 1/2 inches (10 inches finished).

 Hints for FPP:

There are many online tutorials and videos you can watch if you are unfamiliar with the method.

Either tape or pin the first piece of fabric. Start with pieces 1 and 2 and sew seam on printed side of block. You can fold back the the paper on the sewn seam and trim the seams at 1/4 inch - just make sure you are only cutting the seams and not the fabric for the block. Remember to shorten your stitch length for easier paper removal. 

For the center part of the E, I think it is easier to pre-piece the background (BG) and letter part and place those in center with the seam in somewhat the same place as the line between 1 and 2. Then proceed as usual. Remove paper and sew the L and O together side by side and then the V and E. Then sew the pairs together. I ironed toward the O and then with the lower pair towards the V. Then they could be nested. Block at this point should measure 7 1/2 inches square.

This paper is shown in the wrong side, the printed side is the sewing side.

 Second choice for letter blocks:

 Note these sizes will work, but if yours vary a bit, that is totally fine. Do not worry! If each block can be read as the letter, I am happy with it!

 For L, cut a BG square/rectangles around 3 by 3 1/2. Cut the bottom L part at least 1 3/4 strip and a little wider than the BG square. This can be sewn at a slight angle, if so just cut the strip a little longer. Trim edge on left and put the left hand L part on, at least a 2 inch strip. Trim block to 4 inches square.

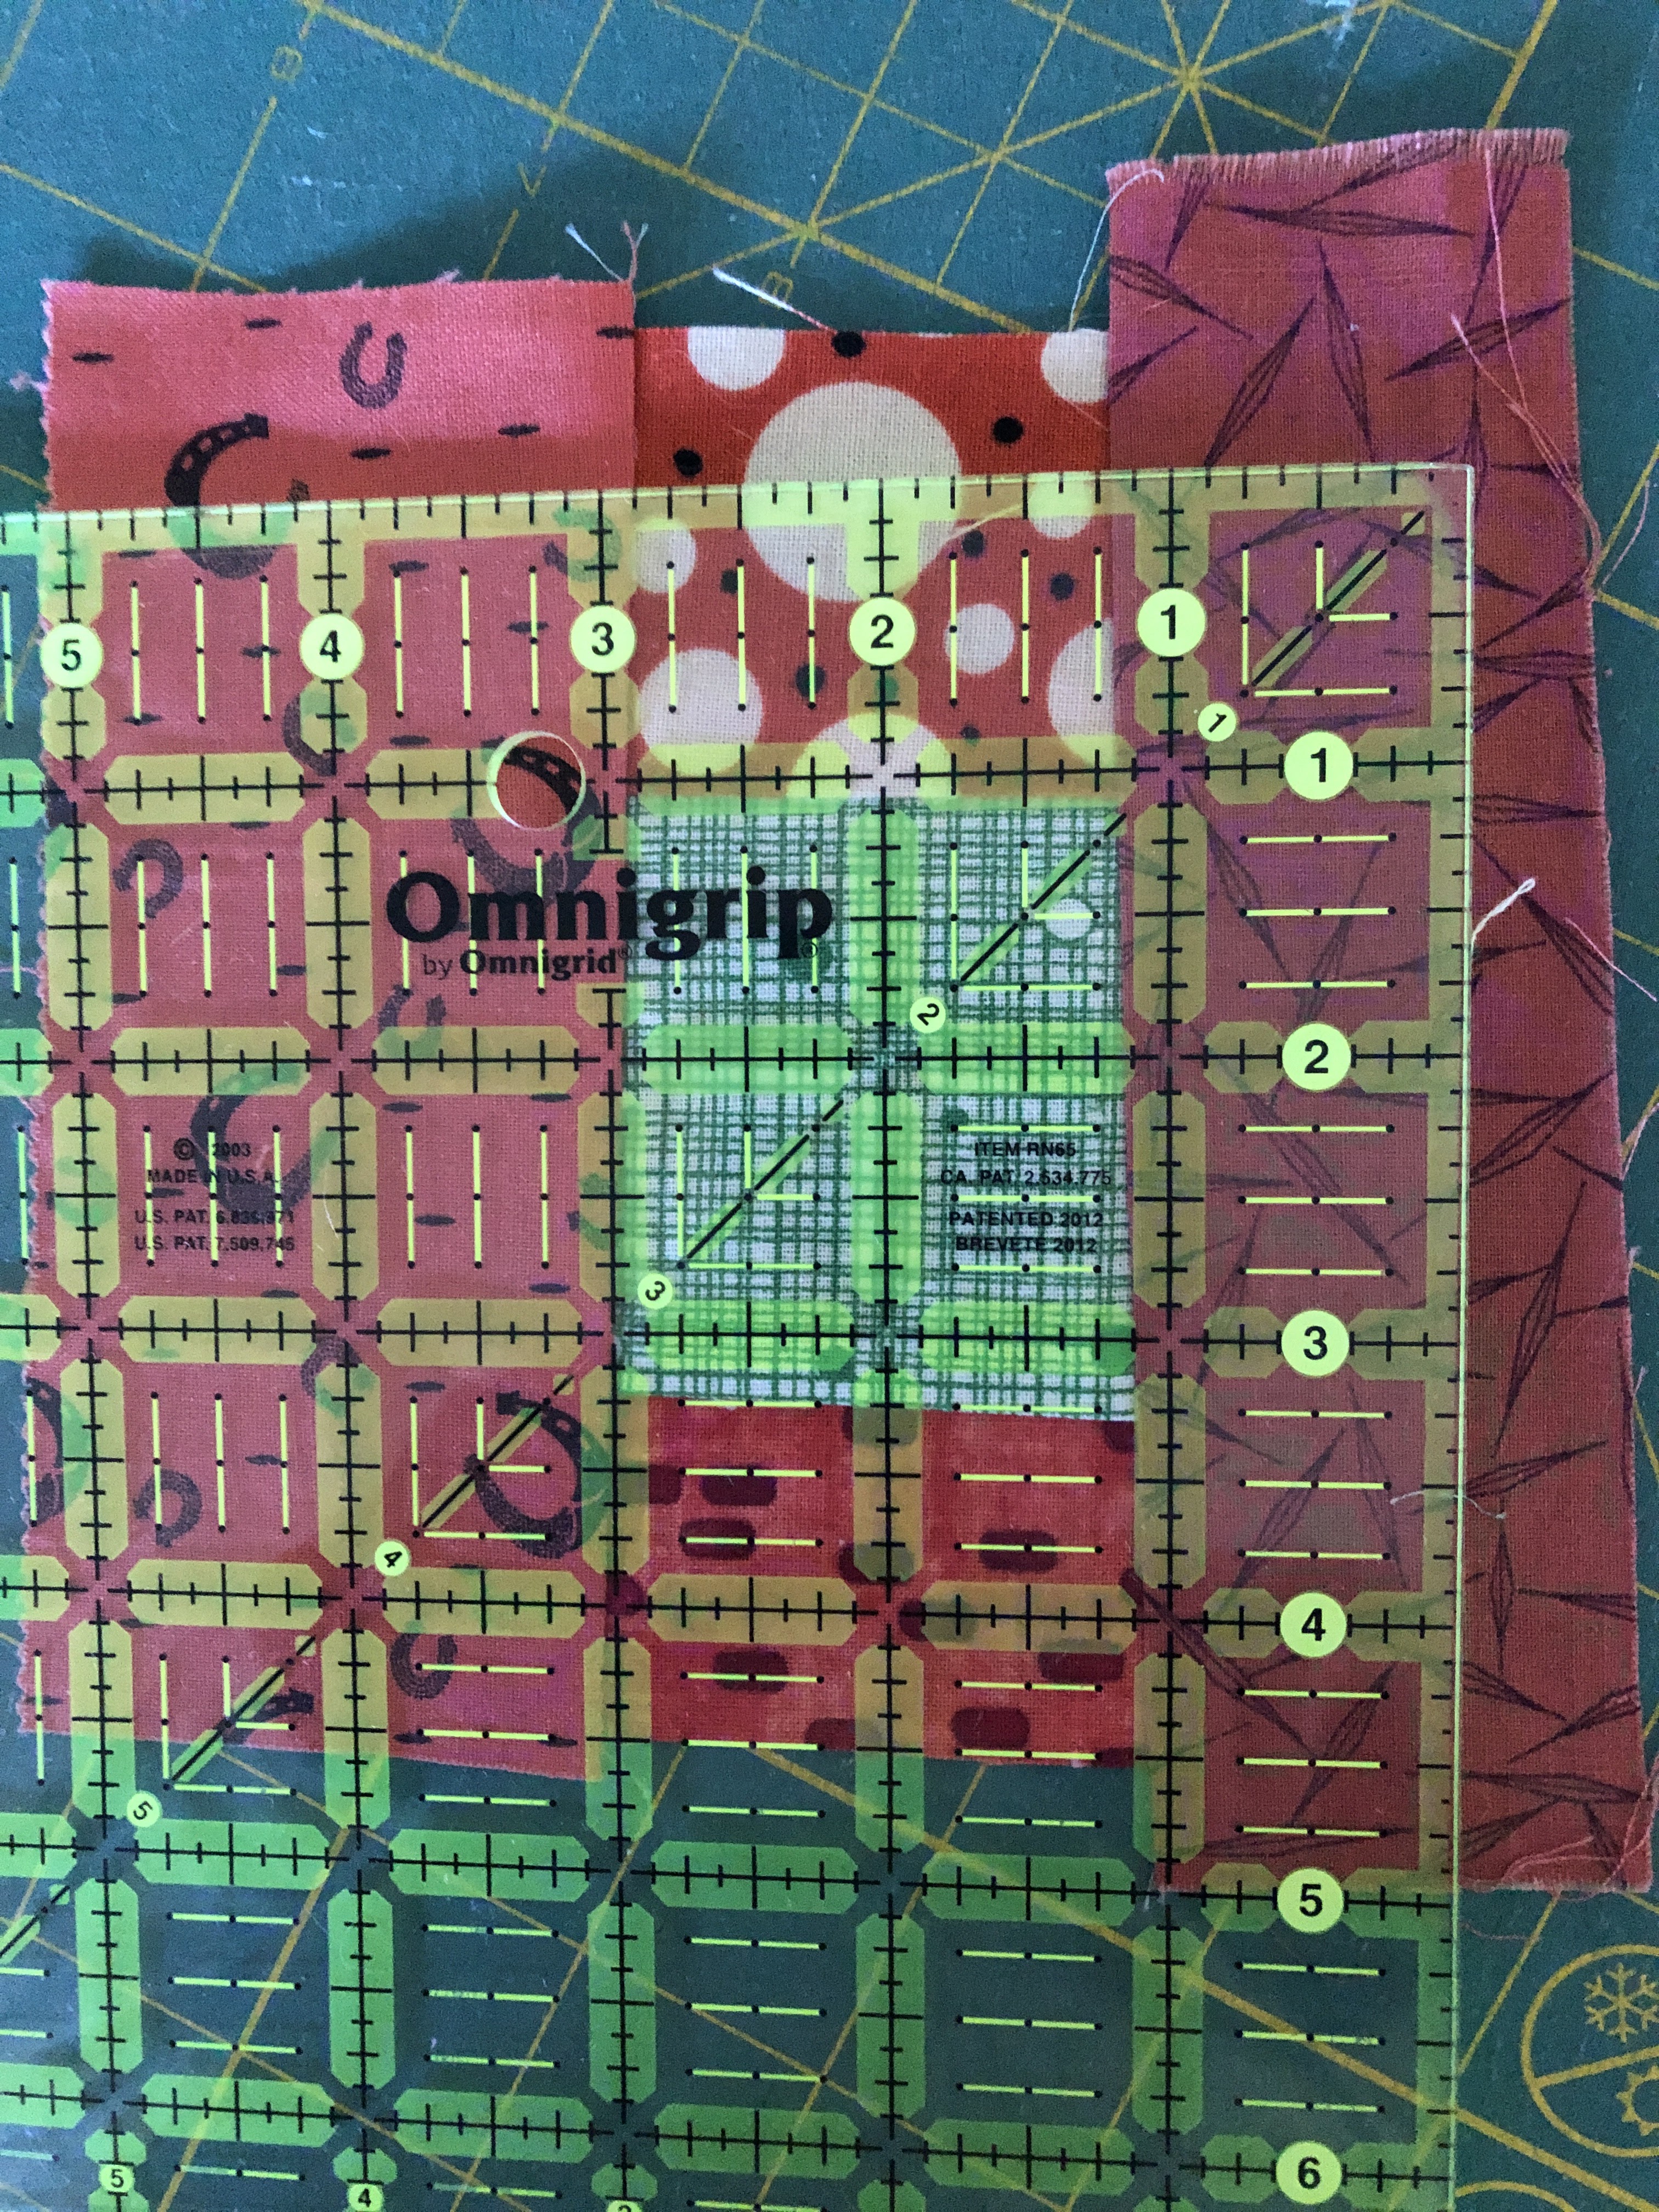
For O, cut a BG square/rectangle around up to 2 1/2 by 2 1/2 - 2 3/4. Cut the upper and lower strips, 1 3/4 inch wide and slightly longer than BG square. Trim sides and add side strips at least 1 3/4. Trim block to 4 inches.

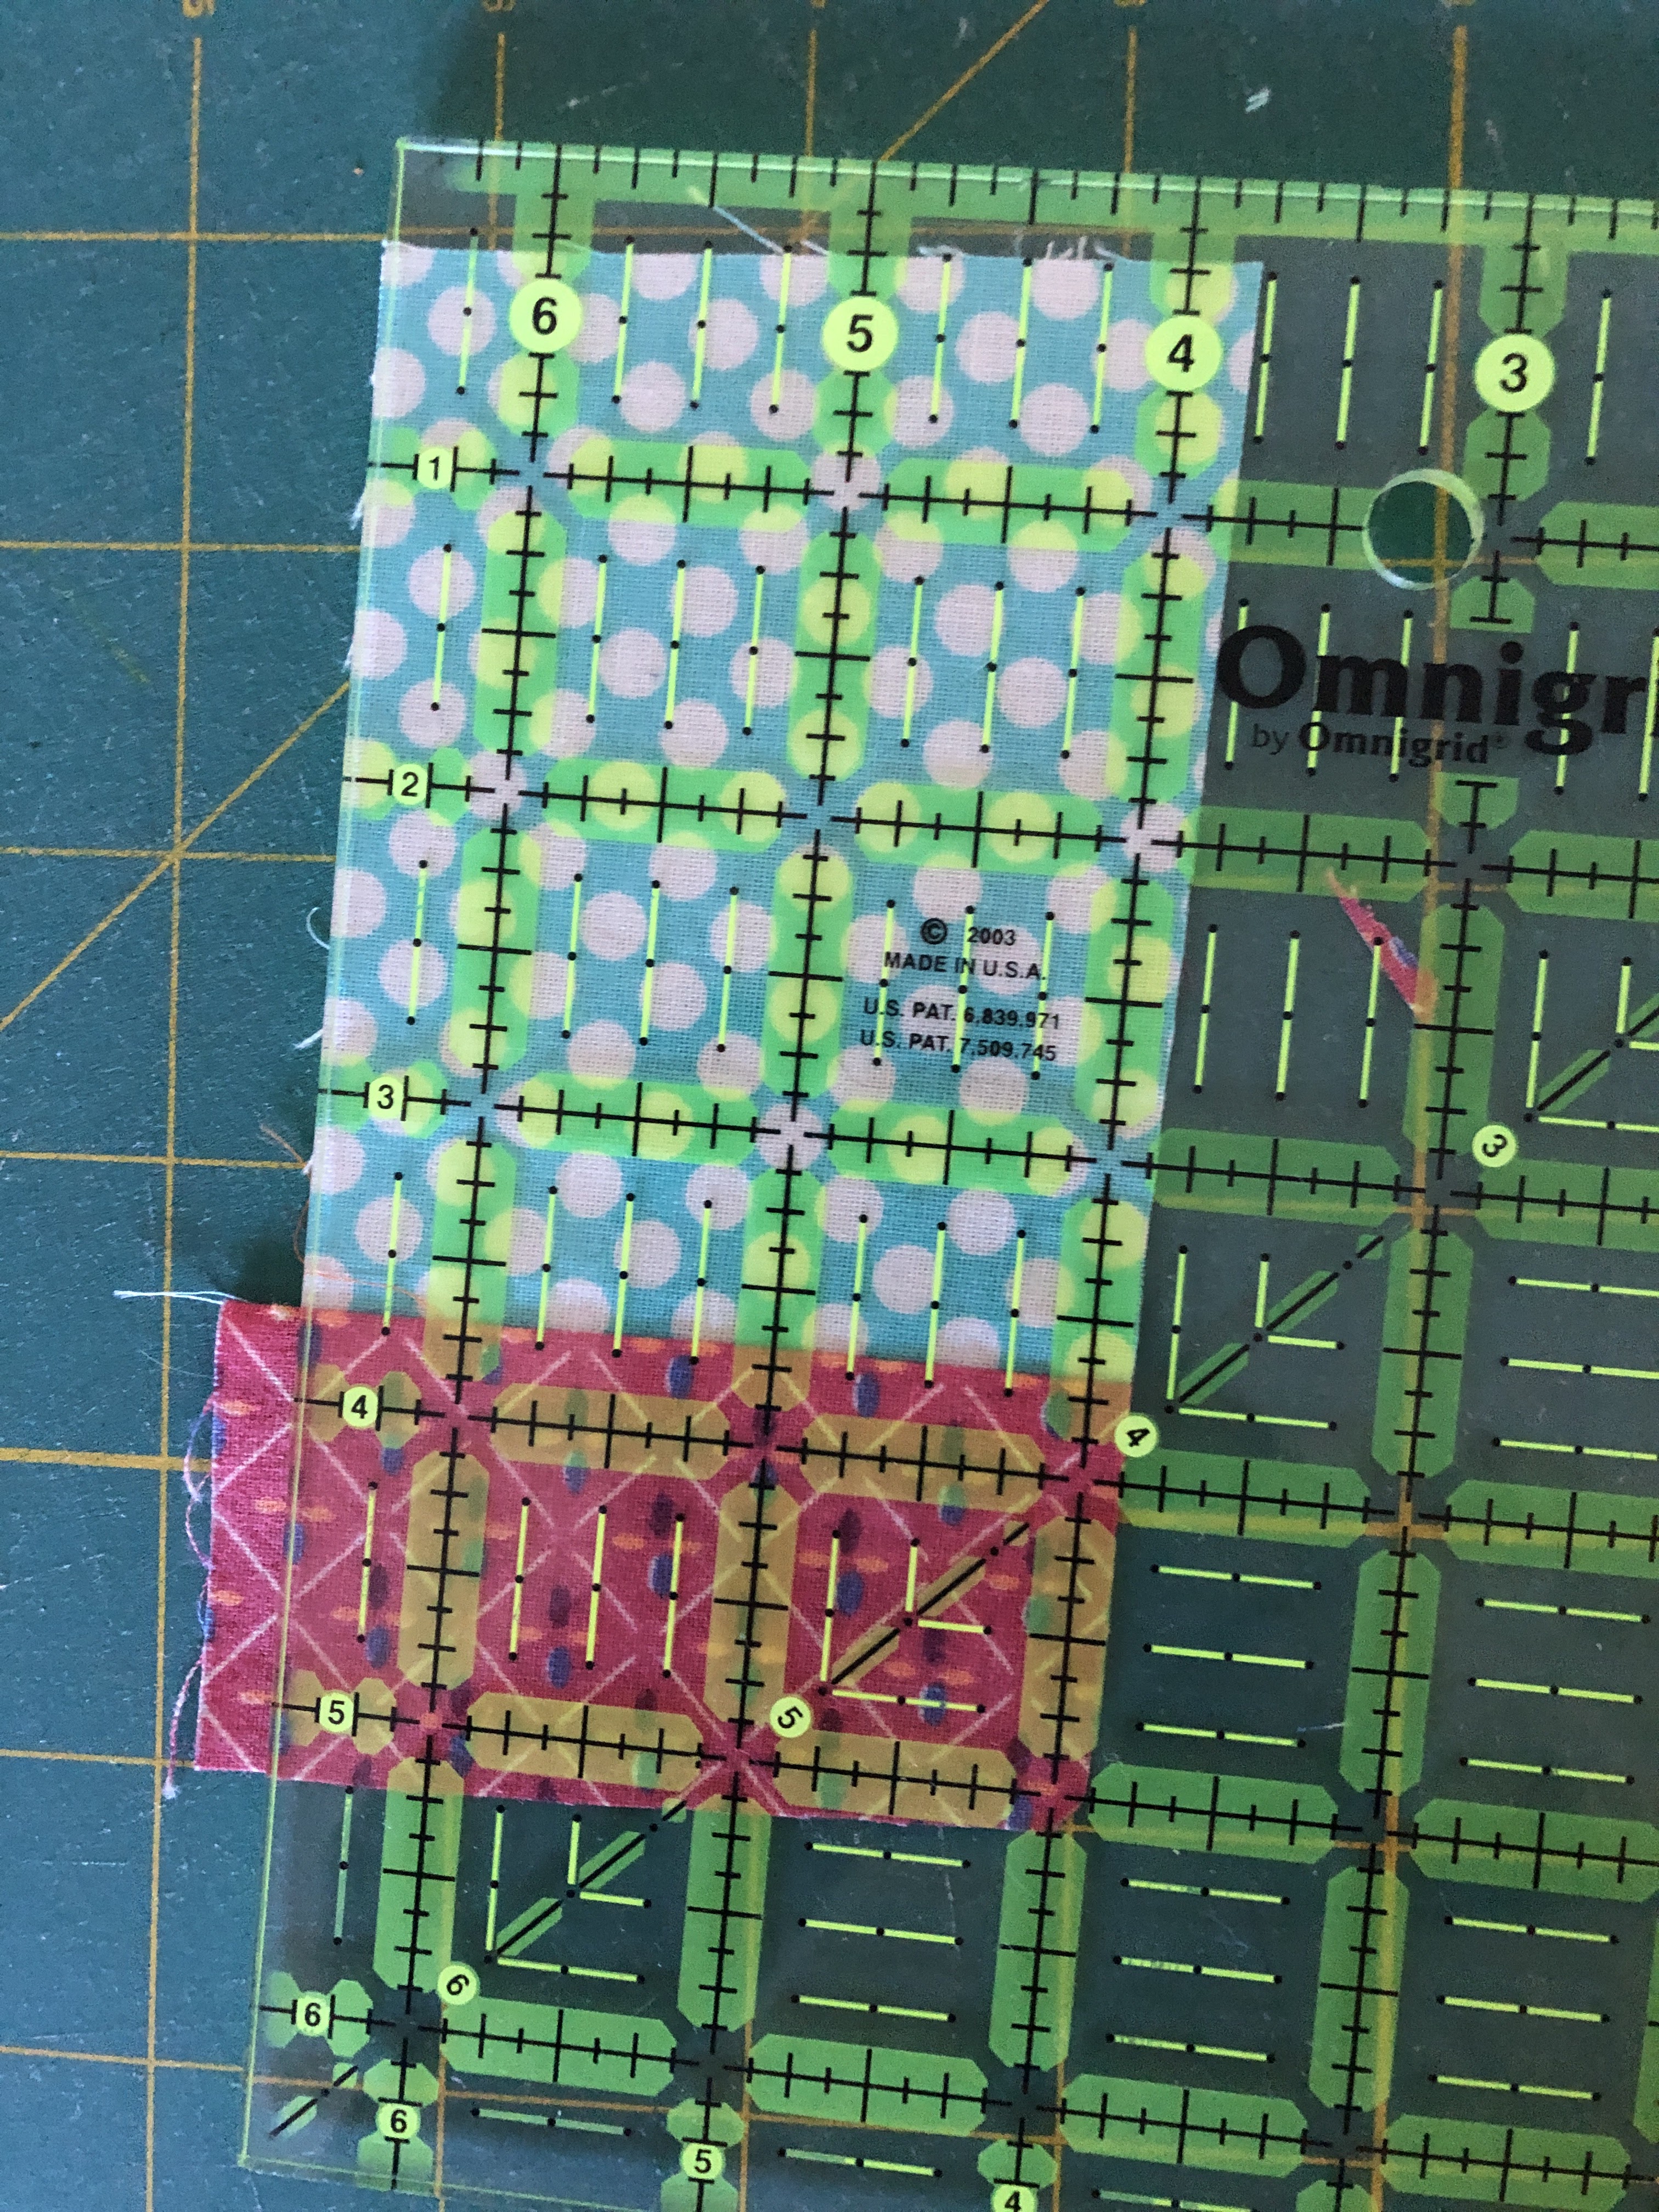
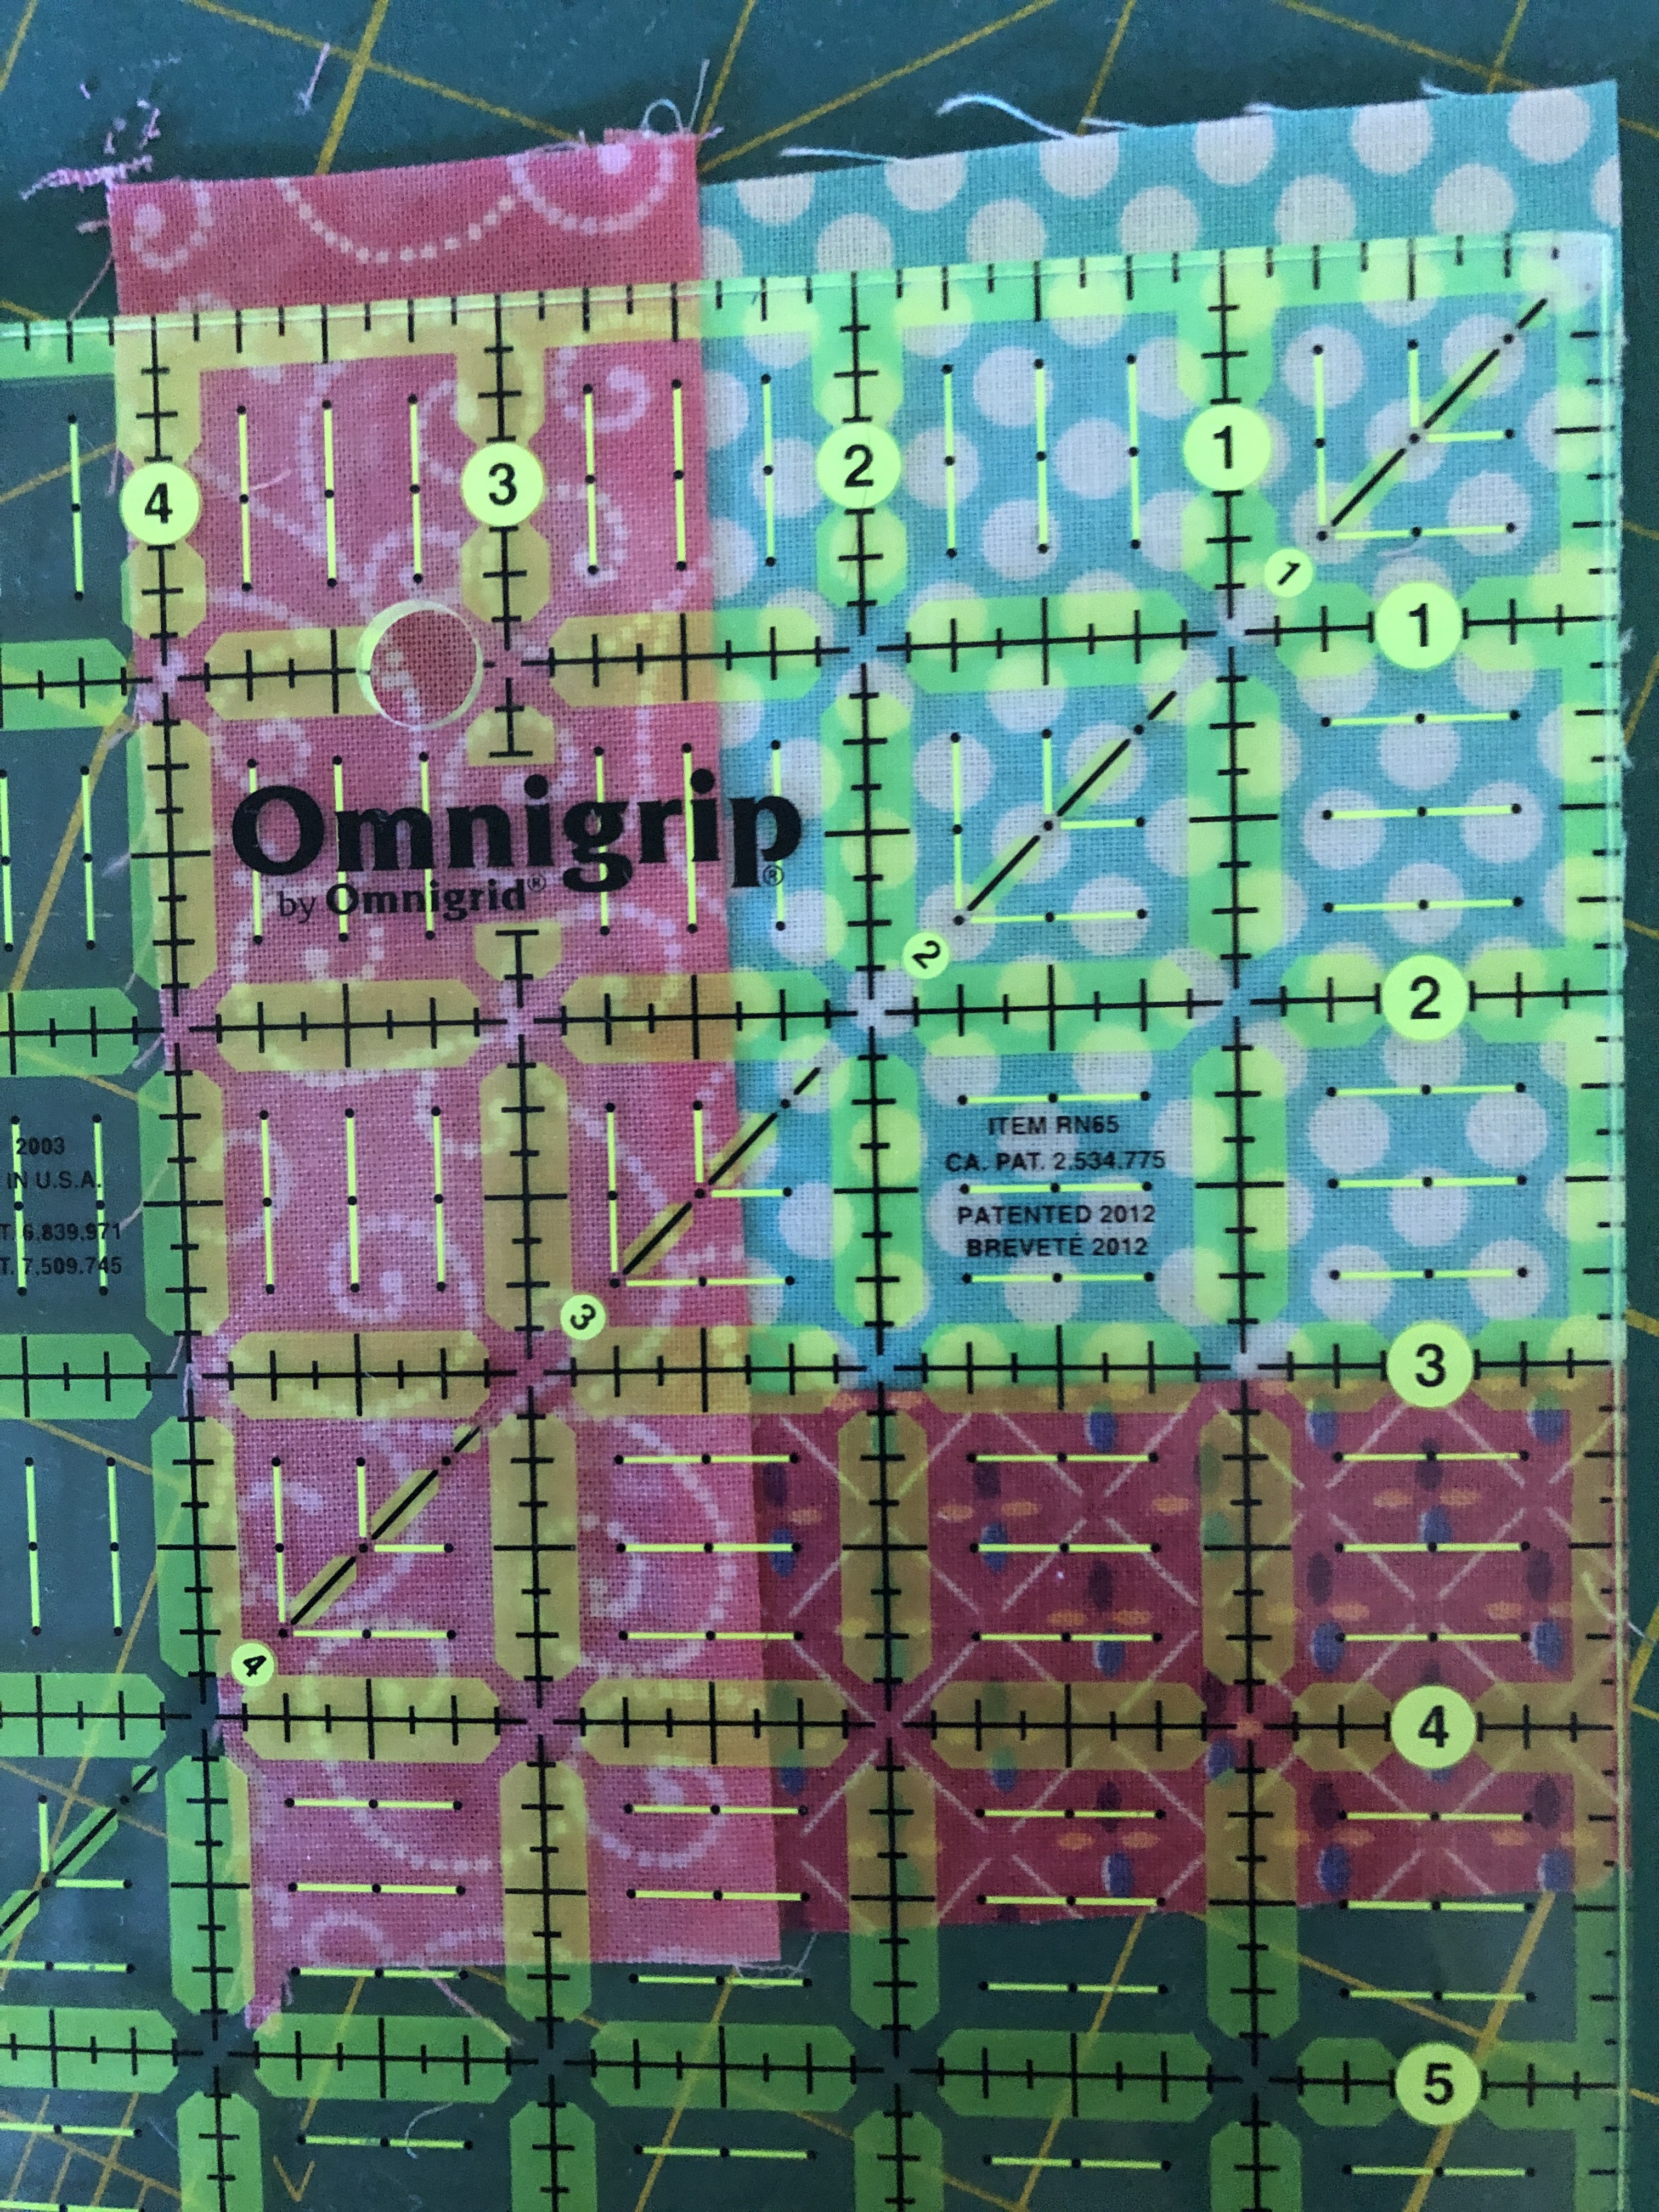
For V, cut a BG tall triangle with a base of 1 3/4" and a height of 3". Cut two letter strips around 1 inch (or a little wider, one side could be slightly wider) by 5 inches. Sew one on one side of the triangle with excess going past the tip (bottom of the V) of the triangle. Iron toward the triangle and trim the excess off in line with the triangle. Note: 2nd photo below should have the ruler to the edge of the yellow fabric before trimming.


Ruler should be lined up with outer edge of background yellow piece before trimming.

Sew the other V letter strip to the other side. For the outer edges I laid the V part on top of the BG fabric and slid it over to make an echo cut but bit wider and taller than needed. This allows for trimming down, so the BG won't be too small. Do this for both sides and then trim to 4 inch square.

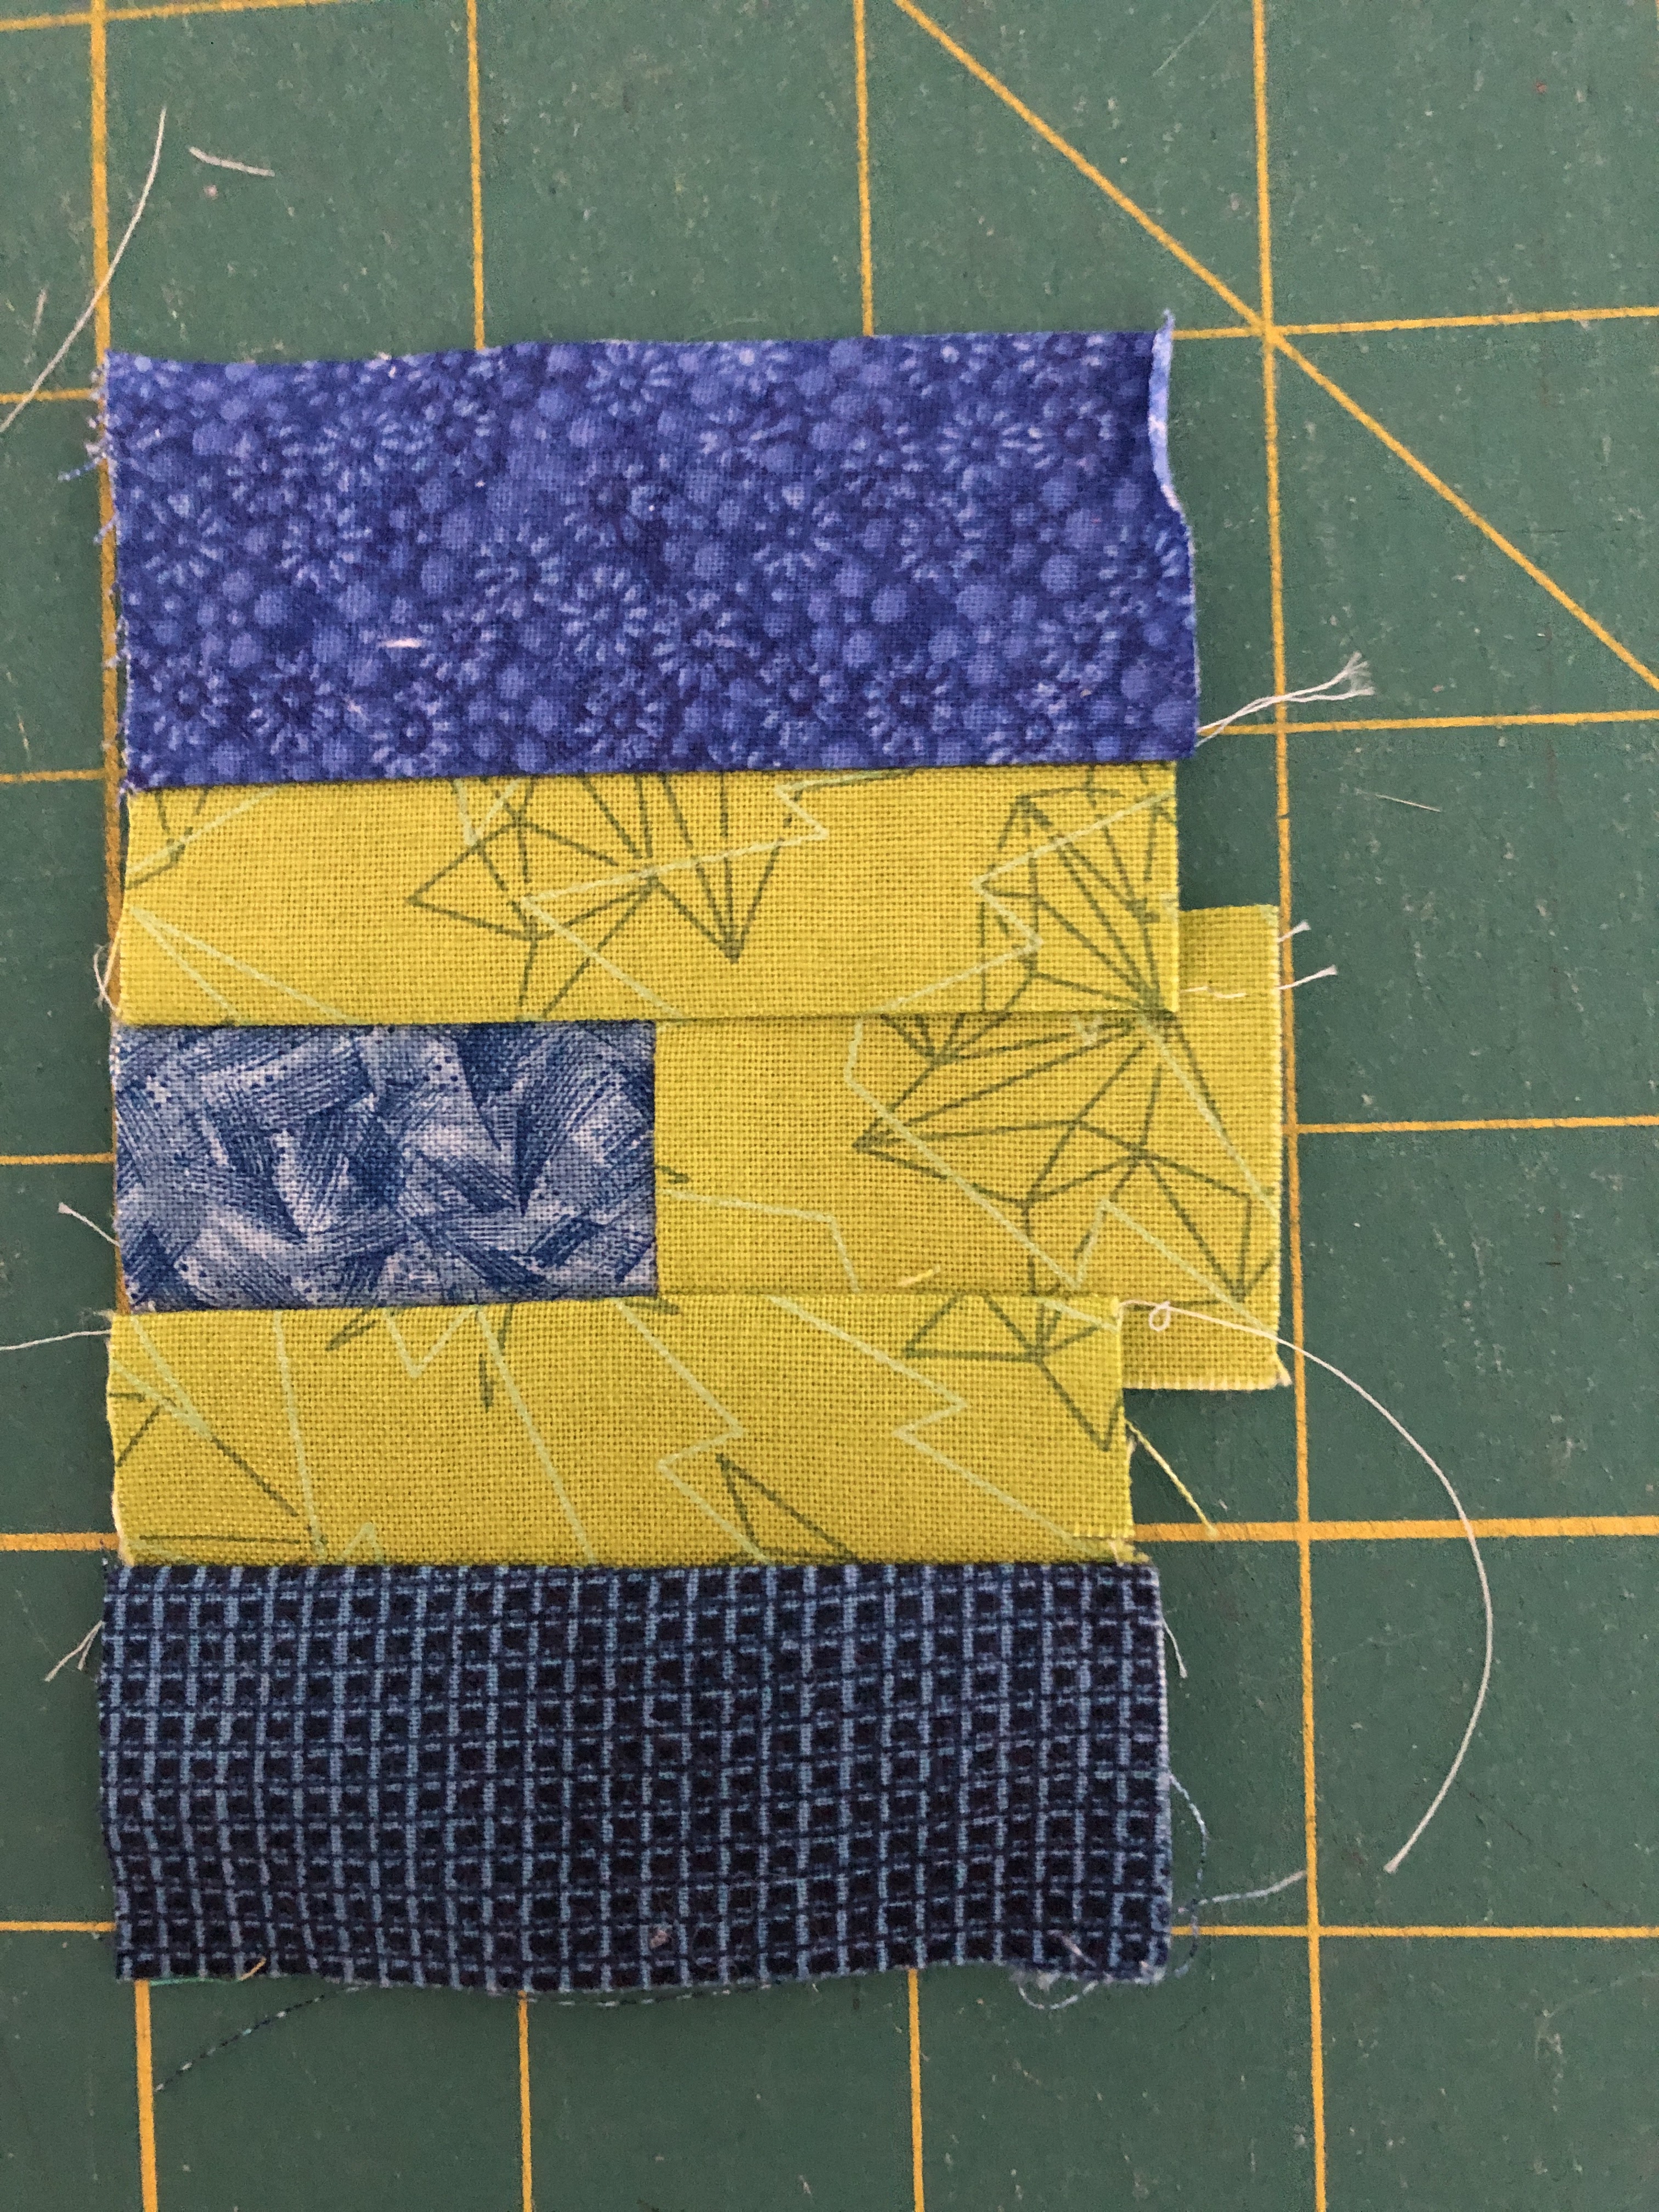
For the E block, start with a BG and a letter piece cut at 1 by 1 1/2 inches. Sew together on the 1 inch sides. Next cut 2 BG pieces of 1 inch or slightly less by 2 1/2 inches. Sew one each to top and bottom of center E piece lining them up with the left side, don't worry about the right side, it will get trimmed later. Then add the top and bottom E parts of cut at about 1 1/4 by 2 1/2 inches. Add the left side E of about 1 3/4 by 4 1/2. Then trim the right side, add about an inch strip of BG on the right side. then trim to 4 inches.

Here are the 4 sewn together.
Next cut some strips 1 1/2 to 2 1/2 wide and add to the 4 sides. You can add 1 or 2 strips to a side. Then can be cut slightly angled if you want. You can add top and bottom first and then sides or go around like adding for a log cabin. Anything goes, just needs to end up at least 10 1/2 square in the end. I made them larger and then trimmed down to the final square. Here are 2 finished blocks. The left one was FPP and the right one was regular pieced.

Now for the easy alternate block. Feel free to make this if you have any qualms the letters are not for you. Go through your novelty fabrics and fussy cut 4 - 4 inch squares you like. They can be animals, flowers or what ever you find interesting. Just avoid anything too juvenile or babyish. Finish the border in the same way.
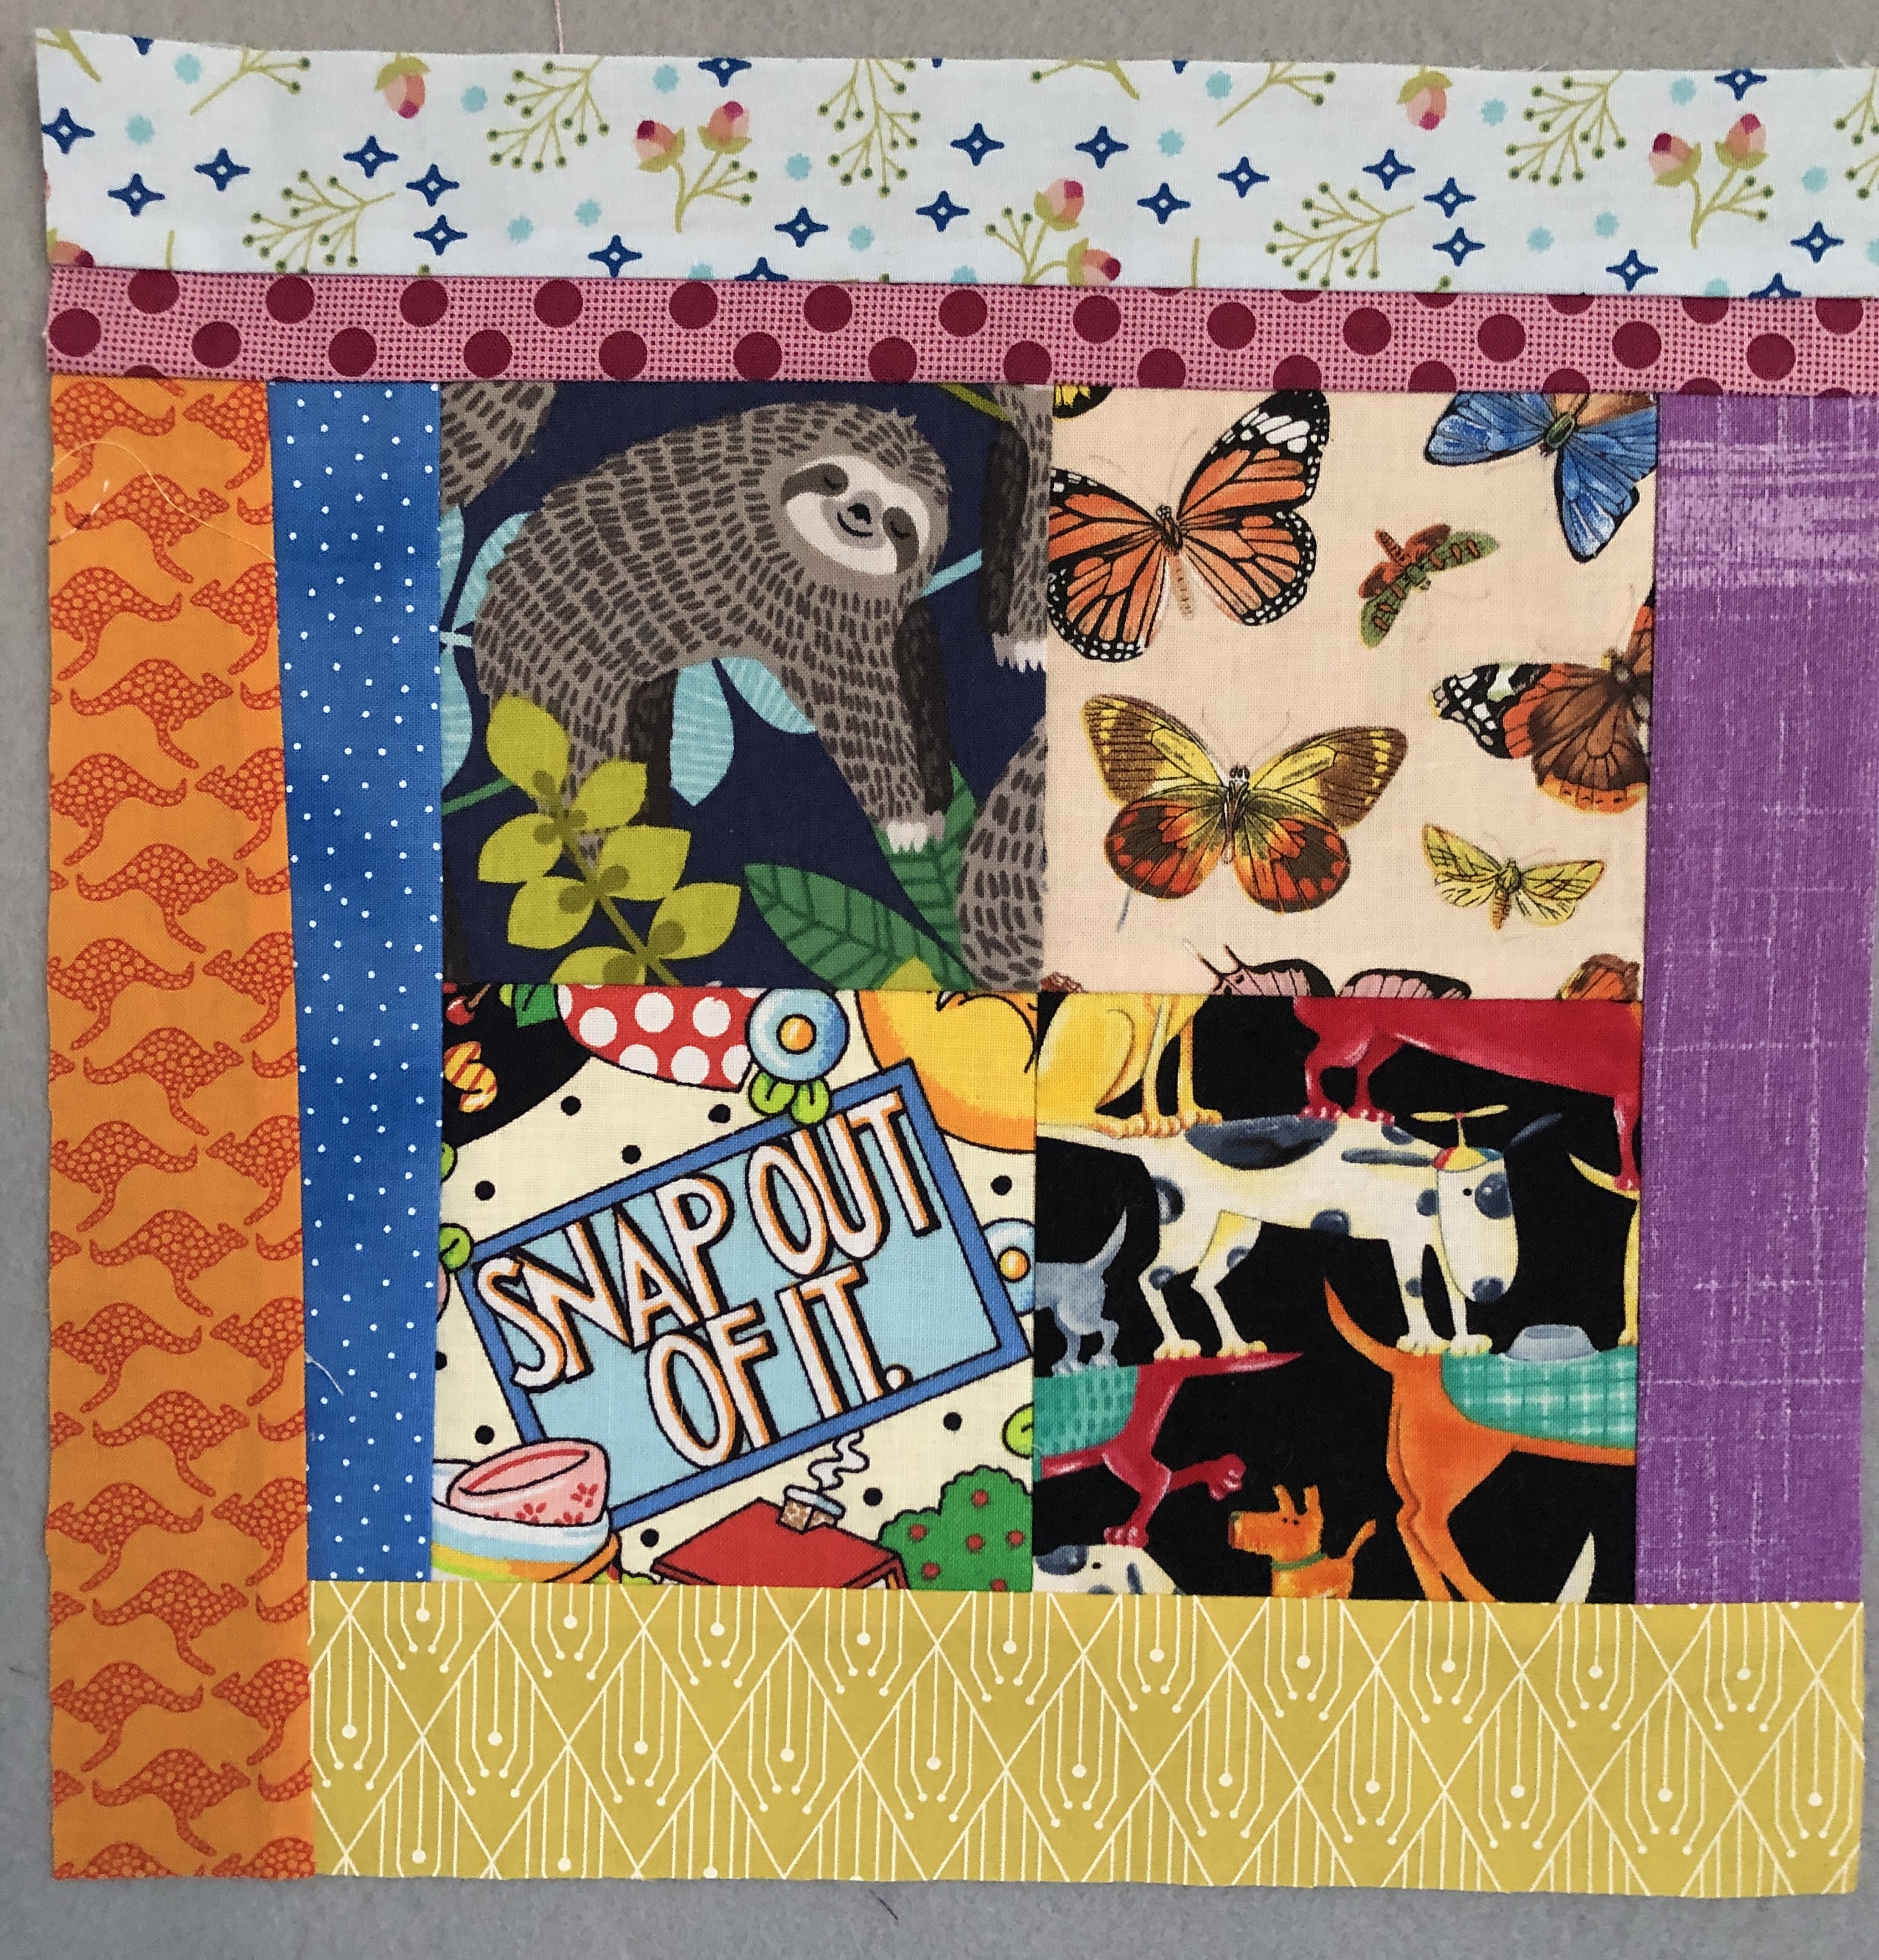

Sorry if this seems like a lot, please just have fun!

Thank you, Gayle

Hive 4 January Tutorial: Look at all those chickens!

Hello and welcome to Stashbee 2023! I thought we’d start the year out with something bright and whimsical to help with the winter blues. My usual style is calm, muted colors, but I was inspired by some of last year’s queens to break out of that rut. I will be walking you through the Chubby
Chicken Block by Oh, Kaye Quilting.


Unfinished block size: 12.5”


Fabric style:The chicken body and wing accent is a bright, cheerful combination of any 2 fabrics your quilty

heart desires: use one color for the main body and one for the wing accent. The chicken can

be scrappy so long as every fabric is in the same color and hue families; i.e. a blue chicken that

is all mid and lighter blues, no pops of navy that stand out. The beak and comb are orange; feel

free to use two different oranges, any hue you'd like. The background is solid or tone-on-tone

white, one fabric. The only prints not welcome are branded or cartoon character prints. 


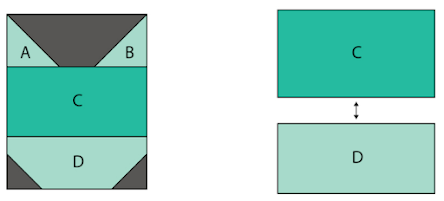
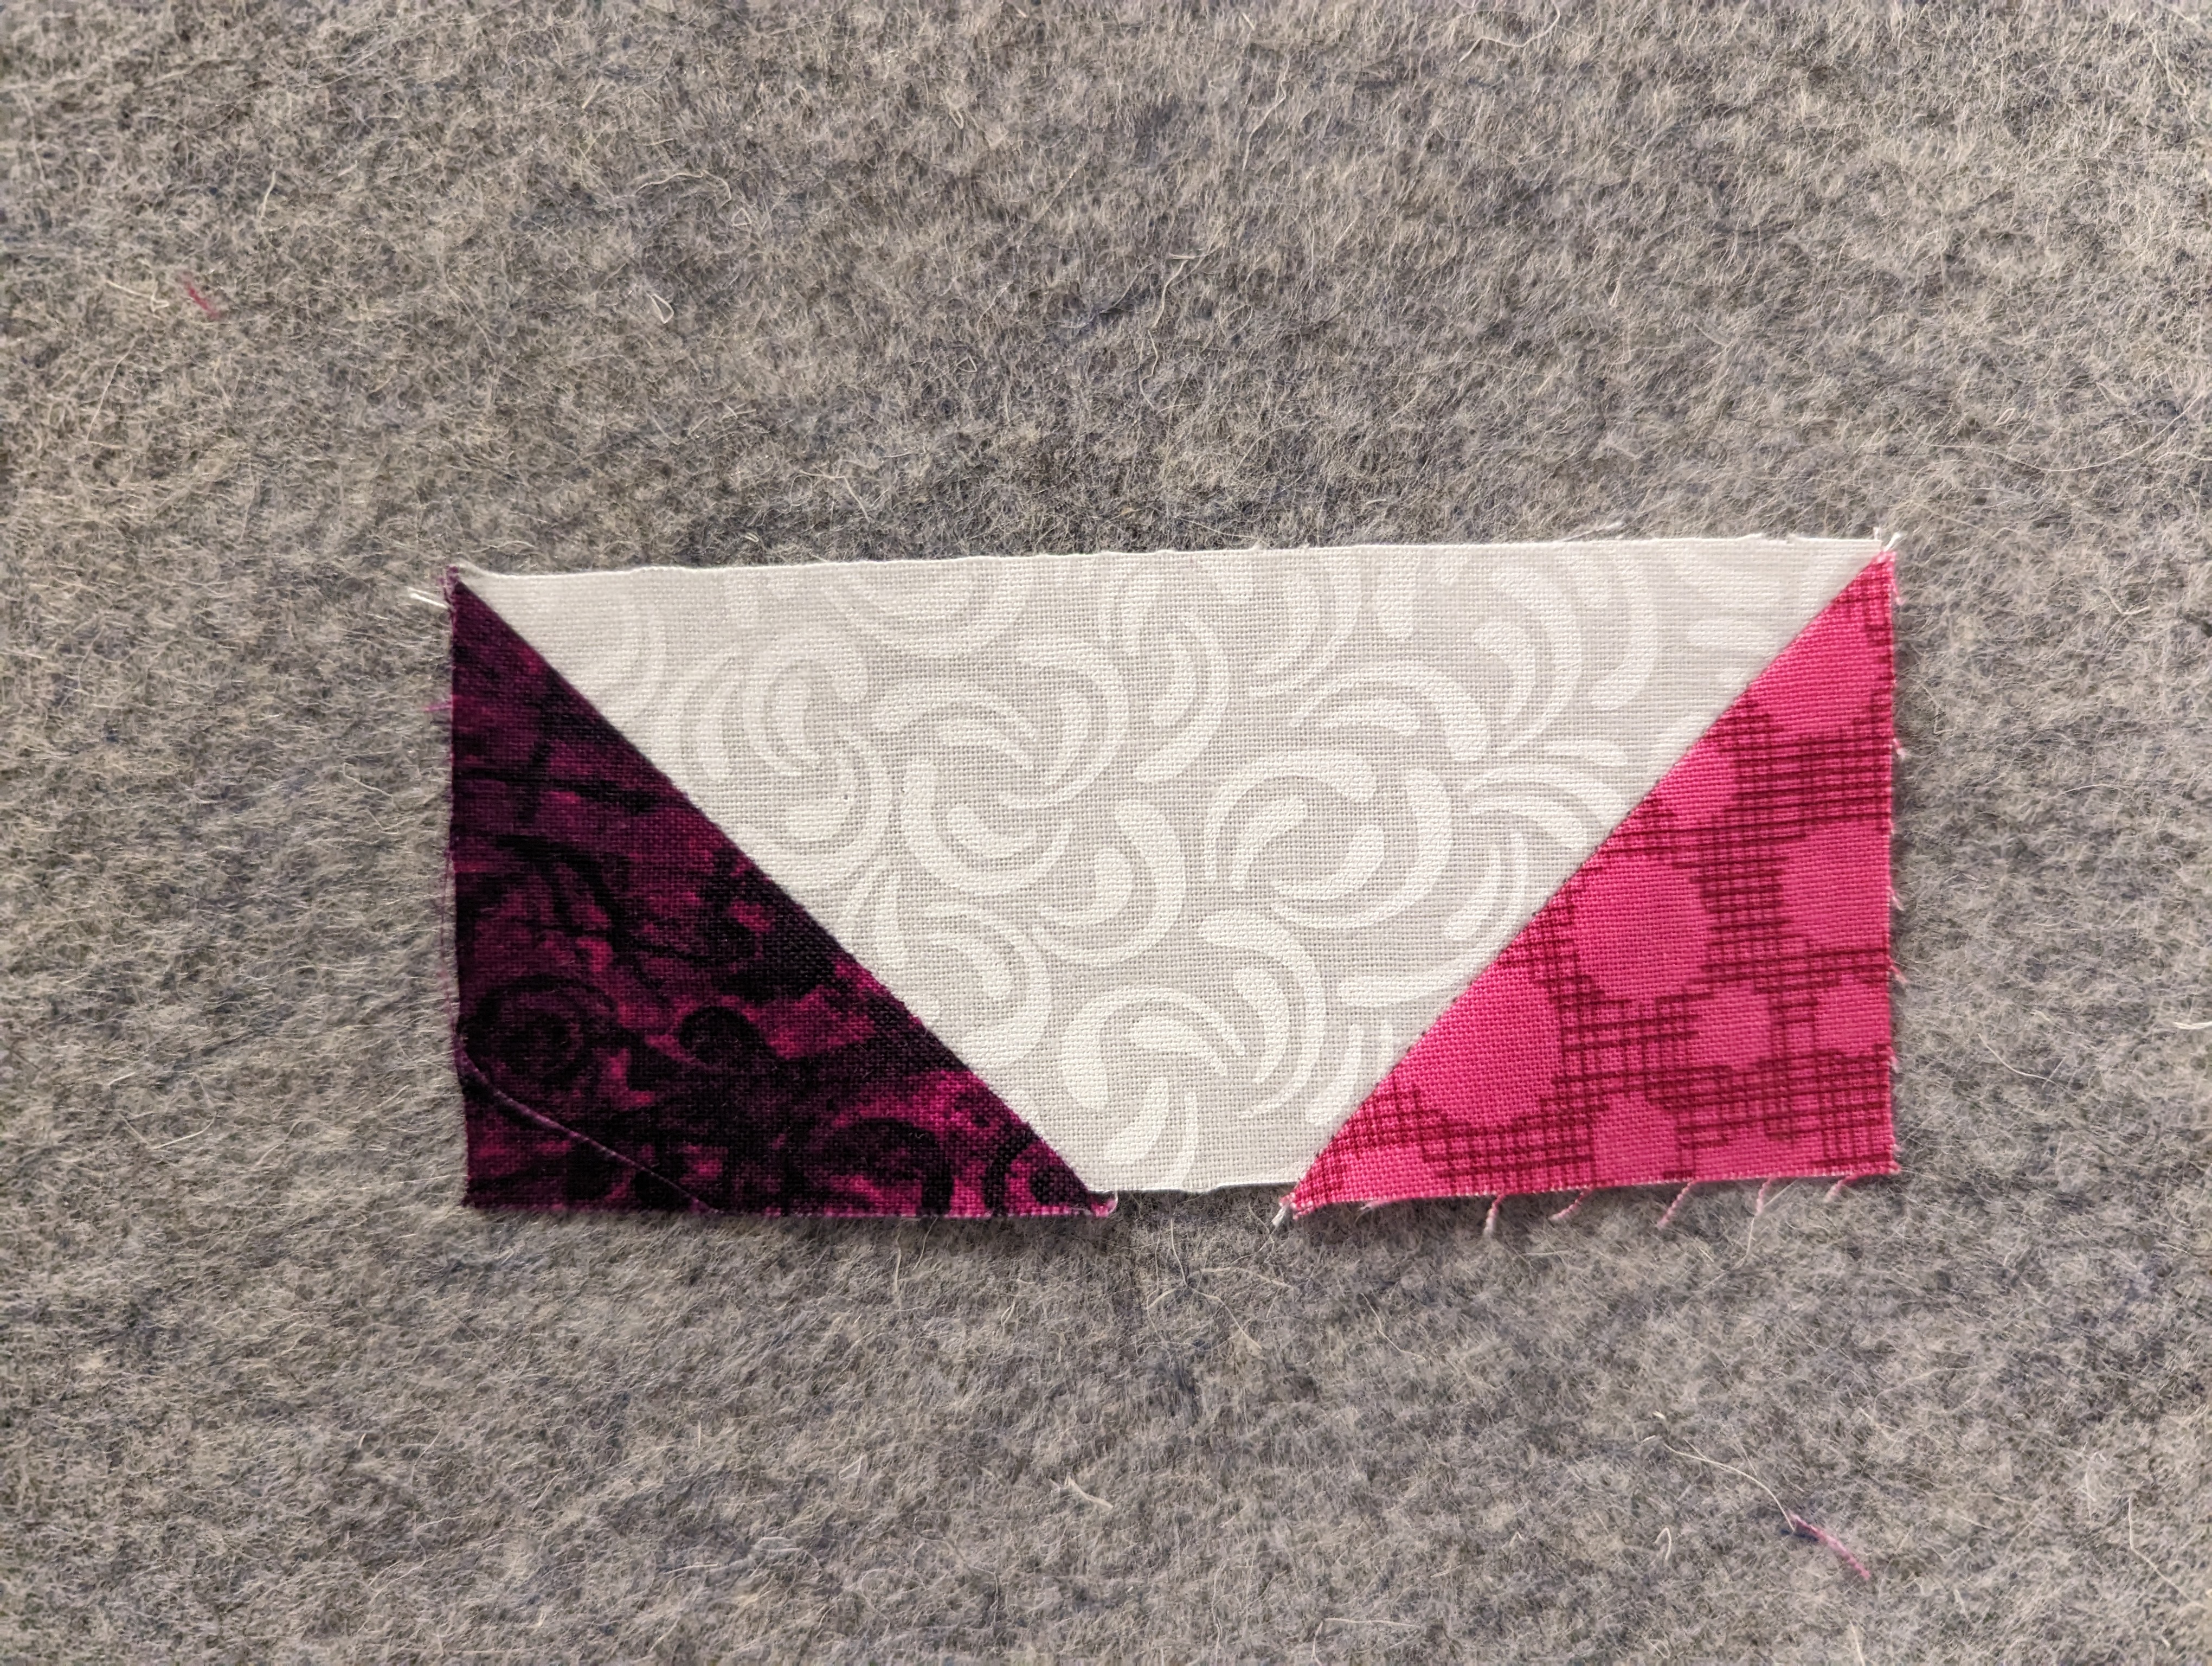
Cutting Instructions: There are lots of moving parts, so each piece has a letter label. Keep a close eye on your half-square triangle (HST) orientations! I’m terrible about getting those backwards and having to frog everything. I’ve included a labeled diagram from Oh, Kaye Quilting as well as pictures from my own assembly.


Background (one fabric, solid or tone on tone white)

  • A: 5” Square 

  • F: 5.5” x 3” 

  • G: 3” square

  • H: 2.5” x 1” 

  • I: 3” x 2” 

  • J: 2.5” Square 

  • K: 8.5” x 2” 

  • L: 10” x 1.5”

  • M: 12.5” x 1.5”


Main Body (scrappy or single fabric, one color and hue, quilter’s choice)

  • A: 5” Square

  • B: 6.5” x 3”

  • C: 5.5” Square 

  • D: (2) 5” x 3” 

  • E: 7.5” x 2”


Wing Accent (contrasting color to Main Body, quilter’s choice)

  • C: 5.5“ Square


Beak & Comb (scrappy or single fabric, orange)

  • G: 3” x 3”

  • J: 2.5” x 2.5”


Block Construction:


1. Place 5” squares A from Background and Main Body right sides together. Sew ¼” seam around the edges, then cut diagonally to make 4 HSTs. Trim to 3”. You will have one extra.


  1. Place 2.5” squares J from Background and Beak & Comb right sides together. Mark a line down the diagonal and sew ¼” seam on either side, the cut down the middle to make 2 HSTs. Trim to 2”. You will have one extra.


  1. Place 3” squares G from Background and Beak & Comb right sides together. Mark a line down the diagonal and sew ¼” seam on either side, then cut down the middle to make 2 HSTs. Trim to 2.5”. You will have one extra.


  1. Place 5.5” squares C from Main Body and Wing Accent together. Mark a line down the diagonal and sew ¼” seam on either side, then cut down the middle to make 2 HSTs. Trim to 5”. You will have one extra.


5. Sew together in a row: A HST from Step 1, then D, then another A HST together. This is the bottom of the chicken. Double check your HST orientation.


  1. Sew C HST from Step 4 to D. Then sew E on top to make the chicken body. Double check your HST orientation.


  1. Sew the chicken body CDE from Step 6 to B.


  1. Sew the chicken bottom ADA from Step 5 to the chicken body BCDE from Step 7.


  1. Sew Beak & Comb G from Step 2 to Background H. Double check your HST orientation.


  1. Sew together in a row: A HST from Step 1, then Background F, then Beak & Comb GH unit from Step 9. Double check your HST orientation.


  1. Connect the row AFGH from Step 10 to the chicken bottom/body unit made in Step 8.


  1. Sew Background strip L to the chicken bottom.


  1. Sew Background strip M to the left/tail side.


  1. Sew together in one column: Background I, then Beak & Comb J from Step 2, then Background K. Double check your HST orientation.


  1. Connect the column IJK from Step 14 to the right/front of the chicken. 


  1. Trim to 12.5”

Hive 3 January Tutorial - Chainlink Block for Helen M

 Hello ladies

Happy New Year to you all, hope you have had a lovely holiday break - I am really enjoying my summer holidays after another long difficult year.

I would like to make a quilt with your help for the king single bed in my husbands office. It is the only bed in our house without a dedicated quilt made for it. And every bed needs at least one quilt right?

The block I would like you to make for me this month is an adaptation of the Chainlink block which you can see the original free tutorial here:

https://www.blossomheartquilts.com/2015/02/bee-hive-chainlink/

This is a drawing of what the quilt might look like. You are making me the part in the drawn squares. The extra sashing parts make the alternate block appear.


Here is a picture of 4 blocks I have made and sewn together with the sashing that I would prefer. The original block has a lot more pieces than my version and I am only asking you to make the block without the sashing parts. However, at the end of the tutorial, I will ask you to send a little bit more fabric to me with your block - more on that later. 


And here is an example of a 10.5 inch unfinished block that I would like you lovely ladies to make for me.


This is a very easy block to make using 2.5 inch squares and 3 inch squares turned into 2.5 inch half square triangles and then all sewn together in the right order. The affect of the chain link comes from the colour value of the fabrics.

Choosing fabrics:

You need a black or very dark grey, a medium grey, a light grey and a low volume neutral that is light enough to contrast with the lightest grey.

You also need a clear bright coloured floral. 

The fabric needs to be modern style fabrics as per the rules of stash bee.

Here is a photo of my fabric pull for this quilt:


Please try and keep the light grey contrasting with the neutral and the medium grey so that the "shadow' affect can be seen in the block.

Cutting:

You are selecting 1 of each fabric colour (the quilt will be scrappy but each block is made of 1 each of the 5 colour fabrics - please see pictures of blocks as examples and my 1 block pull below)

Dark grey or black - 4 x 2.5 inch squares

Medium grey - 8 x 2.5 inch squares

Light grey - 4 x 3 inch squares (for 2 at a time HST) OR 1 x 8 inch square (for 8 at a time HST)

Background/neutral - 4 x 3 inch squares (for 2 at a time HST) OR 1 x 8 inch square (for 8 at a time HST) and 4 x 2.5 inch squares 

Brightly coloured floral - 1 x 2.5 inch square

Fabrics not sewn into block 

Background/neutral - 1 x 6.5 by 2.5 inch strip

Light Grey - 4 x 2.5 inch squares

Floral - 1 x 2.5 inch square


Sewing:

Please use a scant 1/4 inch seam through out.

Making the centre 9 patch:

Take the 4 dark black/grey squares, 4 of the medium grey squares and the bright floral square and make a 9 patch. I tend to press my seams open but you can press them to alternating sides in each row so they nest if you prefer. I don't mind either way. I am not providing pressing instructions.


 A successfully sewn 9 patch should measure 6.5 inch square unfinished (with seam allowances).

Making half square triangles

There are 2 ways to make these, one is the 8 at a time method and a tutorial can be found here:

http://www.blossomheartquilts.com/2015/05/hst-tutorial-eight-at-a-time/

The tutorial says start with 7.75 inch squares but I suggest rounding the starting squares to 8 inches and trimming down the HST afterwards - gives more wriggle room. So instead of 4 x 3 inch squares of lightest gray and 4 x 3 inch squares of neutral/background, you would start with an 8 inch square of lightest grey and an 8 inch square of the neutral/background.

The other way you can make them is 2 at a time as per below:

Take the 4 x 3 inch light grey squares and the 4 x 3 inch neutral/background squares and make 8 half square triangle blocks.

- mark a diagonal line on the back of the 4 light grey squares with a pencil or erasible pen (I use the ones that iron off - they are on the back so it doesn't really matter as long as they can't be seen from the front).


- pair up right sides together with the 4 x neutral/background 3 inch squares and sew a scant quarter inch seam either side of the marked line.


- cut the unit in half along the marked like and then press the block open ready to be trimmed down to 2.5 inches. I over-sized this deliberately at 3 inches to start with so that the block could be trimmed down rather than be too small right from the start.


Arrange the remaining 2.5 inch squares and the 8 half square triangles you just made around the 9 patch you also just made. Please note the orientation of each of the half square triangles. Correctly placed, they make the shadow affect so that when all the blocks are put together, creates a "chain" affect.


Sew the top and bottom 5 blocks in a row in the right order and orientation and then the 3 blocks on each side in the right order and orientation. Sew the 2 side strips to the centre 9 patch and then the top and bottom strips to the block. Take care to line up seam intersections. I press my seams open so I pin either side of the seam intersection so the fabric does not "slip" forward with the presser foot.


How to keep those points nice.  

Pin so you can see where the point edge of the block attaches to the straight part and make sure your line of stitching runs just to the right or left of the point in the background or darker fabric. If your cutting and seam allowance is reasonably accurate it should be easy to keep your points.

See the stitching line to the left of the point.

Your finished block should measure 10.5 inches square with seam allowances (so unfinished). Don't worry too much if it is slightly small, the block will have a tiny amount of give in it. If it is a bit more too small or large for that matter, you need to check your cutting accuracy, seam allowance and sewing the blocks accurately. If you are new to quilting, this block gives you a chance to learn 3 simple techniques - accurate 9 patches and getting that seam allowance correct, how to make half square triangles, and colour selection. 

The Sashing Strips

I have modified my sashings to a more simpler look. If you could please send to me with your block a strip of neutral/background strip of fabric at least 6.5 inches long by 2.5 inches wide, 4 x 2.5 inch squares of light grey and 1 bright floral square 2.5 by 2.5 inches. They can all be a repeat of the fabrics you used in your block - this is because they will be spread out through the double sized quilt I want to make. But they can also be completely different fabrics if you want. If you decide to make me more than one block, may I please have a set of extra sashing fabric pieces per block you send. 

And that is it - really looking forward to receiving your blocks and please do reach out if you have any questions or need any further help with colour selections, sewing the blocks or any techniques you are not sure of etc.

Happy sewing

Helen


Hive 1 January Tutorial - Furr-ever Home Cats

Happy New Year!
I am so excited to begin this year with some fun and whimsical quilt blocks. I work with a non-profit, no-kill cat shelter called Candy's Cats in the Orlando area and twice a year we have a silent auction to help raise funds for quality vet care and foster supplies. I help the organization in a variety of ways - computer and adoption paperwork, cleaning out cages, sewing cat bedding, and even fostering a few cats (when I can convince my husband and not rile up my own 3 furballs).  Here is the most recent cat we fostered, named Boots, who finally found his furr-ever home just in time for Christmas.


It's sweet faces like his that made me decide to ask for your help in making cat blocks that I will make into a quilt for our next silent auction. Elizabeth Hartman designed the Cat Mini Quilt and she created a variety of cat face blocks. I am going to walk you through Cat Block #20: Max but you can choose any of the adorable cat blocks found here, here, here, and here. Or, if you're feeling really creative, here is the link to the basic cat block and you can make up your own. 

The blocks are fairly small, 4.5" x 5.5", so I am requesting that you make 4 blocks. I'm also requesting that you don't sew them together so that I can mix them up according to colors. 


Seams

Just a quick note about seams. All seams should be sewn with a 1/4-inch seam allowance. This is to ensure that all blocks measure correctly. One person's scant 1/4-inch will not measure the same as someone else's, so please measure/test your allowance for accuracy.  Stitch length should be fairly small - I prefer 2.0mm so that seams don't pop when I put the finished top on my long arm. Feel free to press your seams however you prefer.

Fabric Requests

Cat Faces -- Any color of your choosing, including black, brown, and dark gray. Please keep your cat to one color family, so if you make a red cat all of the fabrics should have some amount of red in them. A green cat should have all mostly green fabrics, etc. Novelty fabrics are fine but no batiks. A mix of prints and solids really adds dimension so if you are able to use both, or different colored solids, that would be ideal. Each cat pattern indicates where the solid fabric should go, but have fun with it and place fabrics where you want them. If you don't have solids in your stash, opt for blenders if you have them. 

Background Fabric -- white, as white as you have! It can be solid or a tone-on-tone blender. You can also mix and match your whites and blenders within your block. You'll see that I've done that in my example block below.

Cutting Instructions for Max Block

Background Fabric - white or white blender
(1) 2" x 4.5" rectangle for the ear unit
(2) 1.5" x 1.5" square for the chin unit

Cat Face Fabric Pieces
A -  (1) 2" x 2" print fabric
B - (1) 2" x 2" print fabric (can be the same as A if you'd like)
C - (1) 2.5" x 4.5" solid looking fabric
D - (1) 2" x 4.5" print fabric (can be the same as A or B or completely different)


Sewing Instructions for Max Block


Make the Ear Unit
  • Units A and B will become the ears. On the wrong side of the fabric, mark a diagonal line. 
  • Place your two ear squares (A and B) onto the white rectangle, with right sides together, like shown below.
  • Sew on the lines, then cut off excess corner and press back. This unit should measure 2" x 4.5"


Make the Face/Chin Unit
  • Sew together units C and D and press open.
  • On the wrong side of your white squares, draw a diagonal line.
  • Place your white squares on the bottom of your C/D unit.
  • Sew on the lines, then cut off excess corner and press back. This unit should measure 4" x 4.5"


Finish the Cat
  • Sew together the A/B ear unit to the C/D face unit. Pay special attention that the ears are on the correct way, with the points at the top (I'm talking from experience here, folks!).
  • Press open. 
  • Your final block measurement should be 4.5" x 5.5"

Final Notes

If you cut all of your fabric first and then sew them assembly-line style, they go super quick. Again, when it comes to fabric placement, anything goes. Elizabeth Hartman's patterns are just a starting point and you can pretty much do whatever suits your fancy. Wanna make a cat with only 2 colors? Go for it! Make the face 4.5" x 4" and then add different colored ears. Have some scraps already sewn together? Cut it up to the 4.5" x 4" size then add the ear unit. Done! It's totally up to you. Whatever you decide will be purrfect and I can't wait to add them to my growing cat pride.


Happy sewing!

~ Diana @ Red Delicious Life

Thursday, December 15, 2022

Hive 1 (very late) block for Starla

 Hi Starla!

My sincerest apologies for not only posting but mailing your block late. It was a very cute block to make and I’m glad it’s finally on its way to you! Can’t wait to see your final product. Hope you have a wonderful holiday season :)


With love,

Nicole

Sunday, December 4, 2022

Hive 1 Block for Starla


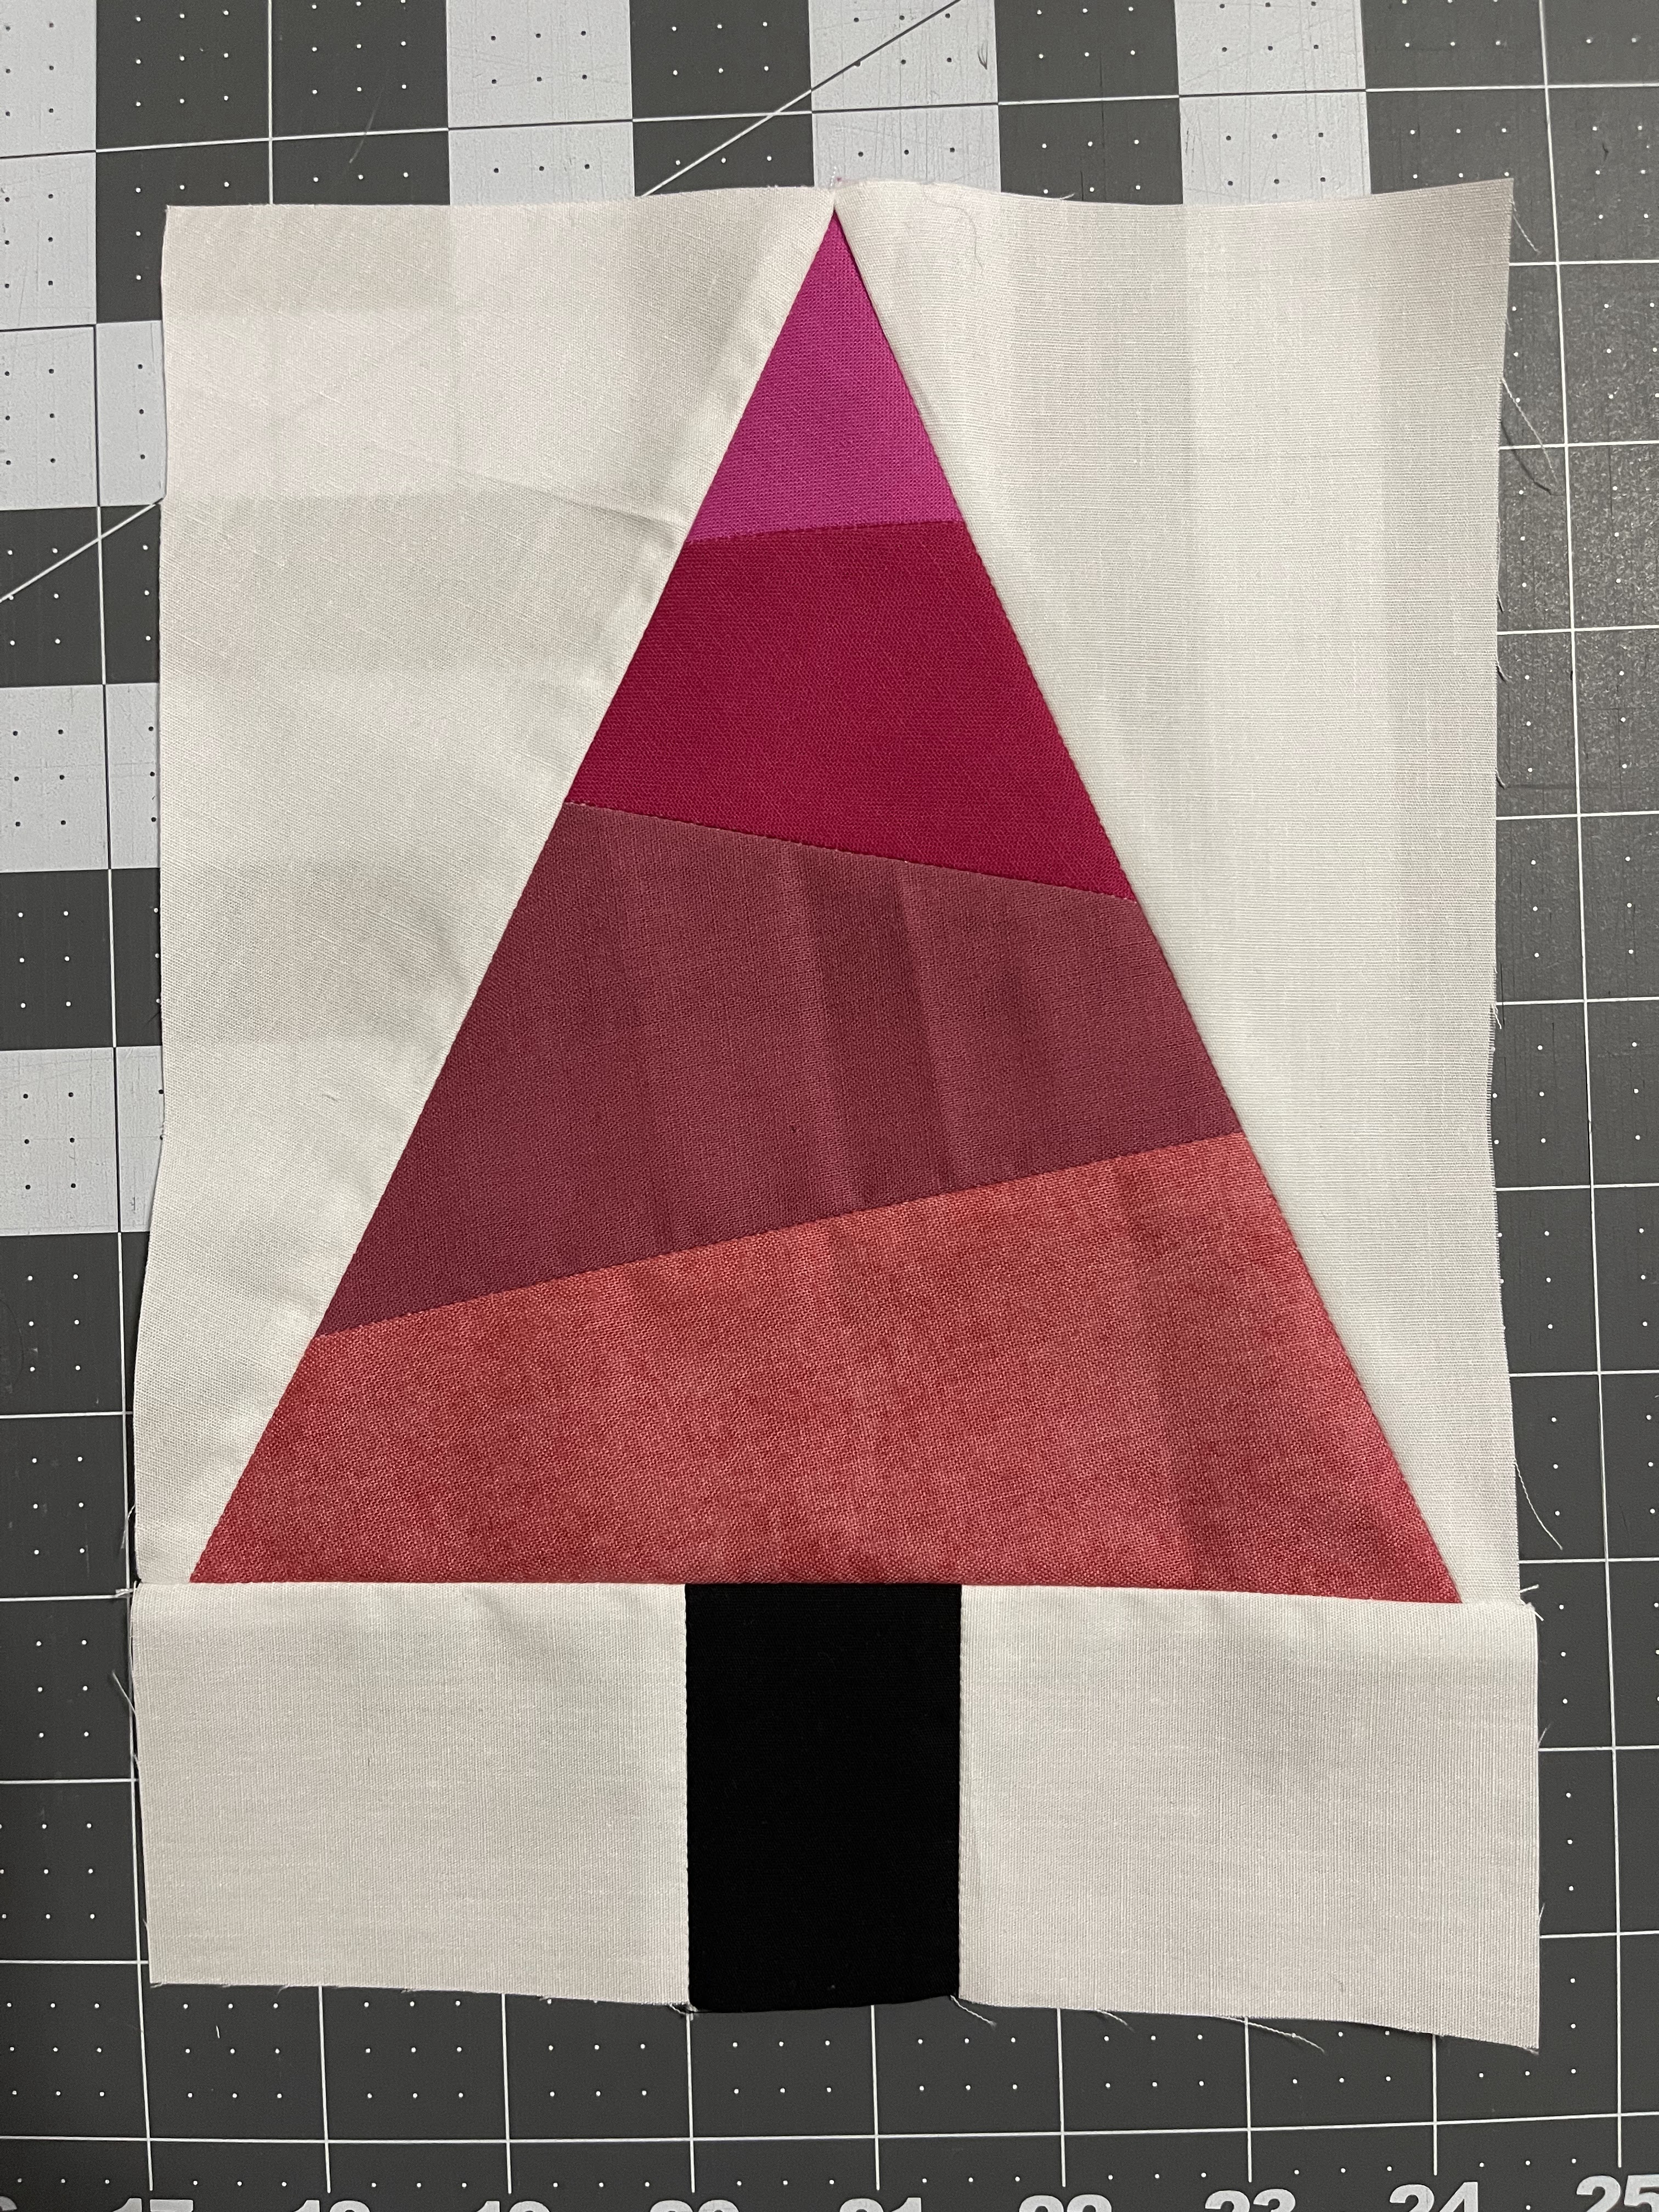
This was such a fun block, Starla! Thanks for picking it out for us. Can't wait to see your forest of colorful trees! 

Apologies for the delay - this month got away from me! This will be in the mail tomorrow, and hopefully it finds its way to you quickly. 

Enjoy!
- Julia H.
 

Hive 1 November block for Starla

 Hello there,

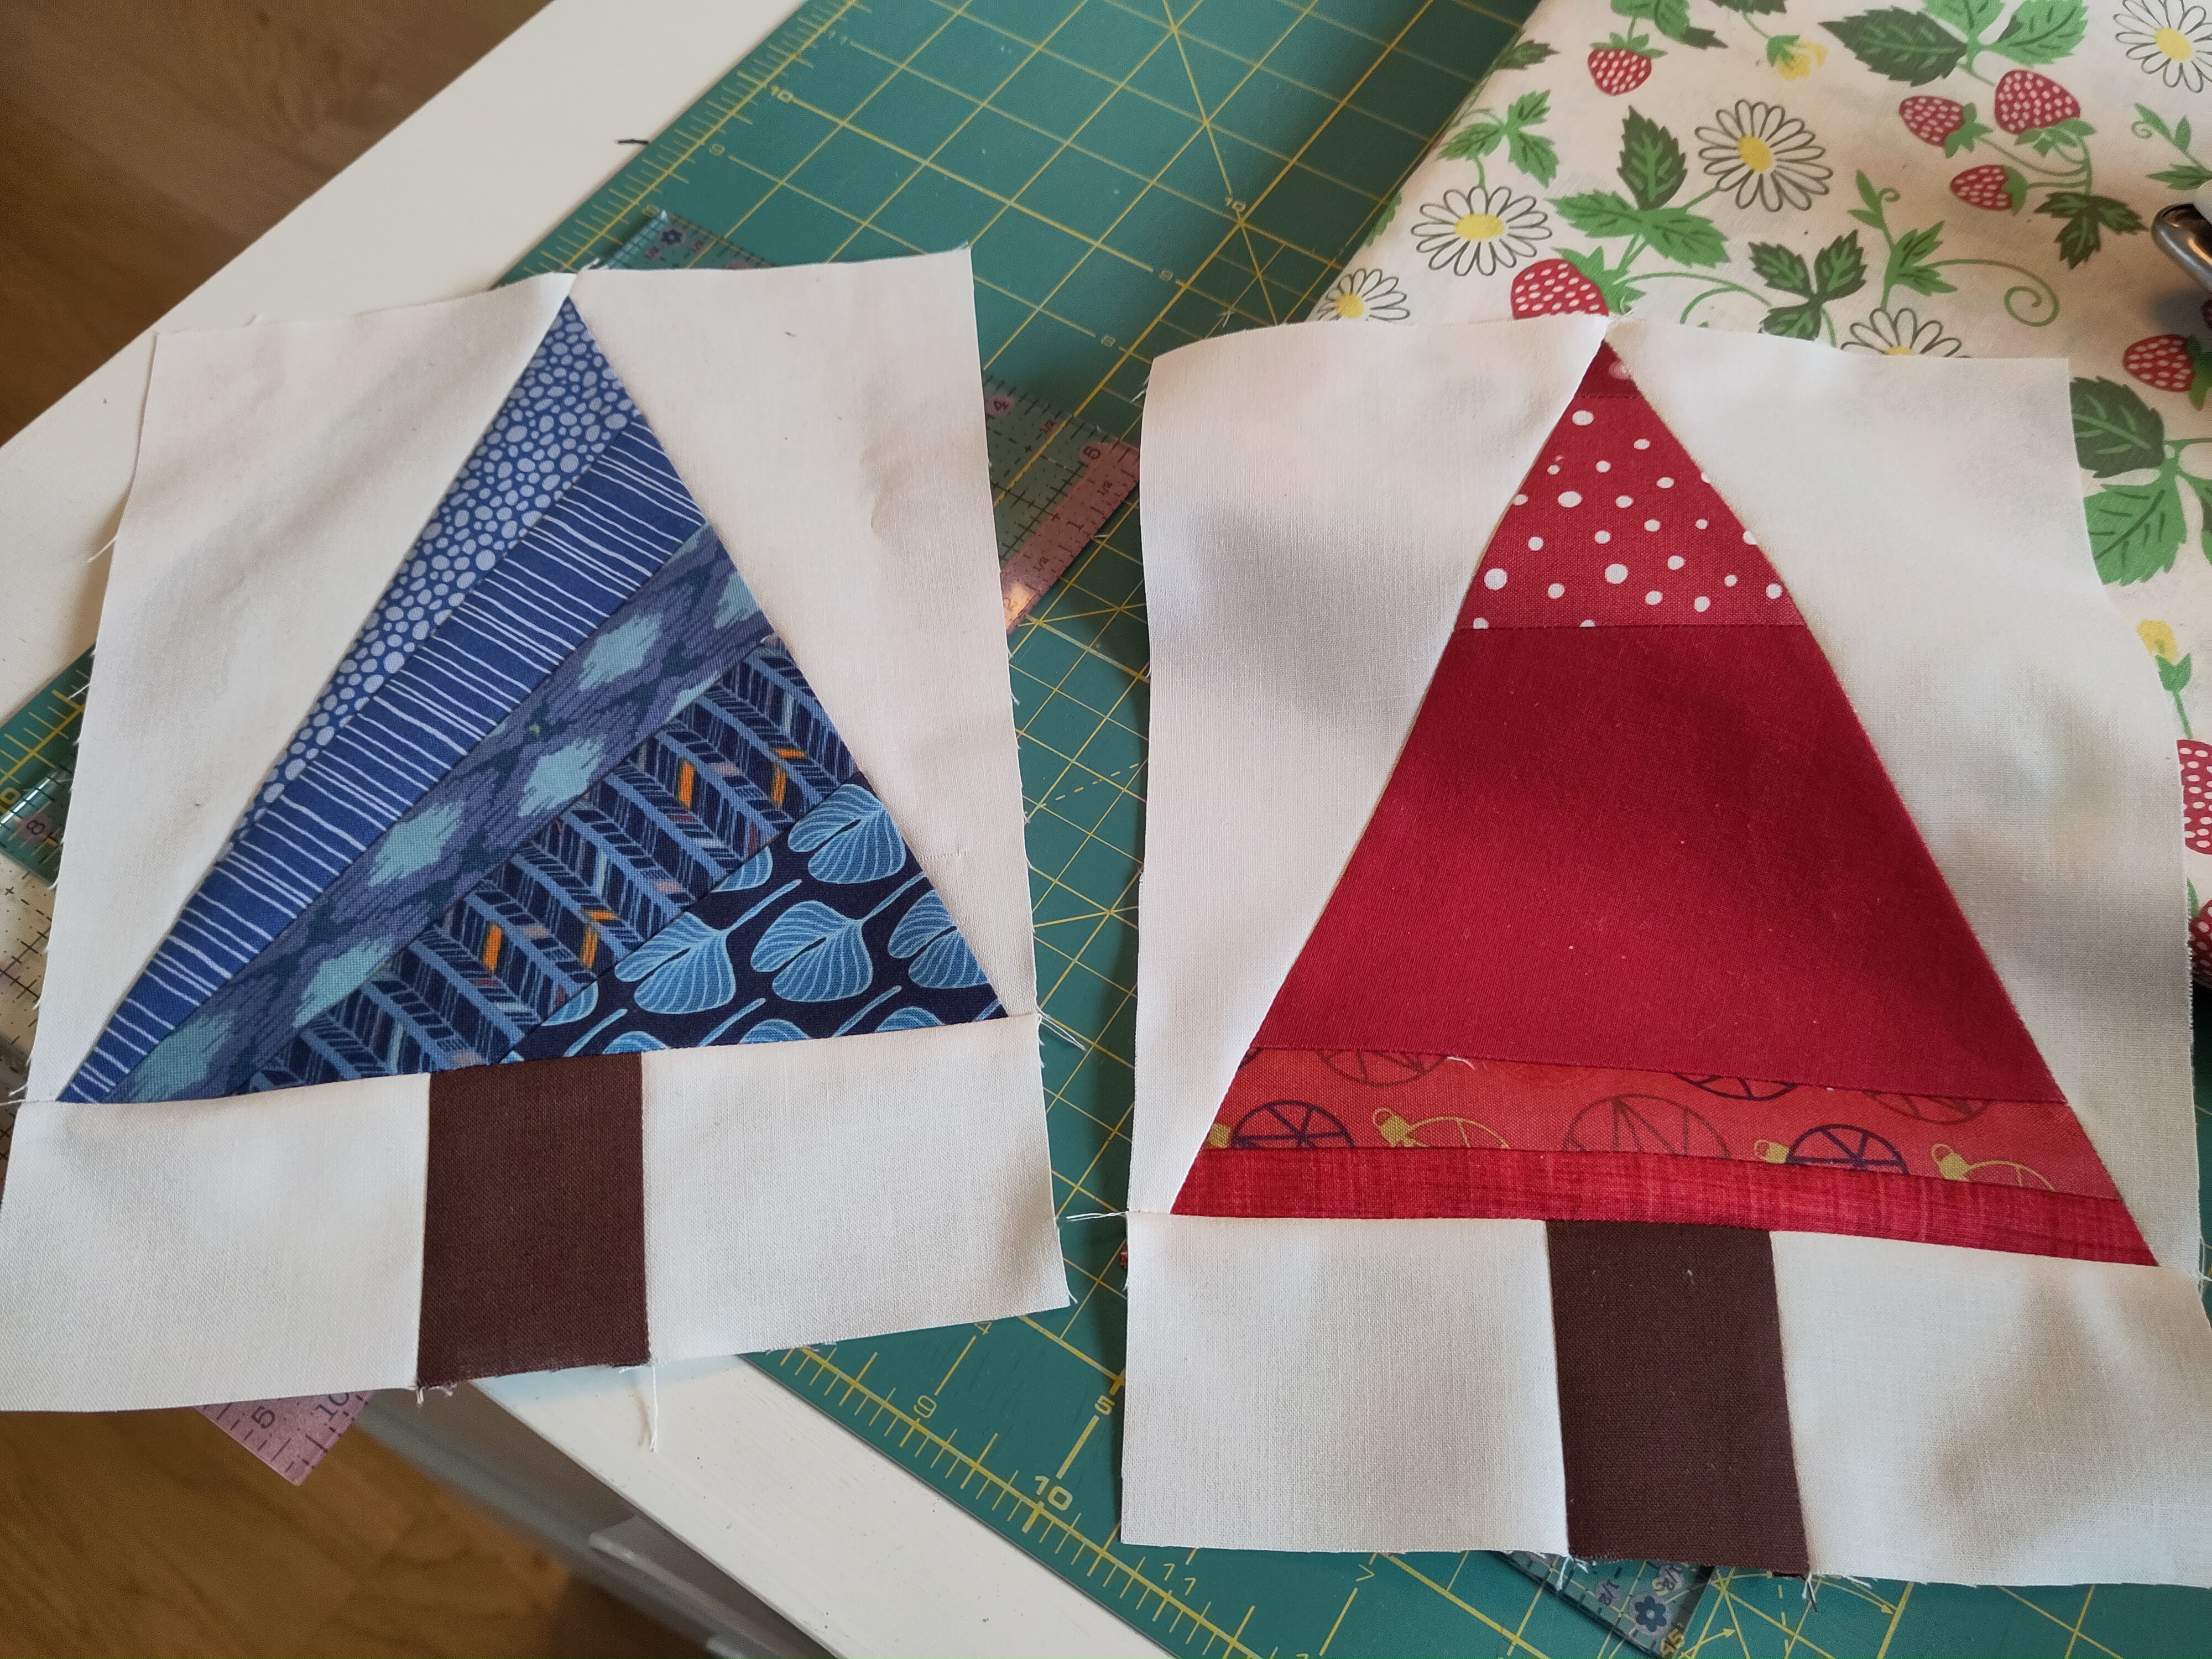
I'm super late because I got Covid and was unable to sew for over 2 weeks. I made two trees to make up for the lateness and hope they will be delivered fast!


Lots of love

/Minnie