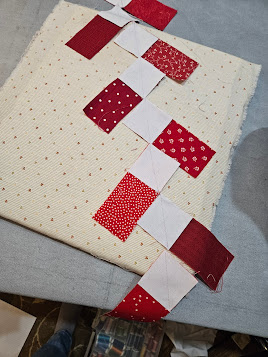
I want to make a new quilt for my youngest grandson. I have asked him what colors he would like and my dear Jensen said red and white. Seriously, I had suggested red and blue, but no, he repeated emphatically red and white. White for a boy who is 9??( which changed my whole idea of what block to choose.
So I am going to choose something somewhat simple . I found this awesome video and pattern.
Scrappy Star
( Pattern and directions from Teresa Down Under) (FYI new pattern every week on youtube)
Finished size 12 1/2 inches
Link of 3 minute video instructions: https://www.youtube.com/watch?v=42I-0idw4_U
I am going to be rather detailed on instructions to give pointers. Please don't be offended if I include too much. (I just thought it might be a teachable moment. )
Colors red prints for background and white or white on white for center star.
Please no Christmas or girly prints; it is for a BOY
Cutting directions:
White or white on white
One 3 1/2 inch square and Eight 2 inch squares
Red prints: Can be red/white even small flowers Fabric pull video shows more white.
I am ok with some of them mixed in.
Four 5 inch squares and Eight 2 by 5 inch rectangles
Lay out block to contrast fabrics and balance brights
Draw diagonal lines on the white small squares from corner to corner. I used a washable pen, that didn't have much ink in it. Where is my Frixion pen when I need it?
Lay white squares on center strips making sure to have alternate angles of drawn line on squares.
Mine are barely seen.
Sew just inside the diagonal line picking up one strip at a time and leaving in chain. ( So you don't lose the order. ) Press to half square and cut off excess on the back.
This is purely optional, but helpful.
Sew 2 center strips together matching the diagonal corner at the top. Press open to avoid bulk at top of V. ( I used something called a strip stick which really helps . It is a padded strip flat on the bottom, rounded on the top. They have new wool ones, but are more expensive.
)
Notice I also have a wool mat that I cover in a scrap fabric and pin it on the sides. It is easy to change it out and wash the cover as it gathers stains from my Best Press and threads.
Lay block back out; fold column 2 onto column one and chain stitch leaving threads between sections.
This is called webbing and helps to keep things in place, not that I haven't turned around some.
Once this is sewn, lay back out and now fold column 3 onto column 2 and stitch together again chain piecing the 3 sections together. ( Forgot picture for this step.)
Fold down and place row 1 onto row 2. Notice I pressed in the direction of the bulky seams; for the center row that means towards the white square. For rows 1 and 3 away from the center block because of the side seam of the diagonal white star point. The 2 seams will nest together. I pin with extra fine pins just before the intersection . ( And you can tell the quilt police I sew over them, too :but very slowly.)
Follow the same procedure for row 2 onto row 3. Clip webbing strings.
I pressed the rows open, but the columns to each side. ( This is for when I assemble the quilt.
And it is finished: a 12 1/2 inch red and white scrappy star block.
Thanks for making a block for me.
Any questions, let me know.


No comments:
Post a Comment