Wednesday, July 1, 2015

Hive #5 - July Tutorial - Converging Corners

It is Kelly here from Hive 5. I've been simultaneously waiting for and dreading this month for so long. I've never joined any sort of bee before so there was that... I have been looking forward to this since I signed up last year but have been dreading the most important part... choosing my block.

First I thought I'd do the flowering snowball block, then I thought perhaps some sort of orange peel block. Next I switched to a feather block. Then houses. Then... Every few weeks since last Fall I had a different block in mind. You can find many of my choices on my Pinterest board.

After going back and forth (and back and forth) I kept coming back to this quilt found on From Martha With Love. Everything about it is just so pretty. And scrappy!


The block is based on the Converging Corners tutorial by Film In The Fridge.

For my color palette, I pulled a mix of floral and geometric prints in tones like mint, coral, blush with some pops of gray, navy, gold, lime, orange etc. Think sherbets with a bit of pop. Please DO NOT use baby pastels or other really deep colors like red as the dominant color. For reference, the majority of the fabrics I used were either Art Gallery's Arizona or Basic Grey's Fresh Cut lines. I also threw some Maude Asbury's Geofabulous and Brambleberry Ridge in there for kicks. A few of the prints even have some metallic gold in them!

A mix of 8-10 fabrics will work well. Try to avoid overtly directional or novelty prints please. I know it is a bit of an eclectic mix but I like it. My 7 yr old son says it is weird. But I am weird so hey... :)


You will also need some neutral background fabric. Personally I do not like bright whites and like ivory tones instead. I chose 4 fabrics to work with. One is a solid Kona in Bone and the rest are very low volume prints. Just mix them up into the block. Please only use very low volume or solids in ivory, creams or off white tones if possible. 


The tutorial by Film in the Fridge is probably best to follow. Her final block is only 12.5". I would love for these to be 16.5" so you can either add extra strips or make them slightly wider than she describes. I'll walk you through a few of the steps here anyway.


I am making two blocks for samples. The block is built much like a log cabin block. You'll need to pick a feature fabric for the center. I suggest making it any size between 3 - 6" square. Next you'll use the background fabric to build out your block to be around 8-10" or so. Please press your seams open as you go.


The next step is to continue building your block's corners by adding strips of fabric. I start in the bottom right then do the top left corner. The length of the first colored strip should be around 2.5-3.5" long with the remainder of the strip being the background color. Each ring of strips should get progressively longer. Vary of the widths of the fabric strips between 1-3" or so. Skinnier strips will require more to complete the block. Aim for 3-5 strips for each corner.


Keep working back and forth from bottom right to top left corner until your block is 16.5". Don't worry about trimming them down or squaring them up. Try to keep the center square roughly in the center but it doesn't have to be precise. Variety will make the quilt interesting.

When finished you should have a block that looks something like this:


Hopefully this will be a fun block for you. Let me know if you have any questions or concerns. 

As for my question for my hivemates... Since I am relatively new to quilting, what is the one tool you think is helpful for a new quilter to get. 

For me, I love my FriXion gel pen for marking. Ink disappears with the heat of an iron. I know, I know... I've read blog posts where people have mentioned how the ink can actually reappear in the cold. I did some testing and yes, the ink did come back a little when I put the fabric in the freezer... but honestly, if ever my house is ever the same temperature as the inside of my freezer, I think some markings on my quilts will be the least of my concerns. :) Overall I love this handy little tool and use it all the time.

Hive 2 - July Tutorial: Molly Sparkles Union Jack block

Oh my goodness I am so excited for July!  Not only has school ended, yes, I'm a teacher :) but I am due to close on my very own house... single again after 23 years of marriage!  

I would love to have you help me make a quilt for my new living room and I have been thinking about the block I want to do since I first found out I was in the swap.  After much hemming and hawing and countless hours spent searching Instagram, flickr and Pinterest I decided to challenge myself and maybe my hive a bit by choosing Molli Sparkles' Union Jack block design.

This was a challenge for me as I tend to create wonky blocks, usually without trying!  This tutorial does require some measuring and more careful cutting than I might usually do but after seeing the gorgeous work my fellow Hivemates have produced I think you will handle it easily!

I followed his tutorial and found that if I took my time there were no issues.  I printed out the tutorial using print friendly but I will caution you that it is 21 pages to print.

I took some photos along the way to share my progress....

In the background of the photo below was my first attempt - I got the diagonal stripes upside down in 2 of the quadrants - if this happens to you - DON'T WORRY OR TEAR IT OUT!!  remember my style is wonky....I will still use it :)


For color inspiration (excuse the pics, my fabric is packed so I couldn't pull any to show you!) I'd love:
blues, greens, purples for the traditional blue section of a Union Jack;  


reds, pinks, oranges for the diagonal & cross (traditional red of the union jack)


text or low volume fabrics for the white accents

No pastels please!  Geometric or smaller pattern prints will work better but larger prints are OK if there appears to be a predominant color.  Any questions - I am just an email away :)

Question for my Hive Mates:  Do you have any exciting or unusual summer plans?  I am moving and sending my oldest off to college!

thanks ladies - hope you have fun :)

Kristen

Hive 1 June Block: Simply Woven

Hi. I'm Sarah from Sarah Goer Quilts. I've had a great time making blocks for my hivemates this year and I'm so excited for it to be my month. I'd been thinking about possibilities and wanted to do something different than the color schemes in my current WIPs. So I decided on rainbows. This seems so timely now, due to last week's Supreme Court ruling. I was initially thinking that I wanted to do Raspberry Kiss blocks with a variety of different centers that I could arrange in a rainbow on the overall quilt. But then I realized that the large size on the tutorial was too big to fit 4 in a 16" block. I thought long and hard about whether I wanted to do a different size of the Raspberry Kiss. I ended up deciding that it would fail to take advantage of the opportunity for a terrifically scrappy project that could (or should?) come out of a Bee. So then I went on a hunt for something that would introduce more colors per block.

I found this finished quilt on Stash Bee (from Alison!). Here's her quilt. Isn't it a beauty!


So this month we're going to make these 12.5" unfinished blocks in RAINBOW COLORS! The tutorial for the block can be found on Moda Bake Shop.

Here's what you'll need:

two matching 4" x 8" background pieces
Please use something that reads as white: low volume black on white or grey on white, white on white, or solid white.

six 2.5" strips
Please use one of each color: red, orange, yellow, green, blue, purple. Try to stick with true rainbow colors that are saturated with color. I'm fine with prints that have other colors in them as long as the fabric clearly reads as one of these colors. Please avoid patterns that have too much white in them. I prefer prints (making sure they read as a single color) and blenders, but feel free to use solids as necessary. (Note: My sample is heavy on blenders, only because that is what's in my stash. And my blue is a little dark, but it was the best I could do for a true blue.)
The six strip lengths are 8", 9.5", 9.5", 11", 11" and 12.5". Cut these in any order. In short, your color placement within the block is up to you. FYI, The order I used was: red, blue, orange, purple, green, yellow.

The tutorial by Jess will take you through the process. To keep the strips you cut apart aligned as you insert each new strip, consider pinning. Please press your seams open. I suggest dropping your stitch length to 2.0.

Finally, here's my first block. Have fun!


Lastly, a question for you. Tell me about your WIPs. How many do you have? What's the oldest? How many do you actively work on at once? I have a million (okay, about 30) on my list at the moment. The oldest is from 2004. And I tend to make slow progress on many projects at once, while finishing the things that have some sort of deadline (like swaps).

July Block - Hive 9

Hi Hive 9! I'm Tiffany. Currently I live in Washington, GA, but will soon be relocating back to Colorado Springs from whence we came 2 years ago. I'm very excited to move back. Let me say right off the bat, we will be moving mid to late August, I'm not entirely sure when yet. So if for some reason you end up running late and haven't mailed my block before, say, August 7, please contact me for a new address.

Two years ago when we moved here I was woefully underpacked the NIGHT before we were supposed to leave and a friend found out and called in reinforcements. Within an hour, 12 adults and kids were at my house packing. They totally saved my butt. I've had it in my mind to make a quilt for each of the three families that helped since then, but being a procrastinator, didn't settle on a plan for any of them until now.  I hope to present them with their quilts shortly after our return, if not right after unloading the moving truck. :)

Two of the quilt tops are complete and waiting to be quilted. The third one is where you all come in!

I've chosen a paper pieced 5-point star from Hot Pink Peonies! You can find the templates and tutorial HERE.

For the star, please use red prints. For the background, please use cream/light tan prints.


You don't have to use 10 different reds and 10 different creams, but please try to use a few of each. There is going to be black and dark grey in the quilt as well, so a little of those colors in your fabrics is ok, just try to avoid other colors if possible (but even I ended up with a little pale aqua in one of my creams). As you can see below, I'm not super picky about the style of fabric. I used what I had on hand which includes batiks and Civil War repros as well as plenty of modern. Also, music themed prints are quite welcome. Just no novelty please.


I assembled my stars a little different than the tutorial, so you can choose which way you want to put yours together.

First things first, to make sure it printed at the correct size just measure across the bottom of section D or E to make sure it's 5 inches there. If it's within an 1/8 of an inch, that's fine, you'll see.


Next, if you've read her tutorial you've see that it requires a somewhat difficult final seam. Instead, I printed two copies of Section B and cut one half of the section out of each copy. I labeled them Sections B1 and B2.


Once I got all of my sections pieced, I attached Section B1 to A and Section B2 to C. It was really easy to get the pieces properly line up just by matching where the red meets the cream on the edges of both pieces. Hope that makes sense.


Next I joined B1/A with E and B2/C with D. Then I sewed the halves together. There's a pretty bulky convergence of seams in the middle, but it'll be ok.


I need the star block to 12.5 inches unfinished. Right now, it should measure 10.5, give or take. Mine was 10.5 high but about an 1/8th of an inch too narrow. So I added 1.75 inch red strips on the sides, then the top and bottom. Then I trimmed the block to 12.5 inches.


And that's it!

Now, if you don't feel comfortable with this block, no worries. Feel free to make a classic 12.5 unfinished 9-patch out of five 4.5 inch black or dark grey print squares and four 4.5 inch cream/light tan squares.


The quilt needs just as many 9-patch as it does stars. So I really will be happy with whichever block you make. :)


Phew. I feel like that got long! Last thing, here's my question. Since we're moving again soon, have you always lived in the same area, or have you moved? My dad was Air Force. For being a military family, we only moved twice in my first 16 years. Shocking. I've moved more in my 24 years of post military life. :) Places I've lived: South Dakota, central California, back to South Dakota, Oregon, college in Virgina, Oregon, southern California, Colorado, Georgia, and now back to Colorado.

Happy sewing!

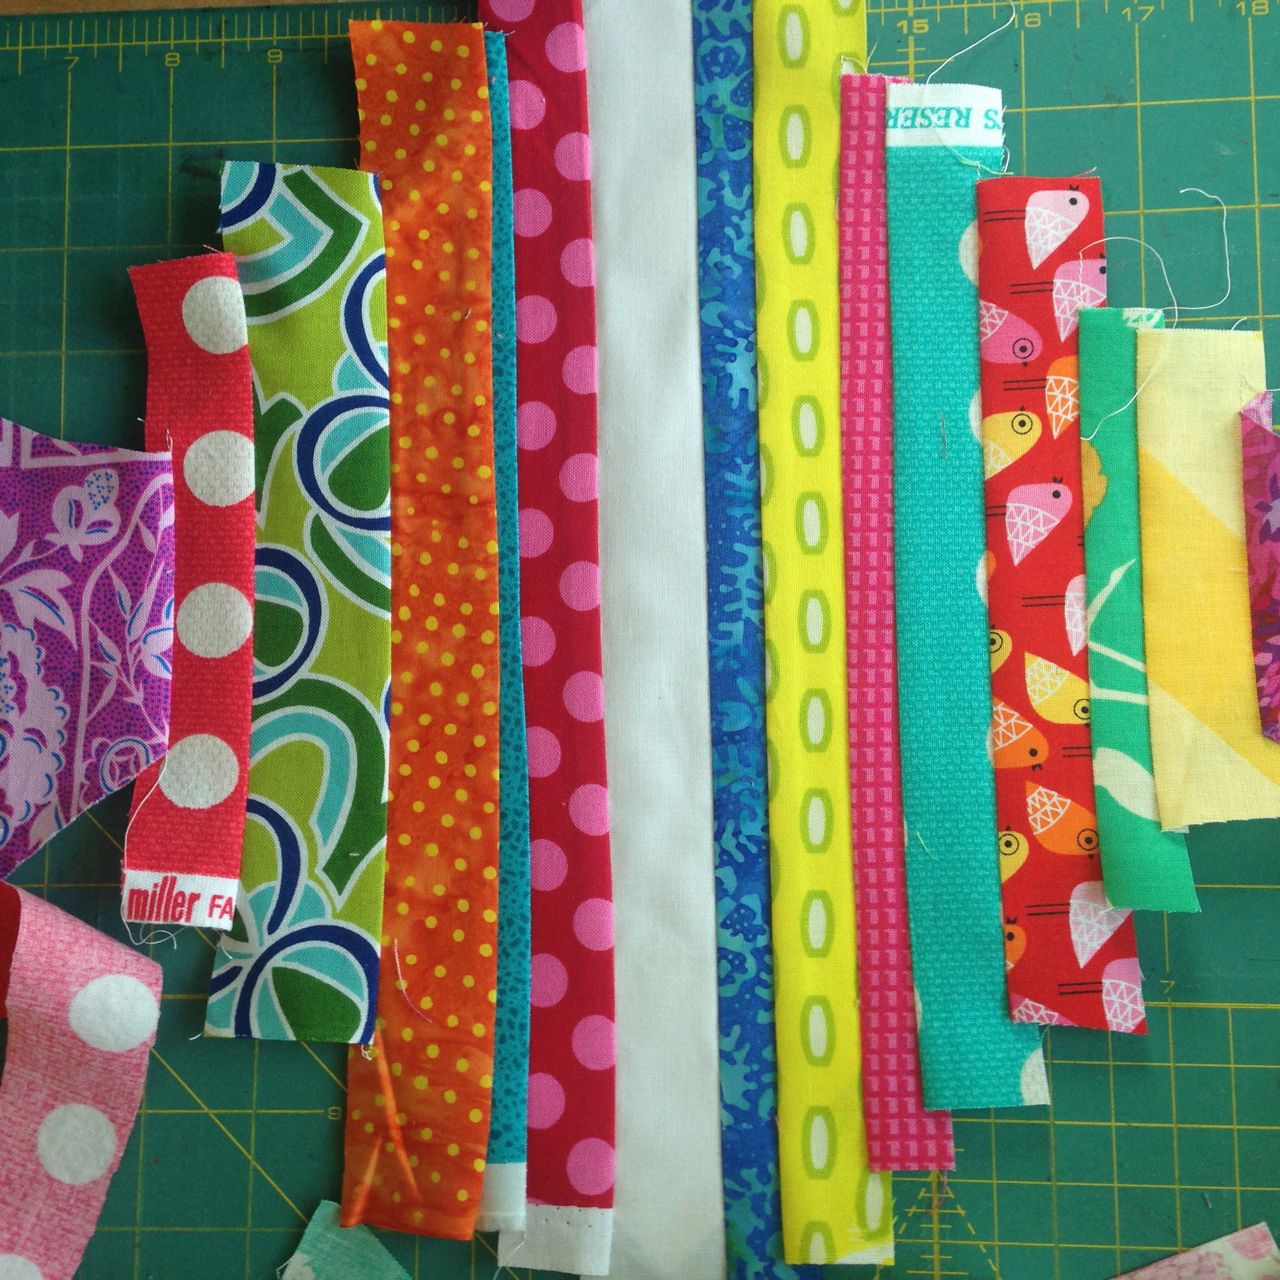
Hive 3 - July Tutorial

Hello fellow hive mates,

I am Martina and we currently live outside of Lille, France. We have been here for a year and will move again next year. Where to we don't know yet...but I'm sure the military will let us know at some point ;) This is my first year with the stash bee and I joined because moving around so much makes it difficult for me to stay connected with a guild, but I also wanted to participate in a bee!

I used to have an Etsy shop. I just closed it this week because it just wasn't worth it anymore–both from a creative and financial aspect. I got to a point where the business was doing ok, but I was stuck making pencil cases and wet bags while not really making any profits (and I had to start thinking about liability insurance, consumer product safety compliance, exemptions, etc.).

Like many others I went back and forth between my block choice. At first I wanted wonky stars made by "make fabric," then I saw some whirlygigs, and so on. In the end, I settled for a block that I always wanted to make but never got around to-a string pieced, bright and scrappy block.

Sherrie from a quilting life has a wonderful tutorial on how to make 8 1/2"string quilt blocks. She uses muslin as her foundation but I use newsprint/scribble pad paper and trim it down to 8 1/2"square.

I would like for you to make four (4) 8 1/2" block sections, with a 1 1/2" (that's the size to cut, it will finish at 1") off-white (think Kona snow, oyster, natural) strip running down the middle. This way, I can create a secondary pattern when I join the blocks.

As for colors, it's time to dig into your scrap bin. Think bright, fun, summer colors. Don't overthink it, just grab a strip and go. I cut my strips between 3/4" and 1 3/4" wide, but you can make them wider if you want. Variety is key as it adds a dimension of surprise to it :)

Here is one of my blocks:


Please no browns, greys or blacks.

A quick step-by-step:


Take the 1 1/2" off-white strip and align it with the corners of your foundation paper, pin it in place or use some washable glue stick. Take a colored strip and sew it to one side of the center strip with a 1/4" seam and a shortened stitch length (I use 1.8), flip it open and finger press it. You can press it with your iron, but I don't like getting up after every strip so I finger press them!


Once the whole 8 1/2" foundation paper is covered, flip it over and trip the strips to size.


And voila:


Also, if you could not join the blocks and send them to me with the paper still on the back, I would appreciate it - pretty please and thanks!

A short recap:

  • 4 - 8 1/2" string blocks, with a 1 1/2" off-white center strip (it finishes at 1" once the strips are attached)
  • foundation paper (newsprint, scribble paper, foundation paper, copy paper)
  • bright colors if possible, feel free to use batiks - if you only have a muted scrap bin or stash, that's fine too!
  • no browns, greys or blacks please
  • short stitch length to make paper removal easier
  • please leave the paper on and please do not join the blocks
  • if you could include a small signature block, nothing fancy, just something with your name and place/date on, I would love to put that into the backing to always remember who contributed to the quilt :)

Lastly, I would like to know what machine(s) you work your magic on and which particular feature you absolutely love, what you don't like and if you could buy any machine, which one would it be?

I used to sew on a very basic Brother and I wasn't happy with the limited space to the right of the needle. Once we moved to France, I splurged on a Janome Memory Craft 8900 QCP. I love the ample (11") space to the right of the needle and the fact that I can change the needle plate with the push of a button. It makes cleaning out the bobbin case and changing plates so much easier, and the space lets me quilt large quilts at home.

I don't like the fact that it does NOT tell me when the bobbin is running low. A feature which even the cheap brother had, and which I really wish the Janonme had :(

If I could buy any machine, I would get a Bernina 800 or 700 series and a long-arm machine ;) But that remains a dream :)


HIVE 7 -- July block!!

Hello!  All my friends call me Mary Huey because that's how I introduce myself so you can tell me apart from all the other Mary's that have flooded my life since Mary was the most popular girl's name the year I was born.  The habit started in first grade and has never died.

I've quilted for a long time and am now in semi-retirement from a career that has always had quilting at the center -- first as a shop owner and teacher and now as a traveling teacher, blogger (at www.maryhueyquilts.blogspot.com), and UFO quilt assault master!!

Making a decision about what block to request is always the hard part of a block swap, so when Cyndi who is off on a long camping adventure contacted me in late May to ask if I knew what block I was going to use, I made a swift decision between all the possibilities I had accumulated!

We are going to make birds!!  I have already made five using the detailed tutorial from the Block Lotto website -- http://www.blocklotto.com/wp-content/uploads/2013/11/BirdBlockDirectionsV2.pdf


The instructions were inspired by a blogger named Lynne Tyler at http://patcherymenagerie.blogspot.com/ -- well worth a visit!
Check out her tab called "Thoughts on Art, Creativity, and Inspiration" -- some thought provoking posts are archived there!!

The Block Lotto instructions are well illustrated and easy to follow.  In addition, I would make two suggestions based on my experience so far piecing these cuties!

In the cutting list on page 3 of the instructions, I had an easier time using a 1" by 2" rectangle for the beaks (listed as a 1 1/2" square of black at the very end of the list).  I struggled to position the square  and it was much easier with a rectangle.

On page 6, when working on the leg section, the photo diagrams suggest the best piecing order (legs to outside background pieces first) which is a good idea so the three background pieces don't get scrambled.  Be sure to press them before trimming the top edges or you'll need to take them off and start again (ask me how I know that).

When adding the leg/background pieces to the center background piece, the seams are angled, so set them up with the top edges crossing where the 1/4" seam begins as in the photo below.
Then you don't need to trim again!!
Now for the fabrics!
Please use one white or off-white fabric with a black print for the background of the block
The Orange-breasted Beetle Catcher
Use a cheerful, larger scale print in clear colors (no drab reproductions please) for the bird's wing.
A Dragonfly Tanager
And a small scale print that looks solid in an accent color for the body.
The Small-beaked Thrush
Please make the beak and legs black or dark charcoal.
A Rosy-winged Green Finch
If you decide to make a "long-legged" bird, read the explanation of how to do that
at the end of page 7 before you cut the top and bottom background pieces.  
It also explains how to reverse the orientation of the block and you can do that if you are feeling contrary the day you decide to piece one!!
The Tangerine-breasted Aqua Bird
Finally,  please DON'T trim the block. 
I'm not sure what these will become so having final control of the size will be easier for me. 

If you look back through the pictures of my birds, you'll see I've "identified them".  So if you are inspired to name the species of your bird, that would be great!

So I'm a life-long birder -- had a Peterson Field Guide at age 10 and good binoculars.  For many years it was a secret passion -- it was not cool to be a birder during my teens.  Now birding is not just an interesting hobby, it's popular and big business -- rather like quilting.  I lead bird walks locally, manage my 1/3 acre suburban lot for the benefit of birds, take birding vacations (i.e., western Montana, Costa Rica, southern Texas, etc.), and according to a hiking friend, my bird radar is never off!  I've even worked as an "bird nerd" for the local park district (a dream come true!).  I've trained up one daughter as a birding companion and am hoping to accomplish the same with my 6-year old grandson who is a great spotter!!

What is your life-long passion?

If you have questions, don't hesitate to get in touch with me via e-mail at maryhueyquilts@hotmail.com

Mary Huey


Hive 4 July Block Tutorial

Hi Everyone. I am Pam and when I do blog it is at http://livingeachday84.blogspot.com/. This is my first stash bee exchange. I joined this group to help me get out of a rut I was in after I lost my daughter Amanda in a car accident in 2013. This group allows me to get back to what I love to do which is quilting. I have been quilting since 2005 and I love it. I live in a small town in Oklahoma on  what was once my grandparents farm. I have been married to my high school boyfriend for over 30  years and we have 2 children Amanda and Thomas and 2 awesome grandsons CW and Hesston.  The block I have chosen for you all to make is the wonky scrappy cross in either the color of orange or blue. My daughters 2 favorite colors were these colors. I want to be able to make by 2 grandsons each a quilt with their mommy's favorite colors. There are 4 and 6 now and we do a lot of activities and such to help keep their mommy memory  alive in their heart.

I started out with a 14  inch square piece of gray fabric and some strips of orange or blue fabrics.The Orange and blue fabric that make up the strips varied in width from 1 inch to 2 1/2 inch sewn together to make the length needed.

I cut the piece of gray fabric in a half  using  any angle desired and then cut my strips of orange and blue fabrics in widths of 1 1/2 to 2 1/2. I then sewed the  strip to both side of the cut pieces. When lining up the first piece to the 2nd piece I did pin and flip before sewing  to get the  cross to line up better.
After sewing the strip to both side of the fabric, I pressed the strip toward the background fabric and then  cut that piece  in half again using whatever angle I desired. After  the 2nd strip was added to complete the block I squared up the block to a 13 1/2 block size.
My question to you. Is where do you shop.  Do you have a favorite brick and mortar store or do you shop a lot online. I  love to shop at www.fabricshack.com, www.intownquilters.com and www.fatquartershop.com/ to name a few.

Hive 8 July Block Tutorial


Hello Hive Mates!

I'm so excited it's finally my month to be the Queen! This is my 2nd year with Stash Bee and I've known since I joined LAST year what I'd be doing (just held my breath for 6 months hoping no one else took it first!)

I live in CT with my husband and our 2 small children (3 & 4.5), our 2 rescue dogs from Louisiana, &  3 cats that my oldest son (26) left here before he moved out. I'm originally from Cape Cod, and really miss the ocean and the breeze. I'm close enough to go home to visit, but it's not the same. After a decade, CT is finally starting to feel like home!

I love to read, sew, garden and bake. We will be homeschooling our daughter starting this fall, so it will be interesting to see how much time I have left for any of those hobbies! OK, enough of the chit chat...lets get on with it!

Since I love reading and sewing, I decided to combine the two. I am really wanting to finish my bookcase shelf! I'll link to a tutorial, but you'll need to tweak the sizes since she is doing a 15" block, and I'd like mine to be 16.5" high. (just add a little to the top).

  • I'd like my backgrounds to be black (unless you have something amazing that you think would work with a bookcase.
  • I'd like the blocks to be 16.5" high, by any width you'd like.
  • PLEASE add whatever you'd like to the bookshelf. Pictures, Coffee cups, candles, art, sculpture....ANYTHING! (yes, cobwebs are okay *grin*) Let this reflect your personality! Below you'll see some from last year :) one girl was from overseas....guess which  block is hers!!

Here's a link to  a tutorial that will give you a basic idea on how to make a bookcase block (ANY method is fine, this is just for those who aren't familiar)
http://www.dontcallmebetsy.com/2011/04/mini-bookshelf-quilt-tutorial.html

These are the blocks from last year. I love how the girls used the selvage edges for the book spines!


Feel free to google "bookshelf blocks" or "bookshelf quilts" for more ideas! I hope you have fun with this! Please don't stress....and please don't make them more perfect and organized than the real bookshelves in my house!

My question of the month......

What's your favorite tool? (I am excluding the obvious like rotary cutters/sewing machine, etc).  I ADORE my June Tailor Half Square Triangle maker. Life has never been the same since I discovered it. As a matter of fact, I think it's almost time to replace it!

Thanks ladies! Seriously CAN'T WAIT to see these!

Karyn!