
I'm Sylvia, and you can find me on my blog or Instagram as Flying Parrot Quilts (kind of like flying geese, but I love parrots...). The quilt I made last year with my Stash Bee blocks is one of my favorite quilts I've ever made, so I'm super excited to be back this year! My question for the month: what quilt have you been most proud of making, and why?
I'm useless at decorating for the holidays, and I've never made a Christmas quilt, so I thought this year I'd ask for your help with that. I was inspired by this quilt, but wanted something a little wonkier, so the block I'm requesting is an improv pieced trees-and-gnomes block with a low volume background:

I'm hoping that you will be able to dive into your scrap bins for this! The combination and placement of trees/gnomes will be up to you, but please include at least one tree/at least one gnome.
Colors
For the reds and greens, if possible I’d like to stick with pretty traditional Christmas colors–bright to darker reds and kelly/hunter greens. The legs and trunks will be brown, and the gnome faces will be some variety of skin color (whatever that means to you). For the low volume, I'd prefer not to bring in too much in the way of additional colors, but use what you have.
Cutting
If you're pulling from scraps, these are mostly approximate measurements--since it's improv, don't worry too much about cutting them down to these exact measurements!
Low volume background:
3 squares 5 1/2″ x 5 1/2″ (open squares, exact measurement)
6 rectangles 6″ x 5" (background for trees and gnomes)
6 rectangles about 6″ x 1 1/2″ (bottom part of backgrounds)
3 squares 5 1/2″ x 5 1/2″ (open squares, exact measurement)
6 rectangles 6″ x 5" (background for trees and gnomes)
6 rectangles about 6″ x 1 1/2″ (bottom part of backgrounds)
Trees (green):
1-5 rectangles, 3 1/2″ x 5″
1-5 rectangles, 3 1/2″ x 5″
Gnomes:
1-5 red rectangles, 3 1/2″ x 5″
1-5 skin-colored scraps, about 3 1/2″ x 1″
1-5 red rectangles, 3 1/2″ x 5″
1-5 skin-colored scraps, about 3 1/2″ x 1″
Tree trunks/gnome legs (brown):
Rectangles, about 1″ x 2″ (1 per tree, 2 per gnome)
SewingRectangles, about 1″ x 2″ (1 per tree, 2 per gnome)
These go fastest if you assembly line them, so that is what my instructions will be for.
Gnome bodies
Take your red rectangle(s) and make a cut about 1.5 to 2 inches from the top. Insert your strip of skin colored fabric:

Feel free to be wonky about it if you like, as I was here, or just insert a straight strip.

These will be your gnome bodies, and from here on will be treated the same as your tree fabrics.
Inserting into the background fabric
Take THREE of your tree/gnome rectangles (DON'T do all six or this won't work right!) and follow these steps with them:
Place each one on top of a background rectangle, about 1 1/2"-2" from the right side.

Line up your ruler with the bottom right corner of the colored rectangle, and make a cut at an angle. Any angle! Do this for all three.

Sew the backgrounds and the trees/gnome bodies together along the cut you just made. Set the other pieces of background fabric aside for now (they will also be right side background pieces). You will want the background fabric to protrude a little at the top, about 1/4″-1/2" or so:

Press towards the dark. This is about how it should look:

Place your sewn piece on top of a second rectangle of background fabric. This time, line the colored section up about 2 inches from the left side. Line up the ruler with the top corner and reasonably close to the bottom left corner of the color, and make another angled cut:

Again, line up your pieces along the line you just cut, setting aside the other piece of background fabric (as left-side backgrounds), and sew.

When you open it up, there should be at least 1/4″ above the tip of the tree to account for seam allowance.

Now, take your last three trees/gnome bodies and do the following with each:

Either cut the colored tree/gnome body fabric right along the line made by the background fabric, or cut through both fabrics at a slightly different angle:


Then sew together, lining up as before with the background fabric protruding at the top:

First side done.

Press and line up with one of the remaining left-side background fabrics:


And sew together:


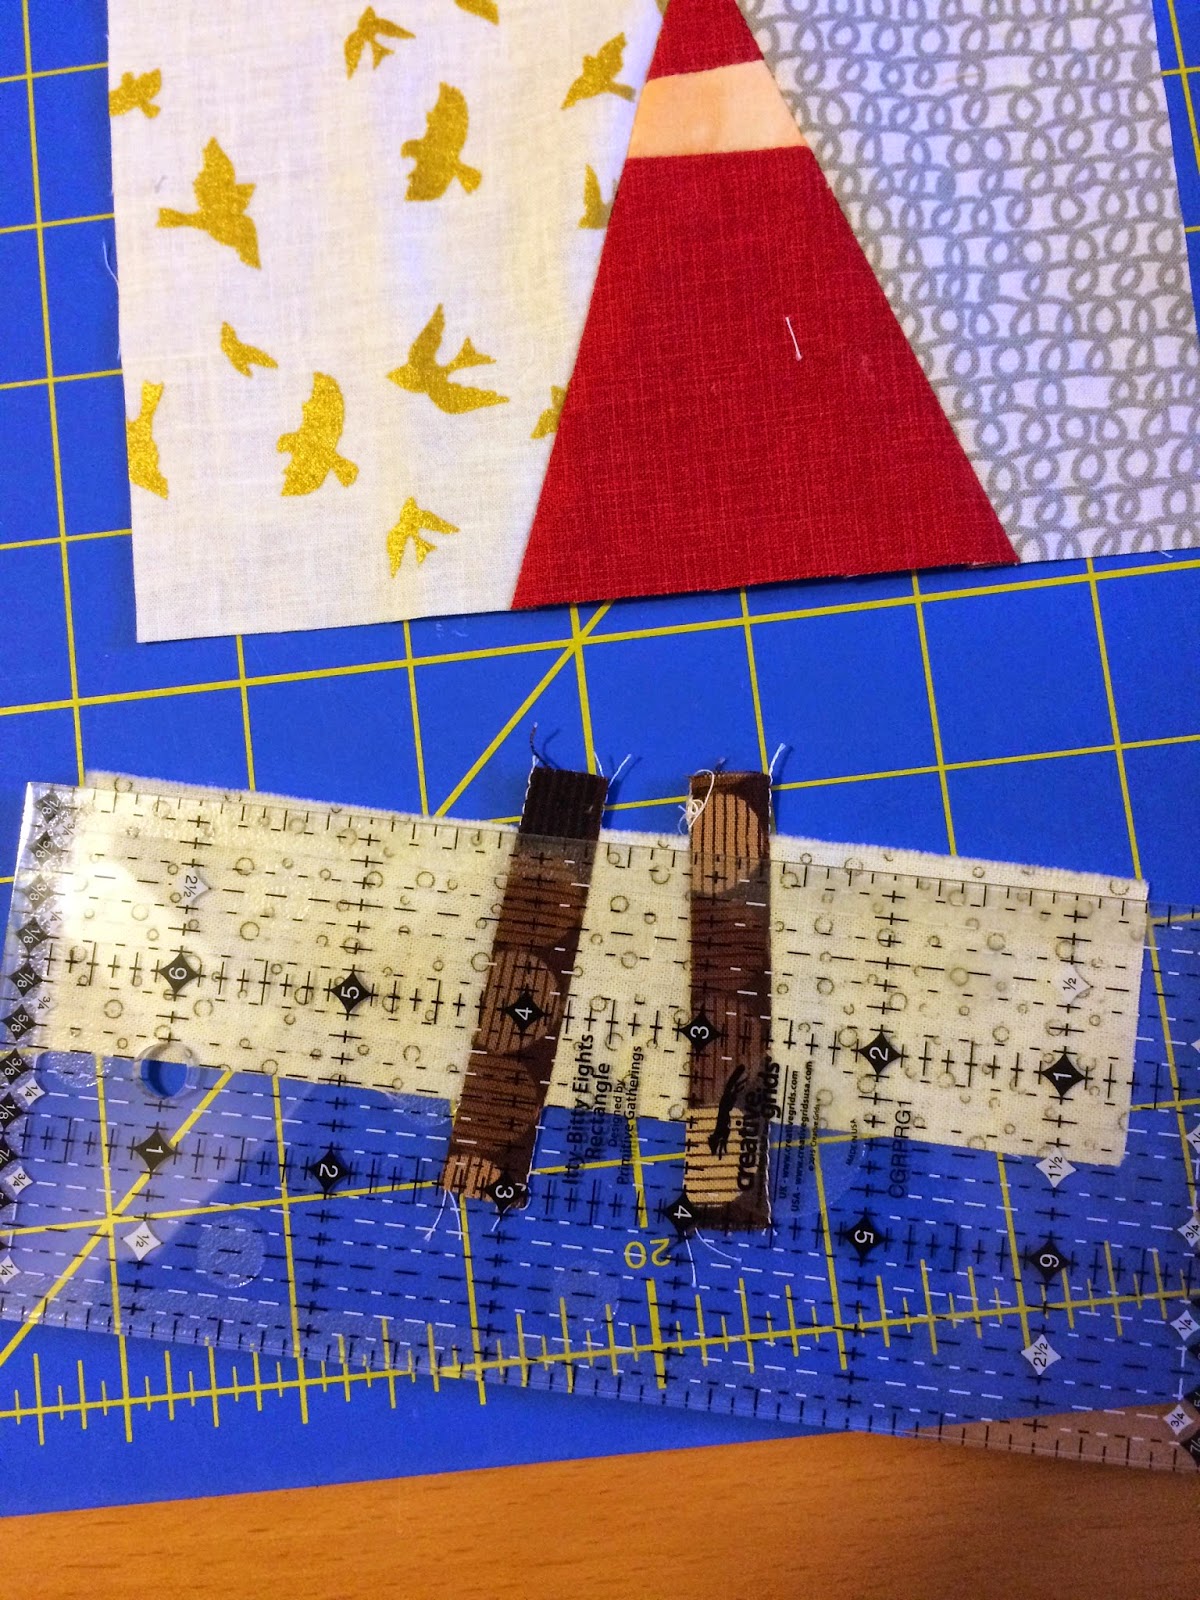
Trunks/legs
These work the same way, except each gnome will need two legs and each tree will need only one trunk. Again, you can and should assembly line these. For the tree trunks, take the narrow strips of background fabric and make a cut somewhere near the middle.

For the gnomes, you will want to make two cuts, keeping them about an inch or so apart. Insert brown scraps into the cuts you just made, trying to keep the background fabric aligned as much as you can:

Press seams in towards the brown:

And straighten up the top.
Final assembly
Straighten the bottom edges of your trees/gnome bodies up.


Once you have your 6 trees/gnomes, take your 3 remaining background squares and put them all together. You can lay them out any way you like!

Sew together. The finished block should be 15 1/2″ x 15 1/2″.

Thank you all so very much in advance! I can't wait to see your little forest!
~Sylvia
1 comment:
looks like fun!
Post a Comment