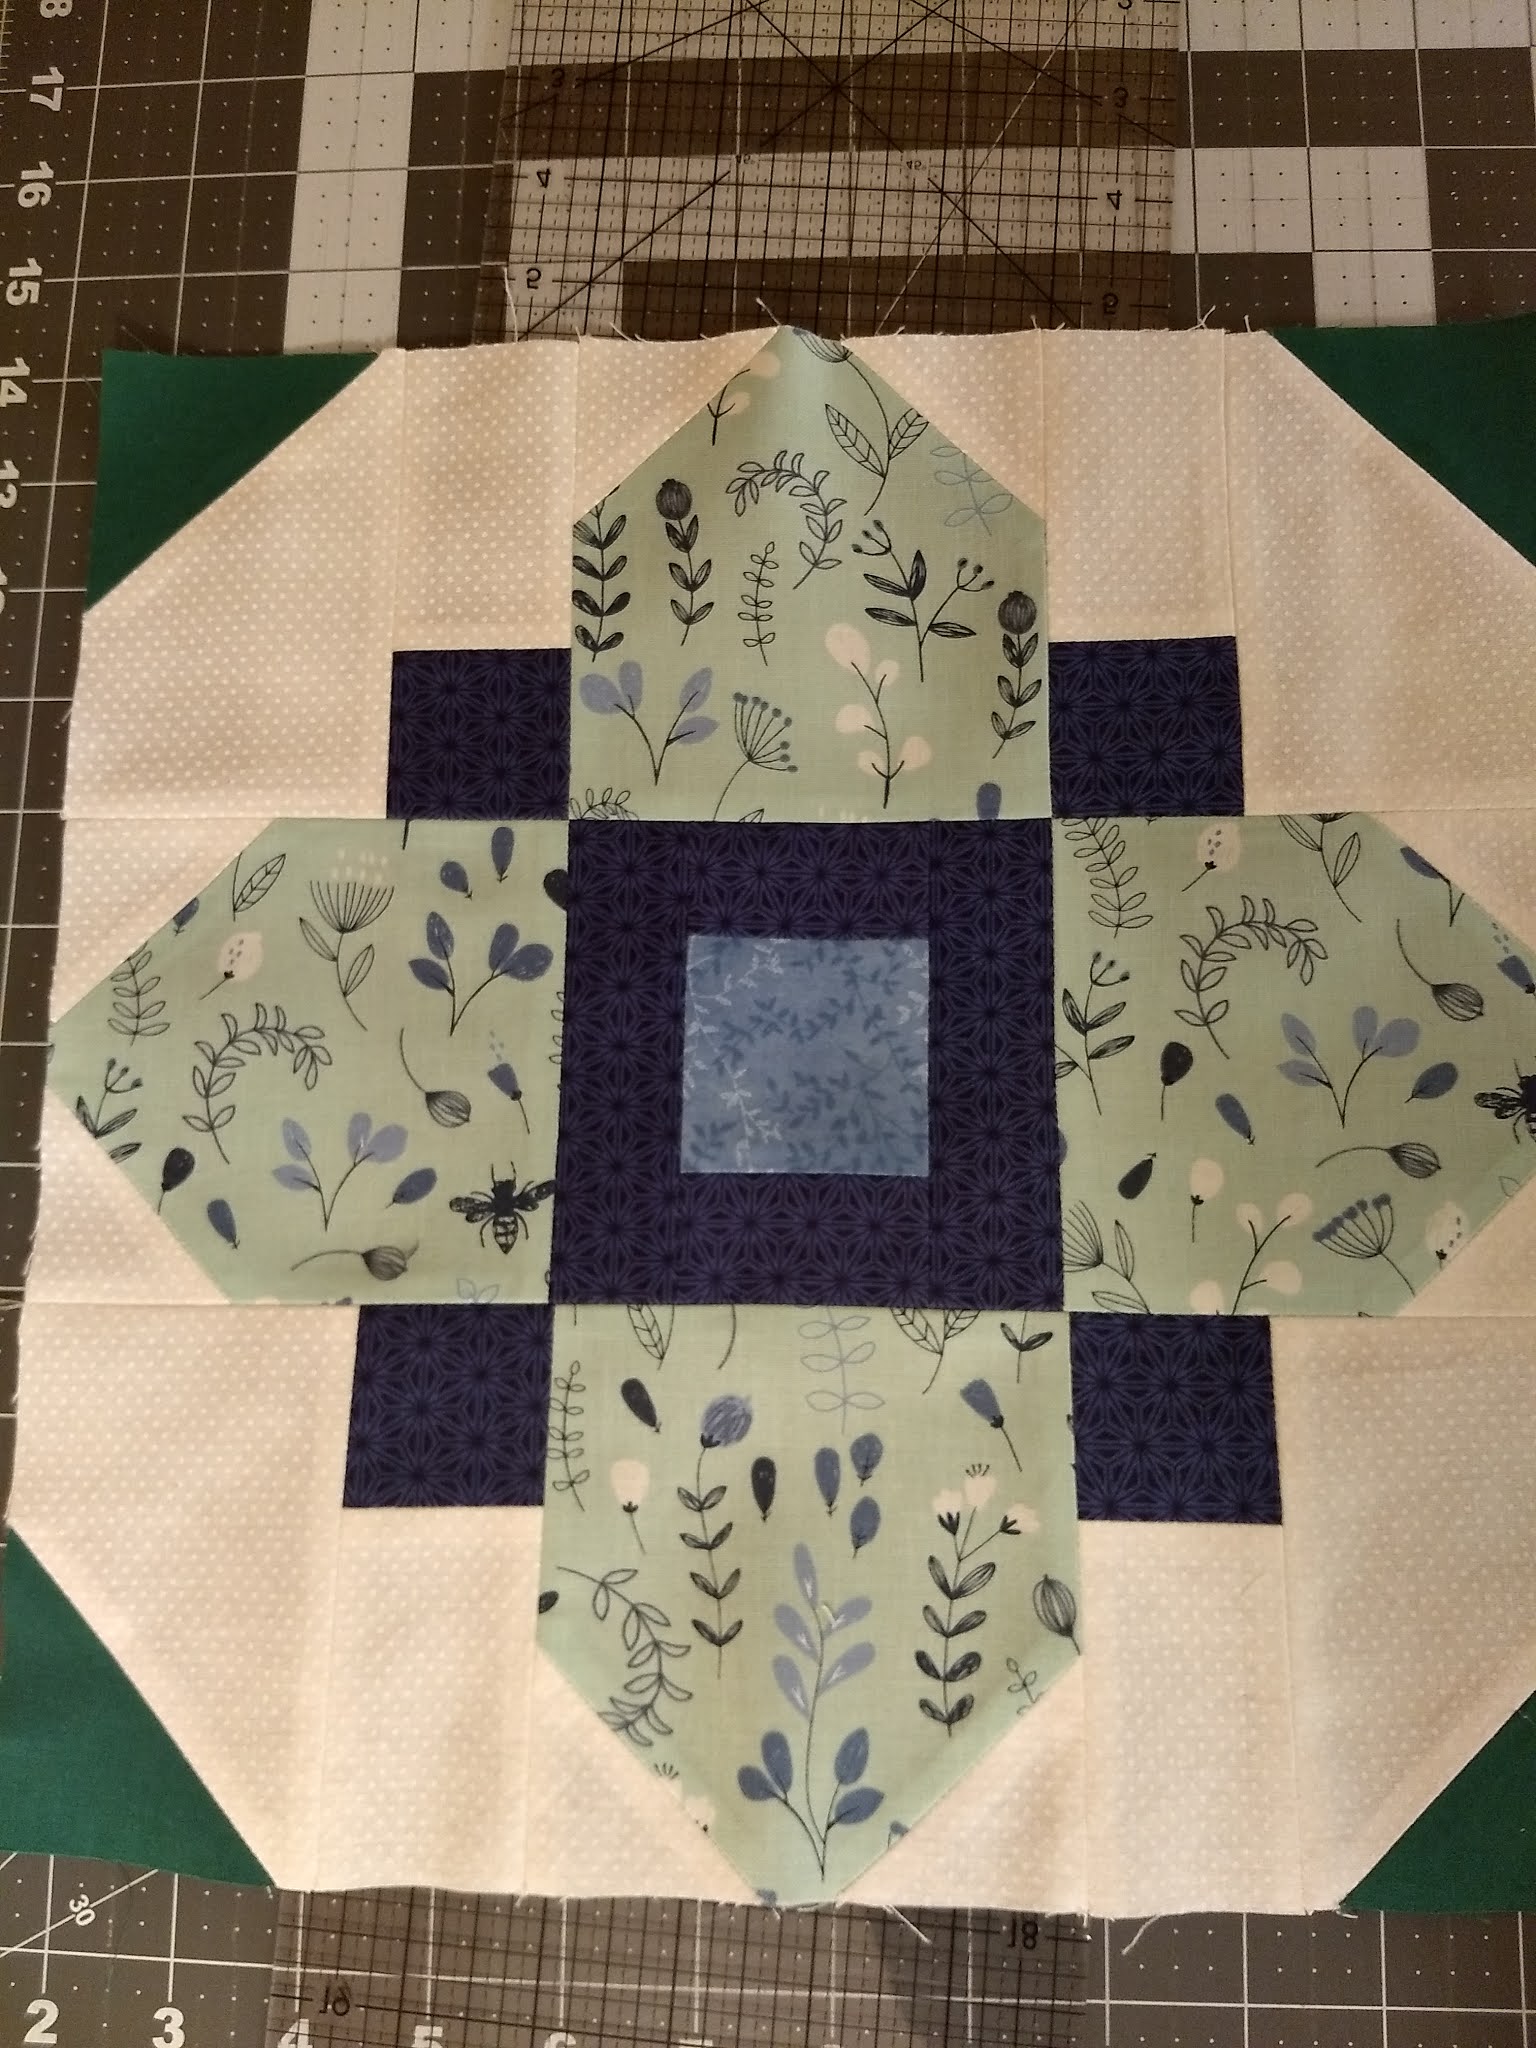
Hi Jayne! It was my first time making a Quatrefoil. It was not easy and I had to carefully follow your tutorial. I loved working around the flowered fabric! So now I hope this blocks blends well with everything you have. Happy Quilting! Marie

Hello Hive 5! – Time for some rays of Sunshine!

I know this tutorial seems really long, it would have been so much easier to have a video, but I couldn’t find one. So, read through it and then remember, it’s just cut, sew, press to yellow, repeat!
This month we are going to make some strip blocks inspired by the Pantone 2021 colors of the year. It’s winter and these colors scream sunshine and friendship! They are Ultimate Grey and Illuminating! Here is the link to the Introduction, “A marriage of color conveying a message of strength and hopefulness that is both enduring and uplifting.”

Strip
blocks are typically created using a paper or fabric foundation. But that takes time and is tedious, but helps
with structure of the block and managing bias edges. So in this technique, we will use alternate
ways for those two things that make doing them without a foundation quick and
fun!
Before we get into the technique, let’s talk color and since I’m not sure what level of color experts you all are, I’ll give some information here on how to select the yellows based on some color theory. The Illuminating color is a “bright and cheerful yellow sparkling with vivacity, a warming yellow shade imbued with solar power.” On a color wheel, that would be Yellow with Yellow. If you add white to Yellow, you get the “Tint” of that color which is more pastel. If you add black with yellow, you get the “Shade” which is deeper and can often be referred to as “dirtier or muddier” yellows. For this block, we want to stay on the Yellow, Yellow-Orange or the Tints of those color ranges. Think bright sunshine rays, lemons, yellow roses and all variations of those mixed with white to give a range of yellows from brightest/richest/darkest to the lightest, palest yellows.


I saw this technique in a blog post or YouTube tutorial but for the life of me.. can’t find it! So, I’ll give you all the steps. I think you’ll find it very easy and fun. No matching seams, no points to consider, just lots of straight line stitching!

Fabrics
Grey
Center Strip – 2 1/2” medium grey, 24” long – This strip needs to be 2 1/2” to
drive consistency among all the blocks.
The other strips can be whatever you like based on the instructions in
the technique below.
Yellows
– Various strips ranging from 1 1/4” to 2 1/4” wide and length cut based on
technique
White
on White – 3” or more wide and length cut based on technique
Prefer tone on tone, tone with white and an occasional solid is fine and will blend right in. Please work with these guidelines but they are only GUIDELINES! Whatever you have will work, please do not go buy fabric(unless of course you just want to and that's fun for you) 😁. If you have any questions and want to run it by me, please reach out on IG or via email.
Grey – Center Strip – 2 1/2” wide
·
Grey should lean more on the “bluish”
side rather than brown.
·
Solid, tone on tone or print with minimal
other colors like greys and whites.
·
Nothing too dark that will read more
charcoal or black
·
Will need a good 24” strip on the
straight grain, so a fat quarter is not big enough

White – Corner strips – 3” wide
·
This can be solid white or white on
white
·
Please no creams

Yellow - Various strips ranging from 1.25” to 2.25” wide
·
Please choose 5-8 different yellow fabrics.
·
They can be solids or tone on tone
prints, tone with white prints.
·
Yellow and Yellow-Orange family
rather than lean towards Yellow-Green.
·
Try to have a variation of
darkest/brightest yellow next to the grey and then step down the range to the
lightest palest yellow before the white corner piece.
·
Fabrics can be repeated on either
side of the grey but if you can vary the order of the strips or vary the width
of the strips, it will blend as more scrappy rather than both sides of the grey
exactly the same.
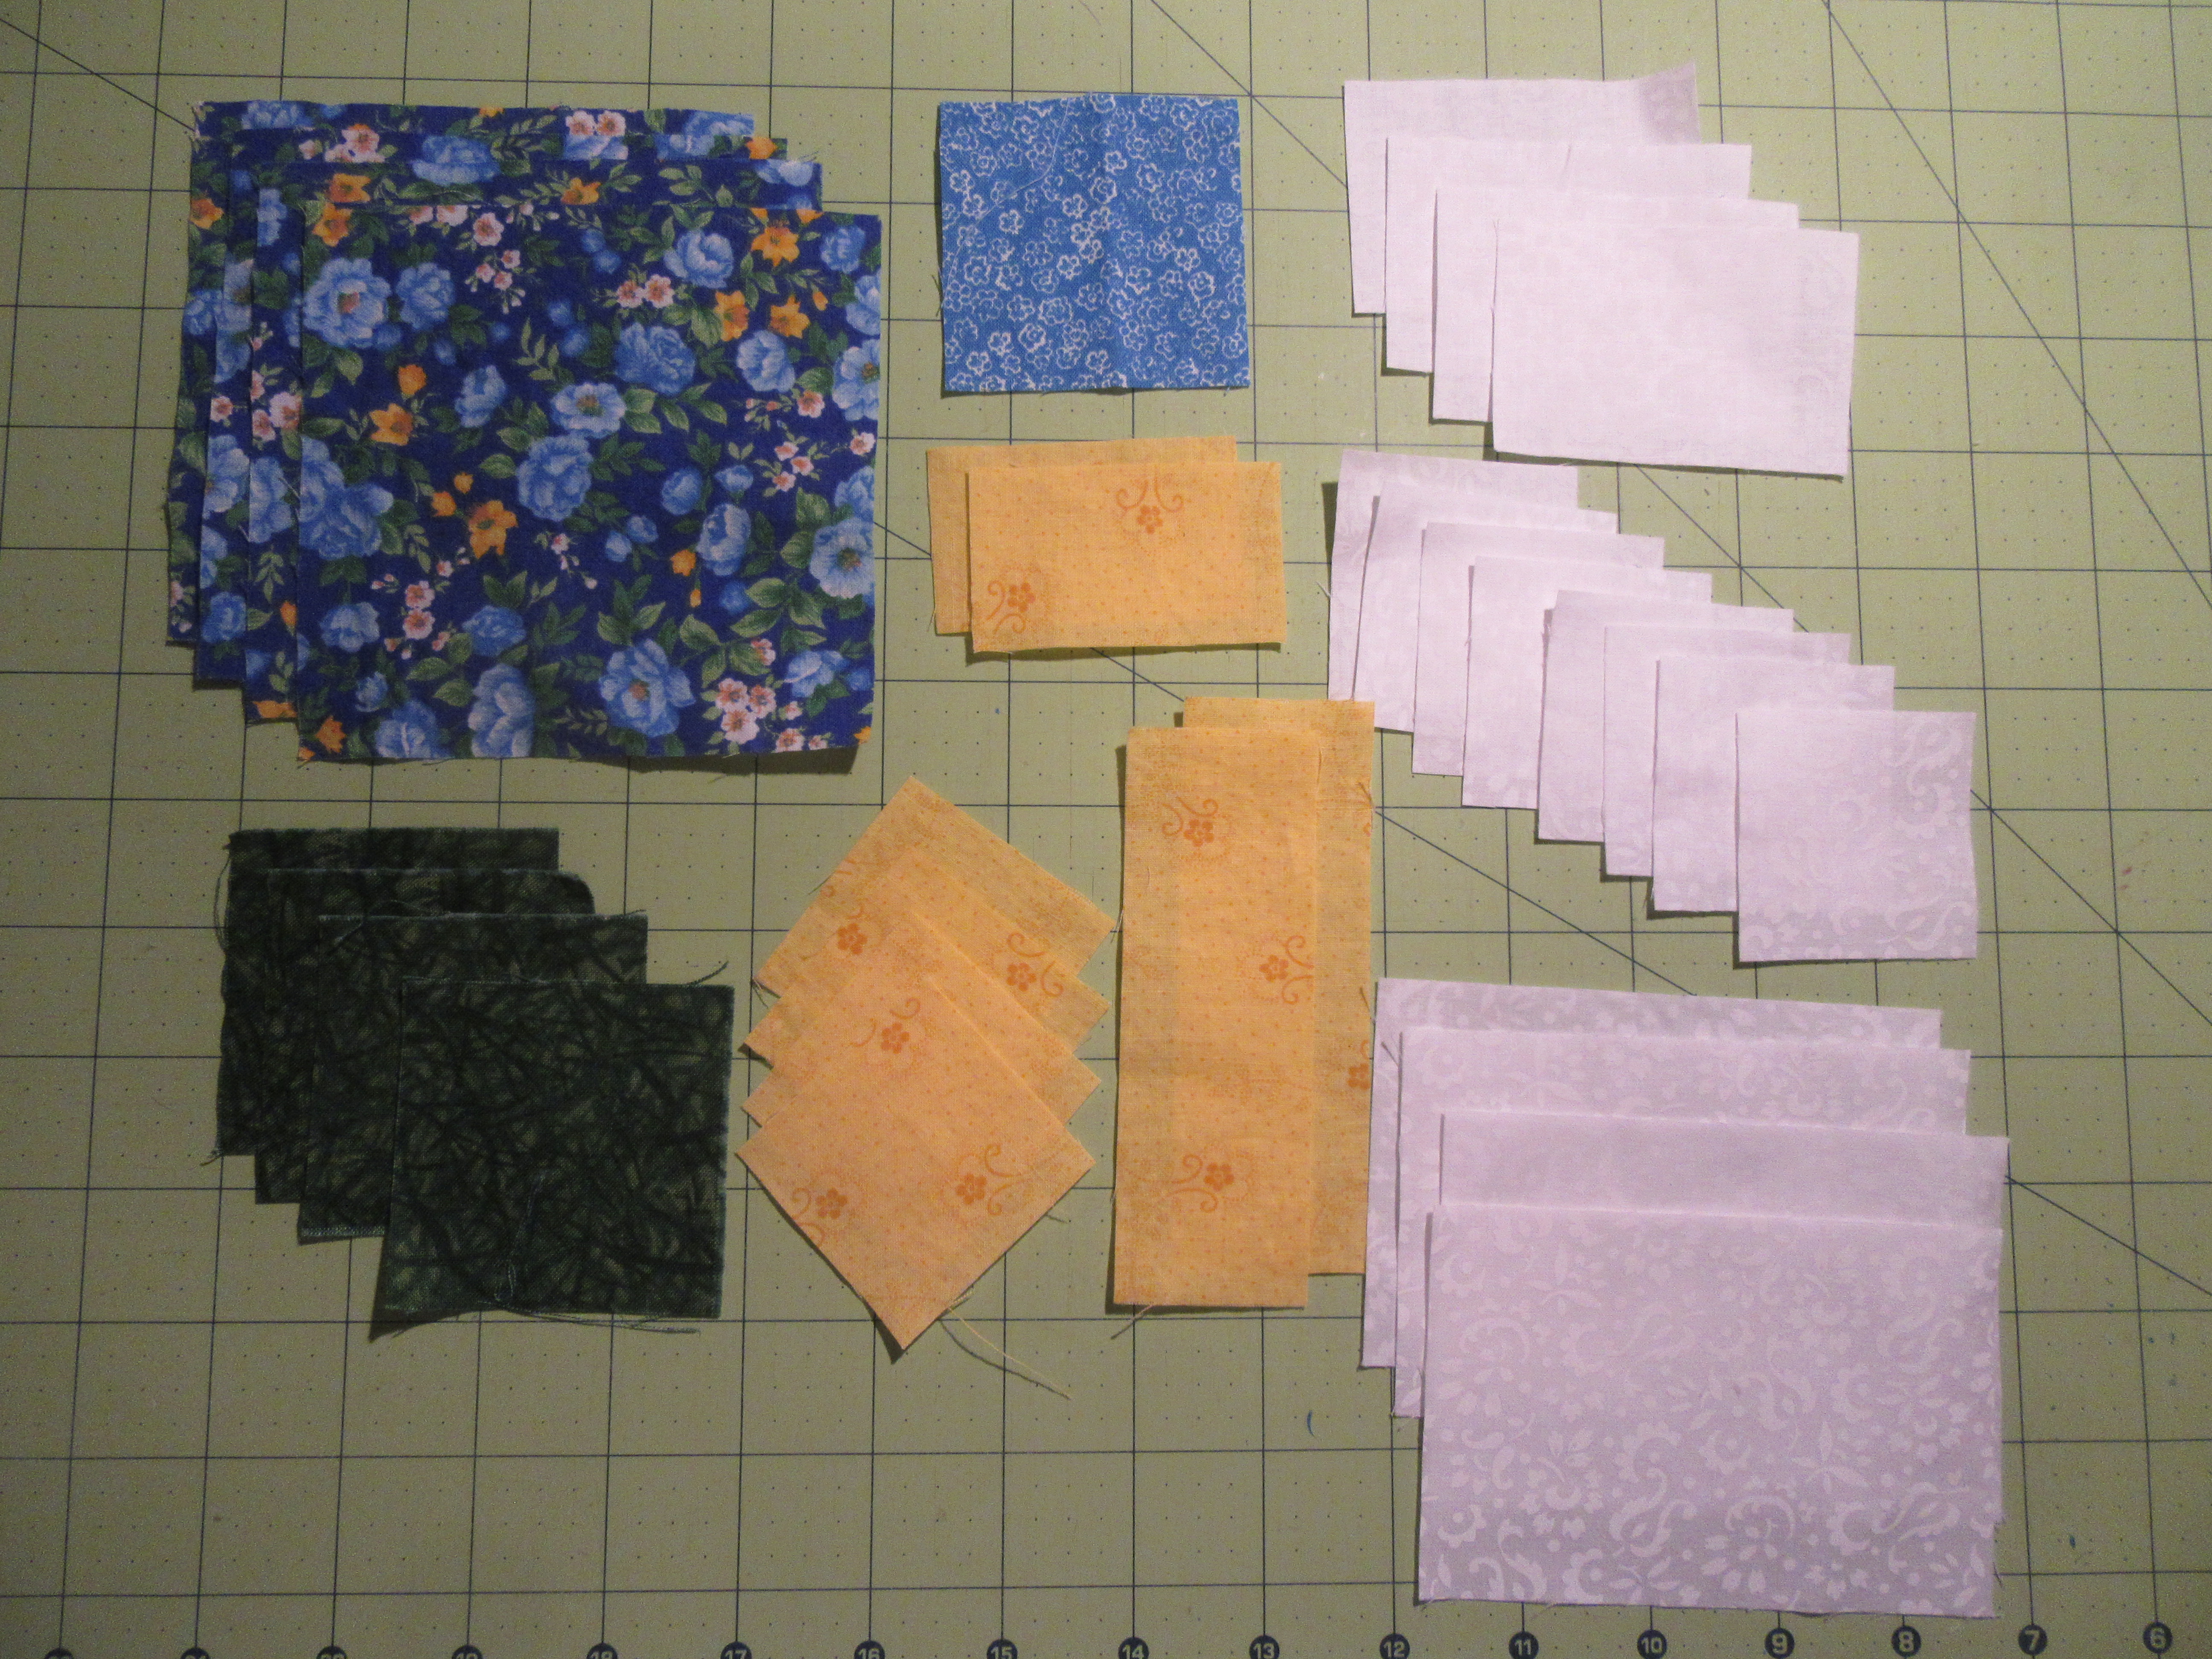
Here
are a couple pics of various yellows. These were also in different lighting so
the pics look different but you can see that some of the fabrics are the
same.


Sewing
·
Seams do not have to be scant ¼’
but do need to be straight and consistent.
· The strips should be sewn in
opposite directions on either side of the grey strip which happens naturally as
you build the block.
·
Use a walking or even feed foot if
at all possible
· Cut your strips on the straight
grain of the fabric – selvedge to selvedge – if you are unsure if a scrap is on
the straight grain, it would be better to use another fabric. Using fabrics cut
on the straight grain is one of the ways we control bias edges and stretching.
· Gentle hold as you let the foot and
the feed dogs feed the fabric through.
Step 1: Determine which method you want to use to establish your 15” “frame”
Since
we are not using a foundation, we need a “frame” to follow so we know how long
to cut our strips of fabric. There are
two ways I recommend doing this. I’ve
used both methods very successfully.
Use a 15” Square Ruler – set the ruler on the surface next to your sewing machine or nearby so you can use it to measure out your strips.


Step
2: Prepare your fabric
Since we are not using a foundation, we need the fabric to
be well ironed before cutting. I do
recommend using starch or Best Press if you have it. I don’t recommend using Steam. Having the fabric firm and straight will help
ensure you cut it straight and it will help prevent bowing and stretching as
you stitch the strips together.
Step 3: Cut your first 2 Strips – Cut on the STRAIGHT GRAIN of the fabric – selvedge to selvedge. You should have a good idea of your strip order from Grey, darkest yellow, medium yellow, light yellow, then your white corner before you begin cutting. Your darkest next to the grey need to be the longest and your palest yellows will be your shortest. The wider your strips, the fewer you need to fill the space but they need to vary and should not be larger than 2 ¼”. (See pics of completed blocks back at the beginning). I found the fastest and easiest way to do the cutting was as I constructed the block. So, here we go…
Grey - Cut one strip 2 ½” by about 24” and lay WRONG side down, corner to corner on your 15” frame.

Yellow - Cut your darkest Yellow strip to cover the blue tape or extend past the ruler by at least a couple inches on both ends. A couple inches is needed to give yourself enough room for any adjustments up or down when squaring up when the block is finished.
·
Pick up this strip set, sew a ¼” seam
and press the seam to the Yellow strip.


Step 4: Cut, place, sew and press your next Yellow Strips – Cut on the
STRAIGHT GRAIN of the fabric – selvedge to selvedge.
Cut your next Yellow strip in color order, to cover the blue tape or extend past the ruler by at least a couple inches on both ends.
Pick up this strip set, sew a ¼” seam and press the seam to the Yellow strip.
Return this strip set to the placement on your “frame” and feel with your finger that the tip of the ruler is in the middle of the grey strip or that the Grey covers the middle of the corner of the taped frame.
Continue in the same method for your Yellow strips until you have about a 2 ½” to 3” space left to fill the frame.

Step 4: Cut, place, sew and press the white block to completely fill in the frame.
Cut the White on White or solid white piece of fabric to completely fill in the corner and have about 2 inches extended on the sides and at the corner.
Step 5: Press your strip set well from back and front making sure you don’t have any little creases between the strips.
Step 6: Repeat the process for the other side of the block and press well.
Example when strips are cut almost too short

But I slid the ruler up and to the right a bit and as long as there is ¼” or more beyond the ruler, it’s ok.

Step
7: Trim your block – You can choose to rough trim at 15 ½” or bigger and I’ll square
to 15” with my square ruler or you can trim to 15” square. Here are some tips if you want to trim
yourself.
Trim and square with the 15” Ruler
Place the 15” square ruler on top of the block
Ensure the placement allows for at least ¼’ of fabric beyond the ruler on all sides
Securely hold the ruler and trim all sides without moving the ruler. (yes, I cut the left side with my left hand.)

Trim and square using a long ruler against the taped Frame
Set your block on the taped frame ensuring all edges and points are covered by more than ¼” of fabric.
Take a long ruler and line up on the line on the mat that is the inside edge of the tape or go a little bigger and I’ll trim down. Do that same cut around the entire frame.


Step 8: OPTIONAL – One of the techniques we can use to help manage the blocks since they do not have a foundation, is to “stay stitch” the block. Stay stitching is a line of stitching at 1/8th in from the edge all the way around the block. It really helps to keep the edges from stretching now that they are cut on an angle where there is bias and stretch.
TIP: to keep the corners from getting sucked into the feed dogs, use a starter piece of scrap fabric and chain piece very close to the block.


WOW – I know it seems really long, but it’s actually just cut strips, sew strips, press to yellow and trim!
Message me on IG or by email if you have any questions about fabric choices or about the cutting/sewing instructions.
Remember to post your block on IG and tag with #stashbeehive5! Thank you for helping me see a few rays of sunshine and friendship in this crazy pandemic!
Lisa…
Long story short, I got carried away, and you're getting your block from me early!
Looking forward to seeing how the garden of flowers comes together.
-Julia D.


This was a fun block, and a great introduction to 2021 Stash Bee! This will go into the mail to sunny FL today. Looking forward to February.
Julia C
Hello Hive 1. I'm Jayne and I live north of San Francisco and love to sew. I'm always planning quilt tops in my head. Being a charity quilter I plan quilts around the amount of fabric that has been donated and go from there. I don't follow directions all the time and I just wing it. I'm a visual learner and appreciate photos and most of the time I do not read the directions if I can help it. I have run into a few problems with this method but always manage to work it all out.
So with that said I did my best to write the directions for my Quatrefoil block. I chose this block by looking at the past patterns used with Stash Bee and for those of you who have made this before, I apologize for your repetition, but I really like it and had never made one before. The difference with this block to most of the Quatrefoil blocks online is the corner unit. I have chosen the half square triangle so it would give the illusion of leaves in the corner and I might sash the blocks and make the corner squares green tying it all together, still deciding.
I would like the WHITE portion of the quilt to be made with WHITE ON WHITE and the corners to be green as for the rest I don't have a color pallet picked out because I love the floral prints for this block and flowers come in all colors. In my blocks, I chose accent colors from the floral print and went from there.


Now for my directions.
 |
| Hive 1 Jayne Quatrefoil Block |