Friday, December 31, 2021

Hive 3 January Tutorial - Scrappy Heart Block for Robin Sue

Happy 2022!  

Let's Make It Scrappy!

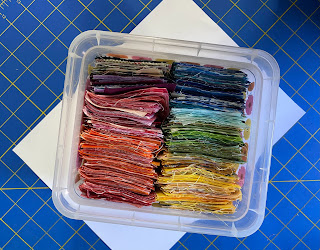
I'm excited to start the year with this scrap buster block.  I like to cut my scraps into a variety of sizes - 2" 2.5" 3" 3.5" 4",4.5" 5" and strips.  This way I'm ready for scrappy sewing.


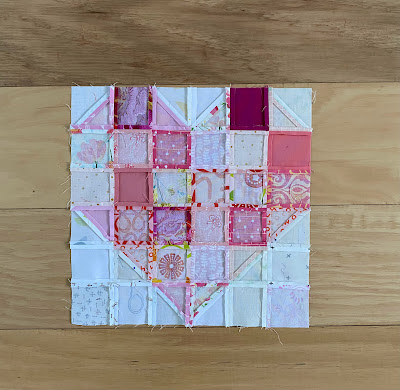
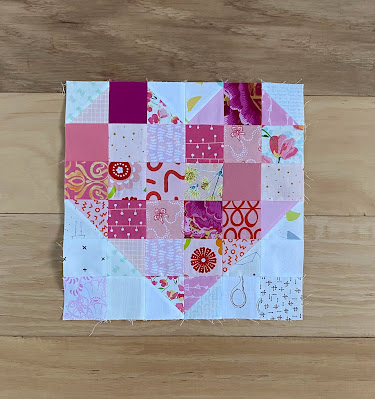
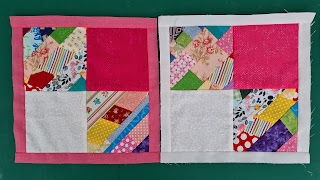
The block I finally settled on is the Scrappy Heart block by Scattered Thoughts of a Crafty Mom

The author of this block does an excellent tutorial, although, you might have to scroll down to find it.


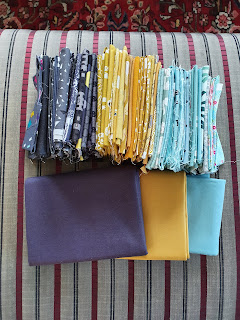
Colors:  Your Choice!  I am requesting that you use "happy" colors and that your fabrics are all in a similar color.


Here are my fabrics used.  I had to pull my low volumes from my 3.5" box & cut down to size.
  • 5 - 3" your choice of color
  • 5 - 3" low volume or white
  • 20 - 2.5 your choice of color
  • 6 - 2.5 low volume or white
As you can see, I have duplicates of some fabrics - I didn't want to cut into other fabrics.  Lazy, I know!

Match 3" color with 3" low volume/white.  These are for the HSTs.  

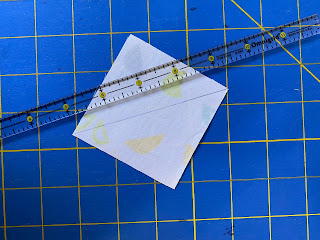
Mark corner to corner

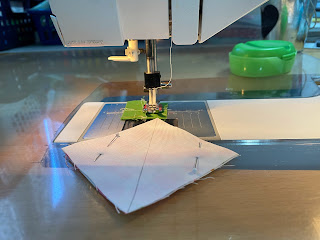
I put a scrap under the needle before I sew HSTs

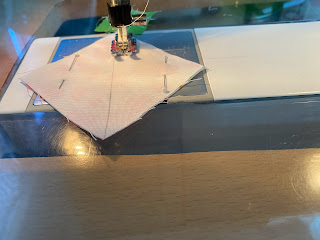
Sew 1/4" away from marked line

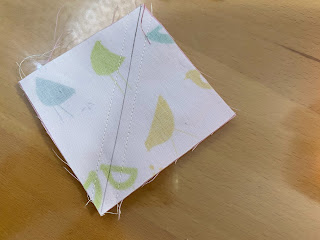
Make sure you sew on both sides of the line
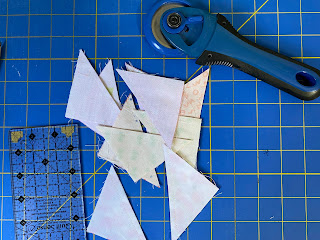
Cut on the line

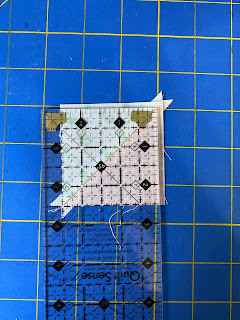
Press open (my personal preference) and trim to 2.5"


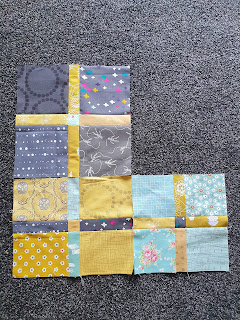
Lay out pieces to make the heart.
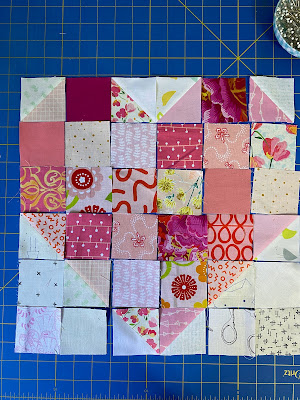
Sew using 1/4" seam.  I sewed in columns and then sewed the columns together.  
There is no right or wrong way.  

After I connected the columns, I pressed seams open.  Then pinned the rows and sewed.


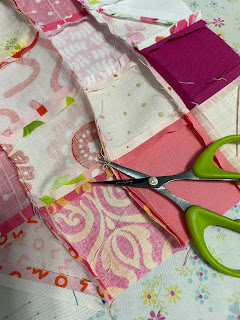
I snipped the connecting threads, then pressed open all seams.


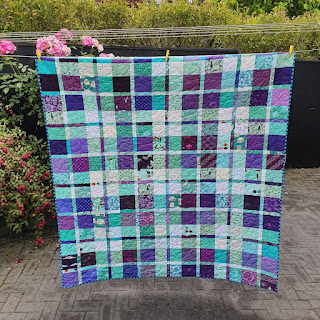
I'm planning to sew more scraps into these heart blocks.  Can't wait to see yours!

RobinSue


Hive 4 January 2022 Tutorial - Plaidish blocks for Helen

Hello ladies

We have finally left 2021 behind (ooo it was a doozie of a year wasn't it?) and we are now in a nice new fresh year, 2022. Let's hope it is a good one.

This year I would like to make a king sized Plaidish Quilt so I will need a whole lot of blocks.

This is the one I made in 2021 as part of the Plaidish SAL.

The pattern is designed by Erica of Kitchen Table Quilting and you can order the free pattern here: https://www.kitchentablequilting.com/2019/06/plaid-ish-scrap-quilt-and-tutorial.html

Scroll down and you will find an Add To Cart button - do that and receive the download.

It is an easy quilt to make and can be in so many colour ways - check out the hashtag #plaidishquilt - it will be so hard to choose.

This time I would like a charcoal, mustard/gold and soft aqua quilt. 

This is the chair in my bedroom that is the colour inspiration:


Here is my fabric pull along with the kona colours of Charcoal, Curry & Aqua for reference. 
I am asking you to make me one block and you can choose which one A, B or C.


The pattern consists of three repeating blocks:


Block A 10.5" square in my colours 

Cut 

4 charcoal squares 5" by 5" 

1 aqua square 1.5" by 1.5" 

4 mustard/gold rectangles 1.5" by 5" 

Block B 8.5" square in my colours

Cut

4 aqua squares 4" by 4"

1 charcoal square 1.5" by 1.5"

4 mustard/gold rectangles 1.5" by 4"

Block C 8.5" by 10.5" in my colours

Cut

4 mustard/gold squares 4" by 5"

1 mustard/gold square 1.5" by 1.5"

2 charcoal rectangles 1.5" by 5"

2 aqua rectangles 1.5" by 4"


If using any directional fabrics within the blocks, please try to orient them all the same way - e.g. the one above the music and the motif on the top left run the same way.

The blocks are constructed the same way, they are just different sizes. You can either press to the dark or press seams open, I have pressed mine open. Please use a scant 1/4 inch seam.

Here are the three different blocks side by side. 

You can see in the pattern that the C blocks are used in both rows, with it upright in one row and on it's side in the other row. Hence the comment about needing to orient directional fabrics the same way in the block.

Please don't go too black or too light with the charcoal and please avoid some mustards that have a green tinge to them.

The aquas are quite soft and not too blue or green.

The fabrics can have other patterns/colours on them as long as they are mainly the 3 colours.

Reach out to me if you require more guidance on how to put the pieces of the block together. I figured you were all experienced quilters and so would be able to do that part OK. 

I hope you all enjoy making these blocks for me. And some of you are tempted to join the SAL for Plaidish in February on IG with @jessicaquilter #plaidishqal. I will be joining in making more of these blocks.

Thanks and happy sewing.

Tuesday, December 7, 2021

Finished Quilt - Hive 2

 Here is my finished quilt from February 2021 with blocks made by Hive 2. I feel happy that I received the blocks and finished it in the same calendar year! Looking forward to participating again in 2022!


Tuesday, November 30, 2021

Hive 1 Block for Marie


Thank you for the great tutorial, Marie! I had a lot of fun with this one - it was my first time doing "improv" for the two diagonal squares! Can't wait to see your pink quilt when it is finished.

Enjoy!

-Julia D.

Monday, November 29, 2021

Hive 1 November block for Marie


What a fun and cheerful way to end the year! I was determined to get two blocks done to finish strong. Thank you for the great tutorial, Marie--and an early happy new year to all!

-Julia C.

Hive 1, June 2021 Jayne's finished top

Here is my finished top. I was hoping to have it quilted by now but my longarm machine part still has not arrived. I wanted my hive mates to see their beautiful blocks they made me all together in the quilt creating a beautiful flower garden. Thank you to all the worker bees for a fun year and espically for the beautiful blocks you made me. This quilt will become my retreat quilt to take along on my sewing retreats and will always remind me of this fun year and having something to look forward to each month while sheltering at home due to Covid. I wish everyone good health and happiness. Keep on stitching. Jayne

Sunday, November 28, 2021

November Block for Hive 1

 Down to the wire but this will be in the mail tomorrow! Marie, I hope you like the pink I picked - it's one of my favorites. 


Hive 1 November Block for Marie

Hey Marie! I hope you had a good thanksgiving! Your block was my only goal once my extended family finally left! I think this is going to be quite the cheerful quilt. 

I did a flamingo quilt for my mom last year with a pieced border that used up almost every last scrap of pink that I had! I hope this pink floral reads pink enough for you!!! Everything else I had was in strips or too small!


Sunday, November 14, 2021

Hive 1, November Block for Marie


Hi Marie,


I do love going through my scrap bags - so many quilty memories. Some of the scaps I used were left over from the first queen size quilt I made, for my best friend, no less. Others from the quilt I made for my mum last year and some already pieced strips, that are still hanging around from a wedding quilt I made for friends...

Pink fabric left overs are plenty in my stash, as I usually buy FQ bundles and pink is always 'left behind'. It's my second least favourite colour, after purple! ;)

Hope the blocks will help create the cheerful quilt you envision.

They are going in the post box today, so will start their journey to you tomorrow.

Take care, happy sewing,

Rita

Friday, November 12, 2021

Hive 1 November block for Marie


I really enjoyed making this block.  The colors and the design are on point! It’s going to make a cute quilt all put together. Enjoy! Carolyn

Thursday, November 11, 2021

Sign Up For StashBee 2022 is Live


What is StashBee?


Stash Bee is an annual modern, international, online quilting bee.  It runs for 11 months (January-November) on multiple platforms including facebook, instagram and on this blog. 

StashBee is open to new and returning members. Stash Bee is international friendly. All hives can expect to have a mix of countries. In the past, the majority of participants have been American, with 1-3 hive members from other countries. Participants are responsible for the cost of mailing blocks to their Hive Mates.
Participants are divided into several hives, each containing 10-11 Hive Mates.  The total number of hives will depend on how many people sign up, so invite your friends! We need 10-11 people per hive, so there may be a wait list if there is an incomplete hive.
Each of the members acts as “Queen Bee” for one month. Before their month arrives, the Queen is responsible for testing out their choice of block and creating a tutorial post on the Stash Bee blog for their Hive Mates to follow. All of the hive members then create the requested block from their own fabric stash, and mails the block to the "Queen Bee".
As "Queen Bee" you specify the block, and the color scheme and type of fabric you would like your hive mates to use (ie. solids, prints, low volume, novelty, florals, tone on tone etc). Since this is a modern bee you  can ask for modern blocks, or a classic block but with modern fabrics. 
By signing up, everyone commits to making 10 blocks over the course of the year (January to November). In exchange, when its your turn as "Queen Bee" you will receive 10 blocks.


Reasons to Join

1) One block a month is an easy commitment!
2) Make new Quilty Friends around the world!
3) Try new blocks and new techniques!
4) Make a dent in your stash!
5) Make a quilt with a great story, and a wonderful diversity of fabric from other people's stash!
6) Have fun!

Rules & Expectations

Please review our Rules and Participant Roles & Expectations before signing up. If you have additional questions you can email me at the StashBee email:  Stashbee.blog@gmail.com

How to Sign Up

CLICK HERE to access the sign-up form. 

Registration will be open until December 4th 2021, and Hives will be announced early December via email. 

Please share the link with your Quilty Friends and encourage them to sign up too!


During the sign-up process, you will be asked what platform you would like to use (facebook, instagram, or the blog). Hives will be assigned based on a combination of platform preference, skill level and design/fabric style preferences. Anyone not assigned to a hive will be placed on the waiting list in the order that they signed up.

One more thing

Follow our StashBee Instagram profile, and tag us in your StashBee makes!


@StashBee.blog


Monday, November 8, 2021

Hive 5 November Tutorial- HST Block for Alicia

Hive 5 November Block for Alicia


Credit for this Tutorial goes to Rochelle of Hive 4 who made this tutorial in February 2021

This month we are making a modern HST block from Steph Jacobs Designs 2019 HST block of the month. The original block and tutorial can be found here:

https://www.stephjacobsondesigns.com/2019/01/modern-hst-block-of-month-january-2019.html


For fabrics I'm looking for black and white only.  You can use solids, tone on tone and/or small modern prints that still read white or black (please no large prints and no batiks). If you use solids, use both a black and a white solid, if you use prints, use both a black and a white print. I'd like to alternate solid blocks with printed blocks in the final layout (if you have any doubts on your fabrics just go ahead and use solids, those solid blocks will be just as helpful since I have to make quite a few for a king).

Here are a few things I pulled from my stash:


You will need:

8 - 5" black squares
8 - 5" white squares


You'll make a total of 16 HSTs, trimming to 4 1/2" (unfinished).  I love my Quilters Magic Wand for marking HST lines 😊


I don't think I need to go through the HST making process but if you do need help, Bloom Heart Quilts has a great tutorial and several HST methods. I chose to make my HSTs the old fashioned way (2 at a time),  if you like to make 4 or 8 at a time - feel free to use your preferred method.  Please iron all seams open throughout, this will make my life much easier when I am quilting 😉

Most HST cheat sheets say to use 4 7/8" for a 4 1/2" unfinished block but I like the warm and fuzzy feeling of using a larger size and then trimming down. Using the 5" square I did not have much trimming to do.


Here is the layout for your HSTs, I had to keep going back to my photo to make sure the layout was correct.


 I sewed the first two and last two blocks of each row together.


Then completed each row.


With all the rows complete, I attached the top two rows and bottom two rows (sorry no photo here but I think you get it). Also, if your block doesn't look quiet right, rotate it and see if it then matches.  Previously, this was a bit confusing.

And finally sew the last center seam and you're done! Your block should measure 16 1/2" (unfinished).  A nice big, simple block! Please let me know if you have any questions.

Saturday, November 6, 2021

Hive 1 November 2021 Block for Marie

Hi Marie, What a great block to end our year in. It was so easy and stress free, not that the others were stressful after a little practice. I enjoyed using my scrap strips I save from trimming quilt backs. I do charity quilting on my long arm and with that I produce a lot of long strips from the quilts. This will be a happy quilt for sure with the white and pink main pieces. I look forward to you posting the finished top. I was hoping to post my finished quilt by now, but my longarm has been in the shop since September, arrg. I might just take a pic of the top to post. Enjoy all your pretty blocks. Karen gave me her block for you and I mailed the blocks to you today and they are to arrive by Friday. Keep on stitching, Jayne

Friday, November 5, 2021

Hive 1 November for Marie

 I'm always glad to raid my strips and put them to use.  Hope they brighten your day.

Kathie Laposata


Tuesday, November 2, 2021

November Block for Marie

Hi Marie, I hope you enjoy these bright strips pulled from my never ending supply of scraps.  Thank you for the opportunity to use some of them!   I hope the pink is not too overwhelmingly bright for you.  Like last month, Jayne, the mailing expert, will be sending my block to you along with hers.   Karen


Monday, November 1, 2021


Hello from Hive 1,  Here is a surprise for Kristin, my fellow guild member. I love batik, and had the rainbow colors in my stash. It's going in the mail tomorrow my friend! Marie


Hive 1 November Tutorial - Pink Four Patch for Marie


Hive 1 November Tutorial: Four Patch Block with improv stripes

Hello Bees! 

Already at the last block of the year! Thank you for this wonderful year in the hive! I thought we could finish the year around the color pink, to help us see La vie en rose!

I am assuming you have lots of scrap fabric, you are reluctant to throw it away, and you know that it will be useful "someday". That day has come. Let's go down that pile and make a bit of improv with your leftover fabric! 

I am hoping for a bright, cheerful quilt, with lots of pink. Bright and cheery fabric, solid and/or prints of leaves and/or flowers. Please, nothing too dark!
I have designed a simple four-patch 10.5"x 10.5" quilt block with improv stripes and sashing.


The four squares are each 5" and will be assembled as follow:
  • Top left: one stripped square with the strips ascending from left to right, 
  • Top right: pink square, either pink or reads pink, any pink works,
  • Bottom left: white square, either white or reads white, and
  • Bottom right: another stripped square, with strips ascending from left to right. 
The white and the pink squares can be from a charm pack, or from your fabric.

Now for the striped blocks. I am suggesting here a method to obtain diagonal stripes.  If you have your own method, please make two (2)  5" squares your favorite way!

Step 1: Piece together scraps from your stash into strips. The more scraps in one strip, the merrier.  Each strip of scrap fabric should be at least 7" long.  Square up the edges. Repeat and prepare more strips! How many strips? It depends of the width of each strip, so find the answer in Step 2!


Step 2: Sew the strips together. Once sewn, the strips should make a rectangular block about 15"x 7". Larger block is even better! 

Here are a few examples of strips sewn together:


Step 3: Prepare two (2) 5"x5" square fabric to be used as a template. You can certainly use a square from a charm pack or, if none are available,  you can make your own paper/cardboard 5"x5" template.

Step 4: Place the 5" square template on your newly created striped fabric. Make sure you follow the orientation of the stripes vs template so that the 5" squares are placed with corners up/down, one square above/under the other, over the stripes that are aligned vertically. 


Step 5: Cut two 5"x5" squares out of your striped fabric using the template.

Voilà! The resulting two squares will each measure 5"x5" and will have a diagonal striped pattern.


You should now have the four squares needed for assembly. Complete the block with a 1" sashing. You can use white or pink sashing...you choose! Sew the sashing on the left and right side first, then finish with the sashing at the top and bottom.  


Here is an example of some completed blocks:


Thank you in advance for working on this block! I will cherish every block and will be forever grateful for your contribution to my quilt.
Best,
Marie