
Hive 6 March-madness... or my turn! :D
Hello Hive 6 and Stash Bee ladies! my name is Melodee Bourdeau.

I live with my awesome family in Ypsilanti Michigan (that's IP-sa-lan-tee). You can find my town in Michigan by holding up your right hand with your palm facing you and in the lower right side, in the fat part of your palm, is my home.

Here I live the glorious life of a stay at home mom (I know I am seriously blessed)! I am married to the man of my dreams :) Tall, dark, and handsome... washes dishes, does laundry, grills a mean steak, has a job...all the important stuff! Ok, so he is a bit of a goof ball but that's my thing ;)
 |
| sporting the Michigan winter beard |

We have four children. My eldest is 20, in college, and basically all grown up. The younger 3 are 11, 10, and 7. When we are not outside geocaching, hiking, swimming, fishing, boating, going
"up north", camping, sledding...we are inside homeschooling, or doing some really awesome crafting, cooking, board games, video games...!! boredom is not an issue in this house! We also have a family fur baby (miniature schnauzer) named Rosie.

I have been sewing for as long as I can recall. I began as a little girl making doll and Barbie clothes (hand stitching) with my mom's and my neighbor friends mom's scraps. I learned to sew from my grandmothers, my mother, and aunt who were all into sewing and crafting and "keeping a home". I then moved into cross-stitching. When my first child was born I began clothes making and quilting. I really got serious about quilting in 2002 when I purchased my first "good" machine. I have a Husqvarna and just love it!

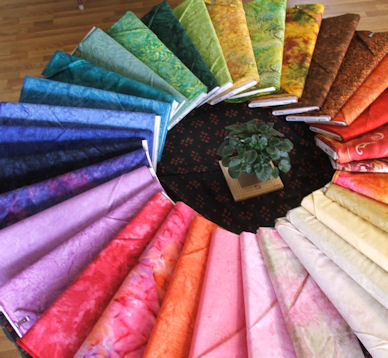
I don't really have a good way of organizing my fabric. My stash grows and shrinks all the time! I have sectioned off...heck I have taken over the living room and do commit to keeping it all in one shelf in one corner of said room. for the most part I have remained successful! My area has spilled out a bit but I am spring cleaning my way back into the organized corner...sort of :)

I don't really have any favorite designers per se. I am frankly terrible with names and instead tend to pick fabrics that play well with each other and are not always from the same line. I just love finding a main print of some kind then wandering around the quilt shop looking for "matching" fabrics. It's like treasure hunt and I love it!
I also tend to pick my fabrics based on a specific project. My stash has recently grown from my work on The Farmer's Wife Quilt I am making for myself. I made a sewing rule to make each block its own individual fabric choices. The plan was to not repeat any fabric. What I failed to think through is this quilt is made up of 111 blocks! I have since changed this rule a bit to mean that each block needs to be its own look and while I am repeating fabrics I am not making two blocks with exactly the same fabrics. mischief managed!
 |
| Farmer's wife progress |
I don't really have a one thing I wish is would have known from the beginning of quilting. Rather, I have an "I wish knew how to now"! I really really want to force myself to commit to learning how to machine quilt! From the beginning I have hand quilted all of my quilts. And, while I love the look, the time it takes to quilt by hand is really overwhelming! I now have a serious pile of finished quilt tops that need to get quilted and loved! Although, I am totally in love with hand quilting with Pearl cotton and this does help make the stitches larger and larger stitches means less stitches and that means getting a quilt to the loving in use part all that much faster!
I do not really have a favorite tool but rather I did make (myself!!) a 4 feet by 8 feet pressing board! I just seriously love this thing! for oh so many years I used the typical ironing board. While an ironing board is functional the area this gives to iron something is oh so ever tiny! my board is perfect for what I need!!

I don't really have a favorite fictional character but will say that if a thing is seen as nerdy I LOVE it! I will not even get into the books I love...see me on good reads for that!! Because this post is seriously long enough!
Currently I am really into all things BBC (Doctor Who, Sherlock, Downton Abbey) and a splash of CBC (Continuum)...we don't have cable in the house but we do have devices that play Netflix and there is where you will find me most nights :) Curled up on my big chair with some kind of sewing project in the works!

And now onto my block for this month: Super Scrappy Sunny quilt!!
I was over on Pinterest (imagine that! ha) a while back and saw a folded up quilt in the background of a picture, yeah I'm that nit picky! I took out my sketch pad and fashioned up what I thought would be a good pattern to achieve the look of the quilt.

Now the quilt hidden in the depths of this picture was all matchy-matchy and totally not me! I decided to go the super scrappy route and .....all-la peanut butter and jelly sandwiches...!!!! here is what I came up with :)

P.S. I'd love to put a link in right here to the original picture but I can't even believe it!!! I did not pin the picture!!!! I have now spent really far too much time looking back through my likes and pinterest in general to find this picture but alas I am now saying, I give up! trust me it's out there somewhere!
First, I decided that each "block" will contain lights and darks of varying and not too matchy prints, and that any ole print will do, going super scrappy on this one!
The block is made up of 4 units that are sewn individually then pieced together to form the one big block seen above.
To achieve this I had to cut from 8 different fabrics, 4 dark and 4 light. In the picture above you can see my darks as being the majority fabric and the light being really small triangles in each section.
So I cut: please note that this picture just shows one of the sections cut out. You would need to cut our four sets of light and four sets of dark.

Dark:
one 4.5 x 4.5 square from each dark fabric
two 2.5 x 6.5 rectangles from each dark fabric
one 2.5 x 4.5 rectangle from each dark fabric
one 2.5 x 8.5 rectangle from each dark fabric
Light:
one 4.5 x 4.5 square from each light fabric
two 2.5 x 2.5 squares from each light fabric
First we need to prepare a few of the blocks for making triangles. To do this I took the 4.5 x 4.5 fabrics and placed right sides together and with my Ticonderoga pencil (the best on the planet I swear!) I used my ruler and made a straight line from corner to corner on the light fabric. This will be our sewing line.

Now we sew along that drawn line. Literally I did a straight stitch right over the line I drew.

Using your rotary cutter and blade, or if you are adventurous I suppose, cut a quarter inch seam creating a triangle.
I then pressed this to the dark. I did this step for each of the segments, assembly style.

Now we move onto the 2.5 pieces. Taking both 2.5 x 2.5 light squares we set them onto the dark (exactly as shown below) onto the 2.5 x 8.5 and one of the 2.5 x 6.5 pieces.
We then draw a diagonal line in the exact direction as shown. This ensures that the final triangle will be in the desired direction. Sew on top of this drawn line.

cut the seam allowance to 1/4 inch.

You will then need to press this seam up to make a complete rectangle. Now the blocks are all ready for final assembly. I like to lay out the blocks in their final placement to ensure that I will sew them in the correct direction.

Taking the 4.5 x 4.5 center square I place a 2.5 x 4.5 dark rectangle along the top edge and sew using a 1/4 inch scant seam.

I then press to dark.

Next, I take a 2.5 x 6.5 plain (the one without the light triangle) and sew that to the right edge. I pressed the seam out toward the 2.5 x 6.5 rectangle.

Next take the 2.5 x 6.5 piece with the light triangle on the end and sew that to the bottom. I pressed this seam out.

Finally, take the 2.5 x 8.5 with the light triangle and sew it to the far left side. I then pressed this seam out.

Here is a picture of my first segment done. You will have four different segments done at this tpoint before moving on to the next step.
When it came time to sew and iron the 4 pieces together I did iron the center seams open. I felt this helped me achieve a more "flat" effect. you don't have to, I'm cool with what you like best :)
However, when I sewed the final two halves together I left the seam closed and pressed to one side.

And here we have it! My first block completed for the Super Scrappy Sunny quilt :)

And some final words for my Hive Mates...I am ok with what ever color you choose or what ever motif you choose. you pick what you think is scrappy best!
I am also ok with a finished block size that passes the stretch test. Meaning, that when it lays flat on its own and is a wee bit off but I can pull a bit to make it 16.5 x 16.5 when I sew it all together, I am totally cool with that!
And lookie here! I also am totally ok with stuff just not lining up so much...check out this seam...

Zoinks! what happened there! all's good in the end...this totally passes the stretch test :)
And I really did my utmost best to make this an easy to follow tutorial but as my husband says you just don't want to get into the labyrinth that is my brain!
So, if this tutorial leaves you with a bald head please feel completely free to "bug me" with a ton of questions or heck if you want to give up I would be ok with just mailing off your I tried but you are nuts lady this ain't gunna happen parts :)
I can't wait to see what rolls in!!
Any questions please ask!!
Happy Sewing!
Melodee :)


.jpg)


