Chris, thankfully there was an extra day this month to get your blocks done and mailed! I'm sorry for the delay, I had to try this block several times to get a better result.


Chris, thankfully there was an extra day this month to get your blocks done and mailed! I'm sorry for the delay, I had to try this block several times to get a better result.

Chris!
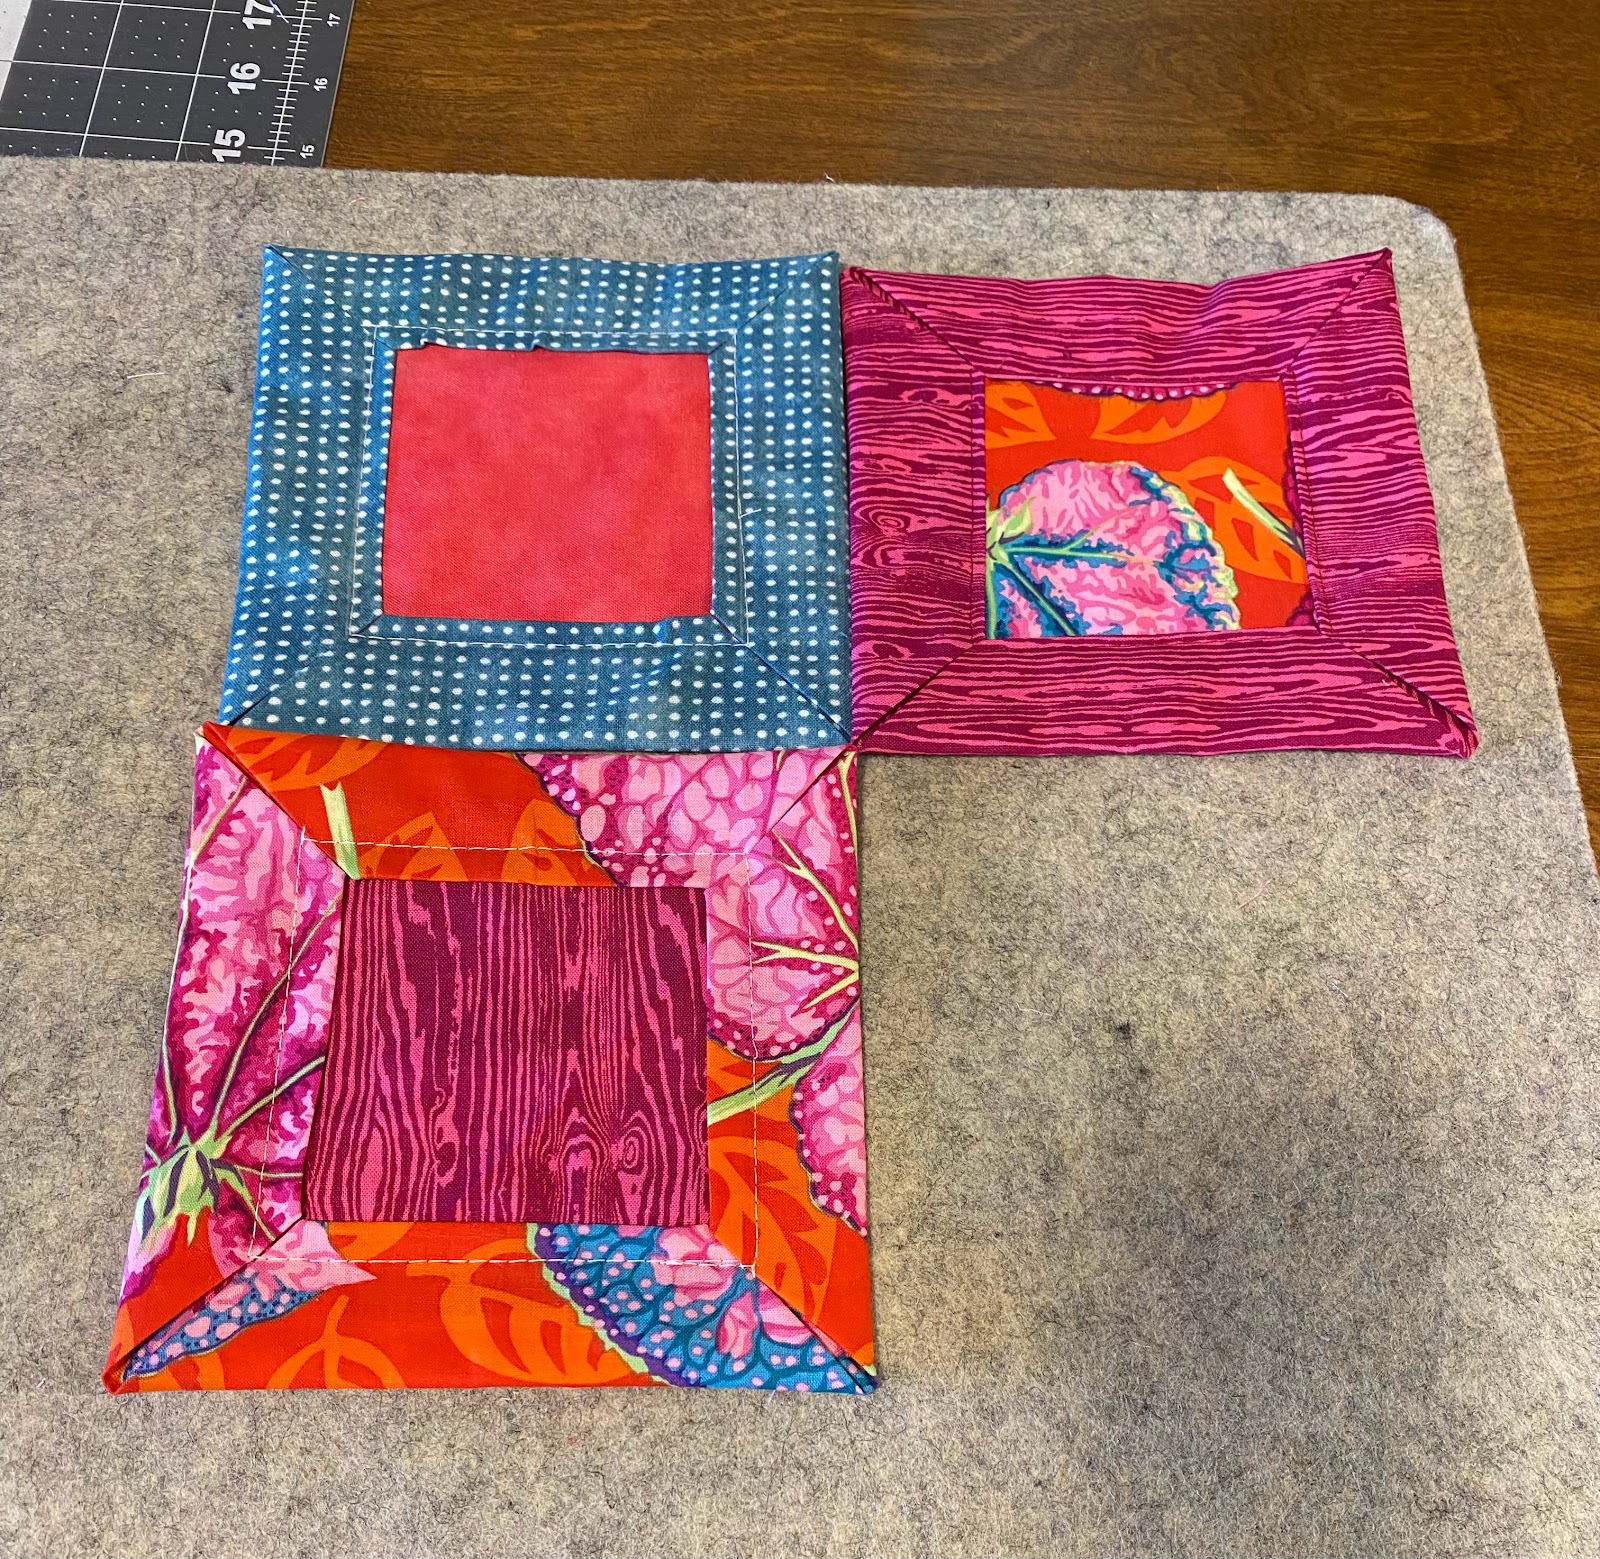
Well...this was something! After the first one took nearly 45 minutes, I was definitely feeling some kind of way 😅, but the subsequent were more like 18. Phew. I, too, hand-basted because I didn't want to risk my hard-fought-for folds.
One more month like this one and the last, and we'll have to call this PrecisionBee!
I'll get these in the mail ASAP—realistically it will be Tuesday morning.
Thanks (90% thanks, lol) for pushing my comfort zone!! I've been obsessed with cozy things lately, so I can't wait to see how this turns out and how much you love it!!! It seems like it would be super snuggly and so fun to look at. I can see this being a fun and different way to assemble an I-Spy quilt.
Molli.
P.S. I hope you're okay with a bit of whimsy!! 🐹🐈🐠🐰🔥

Like some of the others have mentioned, the folding definitely pushed me a bit out of my comfort zone. I'm a perfectionist and I still don't know if my corners are perfect. I hope so! Regardless, these were fun to make and I can't wait to see the finished project.

~ Diana
Oof. This precision folding and pressing is definitely out of my comfort zone. Thanks for pushing me with an interesting new technique, Chris. I really hope these are acceptable--the poor things have been undone and redone a couple of times!

Hi Chris! Here are my folded blocks! It was definitely a great learning experience, and it gave me flashbacks to folding origami in grade school 😁 I hope all my folds and corners are lined up right!
Hello everyone! Here is my block for Diana. I am so sorry it is late, it was a lot of fun to make! This is my first ever Stash Bee block and post as well, excited for more to come!

Hi Chris!
Well that was a fun activity of folding, pressing and glueing! Thanks for introducing me to this technique. I wish you a happy time hand stitching these blocks together.
Take care,
Marie


Hello Beautiful StashBees,
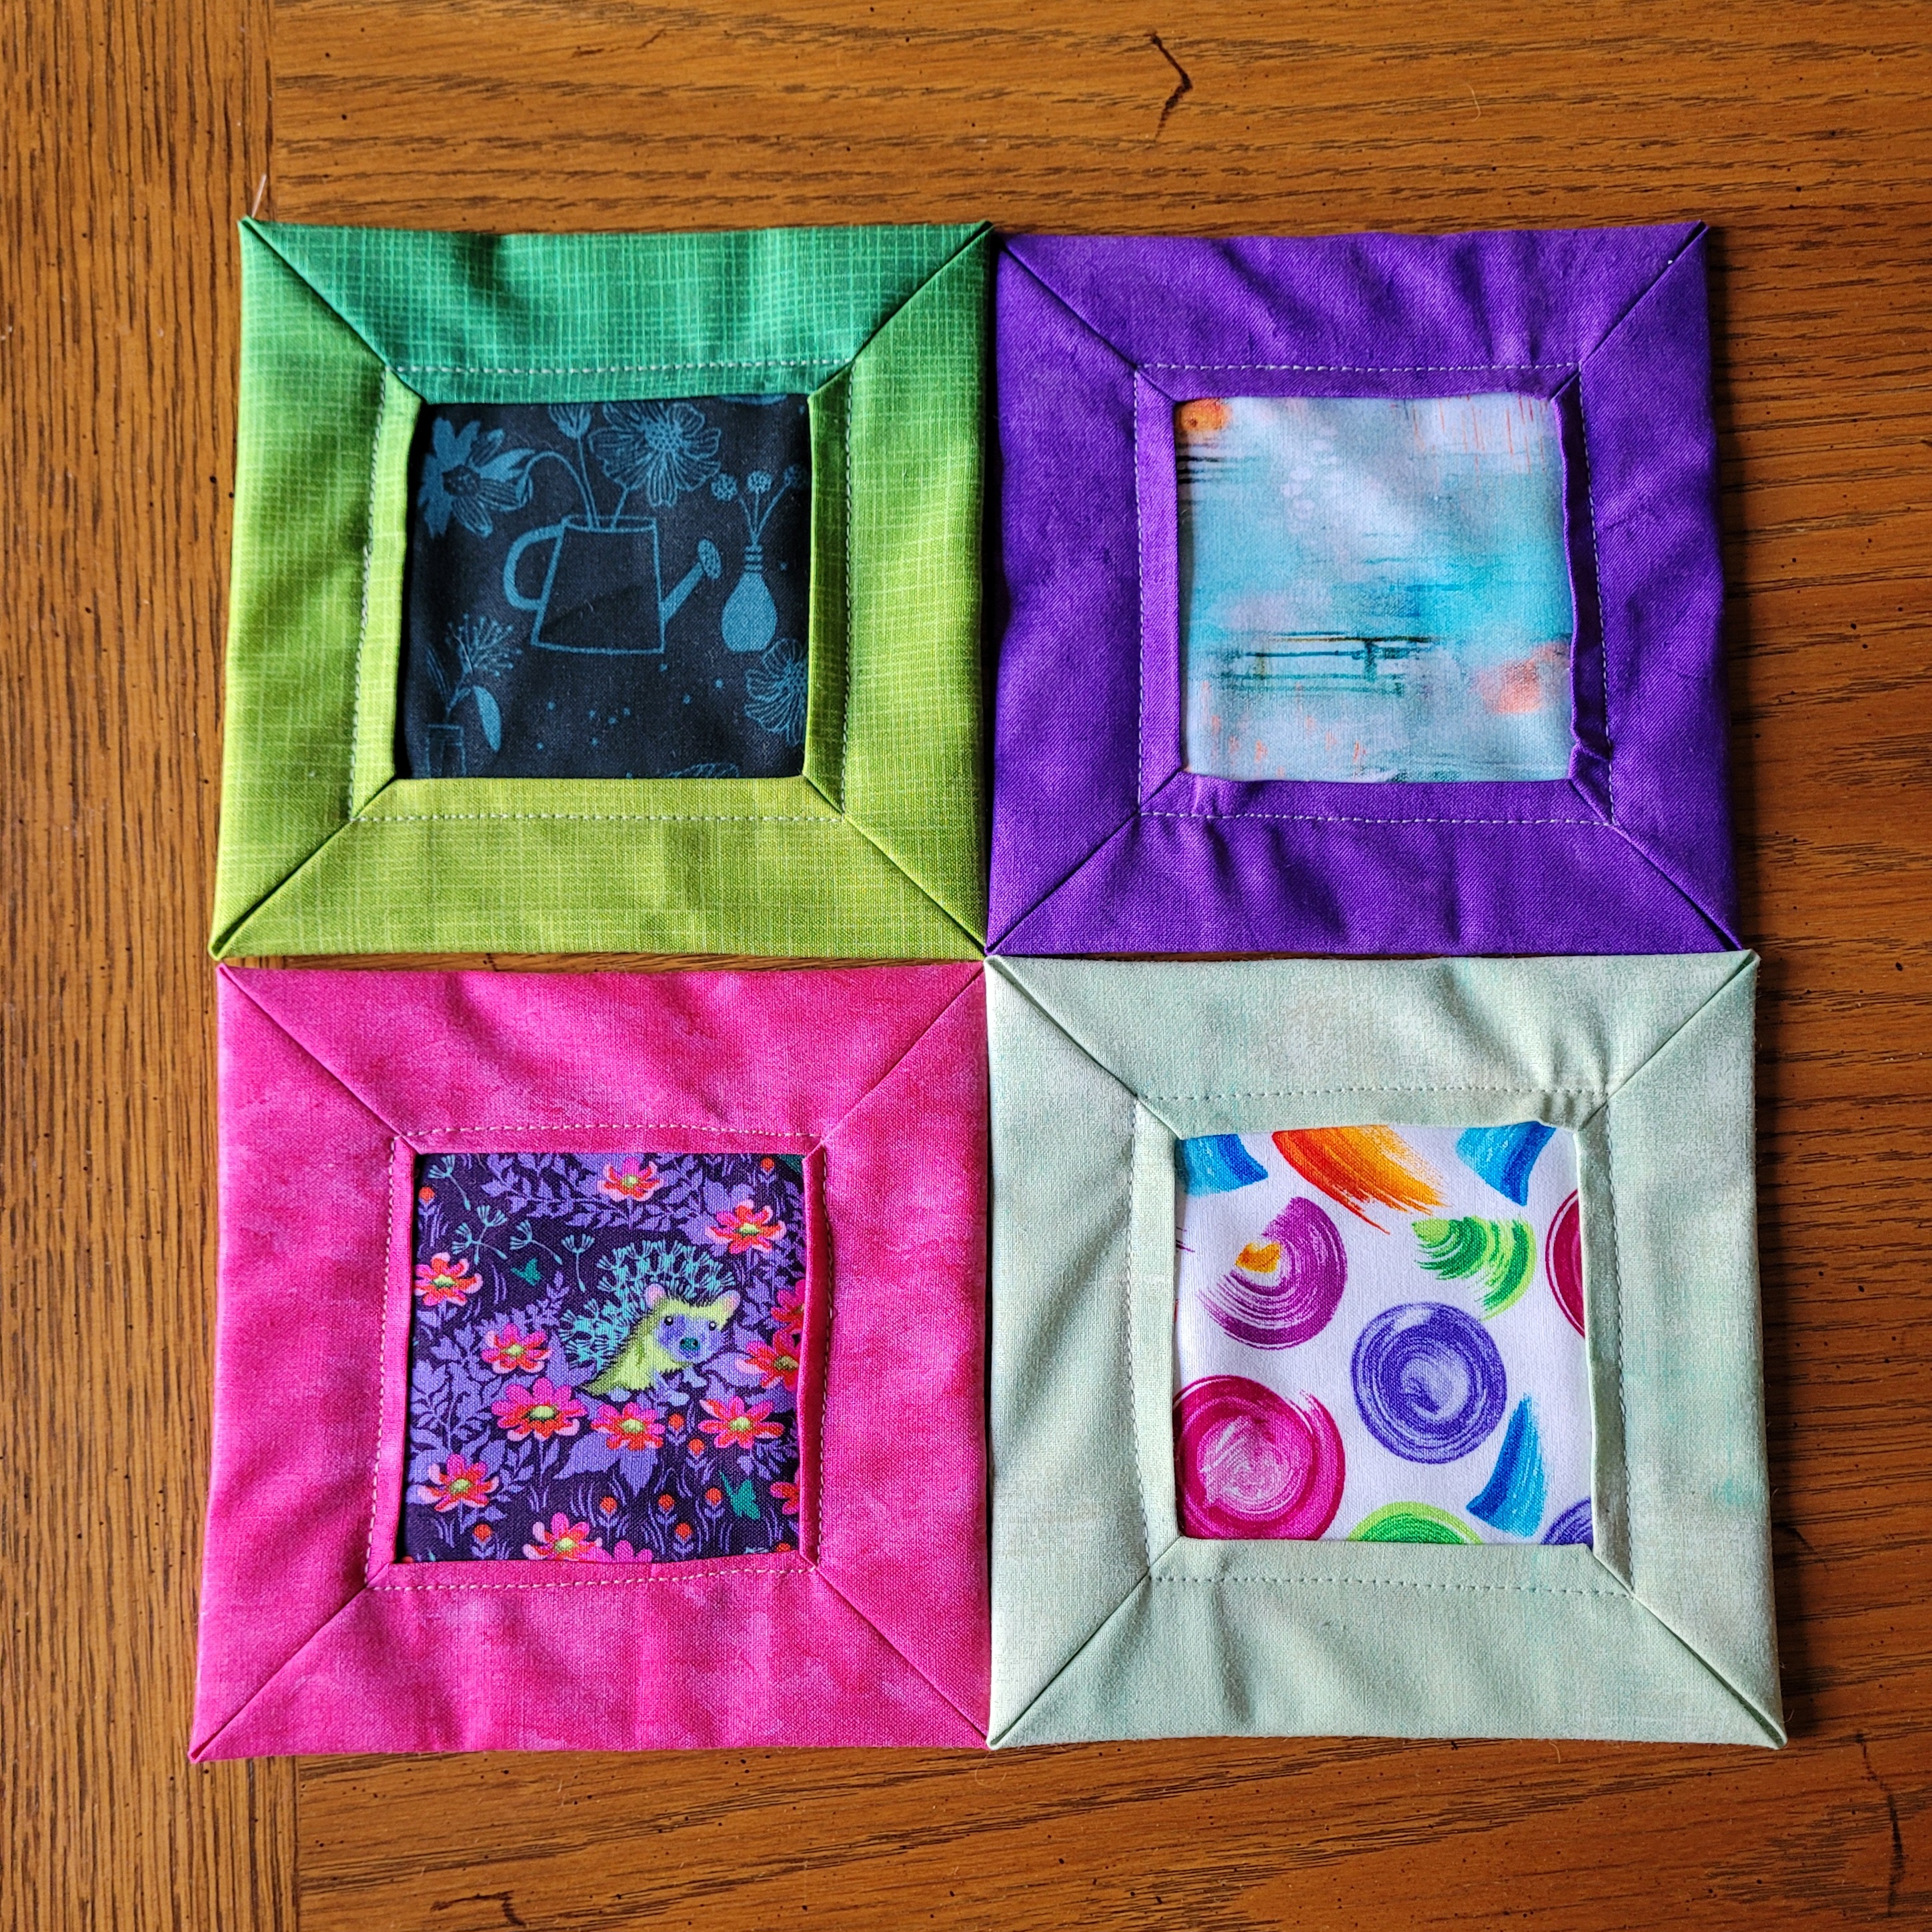
This month I'm thinking about being cozy and warm. Despite living in the south, it has reached low temps that require nice warm quilts. I hope you find the construction to be challenging enough, because I'll be doing most of the sewing!
Each section you make (4) will finish at 5 3/4" and I will be sewing them together to make my finished quilt. All the work is in cutting, pressing and securing a mitered corner. Please do your absolute best to make a perfect mitre and a consistent finished size so I can fit them all together when I construct.
I can't wait to have them all on my design wall to choose placement!
When choosing fabric, please use a good contrast. As for the batting, I'm not fussy about poly/cotton/blend. This quilt will be made for snuggling, so if you have cotton batting, that's great. If you run into a situation where you either need batting mailed to you, or you omit the batting altogether, I will mail you a piece and/or I will make do without! Thank you for agreeing to the extra bulk this may add when mailing.
My fabric "no thanks" are: religious, political, licensed or batiks.
My fabric "yes please" are: contrasting colors quilting cotton that you already have in your stash. I chose some scraps that were both on the bright side and somewhat muted. Prints or solids, it’s Your Choice! If you like the two colors together, I probably will too!
I found this block as a free tutorial on Jo Avery's Blog here:
 |
| Jo Avery's Folded Patchwork Quilt |
(4) 9" Squares (back)
(4) 4.5" Squares (center)
(4) 5.5" Squares of batting

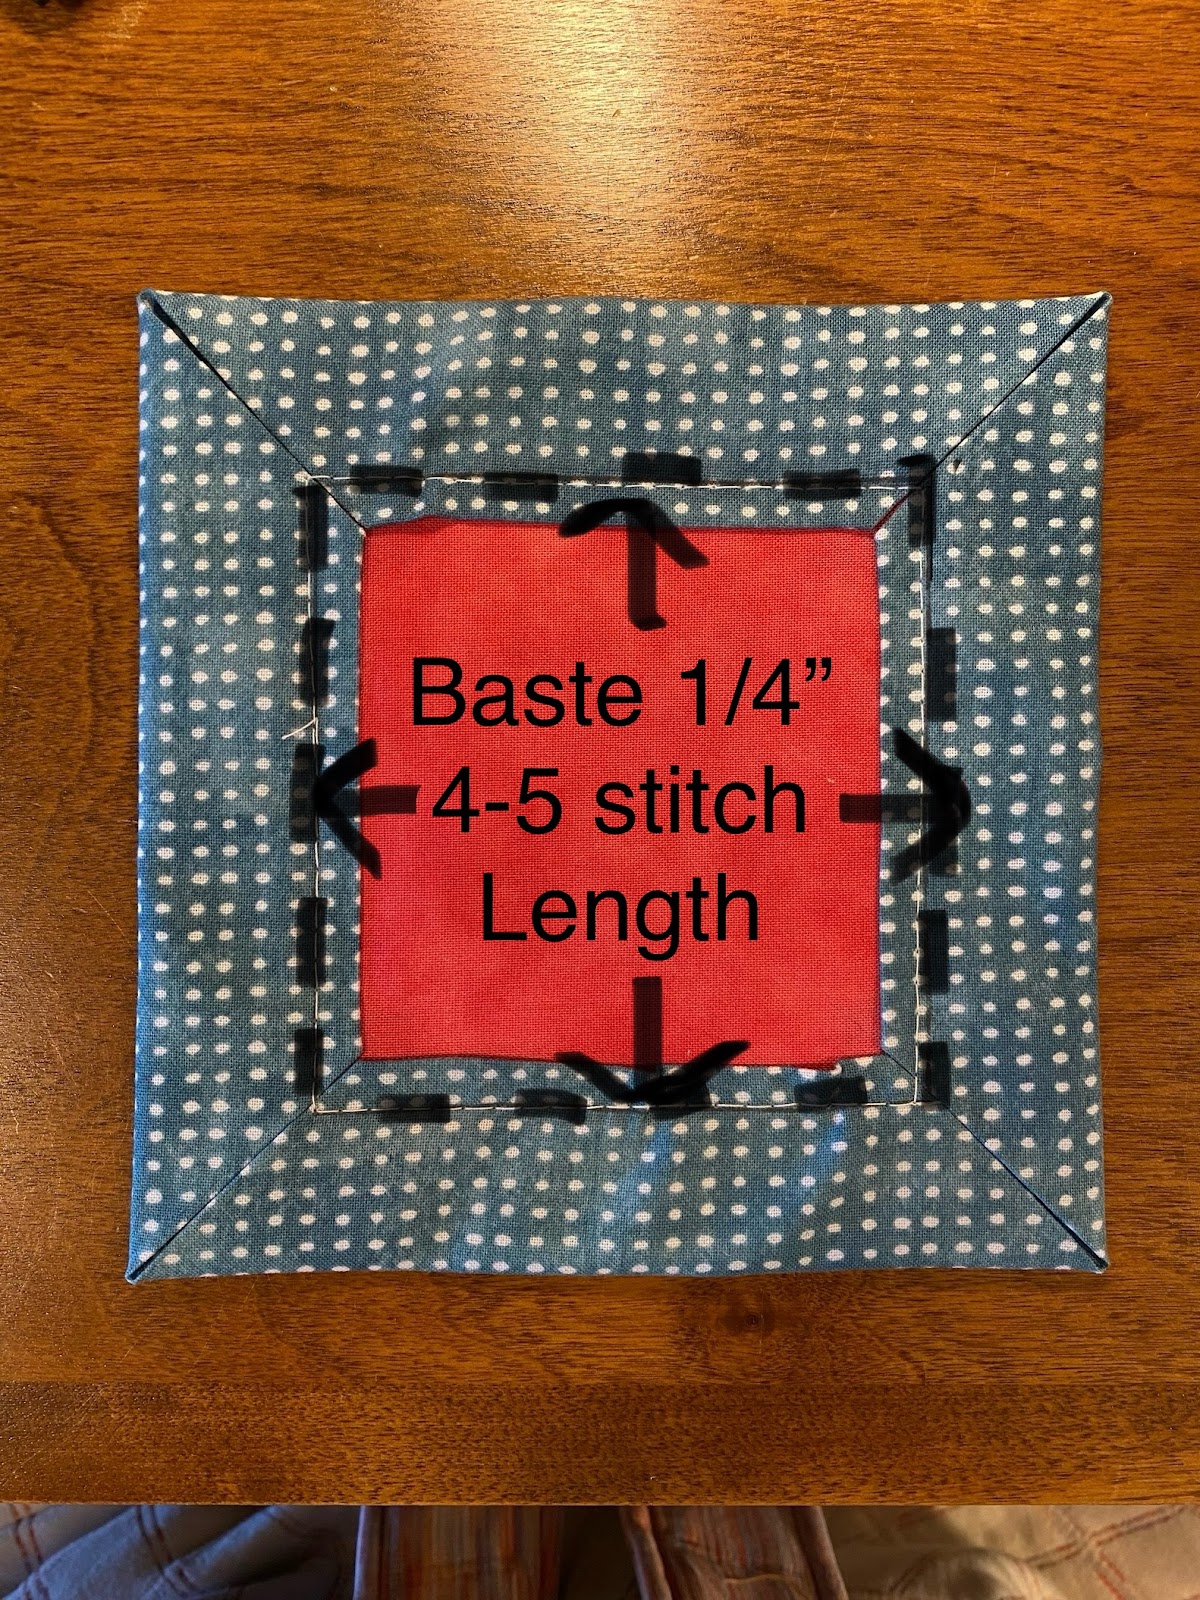
Let's get started. A quick word about glue: if you don’t have a glue stick (generic school glue, Elmer’s, fancy) you can use a dot of liquid school glue and set it with the iron to dry quickly.
Fold and press 1/4" up on center pieces. I used a dab of glue stick to help them stay flat. Perfection is not needed here, but it's a good warm up for the next 1/4" fold/press which requires precision.


Note: you don't need the center piece to be here yet, I just happened to forget to take my picture without it!


Machine Baste (3-4 stitch length) 1/4" from edge of center fabric to tack it all down. Ignore my photo stitch length that says 4-5. I think 3-4 works better! Any color thread will do because I'm going to pull it out once I hand quilt my two lines next to your basting. Note: please make sure to press before basting so that your mitre is YOURS and not something I'll need to fiddle with to achieve finished size. Sounds easy, but I found this part challenging.


Chris
I've been a Stash Bee participant for many years. I'm not even sure how many! And here I am again, another year, another block! I've made this block many times before and I find it quick, easy, and perfect for scraps. I know we did star blocks in January, but in my opinion, stars are always a great way to go. It's the Clover and Violet's Scrappy Christmas Star Block. Now, I believe in using what you already have so I'll show you mine - fabric pulls and a tutorial. Oh, and you won't need holiday fabric!

Here's my idea: The star should be a solid fabric. For this project, I'd prefer bright colors. Leave out the pastels, browns, and grays. The blue star in this block didn't turn out as bright as I'd hope, so look to the end for more blocks.


Hello, Hive 3! Happy February. 💜 I've chosen a simple checkerboard block based on the Maggie Pearl pattern from Penelope Handmade, which is a free pattern that can be found here. It is a fun and fast block and I hope you enjoy making it.
You will need two fabrics to make the block - one dark and one light. The dark fabric is a non-directional colorful print and the light fabric is a non-directional low volume print (directional fabrics will either end up upside down in some rows or require different piecing instructions to keep them right side up). You can get an idea of my color palette in the photo below, which shows 12 different blocks stacked on each other. Please lean toward muted, cooler colors (no red, orange, etc.) and no solids or batiks. I've found that using small scale prints and monochromatic prints will provide the necessary contrast to obtain a checkerboard look.

I like to stack my fabrics right sides together and then cut the strips so that they are lined up and ready for sewing.

Sewing Instructions:
Please use a scant quarter inch seam throughout. Shortening your stitch length (I use a 2.0) can help make the sub-cut pieces a bit more durable.
Sew one dark strip and one light strip together along an 18" side and repeat with the remaining pair. Press toward the dark fabric. You will then sew the two strip sets together so the fabrics alternate dark, light, dark, light. Press the final seam toward the dark fabric.
Once the four strips are sewn together, the unit should measure 8.5" wide x 18" tall. If the unit is not within 1/8th inch of 8.5" wide, please check your cutting measurements and seam allowance and fix as needed.


Sew the rows together (those nesting seams make it so easy!) and you are done. The seams can be pressed either toward the top or bottom of the block, but please press all seams in the same direction. The finished block should measure 8.5" wide x 14.5" tall.


