Monday, September 30, 2019

Hive 2 blocks for Rose

These blocks have been ready to mail for more than a week.  But between remodeling the kitchen, work and some travel I was not able to get to the post office.


These blocks will be on their way to Rose later this afternoon. 

Since we are both "Jersey Girls" she should have them in a day or two.

Great block. . . .just hope I did the "low volume" request correctly.

Sherry V.

Thursday, September 26, 2019

September Block for Rose

Browsing the blog this morning, I realized that even though I mailed these quite some time ago, I forgot to post them. So here they are - Rose may already have them 😀


Sunday, September 22, 2019

Photo catch up, June July August - Hive 2

I’ve been good with keeping up with the sewing but posting September made me realise I hadn’t put up the others!

So....

June for Lynda


July for Kristi


August for Valorie


All started their journey across the pond many many weeks ago so should be safely home.


September for Rose, Hive 2

As Rose said nice and quick.

Hope you like.


Saturday, September 7, 2019

Hive crash hive 2 for Rose

The scrappy pluses looked fun so I thought I would join in the fun and make a couple blocks for rose.
~Carolyn hive 3


Hive 2 blocks for Rose

These were so quick to sew up.  I hope they suit your project Rose.  I really enjoyed sewing them for you.   

Sunday, September 1, 2019

Instagram Hive 1 2019 tutorial- megsverde

Welcome to September!

I am ready for some fun with this quick and easy block!

My six year old daughter, Ella Bea and my three year old son want to continue our #holidaypatchworkforest! Therefore, to get us in the mood, I selected the modern Christmas tree block quilt from the blog, The Diary of a Quilter. The free tutorial is great and easy to follow and I had a great time with this block. I hope it provides some festive fun in your fall quilting. The block took about 30 minutes from cutting to finish, so I also think it will be a quick one to do during this busy fall school season.

Fabric pull- think festive, think Starbucks holiday cups, think anything bright and fun. No pattern is too crazy. I am up for anything you want to throw together! The more (pattern) the merrier in this quilt.  For inspiration- check out #holidaypatchworkforest on Instagram.


The blog is super easy to follow! Please see my pictures below to help you as well. Follow her guidelines as she discusses how to cut the trees. As you can see from the last picture, I did not follow the guidelines so well in terms of seam of allowance. However, the blocks are still beautiful!

https://www.diaryofaquilter.com/2015/12/modern-christmas-tree-quilt-block.html

Cutting:


Piecing:


Final:

The pattern completes two blocks, and now you can start your own #holidaypatchworkforest tree quilt! 

Have fun! Please check the address sheet for my updated address! 
With gratitude, 
Meghan (@megsverde)

A quick Sept Hive 2 block for Rose

My Hive 2 blocks were completed in record time.  This is a great scrappy block.  I'll keep it in mind for using up my own scraps.
Kathie L in Allentown

Hive 4 September Tutorial - Fabric Wampum

Hello, Hive mates.  Wow—my turn already!?  Time is really flying.  I have had this quilt on my wish list for a long time.  My brother in law's birthday is in September so it seemed natural that his quilt finally get on deck.  He is a citizen of the Oneida Nation in Wisconsin which is one of five Native American Tribes in the Iroquois Confederacy.  I thought a quilted version of the flag would be nice—particularly since it includes deep dark violets which I finally figured out is my favorite color after fifty some years saying it was yellow.  My stash, my scraps and my clothes are overwhelmingly violet (and it's many hues).

Here’s a picture of the flag:


This is wampum which are polished clam shells; they were used to make wampum belts that tell stories.  The purple color represents the spirit and white is the color for peace.  We will be replicating those shells so the blocks are very organic with no need to be too precise.

You will need to raid your string scraps and pull the deepest, darkest purples and violets you have. Add a few strings of creams and off whites and you have what you need.   Here is a sample of colors I pulled.


To make fast string blocks, I used 4 pieces of 8-1/2 x 11 inch paper and sewed skinny strings on.  The strips should be two inches or less and need not be sewed on straight. Add strings on the long side of the paper as shown. This method results in a little waste, but including pulling my fabric, I was able to complete the block in 45 minutes. I chain pieced the strings, then ironed them open, and chain pieced again. Repeat. If your strips are not long enough, sew two short strings together-that will work too.  This is organic.  Here is how I started:

After the paper is filled with strings, flip it horizontally and cut strips 4-1/2" wide as follows:


You will get two strips 4-1/2 inches x 8-1/2 inches.  I sewed two sections together, and then four rows together.  You should get a 16" square block.  If you don't like goofing with the paper, feel free to send the 8 strips sets and I will remove the paper and sew them together as needed.  That's no problem.  I am trying to get as much variety as possible.  When putting in a string or two of cream or white, use very skinny strings. Add soft curves if you want.  Remember these are wampum beads made from shells so nothing would ever be perfectly straight.  

Here's are my pieces before sewing them together:


Here is a finished block:


Please feel free to make your string blocks any way that you feel comfortable-with or without paper backing or in 4.5  inch increments if you have shorter strings.  If your string stash is light on purples, make less--it's no problem.  They just have to be able to finish at 4 inches wide and no  more than 16 inches long.  See the diagram highlight? 


Notice they are areas where I will only need three rows and not four, so I will be doing a lot of piecing for the pattern, so if you are only able to make string or two instead of four, it is no problem.    In fact, it may be better to send the strings without sewing the rows together which would allow me to mix them up. 

I love to string piece when I just feel like sewing without having to think about things too much.  I hope you find this block easy and enjoyable during this busy change of seasons.  Thank you for helping me finally move this project off my wish list.

Hive 5 September Tutorial


September Greetings from the Nashville area! As I type this, we’re having an unexpectedly cool day. I’m sure by the time you read this, (and even before I’ve finished this!) it will be full on summer again! And, due to some strange technology glitches, I’m not able to post this directly to the stash bee blog. Cathleen, our Hive Mama, has graciously offered to help me out here. Thank you, Cathleen!

I’ve chosen the Snail Trail block for this month. I previously had not made this myself. I was pleasantly surprised at how quickly it goes together and how striking the end result appears.

You will need fabrics in two color families.  I’d like blocks in purple and lime green/chartreuse or whatever green you have that’s close.  You’ll need two different purple fabrics and two greens. You’ll make 1 block that is 12.5” once all sewn together.  

Please note:  the cutting directions below will yield enough pieces for 2 complete blocks. I’m asking you to sew and send 1 block to me. You can make a block for yourself, or send the additional pieces to me and I’ll sew them.

Here is a suggested fabric pull:

C:\Users\Terry\Downloads\IMG_0328 (1).JPG
C:\Users\Terry\Downloads\IMG_0345.JPG
Please make the following cuts from each of your 4 fabrics:

1 – 7 ¼” square (A)
1 – 5 ½” square (B)
1 - 4 ¼” square (C)
2 – 2 5/8” squares.


Cut each of the 3 larger squares on the diagonal
Note:  A is the largest, B middle and C the smallest.  


C:\Users\Terry\Downloads\IMG_0349.JPG


Set aside one half of each triangle and one square from each of your 4 fabrics. (These are for the extra block as mentioned above.)

Separate the remaining pieces into 2 piles: a purple pile and a green one.  You should have 8 purple pieces (4 each of two different fabrics) and 8 green pieces (4 each of two different fabrics).

Start by sewing the 4 squares together.
  • Press the seam toward the purple (darker) side.
  • Press the center seam open.

Now sew the C triangles to your 4 patch, paying attention to placement.

Sew the C triangle that matches the fabric in square #1 to the top of the 4-patch.

Sew the C triangle that matches the fabric in square #3 to the bottom of the 4-patch. 
C:\Users\Terry\Downloads\IMG_0357.jpg

Press seams to the outside.

C:\Users\Terry\Downloads\IMG_0358.jpg


Next, sew the C triangles that match fabric in squares 2 and 4, respectively, to the right and left sides of the 4-patch.
  • Note: once you’ve sewn the triangles on, each fabric should appear to make a small arrow; the square from the 4-patch should be to the left, underneath the triangle of the same, matching fabric.  (As you add triangles, the spiral should move clockwise or outward to the right. I know this from not having sewn my first block correctly!)

Round 1 should measure 6 ½” square. Please trim if necessary.

C:\Users\Terry\Downloads\IMG_0359.jpg


Continue in the same manner for round 2, using the B triangles. Please note fabric placement in picture below:

C:\Users\Terry\Downloads\IMG_0362.jpg

Press seams to the outside.

*Add Green “B” squares.
C:\Users\Terry\Downloads\IMG_0364.jpg

Trim block to 9” square.
For the final round, please add A triangles.
C:\Users\Terry\Downloads\IMG_0365.jpg

Press seams to the outside.
Trim block to 12 ½” square.  (It is ok with me if you skip this final trimming.)
Please take a peek at my local friend and prolific quilter, Tracy’s blog: “Tracy’s bits ‘n pieces”.  I’ve directly plagiarized—with her permission! Tracy has a picture with 9 blocks together. That picture gives a great perspective of what this quilt will look like when complete!

Please feel free to contact me if you have questions or concerns. IG: @maryfromvaintn or maryEsiemen@gmail.com.  My Instagram is private since I work at a public school (and want to keep my job!)  If you haven’t yet requested to follow me and would like to, please do so! 

(I think you can send a DM regardless of following status.)

Other random info:  A member of my local modern guild referred to a green I selected recently as “the most horrible green color ever…”. So I understand if chartreuse isn’t in your stash. Please use what you have that’s close yellow–green, even gold if needed.


Hive 3 September Tutorial - Scrappy Irish Chain


Hello bee mates

I am quite excited but a bit nervous that it is now my turn to post a tutorial in our bee hive. I have never done this before so I really hope it all works out and you can follow my instructions and love the block I am asking you all to make.

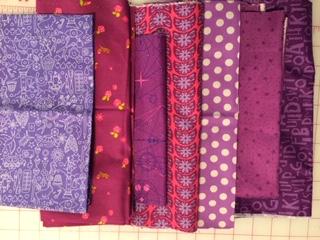
I have a rather large stash, lovingly curated over the past eight years and I have an awful lot of scraps. I have cut a few them up into squares and keep them in pretty jars. These are cut into 2.5 inch squares.


I fell in love with this lovely scrappy quilt called Super Scrappy Irish Chain by Melissa Corry of http://www.happyquiltingmelissa.com/


You can find her example and a tutorial here http://www.happyquiltingmelissa.com/2015/06/super-scrappy-single-irish-chain-finish.html (with Melissa's permission and blessings).

Melissa's cutting instructions are for a whole quilt. Below I list what you need for one block. If you scroll down her tutorial she has links to another helpful tutorial on making the four patches as a leader & ender project. She also includes instructions on how to sew the completed blocks together and layout options which I will do once I receive your blocks. So you don't need to make the sashing strips for me.

I would love a scrappy rainbow version of this quilt. I really like the colours in Melissa's example and would like something similar: red, pink, orange, yellow, blue, green, purple - essentially the colours of the rainbow. Modern bright clear colours please. The background can be of low volume/neutral scraps in white, tone on tone, off white and cream and a little bit of pattern and colour is also okay.  (please excuse my spelling of "colour - we use UK English in New Zealand).

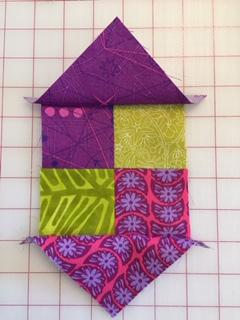
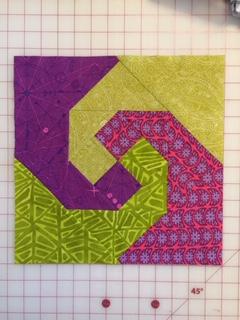
So here is my sample block in pink. The block should measure 10.5 inches unfinished.


What you will need for one block:
- 9 x 2.5 inch scrappy fabric squares in a colour way e.g.  all yellow, all purple etc
- 8 x 2.5 inch squares in a neutral, low volume background - please see my example. Off white, light cream, tone on tone, with a little bit of colour if you want.
- 4 x 4.5 inch rectangles in a neutral, low volume background - please see my example. Off white, light cream, tone on tone, with a little bit of colour if you want.

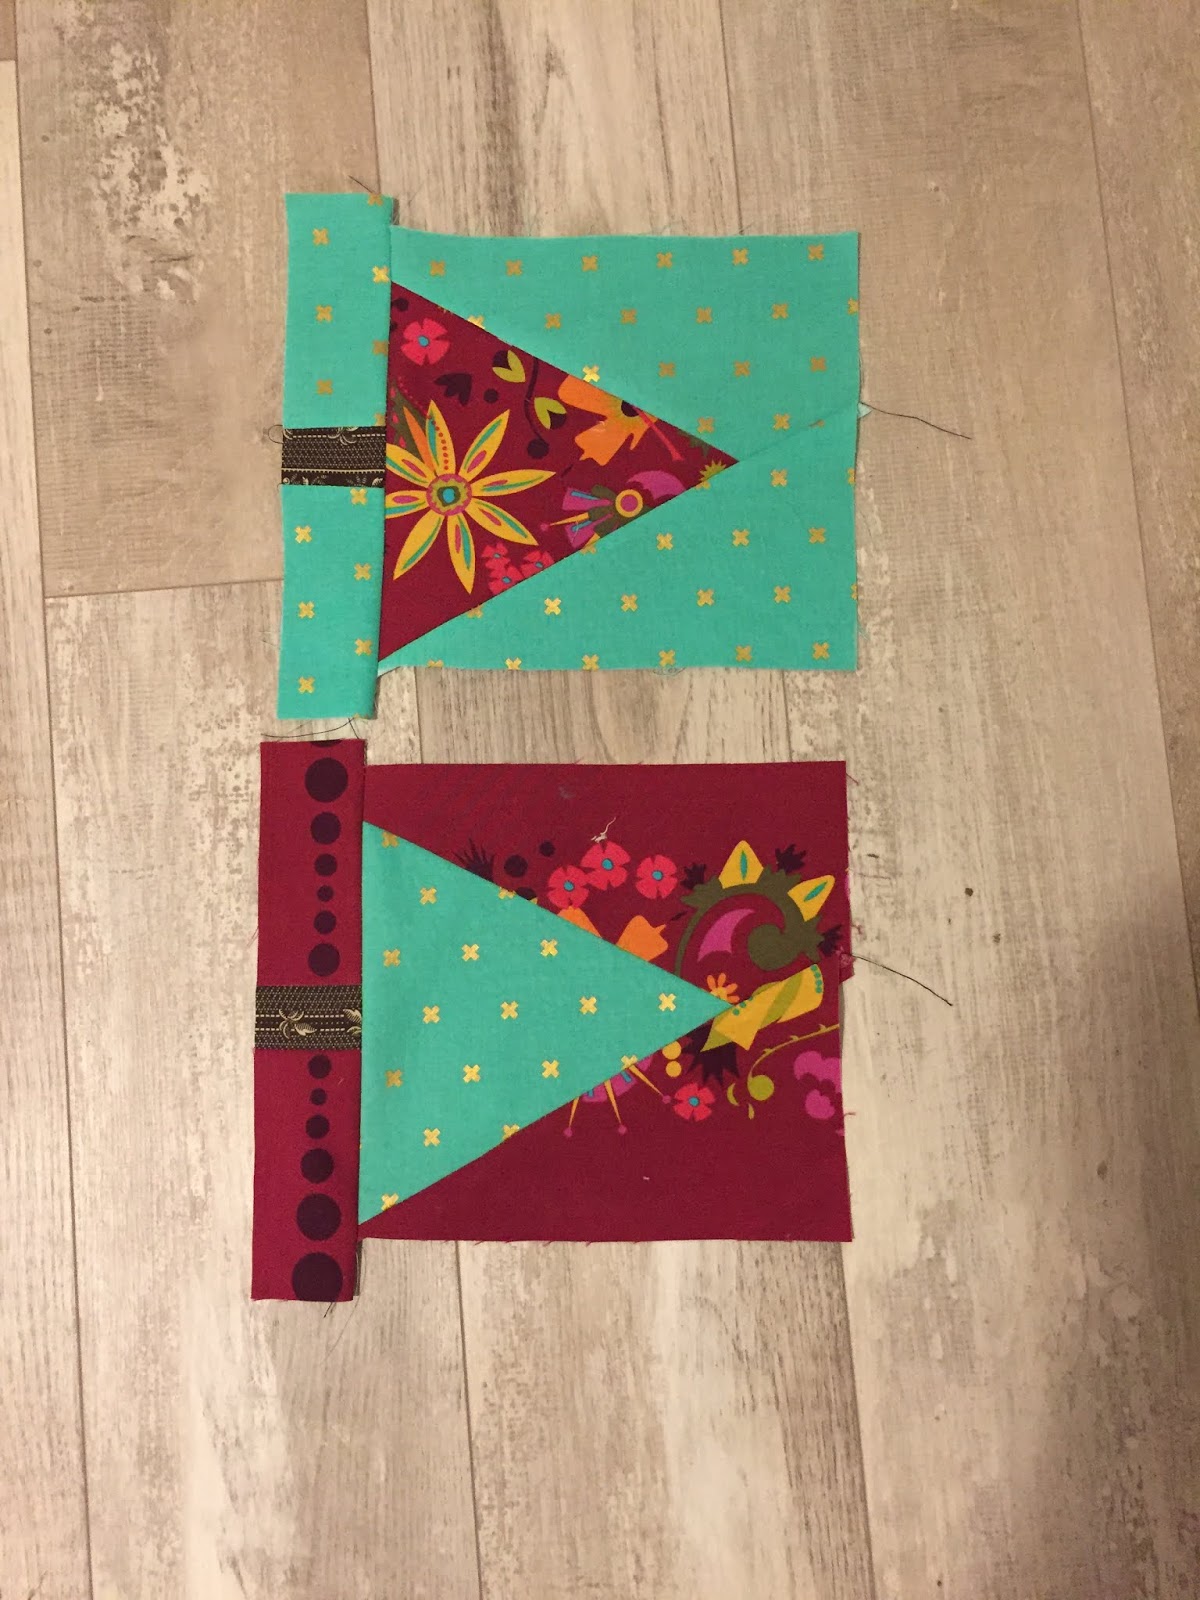
Here are my selections for my block laid out ready to sew.


You may note that once I had sewn it all into the block I got some of the placement round a different way...oh well, stuff happens. I think as long as any directional fabric is considered and sewn the right way up, it should be fine. After all it is meant to be scrappy.

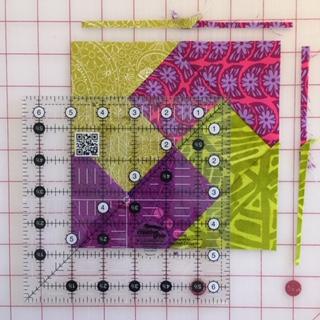
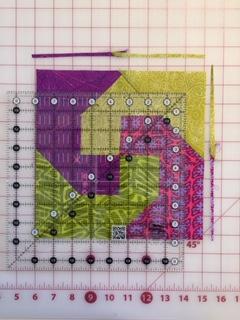
The following pictures are the sewing process I used. WARNING I tend to iron my seams open but I have shown a picture where you "spin your seams". There are plenty of tutorials online for how to do that. ALSO I leave my pins in when I sew and I know that is likely bad for my machine, but I am a little lazy and only occasionally hit a pin.

Chain piecing the four patches.

Four patches all in a row.

Spinning the seams.

Sewn layout  progress shot.

The back of my finished block showing the seams mostly ironed open but with one four patch with the seams spun.

And the finished block.

It would be great if you could all comment on my IG post of my completed pink block what colour you plan to do so I get a lovely variety of colours. @helenmalanquilter

Happy sewing and I really look forward to seeing your blocks.

Helen


Hive 2 September Tutorial

Hi all. I'm Rose from New Jersey and I have chosen a fun scrappy block for this months block.  It goes together quickly and easily so I hope you will make 2 of them for me.


This block is a small plus block using scrappy low volume (here is just an example of some that I have already made) and bright happy colors. Solids would be fine. I also like Batiks.


To start you will need for each block:

2 - 2.5"x 2.5" color block
1 - 2.5"x 6.5" color strip
1 - 2.5"x 2.5" black and white
2 - 2.5"x 6.5" scrappy low volume
4 - 2.5"x 2.5" scrappy low volume


To start, lay out the fabrics like this.  


Sew together the 2.5" square low volume and and the color blocks.  Then add them to the center color strip.  


Next sew the black and white square to the top low volume strip and the other low volume strip to the plus. 


 Finally, sew the top strip to the block and you are done.You will have an 8 1/2" block.  It took a half an hour to complete these two blocks, including choosing fabrics, cutting, and sewing. They are small so I hope you will make me 2 blocks. It will take quite a few for a quilt. I better get busy.


 Hope you like my blocks!  If you have any questions feel free to ask. I can't wait to see how scrappy this will look when it is done. Thanks!