Monday, August 1, 2016

Hive 8 August Tutorial

Happy August, bee mates!  The weather  is hot, the kids are going back to school, I turn 35, and I am your Queen, Queen Lee of Central Connecticut.
We are going for fun , quick and easy this month, with some slashing and sewing.  I missed out on that gorgeous washi tape fabric from a couple years ago.  I can't find it, I want it, and y'all are going to help me make my own.  
You need: 9 5" or larger squares of dark grey to light black fabric.  Think Kona Steel or darker:

And a pile of strings.   You know those "too skinny to use for anything else" scraps you've been hoarding?  Well, now you can use them.  Don't have any?  Okay, weirdo, cut a bunch of bright fabric that contrasts well with your grey about 1 inch wide by about 4 or more inches.
Construction:
Take a grey square with a string RST and sew a quarter inch in on the side you plan on slashing. Then cut along the edge of the string. Press open. 

Take the grey piece that you cut off when slashing and lay it RST on top of the sewn in string.  Especially if you have a 5 inch square, be careful with placement, as we want these to remain 5 inches square when finished.  If you have opted to start with a larger square, then there is more leeway for trimming the square down.

Sew that bad boy down and press as before.  Want to add another string?  Cool, me too.  Rinse, lather, and repeat:
Make nine of these blocks, squaring them all up to 5".  You may choose to make the background greys scrappy or use a single fabric.  You may choose to add one or two strings to each five inch square.
Finished block with a single fabric:
Here is a finished block with different grey background fabrics:
To be honest I like the single background fabric better, but once all the blocks are pieced, I think they will all come together nicely. 
Let's have a Q&A:  is there a fabric or fabric line that you missed out on that you wish you hadn't?
Happy sewing bee mates!

Hive Two July block


I am so sorry that this block is going out late........I was not able to get to the post office to mail it on Saturday.

Wonky nearly drove me batty!  LOL. I hope that this is satisfactory and can be used in your quilt, Marga.


Sherry V.


Edited 8/1/2017  I don't know why the first picture would not upload. . . . but I was finally able to get it to show up.

August Block, Hive 2

Happy August! 

Hi everyone! I’m Miranda, better known as TheGeek. I’m a math and science teacher for grades 7-12 in the beautiful mountains of Northern New Mexico. I started quilting a few years ago after I lost my job for being in a car accident (sprained wrist = no ice cream scooping for a few weeks. No ice cream scooping = no job) and got stuck at home in the boonies for several months. It’s become a bit of an obsession, and I’m now the youngest member of my local quilter’s guild by a couple of decades (I'm 26 this month).

I’ve selected the Urban Chicken block, tutorial here (https://wombatquilts.com/2013/10/23/playing-with-urban-chickens/) with some adjustments. I’m not fond of 4x4 blocks, or any square-based block that doesn’t have a defined center, so my block will be a 5x5. It should finish about 15" to 15.5”
Here are the ones I've made already

A note on fabrics: I’m doing this one in all colors, but please, no brown and go easy on the pink. I like to combine my pinks with reds whenever I can, but if you want to do a whole pink block, just please try to veer away from hot bubblegum pinks. Try to stick with tone on tone fabrics, solids, blenders and the like- if you have a green block, for example, I’d prefer there not be other colors in it, but black and white bits are fine. For the white parts, off white, white, white with a small black print or white-on-white patterns are all super okay. I’m using solids because I have very few of the aforementioned options. 

I’m a sucker for polka dots and botanical prints. 

For each block you need:
5 shades of the same color (I used FQs)
White scraps

Cut:
1 strip 3.5” by 18” from each colored fabric. 
10 pieces of white scrap at least 2.5” wide
I cut my white scraps in triangles to limit waste, but you don't have to.


Make the base:
1. Cut 1 3.5” square from each strip and set aside
2. Sew all 5 strips together lengthwise with a 1/4” seam allowance and press the seams to one side. 
3. Sew one end of this strata to the other to form a tube
4. Cut the tube into 4 3.5” wide sections and unpick each in a different location. 
5. Spread the strips out and arrange in whatever way suits you. Nest the seams and sew into a 5 x 4 block with 1/4” seams. Press seams open

Make the hens:
1. Lay a piece of white fabric diagonally over a colored square. Sew a scant 1/4” seam on the INSIDE of the diagonal. Press outward and square up.
2. Repeat to make the other side. 
3. Please make sure there is at least a generous 1/4” at the top of your triangle so the chickens don’t lose their heads. 
4. Arrange chickens in a strip and sew together with a 1/4” seam. Please make sure your chickens are all facing the same direction (up or down)
You'll notice that some of my chickens are a little...broad in the beam. No worries! I love fat chickens!
5. Sew chicken-strip to one side of the base block. 

6. Press seam open
One of these chickens has a broad side sewn against the block. I don't mind this either.
HAPPY STITCHING!

Hive 9 August Tutorial

Hello Hive mates.
The day has finally come for me to have a turn to receive some beautiful quilt blocks, and I am so excited. There are so many blocks to choose from, it was a very difficult decision. I originally was going with a butterfly paper pieced block from Lillyella, but she has 3 different butterflies and they are paper pieced, so I did not want to confuse everyone with which one, and how much to enlarge the pattern, how to paper piece, etc. Maybe next year! 😀
 
We have been away on local camping vacation for the last weekend, and I have just gotten caught up with all my sewing before we left, and realized while I was there, that it was the end of the month and it was my turn next. I ran home one day and had to make a quick decision on my block. Turns out, I love this one more than any other the other three that have been on my list for the last three years.
 
I hope you will enjoy making the Wonky Pinwheel Block as much as I did.
 
 
I found the block from here.Greenleafgoods Wonky Pinwheel
 
Here is my tutorial -
 
Main Fabric-
I really love bright colors, geometric patterns, and low volume fabrics.
This is a little inspiration fabric.
 
Please be creative.
I ask that you avoid dark colors like black, brown, gray, navy and maroon. No batiks!
A little novelty is OK, especially if it is sewing related.
You should be able to use all scrap strips for this block.
The largest piece I used was 3 inch by 5.5 inches.
 
Background Fabrics-
I used Kona Snow for my background in my tutorial, but would love for you to mix it up with low volume fabrics. The fabrics do not have to match, and can be white or off white with small print or low volume designs, like these. There can be some colored print, but try not to use colored fabrics.
 
Photo courtesy of Pink Castle Fabrics
 

Start by cutting 16 squares, each 3.5 inches,  out of your background fabrics.

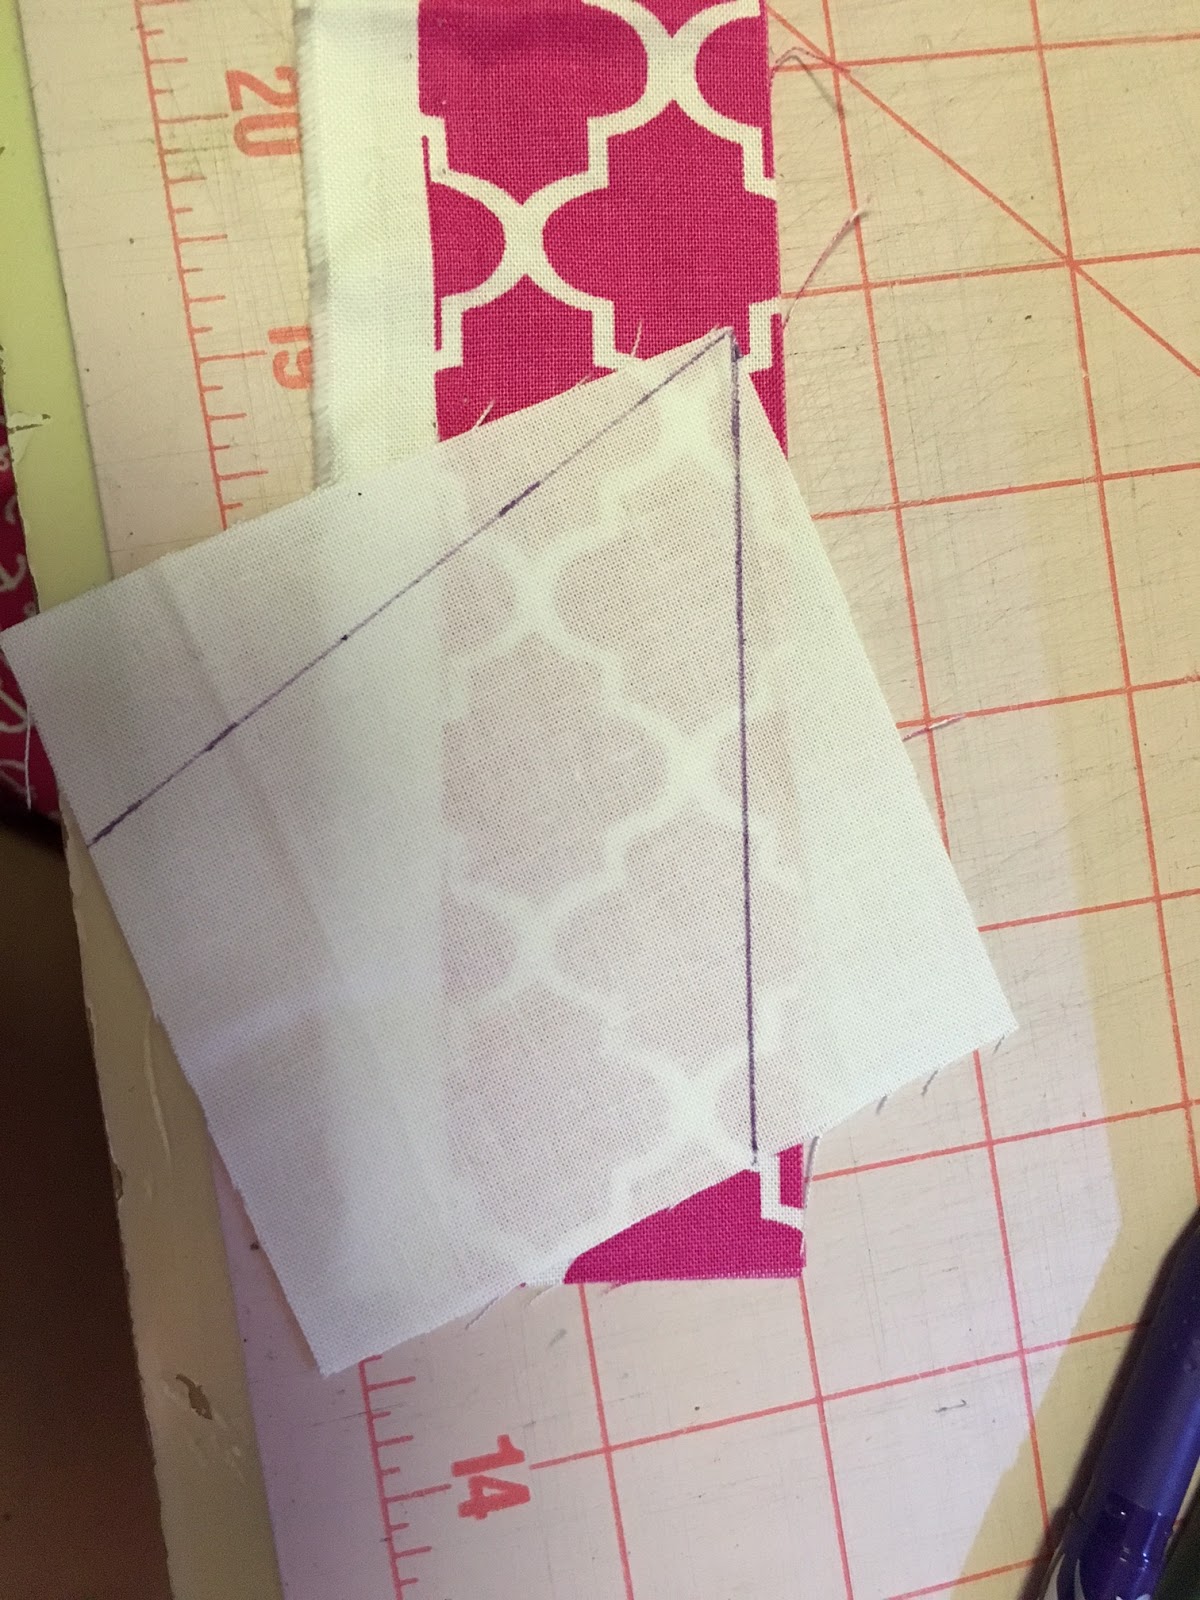
On the back of each square, draw two lines coming from one corner. This should be wonky, so try not to draw the lines in the same place on both edges. Remember that these pieces you will make will eventually be sewn together, so do not make the lines too close to the edge, as that fabric will be lost in the seam when the whole quilt is assembled. (For example: on this square on the lower left side, the upper line is too close to the edge)
 

For the next two seams, try to keep the images close as you are working, so that you line up the fabrics under the background correctly. I did not, and I ended up doing a lot of seam ripping while doing this block.
 
First -
Place a main fabric face up, and lay your neutral fabric on top with your lines facing up, and the point that you drew facing away from you. 
You will be sewing on the line you marked, so give yourself approx. 1/4' overhang for the seam.

 
Sew on the line. ( I did the first seam on each of my 16 pieces, one right after the other, (chain pieced) so as to save some time)
 
Press to the dark. Do not trim yet. (I prefer a dry iron press over finger pressing)


NEXT -
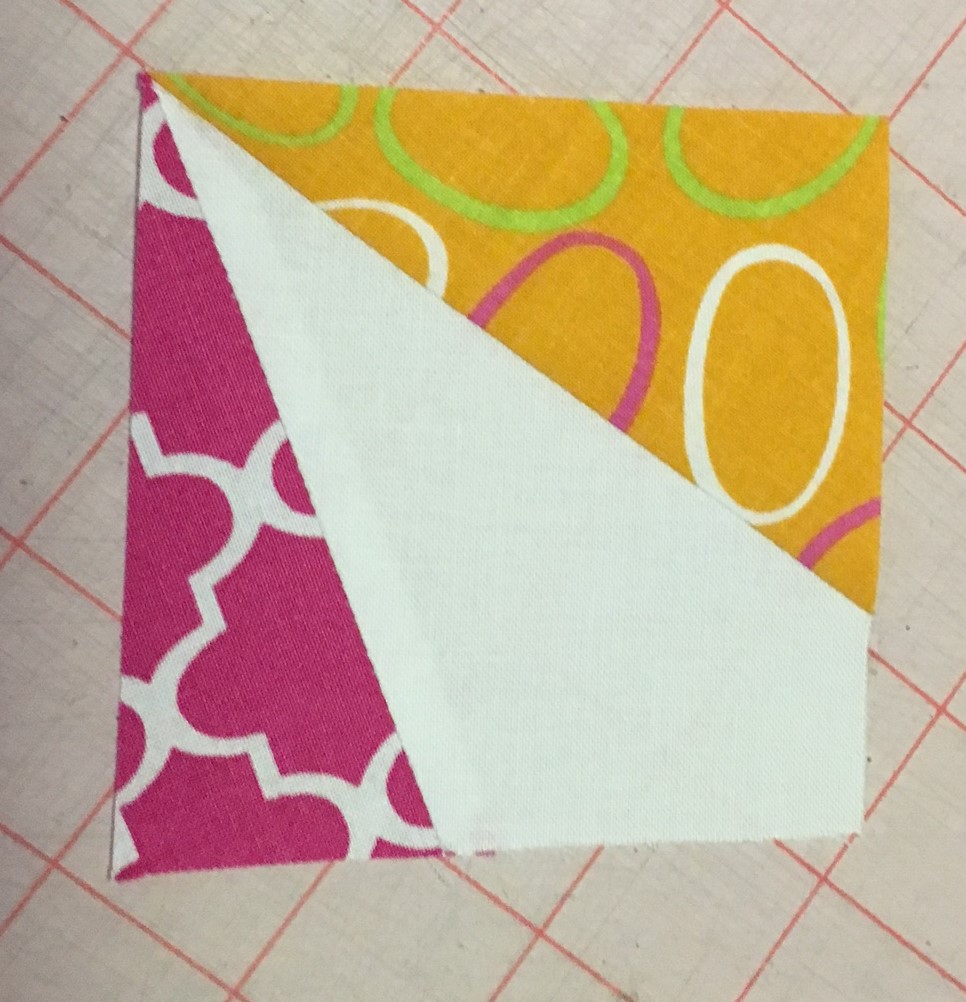
Lay your second fabric face up on your work table. Place your second line with the point facing toward you. (The new fabric is face up, and the one you already stitched on is face down)
 
Sew on the line (for all 16 pieces) Press to the dark.
 
At this point, I used the exposed background fabric corner, to line up my ruler and trim the excess fabric off to get back to the original 3.5 inch square. I did not remove the background fabric because it helps to control the number of seams on the back of the block.


You will have 16 of these finished pieces.
We are ready to assemble.
 
Taking 4 pieces at a time, you are going to place the upper left and lower right pieces with their points facing to the center. The upper right and lower left will have their points facing to the outside corners.
This creates the Wonky appearance of the pinwheel.
 
Arrange the other 12 pieces in the same manner to create a block of 4 sets of 4.
(Please use a scant 1/4" when piecing these together)
You will assemble in rows.
Press the seams of the first and third row to the right, and the second and 4th row to the left.
Nest the seams, and sew the rows together and press those horizontal seams open.
 
 Your block is complete.
Your block should finish off at 12.5 inches.
Please do not trim the block if it comes out larger, just send it as is.
 
Thank you so much! Please email me with any questions.
 I cannot wait to see all the beautiful blocks that will arrive!


 Just for reference, I wanted to show the NOT correct way to line up the 4 patch. You can see how this is beautiful together, but does not make a Wonky appearance.
 
Heather!


Hive 1 August Block Tutorial...


Hi everyone, I hope you're all finding a way to stay cool during the summer heat.  Several years ago, an old friend decided she didn't have time to make a quilt she had purchased a kit for and she no longer loved the fabric in the kit. She offered me the kit and  I took the kit with the agreement that I would do something with the fabric and when I was done she could donate the quilt to her charity of choice. So I'm going to ask all of you to help me keep this promise. I've decided to use the Tic Tac Toe block. There is a great tutorial at Blossom Heart Quilts. This is a fun and easy block to make, I had one block put together in 30 minutes.


The photo above is the fabric that came in the kit. As you can see it's all bright yellows with medium blues. I went into my stash to find some fabrics that compliment these fabrics.
I pulled these blues and yellows from my stash. This block requires 3 fabrics, my request is that you use bright yellow, along with medium blue and a white solid or white on white fabric (please no cream, tan or gray).

Cutting Directions:
4 – 4.5″ x 4.5″ print A (blue)
1 – 4.5″ x 4.5″ print B (yellow)
12 – 2.5″ x 2.5″ print B (yellow)
4 – 4.5″ x 4.5″ background (white)

The block will measure 12.5".

First draw a diagonal line on the back of all twelve, yellow 2.5" squares with your favorite marking tool.

Sew a yellow, 2.5" square to the bottom right hand corner of a blue square. Trim away excess fabric and press towards the yellow fabric.

Sew a yellow, 2.5" square to the bottom right hand corner of a white square. Trim away excess fabric and press towards the yellow fabric.
Sew a yellow, 2.5" square to the top right hand corner of the white squares. Trim away excess fabric and press towards the yellow fabric.
Layout the squares as shown and sew each row together.

Combine the rows to finish the block.


I made a few more blocks so you could see what they look like together. I really like the secondary pattern that emerges with this block and I think this will end up being a fun cheery quilt. Have fun and please email me if you have any questions.

August Quatrefoil Block for Mary Hive 7

I'm very excited to be the Hive 7 queen bee for the month of August. I'm asking my hive-mates  to sew the Quatrefoil block designed by Jennie of Clover & Violet.

It's a fairly easy block to sew though it is really important to look carefully at Jennie's diagrams to sew each of corner block subunits correctly (Hint: Even though they look the same, two of the corner block subunits are the mirror image of the other two corner block subunits).
The colors I have chosen are teal, navy, lime green, and low volume fabric. I've sewn two example blocks to show color placement:


Below is a pic of a fabric pull using my color choices:

For inspiration, you might also want to check out Sarah Goer's Swoon blocks. I love her fabric choices for her swoon blocks.

I would prefer tone-on-tone or small-scale modern prints or solids that have some pizazz like Grunge, Painter's Canvas, and Cross-Hatch, and for the low-volume, I'd like grey or black on white (no cream or any other colors).
If you have any questions, please feel free to leave a comment or email me.

Thanks so much,
Mary


Modern Summer Sampler, Hive 5, August ,2016

Hive 5:

This has been a summer of sunshine and beach trips for our family.  We have a new den to hang out in.  I am thinking of keeping this months blocks simple and modern & mysterious.   That's right.  We are making a sampler.  As variety is the spice of life, I am looking to see what your favorite 15" block  finished.  Please think beachy, coastal colors.  Solids or Modern Prints only !


Shades of Aqua, turquoise, tans gray,pale green,beige, and a touch of rust.
Here are my upholstery fabrics.

For some ideas, go to my friend Jennifer Dick at 42 quilts , Modern Monday's posts are here:

http://www.42quilts.com/p/modern-monday.html?m=1


Here's a sneak peek at some block parts and my improv star.


Any questions😏  ?  Give me a holler.
Have fun with this.  Wonky is encouraged! 
MJ