

Hey - I'm Tasha and if you ever get the chance to meet me in person, you would know I love to have conversations and be social! I love to know about people, I will ask questions to know more about something they are talking about, and I will ask follow-up questions that might lead to other conversations. One of the things I have learned in the first 6 months of being a part of StashBee is that people can be very passionate about the way things are done to their block. And, sometimes, its just not our style or we haven't built the skill set for it yet (which is ok and we knew this signing up for the exchange).
So, I want to know about YOU! I want to see your personality. I want to see what you enjoy the most. I want to know your preference of pressing to the dark side, the open side, or -- gasp -- the light side (is this a thing?)! Nestled seams or the same direction? So, this month's block is a figurative, "let's sit down, have a drink together, and get to know each other". I am calling this block the "Sip & Sew Social".
You can search any platform and get dozens of variations on coffee cups, mugs, tea cups, etc. and instead of looking at them all and trying to decide, I just sketched out my own. And, because I want you to show me your personality, for the most part...I don't care what your preferences are.
- Seam allowance: .25" or scant .25" - pick your favorite.
- Fabric Choices: show me your personality and favorites; patterns, novelties, solids, favorite animal, hobby showcase, scrappy, matching thread or using up that ugly one you can't get rid of...any are perfectly fine (maybe keep it to cottons though)
- Block size: aim for 8.5" x 8.5" unfinished - a little over, a little under, a little wonky - I don't care. Don't worry about squaring up, but if you do, thats fine, too.
So what are my "hard rules"?
- Silhouette: I am asking that the mug be on an isolated background. Please do not make it look like it is sitting on a table. I am ok with scrappy background if you want, but be mindful the mug still "floats" in the block.
- Contrast: I have no preference if you want a dark mug on a light background or a light mug on a dark background. I just ask that you can have a contrast between the two so you can see the shape of the mug.
- Embellishments: If you want to add a tea bag tag, great! Need a spoon to stir your drink, put one on. Steam from your mug - okay! I only ask that whatever you add is flat enough I can quilt over (so, no buttons or unsecured strings, etc). Also, please keep anything inside the edge of the block by .5" (so when I sew it together with .25" seams, there is still .25" left of just background and the embellishments aren't touching the edge of the block.)
Fabric & Supplies Requirements
Supplies:
- Sewing Machine
- Iron and Heat-Safe Ironing Surface
- Ruler, Rotary Cutter, Cutting Mat
- (optional) Pins
- (optional) Marking Pen(cil)
Background Fabric:
- [A] (2) 8.5" x 1.5" [top/bottom edges]
- [B] (2) 6.5" x 1.5" [side edges]
- [C] (2) 1.5" x 1.5" [snowballing bottom of mug]
- [D] (1) 3" x 1.5" [under handle]
- [E] (1) 2.5" x 1" [inside handle]
- [F] (1) 1.5" x 1" [above handle]
Mug Handle Fabric:
- [G] (1) 2.5" x 1"
- [H] (2) 1.5" x 1"
Mug Body Fabric (Get Ready to Shine!):
- [M] (1) 6.5" tall x 5.5" wide -- you can cut one single piece of fabric for this or piece together anything to get up to this size

Block Assembly
Handle Assembly:
(Pieces after 1. iii)
i. (top handle)Take 1 of your smaller mug handle pieces [H] and sew it to the smallest background piece [F]. Wrong sides together and press seam.
ii. (side handle) Sew the mug handle piece [G] to background piece [E]. Wrong sides together and press seam.
iii. (bottom handle) Take the other smallest mug handle piece [H] and sew it to background piece [D]. Wrong sides together and press seam. (See photo above)
iv. Take the side handle unit [G,E] with the background fabric to the left and sew the top handle unit [H,F] above it with the background fabric to the top. If your handle fabrics aren't touching each other, it's incorrect. Wrong sides together and press seam.
v. Take the unit constructed above [H,F;G,E] with the top handle unit facing up and sew the bottom handle unit [H,D] to the bottom with the background fabric on the bottom. Wrong sides together and press seam.
Your finished Handle Unit should look like this:
- Mug Body Assembly:
i. Take your mug body piece [M] - whether it's a single cut of fabric or a pieced together cut - and lay it so it is 5.5" wide and 6.5" tall (right side up). To snowball the bottom corners, take both of the square background pieces [C] and place them in the bottom corners of the mug body with the wrong sides together. You will be sewing outside side edge corner to bottom inside corner on these little background blocks, so if you want to mark the wrong sides from one corner to the opposite, now is the time to do this. With something this small, I will just eyeball it and it will be close enough but marked it for the demo. Do what you are most comfortable with.
ii. After checking the corners were sewn on correctly, snip excess fabric off leaving a .25" seam, and press.
(Photo for 2. i.) 
(photo for 2. ii.) - Mug Body Gets a Handle on Things:
Layout your Mug Body Unit so the snowballed corners are at the bottom and the pretty side is up. Take your Handle Unit and place it wrong side up on the right side of the Mug Body Unit. Sew and press seams. Your completed Mug Unit should look like this:
- Give it Some Space:
i. Take your Mug Unit and sew on the background strips [B], one to each of the right and left sides. Use .25" seam allowance and press when done.
ii. Finally, sew on the top and bottom background strips [A]. Sew wrong sides together and press your seams. Flip it over and give it one more press on the front so it's nice and flat. It should be roughly 8.5" x 8.5" but its ok if it's slightly wonky, smaller, or larger.
(Photo for 4. i.)


|
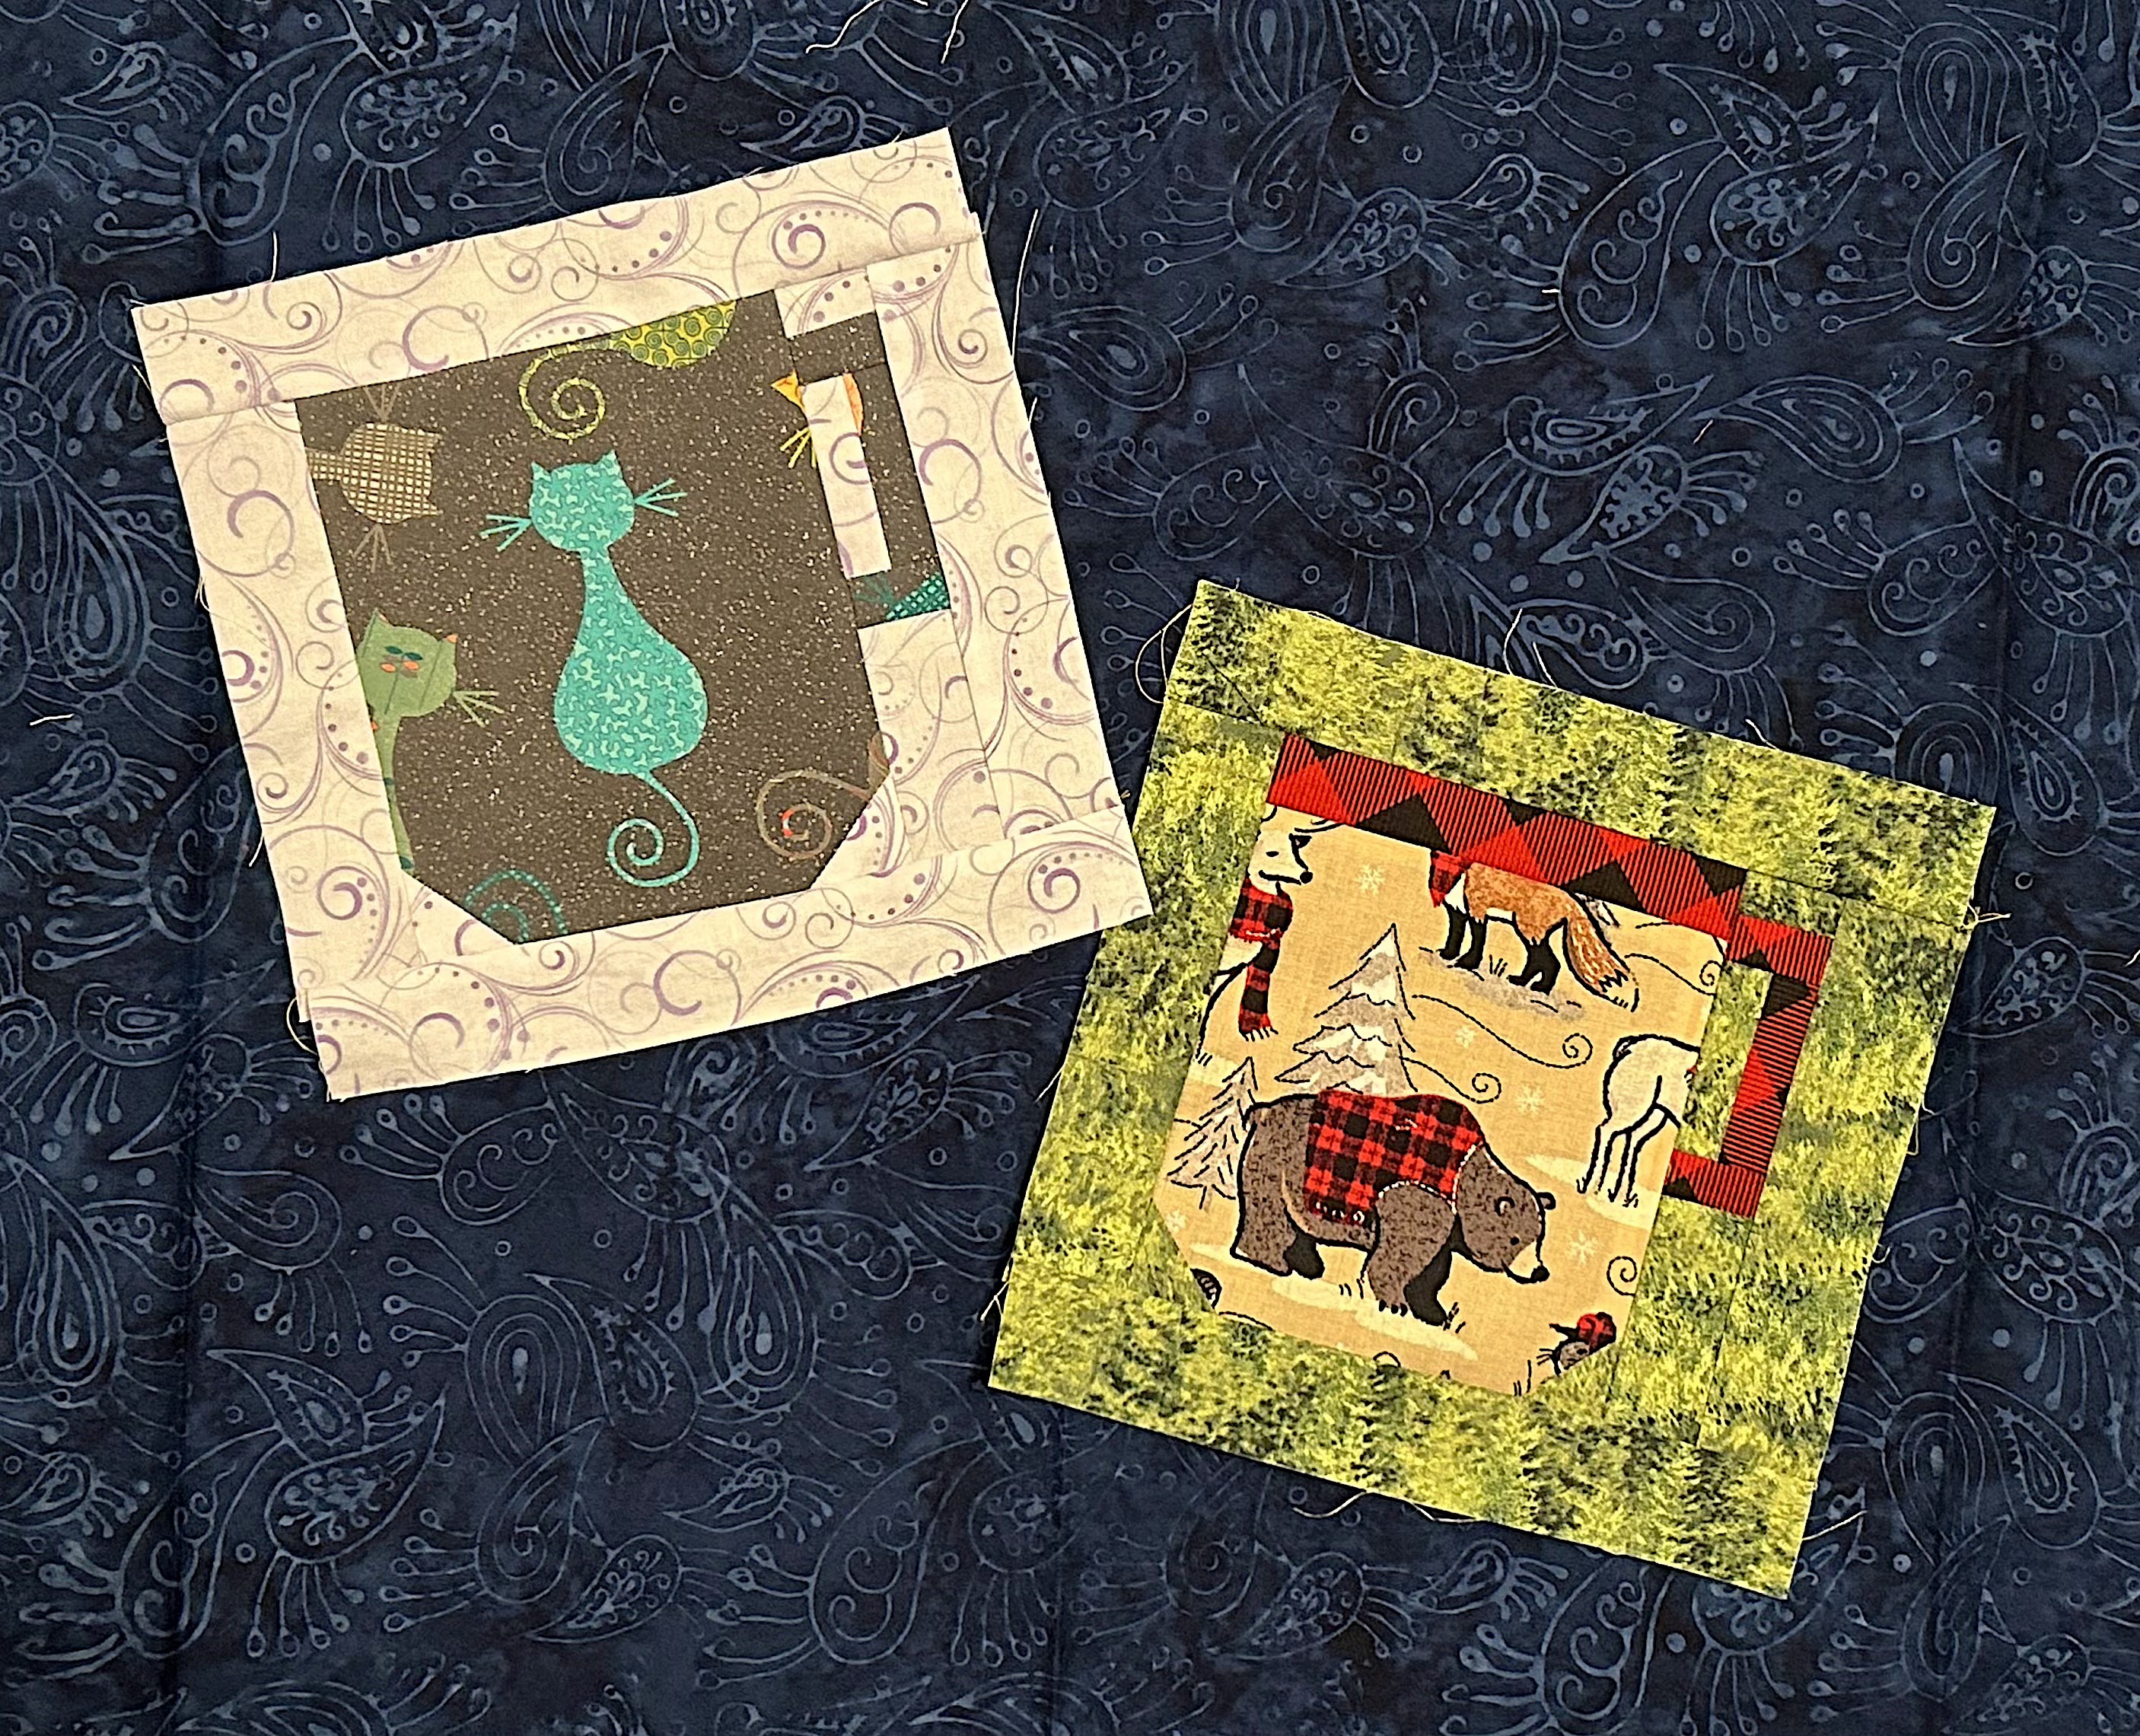
| Finished block (photo for 4. ii.) |
This block not quite your cup of tea and want to go rogue? I'm ok with this!
- Are you an appliqué lover? Go ahead, cut out a 8.5" square background fabric and follow the guidelines for the block, and have fun appliquéing your own version
- Are you left handed and want the handle on the other side - go for it! (let me know if you want me to modify the instructions for you)
- Feel free to use a different cup! - Maybe you like wine instead and want to freely find a wine glass pattern, go for it. Or, maybe you want a travel coffee cup or a small china tea cup. Thats all ok, too!
- If by going rogue your block size needs to change - thats ok! Please have roughly 1.25" background around the edge of the mug/cup/glass (1" when finished) and avoid putting anything in the .5" edge so that when it's sewn together with .25" seams there is still .25" background
Have fun with it and thank you for telling me about yourself with this block! Happy Sewing!
No comments:
Post a Comment