The 12 ½” square block uses a few partial seams which aren’t difficult
if you’ve used them before. If you haven’t sewn partial seams, I’ve provided
directions and illustrations below. If the directions aren’t clear, there are
tutorials on partial seams on the internet. Here is a YouTube video: https://www.youtube.com/watch?v=UnYll1fzAJM
My color selection is aquamarine (or medium turquoise), butterscotch/goldenrod
yellow, crimson red and low volume white (preferably, grey on white; no creams
please). I tried the block with a medium gray before I changed the gray to
white-low-volume. So, the block construction steps show the gray fabric. Please
use white in your block instead of gray.
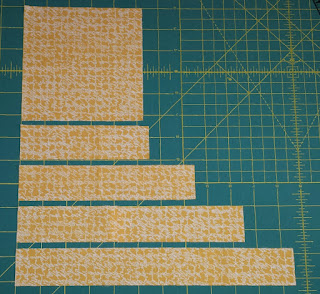
From each color, cut the following:
1 sq. 5 ¼”
1 rectangle 1 ½” x 5 ½”
1 rectangle 1 ½” x 7 ½”
1 rectangle 1 ½” x 9 ½”
1 rectangle 1 ½” x 11 ½”
Cut the 5 1/4“ square into 4 pieces by making 2 diagonal
cuts as shown below. You will only need 1 triangle per block.
Arrange the triangles in color order as illustrated below.
The color order is important.
Sew aqua and white triangles (also the red and butterscotch)
together. Press to aqua (red) side. Join these sections together with seams
facing opposite directions. Press & trim to 4 ½” square if necessary.
Lay out the 5 ½” strips next to the same color in the
square.
Starting with the butterscotch strip, sew a partial seam
from the crimson end to roughly the middle. The ending point does not need to
be precise and please don’t back tack. Press toward strip. Next, sew the
crimson strip to the square (the side will include the crimson triangle and the
end of the butterscotch strip). Continue in the same manner for the white low volume
strip (shown in gray in the picture) and the aqua strip, pressing toward
strips.
Finish the partial seam by pinning the unsewn part of the
butterscotch strip to the unsewn butterscotch triangle side.
Sew the partial seam by starting about ½“ from where your
first partial seam ended (overlapping stitching). Again, please don’t back
tack.
Arrange the remainder of the strips as shown below. Each color
will form a continuous ring around the block. The block should finish at 12 ½”
square.
Begin the second ring by sewing a partial seam with the
crimson strip attaching to the butterscotch strip from the previous round.
Finish each ring/frame of the block in the same fashion.
Wha-la!!! A beautiful Which Way block! Please don’t hesitate
to contact me if you have any questions.


No comments:
Post a Comment