Saturday, July 1, 2023

Hive 1 - July Tutorial - Tiny Tiles for Chris

Hello Hive Humans:

Being so busy in the middle of summer (vacations and plenty of outdoor beach activities) I chose a very simple and fast block to make - a Tiny Tile Quilt by Purl Soho for the Fall.  I chose batiks because they make me happy!

I'd really love you all to embrace a Fall Spectrum of colors:  oranges, reds, greens, yellows, golds, browns and the like.  Please keep your choices to very small or solid'ish batiks. Maybe no blues, purples and blacks?  If this sounds too picky, you are free to ignore me! Also, if you don't have batiks, please select some fabric in your stash that looks like it could be a batik.

Here are some of the batiks I’m working with:


I noticed I don’t have many (any) reds or yellows so…

The larger background squares should be quilting cotton in either solid off-white or solid light tan.

Each hive member will make 4 blocks but please don't stitch them together. I will lay them all out on my design board for placement.


Fabric Requirements:

16  2" squares of (random) batiks

4    5 1/2" squares of off-white or light tan solid (quilting cotton)

Here is the website with a tutorial if needed:

Tiny Tile Quilt - Purl SohoPurl Soho

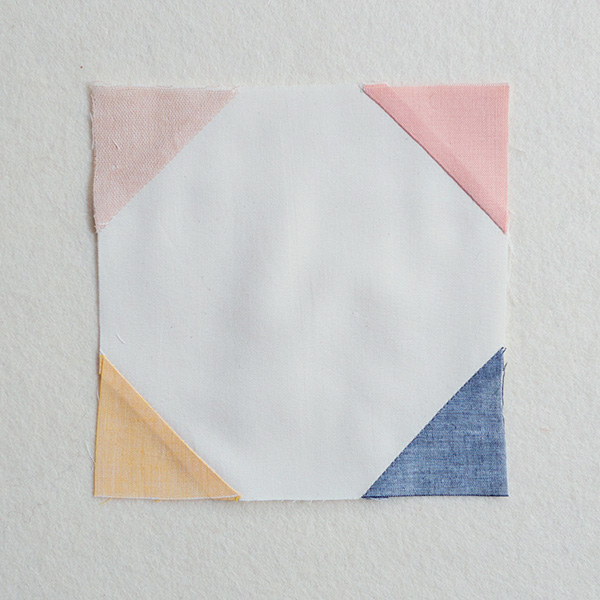
Start by cutting your 2" squares and place them in a bowl or bag to randomly pick 4 for each corner of your  5 1/2” background square.

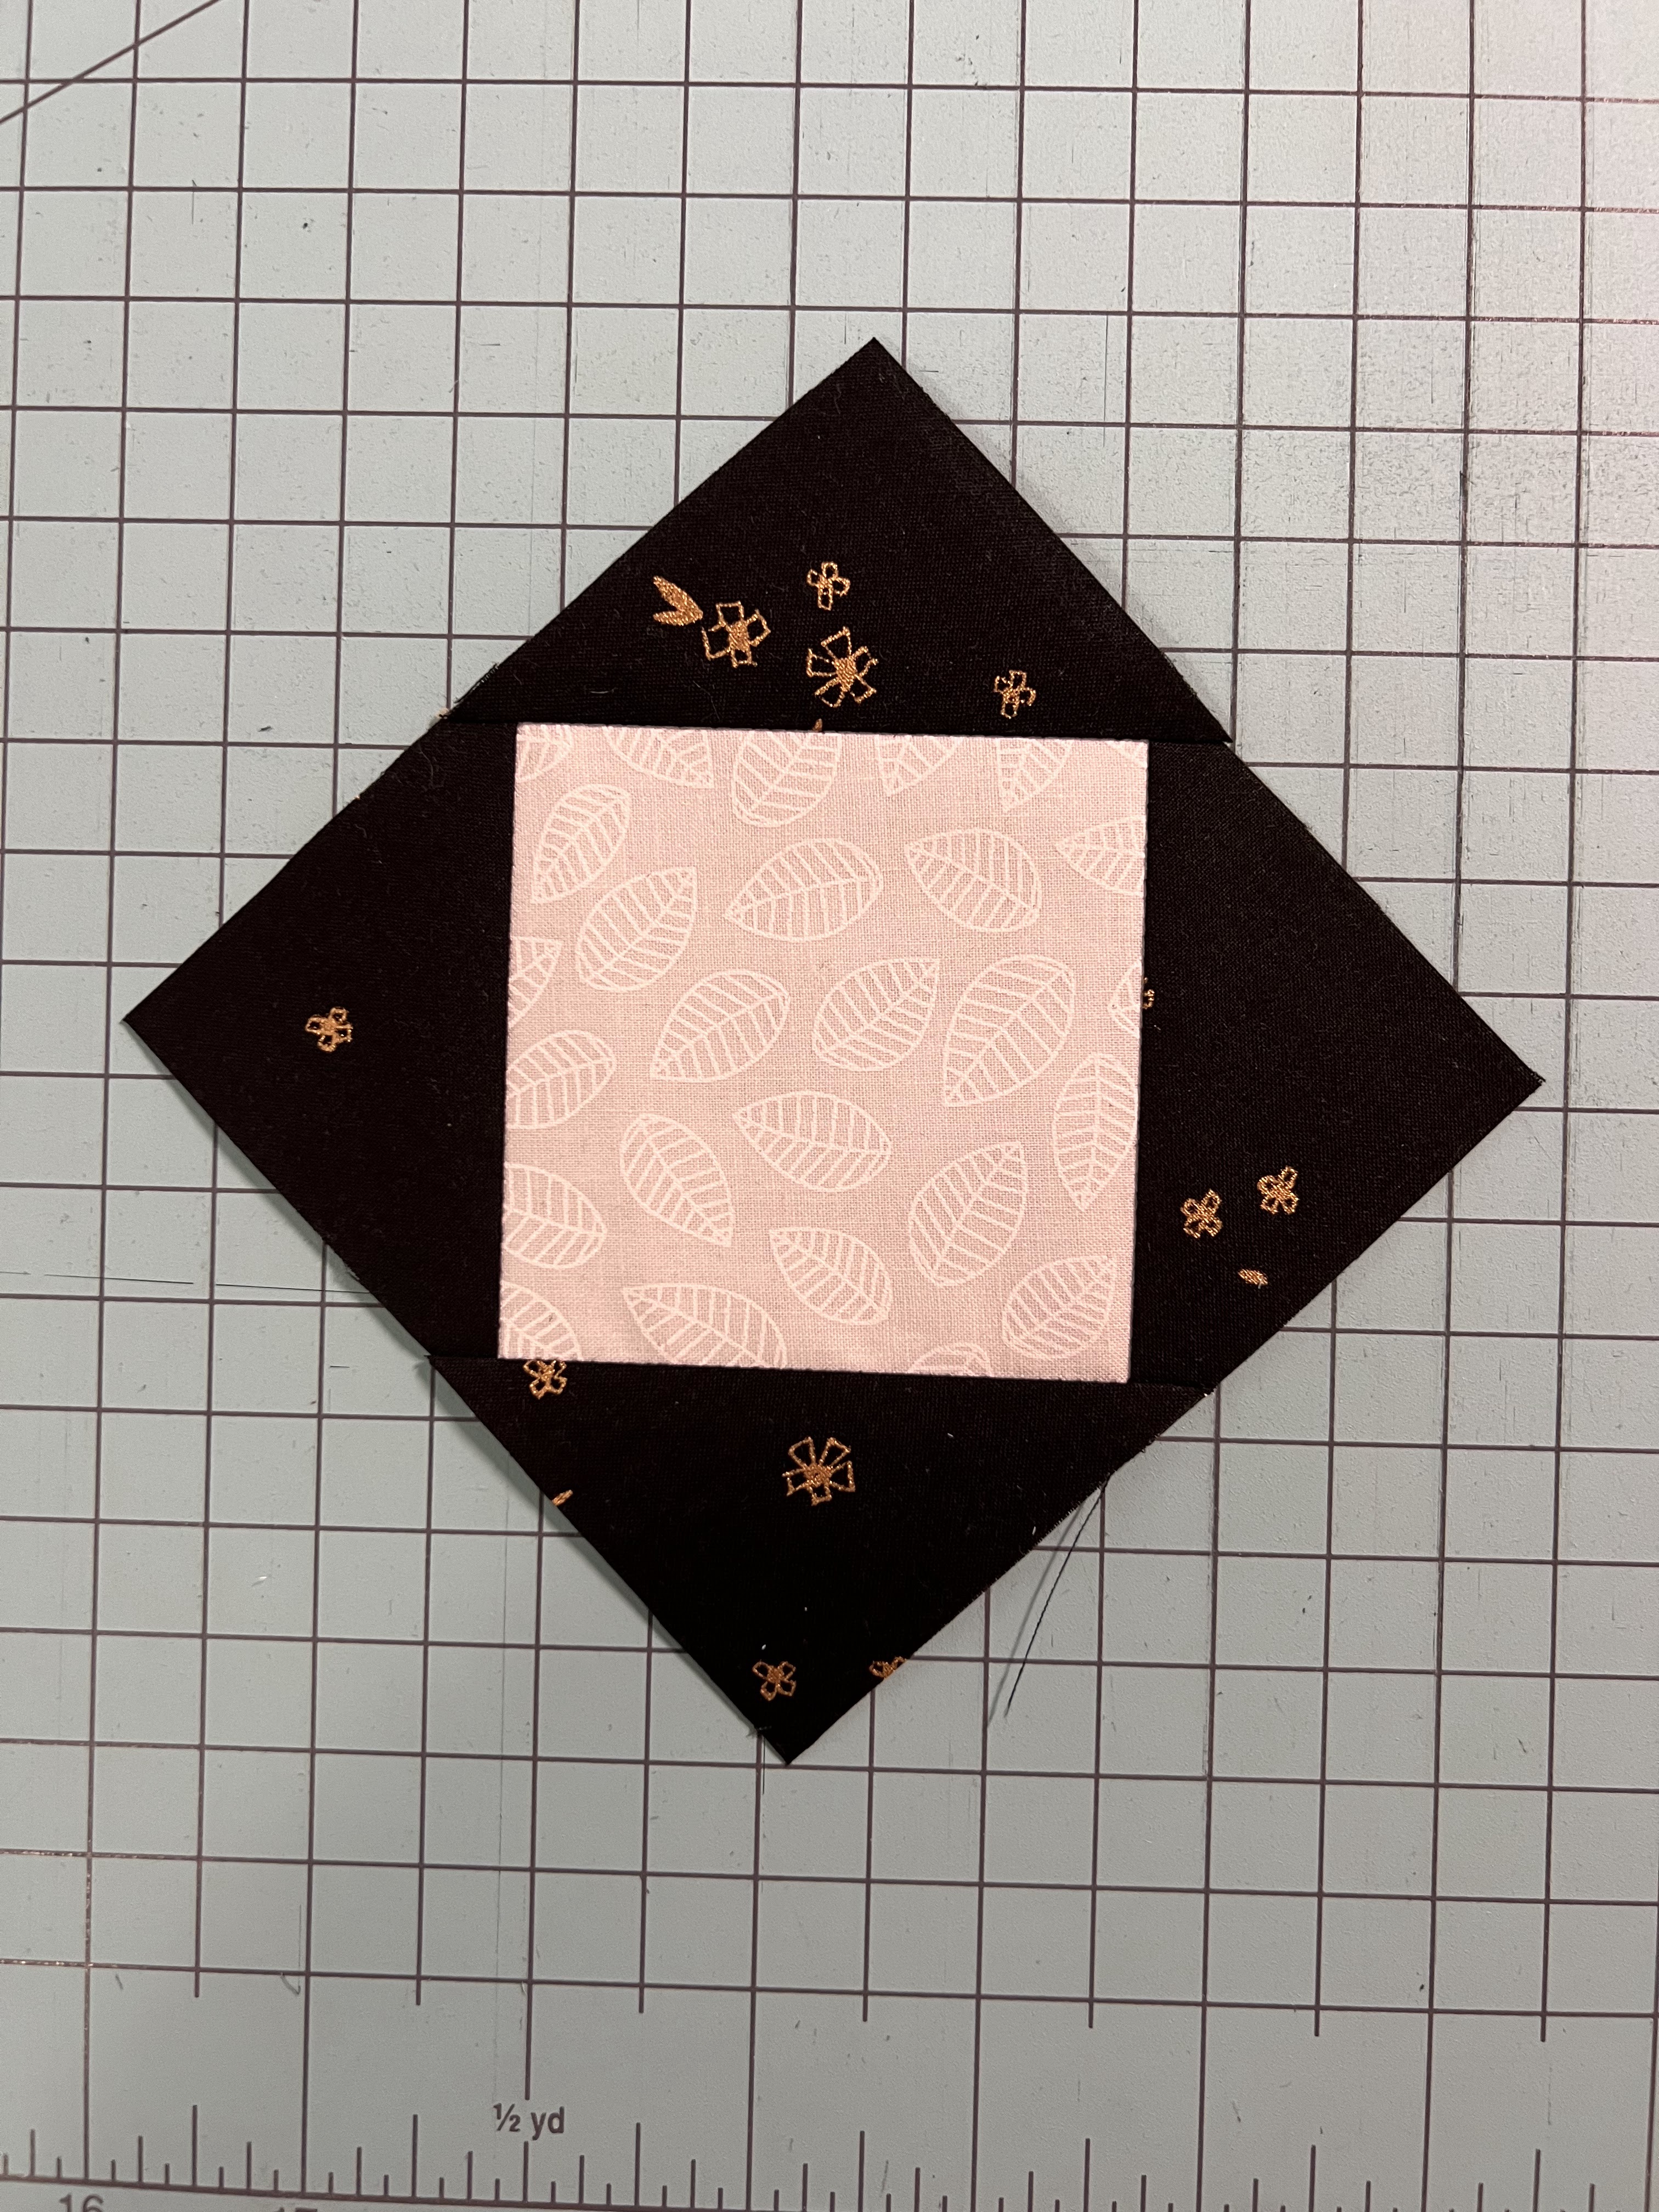
Draw a diagonal line on the back (hmmm...which side of the batik is the back?!) of each 2" square and sew one to each corner of your background fabric.  

Note:  A wise Quilty Pal once directed me to sew just on the outside of your drawn line - toward the corner - so that when attached, it will perfectly align with the bottom half when you fold it over to check.


Repeat on all 4 corners, remembering to be random in your batik picks.

Trim away excess to 1/4" and press toward the corners.

And then... YOU. ARE. DONE.

Remember to make 4 blocks total.


I hope you all embrace the simplicity of this little project of mine.  I am a confident beginner looking for quilt projects that will stay off my naughty shelf of UFO's!  Although it may not be great a skill-building block for most of you, it means a lot to me as a beginner seeking community and the joy of quilting!

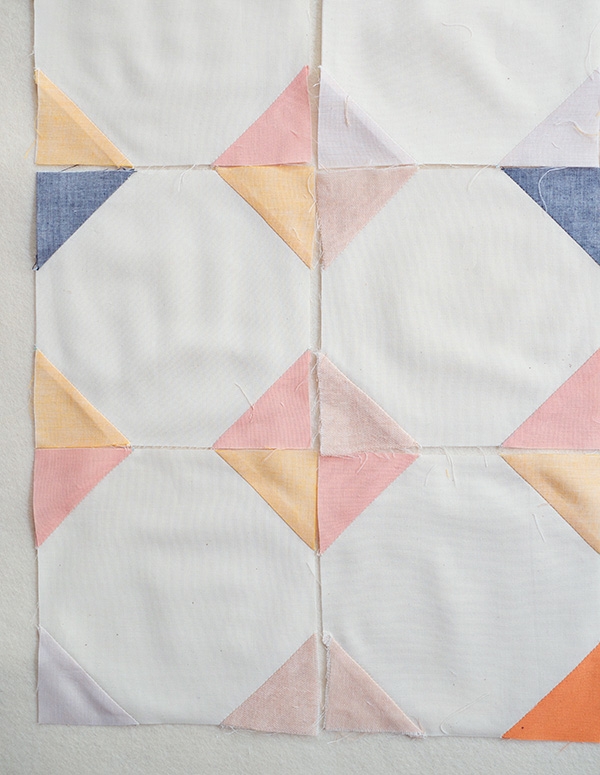
Here is a photo of the finished Tiny Tile Quilt by Purl Soho:


This may actually be my first project I will quilt by myself on my domestic machine, and the first quilt I will hand finish my binding!  My previous quilts have been finished with a Longarm computer program and machine binding.  That's the Big Plan anyway.

Happy quilting!

Chris

Hive 3- July Tutorial- Road to Grandma's for Liz

 Hello everyone!

I decided to go with the Road to Grandma's block from Patchwork square. Here is the link to the original tutorial. I wasn't a fan of how sparse the directions are, so here's my version of a tutorial to include 4 at a time flying geese! (makes it go by way faster!)

If you don't want to read through my tutorial and go with the link, please make the 12" version, which should be 12 1/2" unfinished.

Here are the two blocks I've made so far:


Here's the fabric pulls I did, which I later changed around:


Here's the colors I would like for the block, and amount of fabric needed for each one. For the pink and yellow, they can be any shade.

Black:   1- 2 1/2" x 20" strip
              4- 3" squares
              2- 2 7/8" squares, cut in half diagonally
White:  1- 5 1/2" square
              1- 3 3/8" square
Yellow: 1- 2 1/2" x 20" strip
Pink:    4- 3" squares
             1- 5 1/2" square
**I would like each fabric to NOT be a solid. Please no batiks or novelty fabric**

Step 1: Sew the black triangles (from the 2 7/8" squares) to the white 3 3/8" square. Use a 1/4" seam and press to the dark after. Trim to 4 1/2" square.
Step 2: Make 4 at a time flying geese! The sizes I have listed are so you can trim down to size. Overlap two of the pink 3" squares onto the white 5 1/2" square and draw a diagonal line. Sew a 1/4" out from the line on each side and then cut along the line. For the white and pink geese, press to the pink. For the pink and black geese, press to the black.

Next, add a 3" pink (or black, depending on which geese you're making) to the bottom of each of your little heart shaped pieces. Draw a line diagonally on it, and sew a 1/4" off of each side then trim. Again, press to the pink or the black.

Yay flying geese!!!!

(yes, I couldn't help myself)

Anyways, trim your unfinished flying geese to 2 1/2" by 4 1/2".You should have 8 total, 4 white and pink, and 4 pink and black.

Step 3: Sew your flying geese together like so and press the seam open-


Step 4: Sew your black and yellow 2 1/2" by 20" strips together, and press to the black. (I forgot to take a picture of this step with both blocks I made) Once pressed, cut eight 2 1/2" sections. Pair them up to make four 4 patches. Press the seam open. You should have 4 of these cuties total. 


Step 5: Last, but certainly not least, sew your block bits together. I web pieced mine and it helped ensure my seams were (mainly) lined up neatly. It also helps if you press the seams in the web to    nest your seams nicely. Make sure you pay attention to which way the 4 patches go please!

Please reach out to me if you have any questions. I hope you enjoy making this block as much as I did!

Thanks,
Liz

(here's my blocks in a bigger view)


Hive 4 - July Tutorial - In The Afterglow block for Sarah

Hi all,

I've loved making everyone's blocks so far, and hope you all enjoy this one! I'm making this quilt for my mom.  She selected a free Riley Blake pattern - In The Afterglow.  We visit a tiny town on the coast of Maine every summer - she's gone up since 1970 and I've been up every year since I was a baby. She's hoping for a quilt that reminds her of that, so she has requested a sea glass/coastal color palette.  Calm, muted colors, like lavender, light pink, mauve, gray, and muted teals, blues, and greens.  Solids, batiks, or smaller prints are all great! Please no novelty, licensed, or juvenile fabric.  You'll need two colors and some solid white background fabric.  Please try to stick to a solid, true white - not too cream or ivory.  Here's what I've pulled.


Cutting Instructions:

  • Solid white background fabric: cut 2 - 4.75" squares and 4 - 3.5" squares
  • Lighter colored fabric: cut 2 - 4.75" squares
  • Darker colored fabric: cut 4 - 4" squares, then cut the squares from corner to corner so you have 8 triangles


Sew the 4.75" lighter colored squares to the 4.75" white squares to make a four-patch.  The four-patch should measure 9" x 9".  I'm not fussy about pressing, but personally found it easier to press toward the darker fabric.


Sew a darker colored triangle to the right side of a 3.5" white background square with the top edges aligned.  Again, press how you prefer, but I found it easiest to press toward the darker fabric.


Sew a second triangle to the bottom of the square with the left edges aligned.


Repeat so you have a total of 4 triangle units.  If needed, trim the bottom edges of the triangle units so the point is .25" from the edge (OR be ready to watch the seam intersections when sewing the triangle units to the four-patch to make sure the points don't get cut off).  Please trim the dog ears even if you aren't trimming the whole edge.


Sew 2 of the triangle units to opposite sides of the four-patch, lining the point of the white square up with the center seams of the four-patch.  You'll probably want to use a scant quarter-inch seam here since it's a bit bulkier.  I found pressing toward the outside made my final block look neater.


Sew the 2 remaining triangle units to the remaining sides of the four-patch.  The block should measure 12.5" x 12.5".


And that's it! Thanks so much for contributing to this quilt. Let me know if you have any questions! Happy sewing! 
- Sarah


Hive 5 - July Tutorial - Sip & Sew Social for Tasha


Hey - I'm Tasha and if you ever get the chance to meet me in person, you would know I love to have conversations and be social! I love to know about people, I will ask questions to know more about something they are talking about, and I will ask follow-up questions that might lead to other conversations. One of the things I have learned in the first 6 months of being a part of StashBee is that people can be very passionate about the way things are done to their block. And, sometimes, its just not our style or we haven't built the skill set for it yet (which is ok and we knew this signing up for the exchange).  

So, I want to know about YOU! I want to see your personality. I want to see what you enjoy the most. I want to know your preference of pressing to the dark side, the open side, or -- gasp -- the light side (is this a thing?)! Nestled seams or the same direction? So, this month's block is a figurative, "let's sit down, have a drink together, and get to know each other". I am calling this block the "Sip & Sew Social".

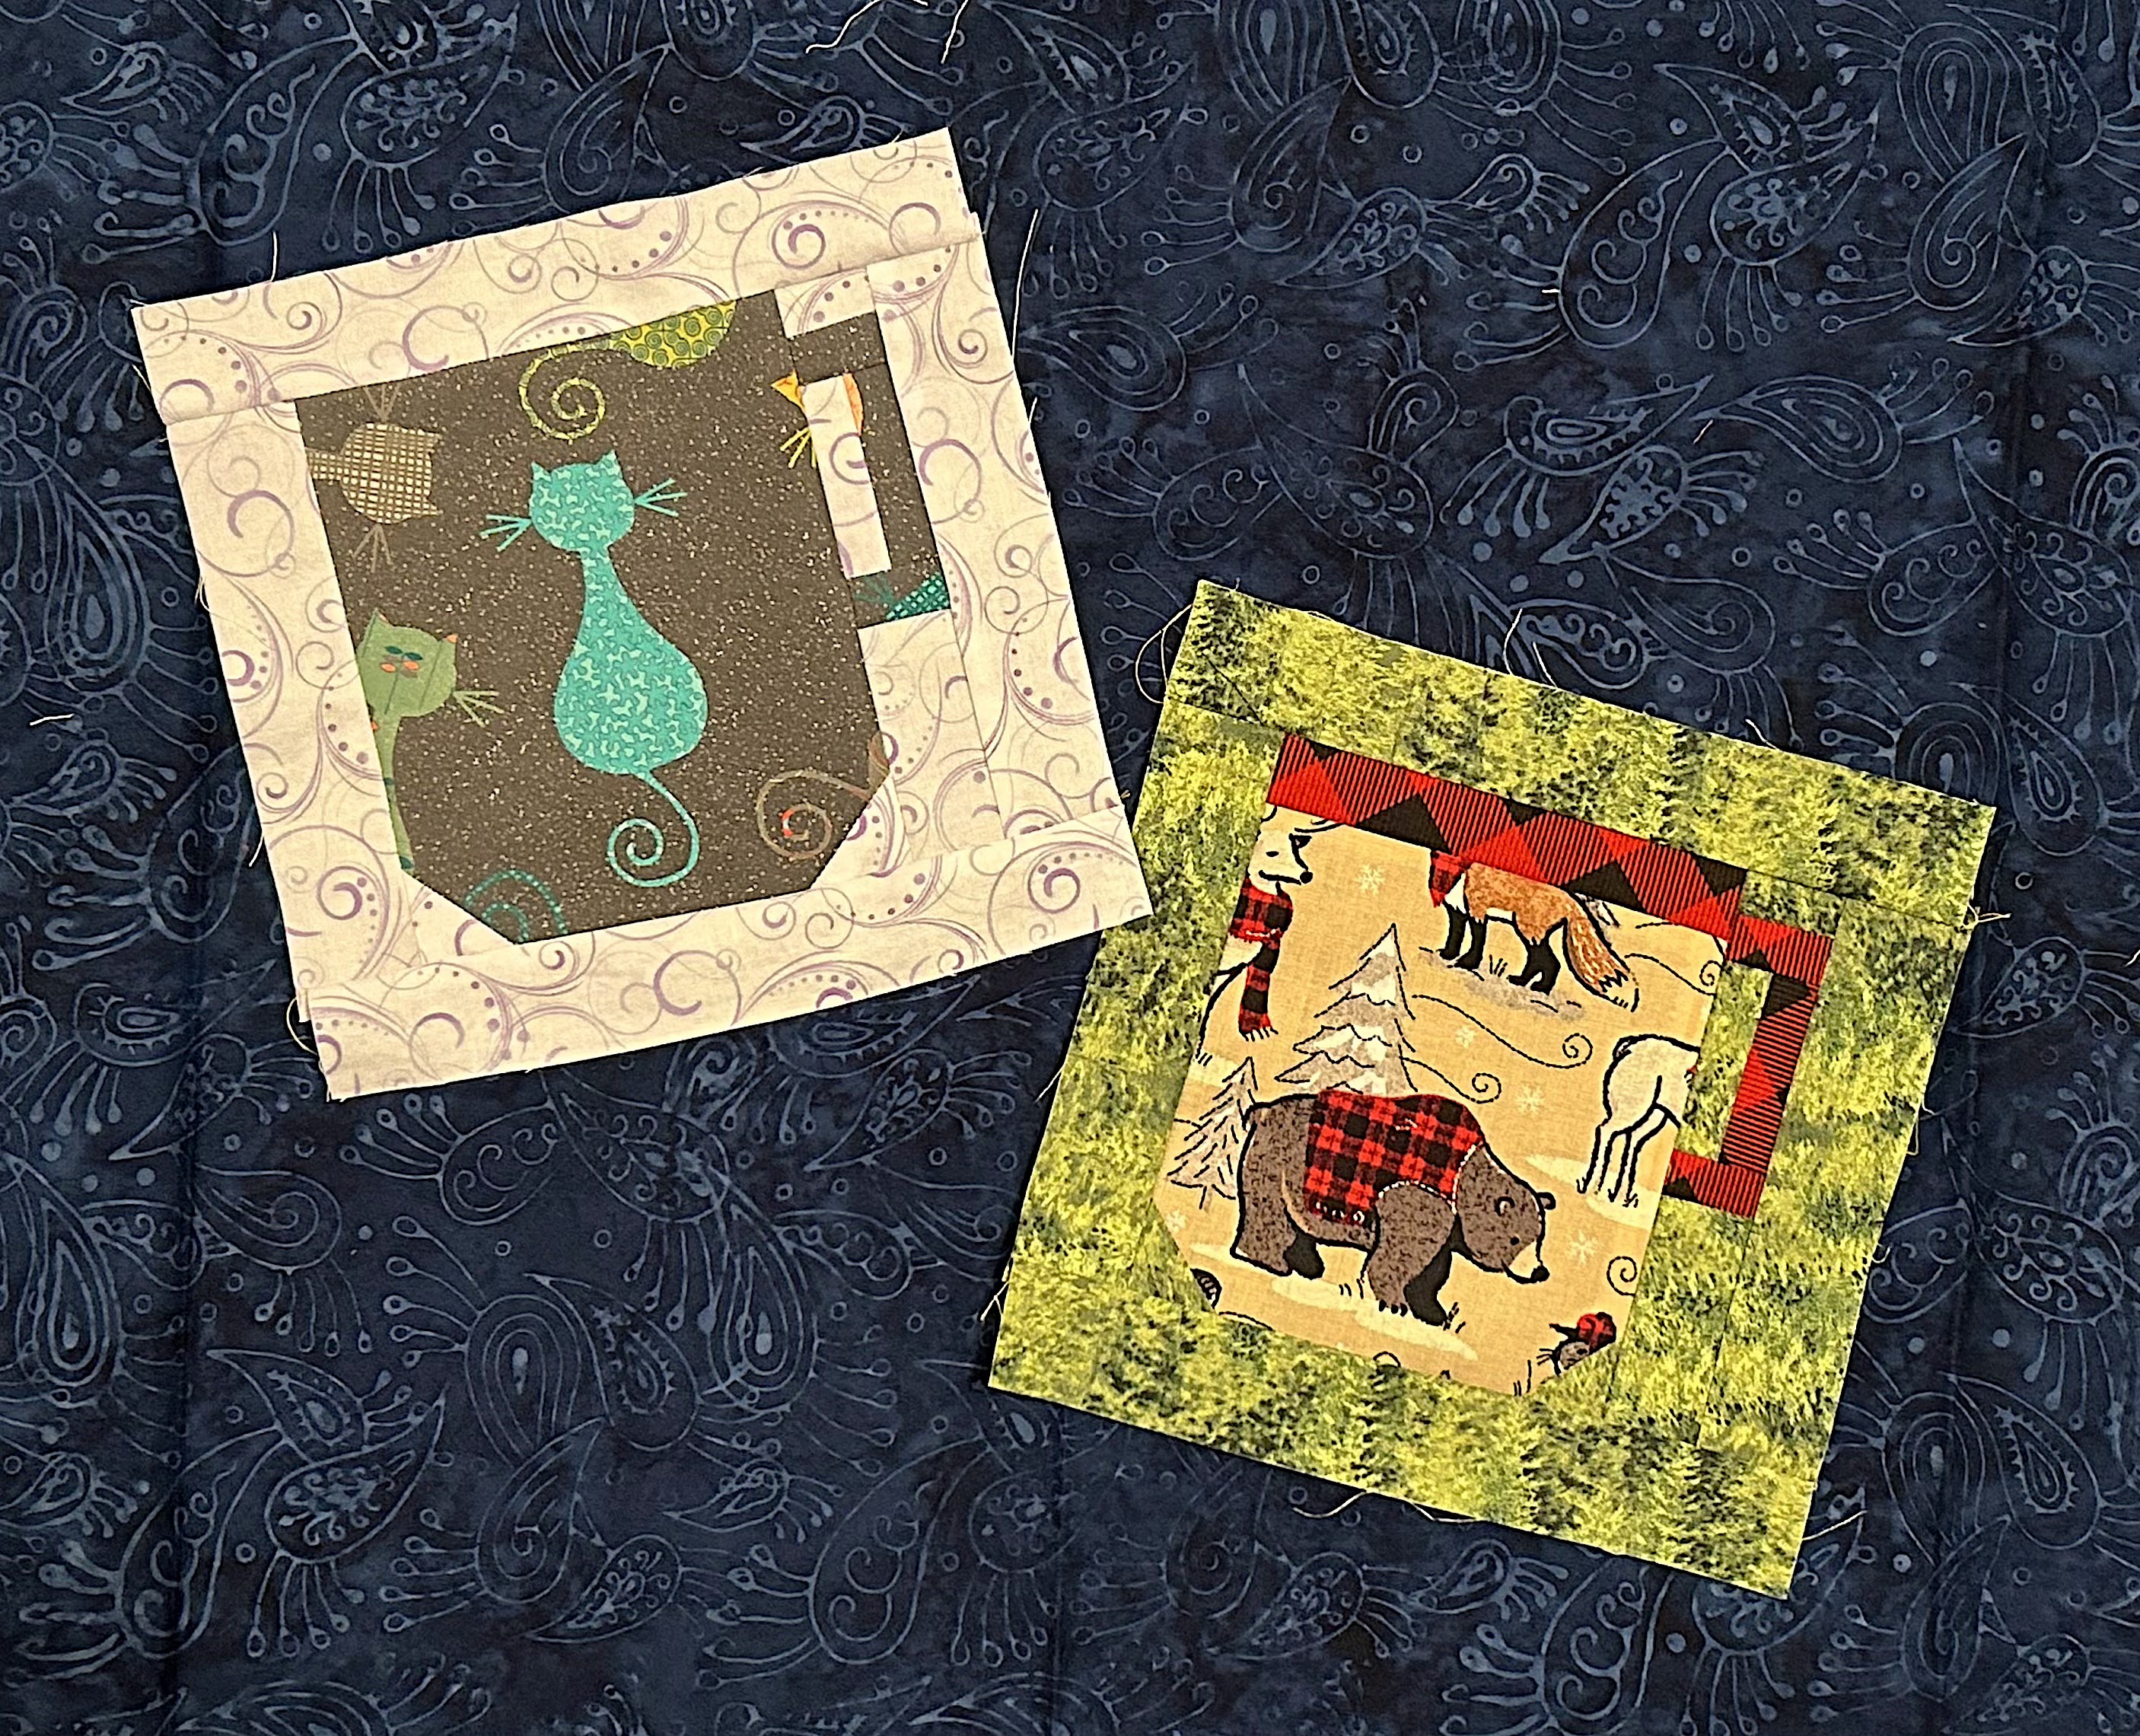
You can search any platform and get dozens of variations on coffee cups, mugs, tea cups, etc. and instead of looking at them all and trying to decide, I just sketched out my own. And, because I want you to show me your personality, for the most part...I don't care what your preferences are. 
  • Seam allowance: .25" or scant .25" - pick your favorite.
  • Fabric Choices: show me your personality and favorites; patterns, novelties, solids, favorite animal, hobby showcase, scrappy, matching thread or using up that ugly one you can't get rid of...any are perfectly fine (maybe keep it to cottons though)
  • Block size: aim for 8.5" x 8.5" unfinished - a little over, a little under, a little wonky - I don't care. Don't worry about squaring up, but if you do, thats fine, too. 

So what are my "hard rules"?
  • Silhouette: I am asking that the mug be on an isolated background. Please do not make it look like it is sitting on a table. I am ok with scrappy background if you want, but be mindful the mug still "floats" in the block.
  • Contrast: I have no preference if you want a dark mug on a light background or a light mug on a dark background. I just ask that you can have a contrast between the two so you can see the shape of the mug. 
  • Embellishments: If you want to add a tea bag tag, great! Need a spoon to stir your drink, put one on. Steam from your mug - okay! I only ask that whatever you add is flat enough I can quilt over (so, no buttons or unsecured strings, etc). Also, please keep anything inside the edge of the block by .5" (so when I sew it together with .25" seams, there is still .25" left of just background and the embellishments aren't touching the edge of the block.)

Fabric & Supplies Requirements

Supplies:
  • Sewing Machine
  • Iron and Heat-Safe Ironing Surface
  • Ruler, Rotary Cutter, Cutting Mat
  • (optional) Pins
  • (optional) Marking Pen(cil)

Background Fabric:
  • [A]  (2) 8.5" x 1.5"   [top/bottom edges]
  • [B]  (2) 6.5" x 1.5"   [side edges]
  • [C]  (2) 1.5" x 1.5"   [snowballing bottom of mug]
  • [D]  (1) 3" x 1.5"      [under handle]
  • [E]  (1) 2.5" x 1"      [inside handle]
  • [F]  (1) 1.5" x 1"      [above handle]

Mug Handle Fabric:
  • [G]  (1) 2.5" x 1"
  • [H]  (2) 1.5" x 1" 

Mug Body Fabric (Get Ready to Shine!):
  • [M]  (1) 6.5" tall x 5.5" wide -- you can cut one single piece of fabric for this or piece together anything to get up to this size


Block Assembly
  1. (Pieces after 1. iii)
    Handle Assembly: 
    i. (top handle)Take 1 of your smaller mug handle pieces [H] and sew it to the smallest background piece [F]. Wrong sides together and press seam.

    ii. (side handle) Sew the mug handle piece [G] to background piece [E]. Wrong sides together and press seam.

    iii. (bottom handle) Take the other smallest mug handle piece [H] and sew it to background piece [D]. Wrong sides together and press seam. (See photo above)

    iv. Take the side handle unit [G,E] with the background fabric to the left and sew the top handle unit [H,F] above it with the background fabric to the top. If your handle fabrics aren't touching each other, it's incorrect. Wrong sides together and press seam.

    v. Take the unit constructed above [H,F;G,E] with the top handle unit facing up and sew the bottom handle unit [H,D] to the bottom with the background fabric on the bottom. Wrong sides together and press seam.

    Your finished Handle Unit should look like this:


  2. Mug Body Assembly:
    i. Take your mug body piece [M] - whether it's a single cut of fabric or a pieced together cut - and lay it so it is 5.5" wide and 6.5" tall (right side up). To snowball the bottom corners, take both of the square background pieces [C] and place them in the bottom corners of the mug body with the wrong sides together. You will be sewing outside side edge corner to bottom inside corner on these little background blocks, so if you want to mark the wrong sides from one corner to the opposite, now is the time to do this. With something this small, I will just eyeball it and it will be close enough but marked it for the demo. Do what you are most comfortable with. 

    ii. After checking the corners were sewn on correctly, snip excess fabric off leaving a .25" seam, and press.

    (Photo for 2. i.)

    (photo for 2. ii.)

  3. Mug Body Gets a Handle on Things:
    Layout your Mug Body Unit so the snowballed corners are at the bottom and the pretty side is up. Take your Handle Unit and place it wrong side up on the right side of the Mug Body Unit. Sew and press seams. Your completed Mug Unit should look like this:


  4. Give it Some Space:
    i. Take your Mug Unit and sew on the background strips [B], one to each of the right and left sides. Use .25" seam allowance and press when done. 

    ii. Finally, sew on the top and bottom background strips [A]. Sew wrong sides together and press your seams. Flip it over and give it one more press on the front so it's nice and flat. It should be roughly 8.5" x 8.5" but its ok if it's slightly wonky, smaller, or larger. 


    (Photo for 4. i.)

Finished block (photo for 4. ii.)


This block not quite your cup of tea and want to go rogue? I'm ok with this! 
  • Are you an appliqué lover? Go ahead, cut out a 8.5" square background fabric and follow the guidelines for the block, and have fun appliquéing your own version
  • Are you left handed and want the handle on the other side - go for it! (let me know if you want me to modify the instructions for you)
  • Feel free to use a different cup! - Maybe you like wine instead and want to freely find a wine glass pattern, go for it. Or, maybe you want a travel coffee cup or a small china tea cup. Thats all ok, too! 
  • If by going rogue your block size needs to change - thats ok! Please have roughly 1.25" background around the edge of the mug/cup/glass (1" when finished) and avoid putting anything in the .5" edge so that when it's sewn together with .25" seams there is still .25" background

Have fun with it and thank you for telling me about yourself with this block! Happy Sewing!