What is your name? Hi everyone! I'm Shena, last minute replacement queen for Hive 6 in May. I was supposed to be October queen, but I got bumped at the last second. I blog at Apple Pie Patchwork.
Where do you live? I live in Lethbridge, Alberta, Canada. I love it here, in the wide open prairie.
Tell us about your family (Spouse, kids, grandkids, pets, etc.) I've been married to Darren for over 10 years now. We have three kids, 9, 6, and 4.
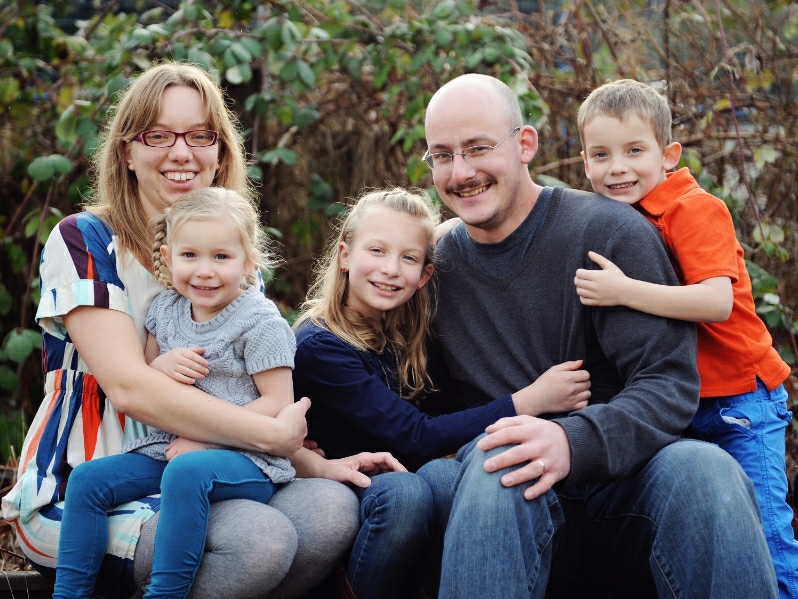
Tell us about how you got interested in quilting. I started quilting about 8 years ago. I sewed garments in high school, but had mostly lost interest in that. My sister started quilting, teaching herself with books and I was intrigued and started myself about a year later. I've been loving it ever since.
How do you organize your fabric stash? I'm sorry, I have no picture of this because my stash is still in a dark room in my basement, in the boxes I moved it into my house with 5 years ago. I have it organized by colour, with a separate box for favourite designers.
Who is/are your favorite fabric designers? I love love love Heather Ross. So so much. I was already quilting when her first lines came out but I wasn't aware of them because I live in a very conservative area, quilting wise. The shops here think batiks are modern. :) So until I discovered blogs and online shops, I wasn't aware of her stuff and now I'm collecting things I could have bought when they first came out! Oh well. I also love Tula Pink and Sarah Jane. Novelty fabrics and low volume fabrics I am a big fan of.
What is one thing you have learned that you wish you knew when you first started quilting? As previously mentioned, awesome designers and their awesome fabrics. :)
What is your favorite sewing/quilting tool and why should we all go out and buy it? I love my rotary cutter and rulers, which may be a cop out, but it's true. And my design wall. I don't know what I'd do without that. I have 3 in various rooms in my house.
Who is your favorite fictional character and why? I think my favourite fictional character is probably a tie between Jane Eyre and Elizabeth Bennet. They are both strong, independent female characters. I wouldn't have to live in their times, and give up all my modern conveniences, but I love their fierceness.
Anyway! On to the tutorial. The block that I've chosen for this month is called Scrappy Mountains. The tutorial was originally by Bonnie Hunter, of Scrappy Trip fame, among other things.
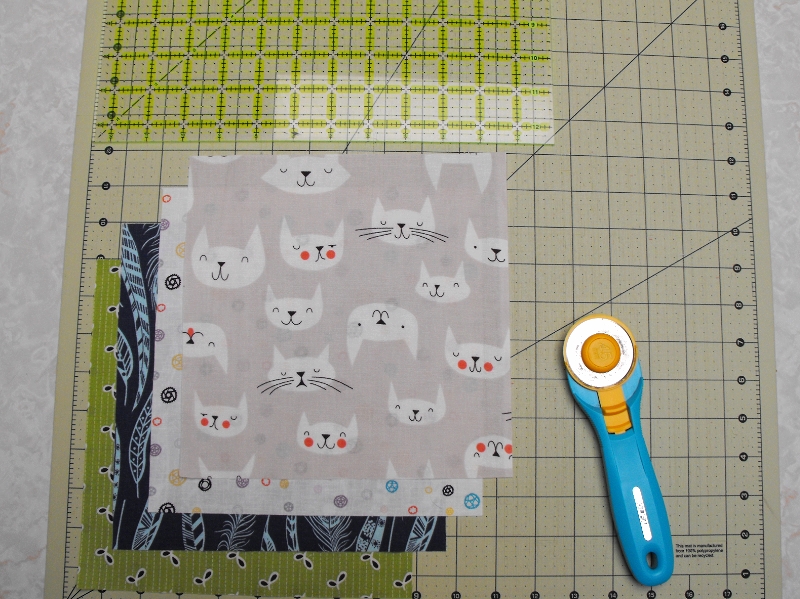
To start with, you need to cut:
2 - 8.5" low volume squares
2 - 8.5" coloured fabrics
A note about fabric choice. I love low volume and bright, modern fabrics. However, I know not everyone has these in their stash. If you don't have low volume, please use a light solid colour for the background, or anything light coloured and funky. :) Please don't use anything too dark for the coloured fabric, like black, and also please don't use brown since I don't like it very much. Anything else is fair game. Please also use 4 different fabrics. The scrappier the better!
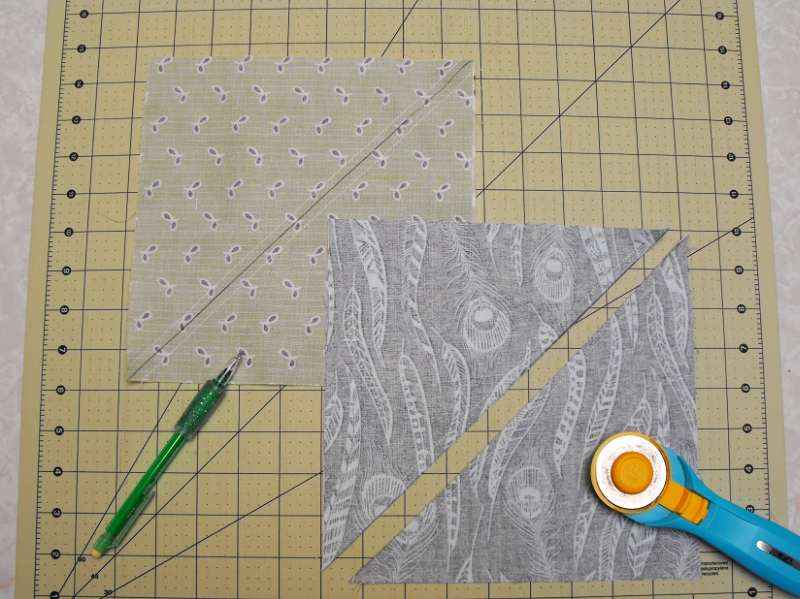
Draw a line down the centre diagonal of each coloured square. Pair each of the coloured squares with one low volume square, right sides together, and stitch 1/4" away from either side of the marked line. Cut the squares in half along the marked line. Press the seam toward the coloured fabric.
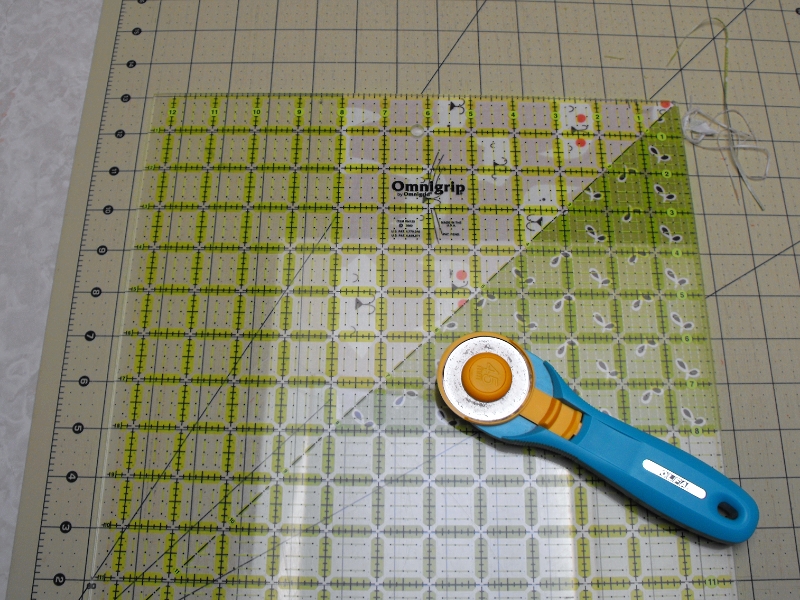
Trim all 4 HST to 8".
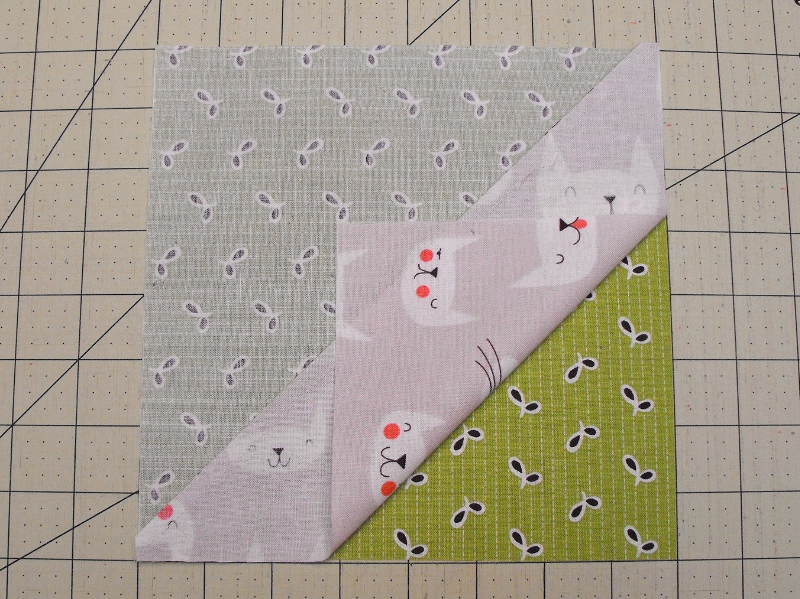
Take a matching set of HSTs, (in the picture I took both green ones) and layer them right sides together. Make sure that the dark triangle is sitting on top of the light triangle, as pictured. This is very important later, so that you get two mirror image blocks at the end. I found it helpful to quickly give these two stacked HSTs a quick press at the ironing board. It made the next step much easier and prevented slipping.
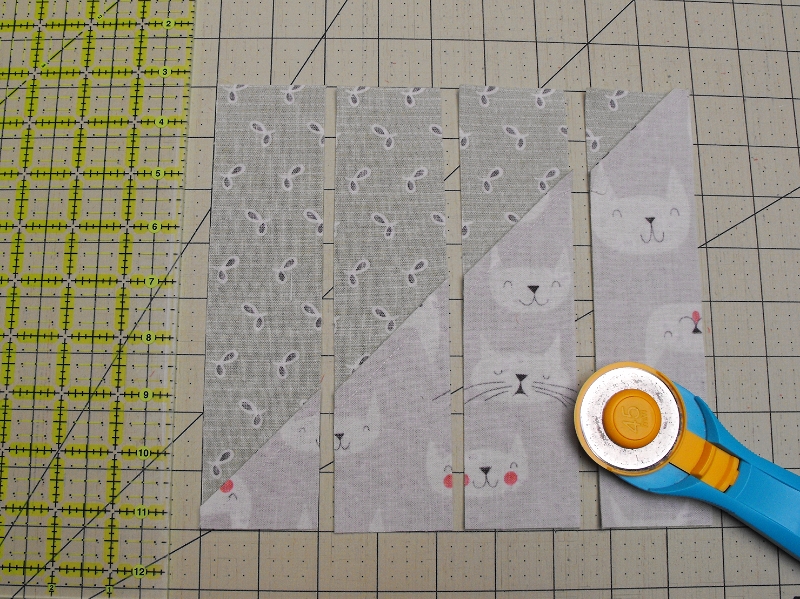
Take your ruler and cut 2" segments across the block, as shown. Cut through both layers.
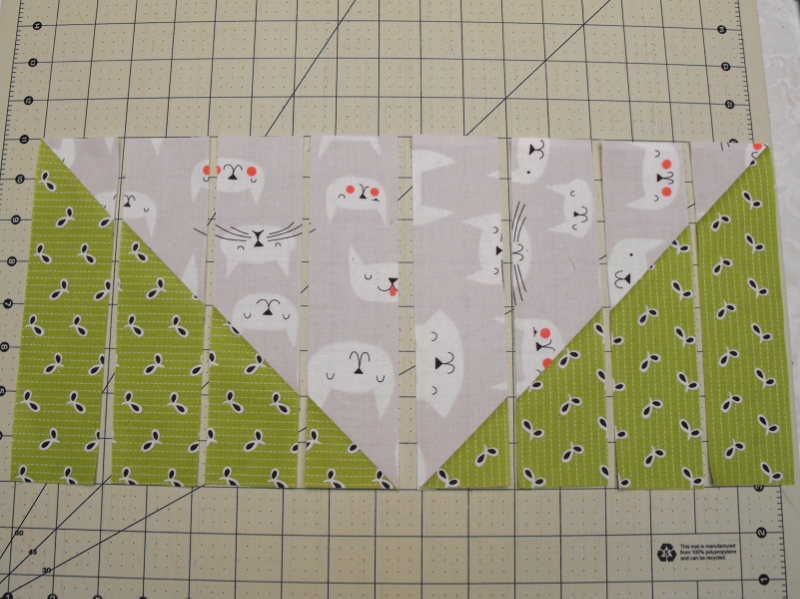
Carefully peel apart the layers. You will now have a set each of downhill and uphill strips.
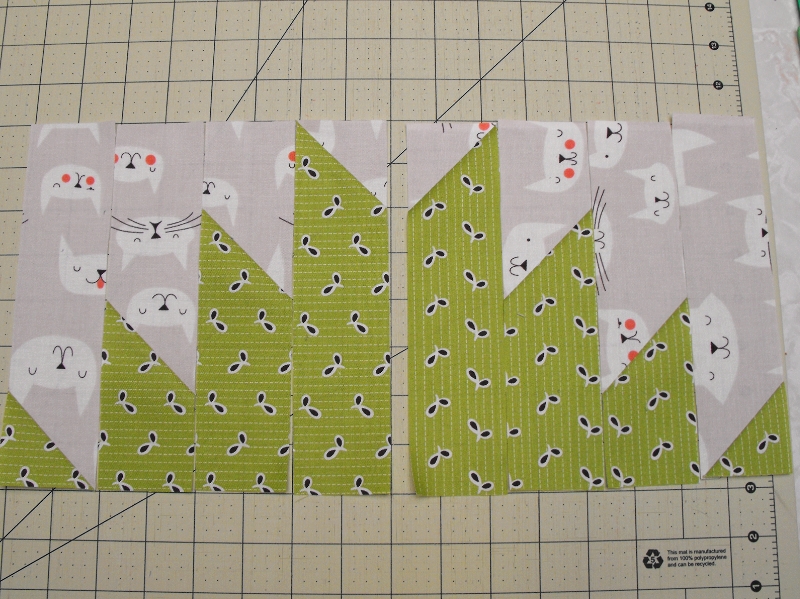
Flip each strip around 180° to rearrange the strips into the Scrappy Mountains block. Stitch each half of the block together and press the seams open. Repeat the same process of layering, cutting, and resewing with the other pair of HSTs for the second half of the block. And that's it! You're done!
These blocks can be arranged in so many different ways. I haven't decided on my final layout yet, which is why I would like you to leave the four segments separate from each other.
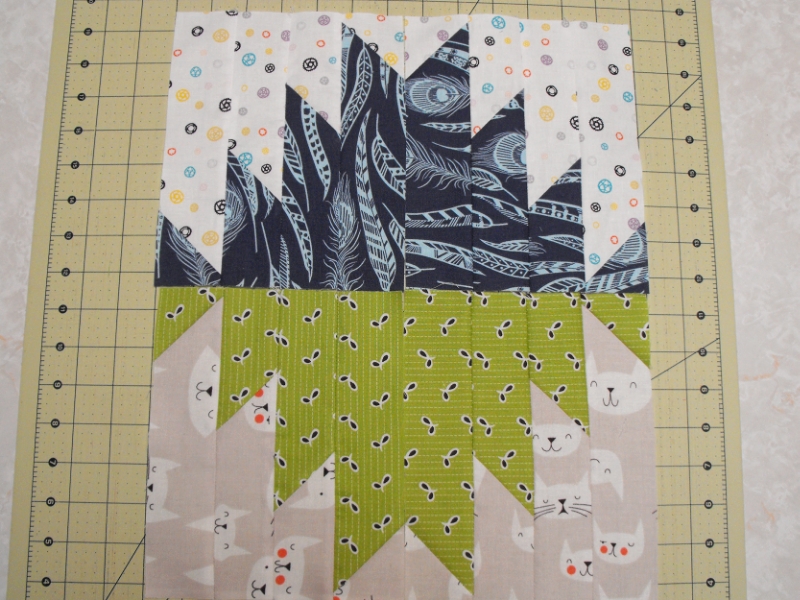
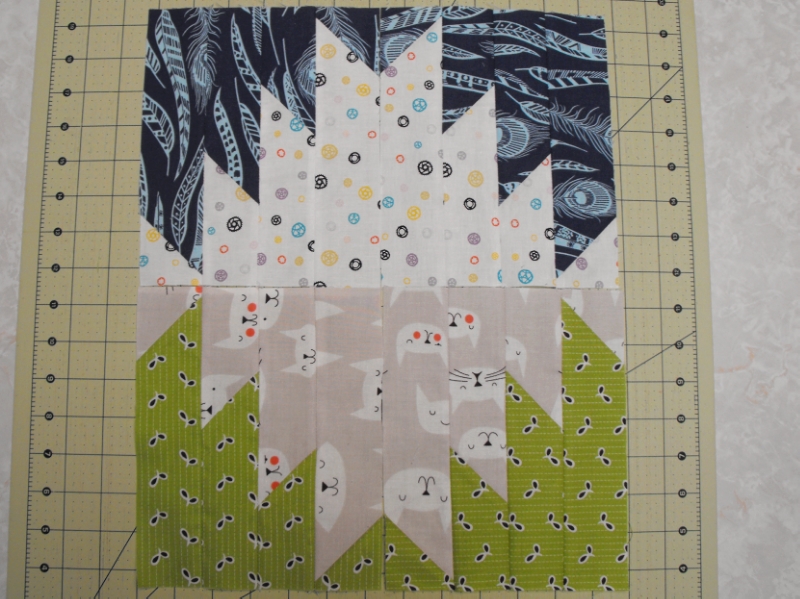
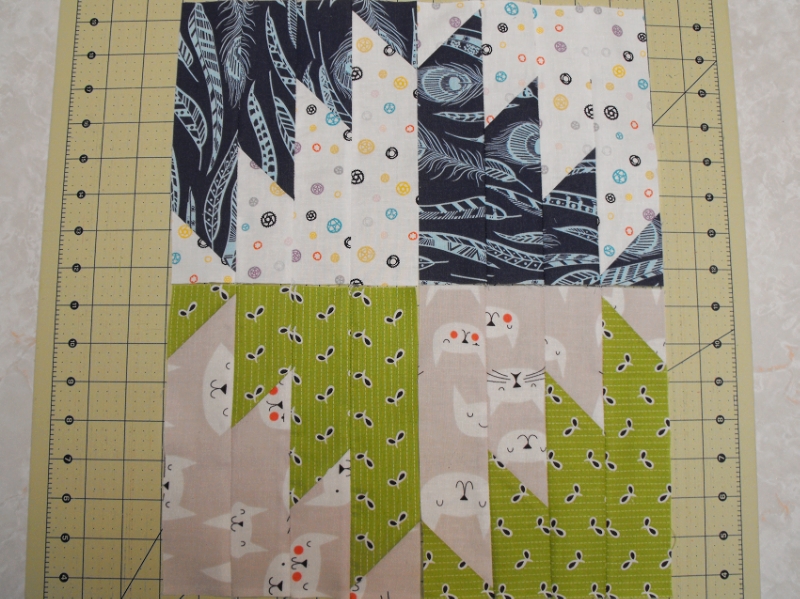
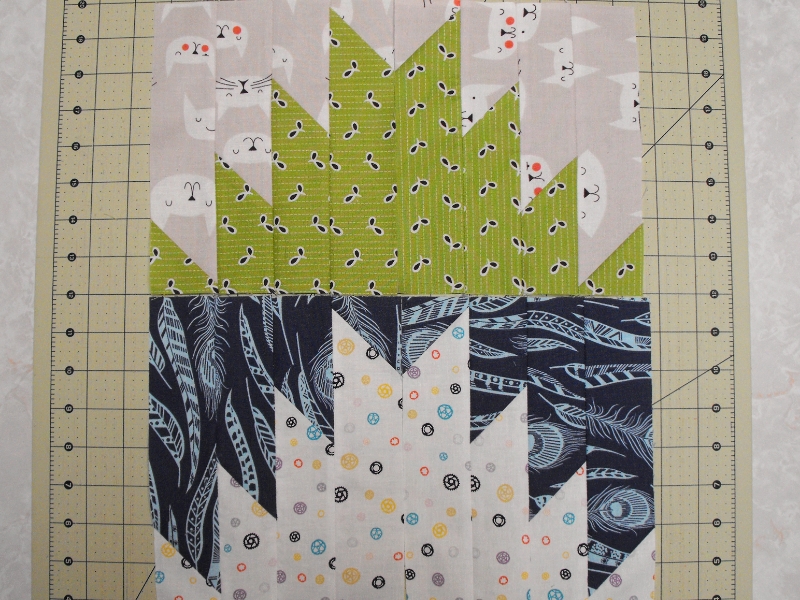
If you have any questions, please let me know. I look forward to getting these blocks in the mail! It's going to be such a fun quilt.

5 comments:
It looks awesome! I can't believe how fast you put it together. Thank you so much!
lookin' good! and thanks for bumping up to May for us :)now to pick fabric....
This looks like a fun block. And I love Heather Ross too! What are your favorite prints of hers??
I think I like the Far Far Away lines the best, so far. I have her entire reprint of FFA on pre-order. I recently found some Nursery Versery that I love too.
I just made these blocks today and love how easy they were to put together. Thanks so much for picking a fun design on such short notice.
Post a Comment