
Hello Hive Mates,
After a very long winter, Summer has finally arrived in CT
I am looking forward to some warm weather, so I have decided to go with a bright summery colored block for my month

This block is the Scrappy Cross Roads block from Lori at Bee In My Bonnet.
She has a great tutorial in the link above in case you need extra help.
For this block I chose bright colors, with a low volume white fabric as the background print.
This block will measure at 16.5 inches unfinished.

48 different 2 1/2" squares (bright colors)
8 each 4 1/2" squares of background (low volume)
Please avoid brown, black, burgundy and navy and keep greens on the lighter side.
A few lighter grays in the mix are OK.
Choose 16 of the 2 1/2" squares and draw a diagonal line from corner to corner on the back.
Sew two on opposite corners of each background square (sewing on the line you drew).
Trim the excess and press the seams toward the corner fabrics.


These should still measure at 4 1/2".
Now arrange the remaining squares and these newly made pieces into the block layout.

I took the 2 1/2" squares and sewed them together into pairs, then sewed those pairs into 4 patch blocks. You will end up with 8 four patch blocks and 8 triangle corner blocks.
Arrange them as above and sew the units in rows. Sew the rows all together and then you are done.
I pressed my seams to the sides. not in any particular order, I just prefer nested seams instead of them being pressed open.
Thank you in advance for you creativity.
Heather
When I made this block, I had to cut a lot of the 48 squares because I did not already have enough in my stash basket. It was quite time consuming for the cutting part, but the sewing if pretty quick.
If you do not have 48 different prints or you feel that this block is too time consuming, please feel free to make the alternative block shown below!
Alternative choice - Wonky Pinwheel Block!

Here is my tutorial -
Main Fabric-
I really love bright colors, geometric patterns, and low volume fabrics.
This is a little inspiration fabric.

Please be creative.
I ask that you avoid dark colors like black, brown, gray, navy and maroon. No batiks!
A little novelty is OK, especially if it is sewing related, just not too child like.
You should be able to use all scrap strips for this block.
The largest piece I used was 3 inch by 5.5 inches.
Background Fabrics-
I used Kona Snow for my background in my tutorial, but would love for you to mix it up with low volume fabrics. The fabrics do not have to match, and can be white or off white with small print or low volume designs, like these. There can be some colored print, but try not to use colored fabrics.

Photo courtesy of Pink Castle Fabrics
Start by cutting 16 squares, each 3.5 inches, out of your background fabrics.

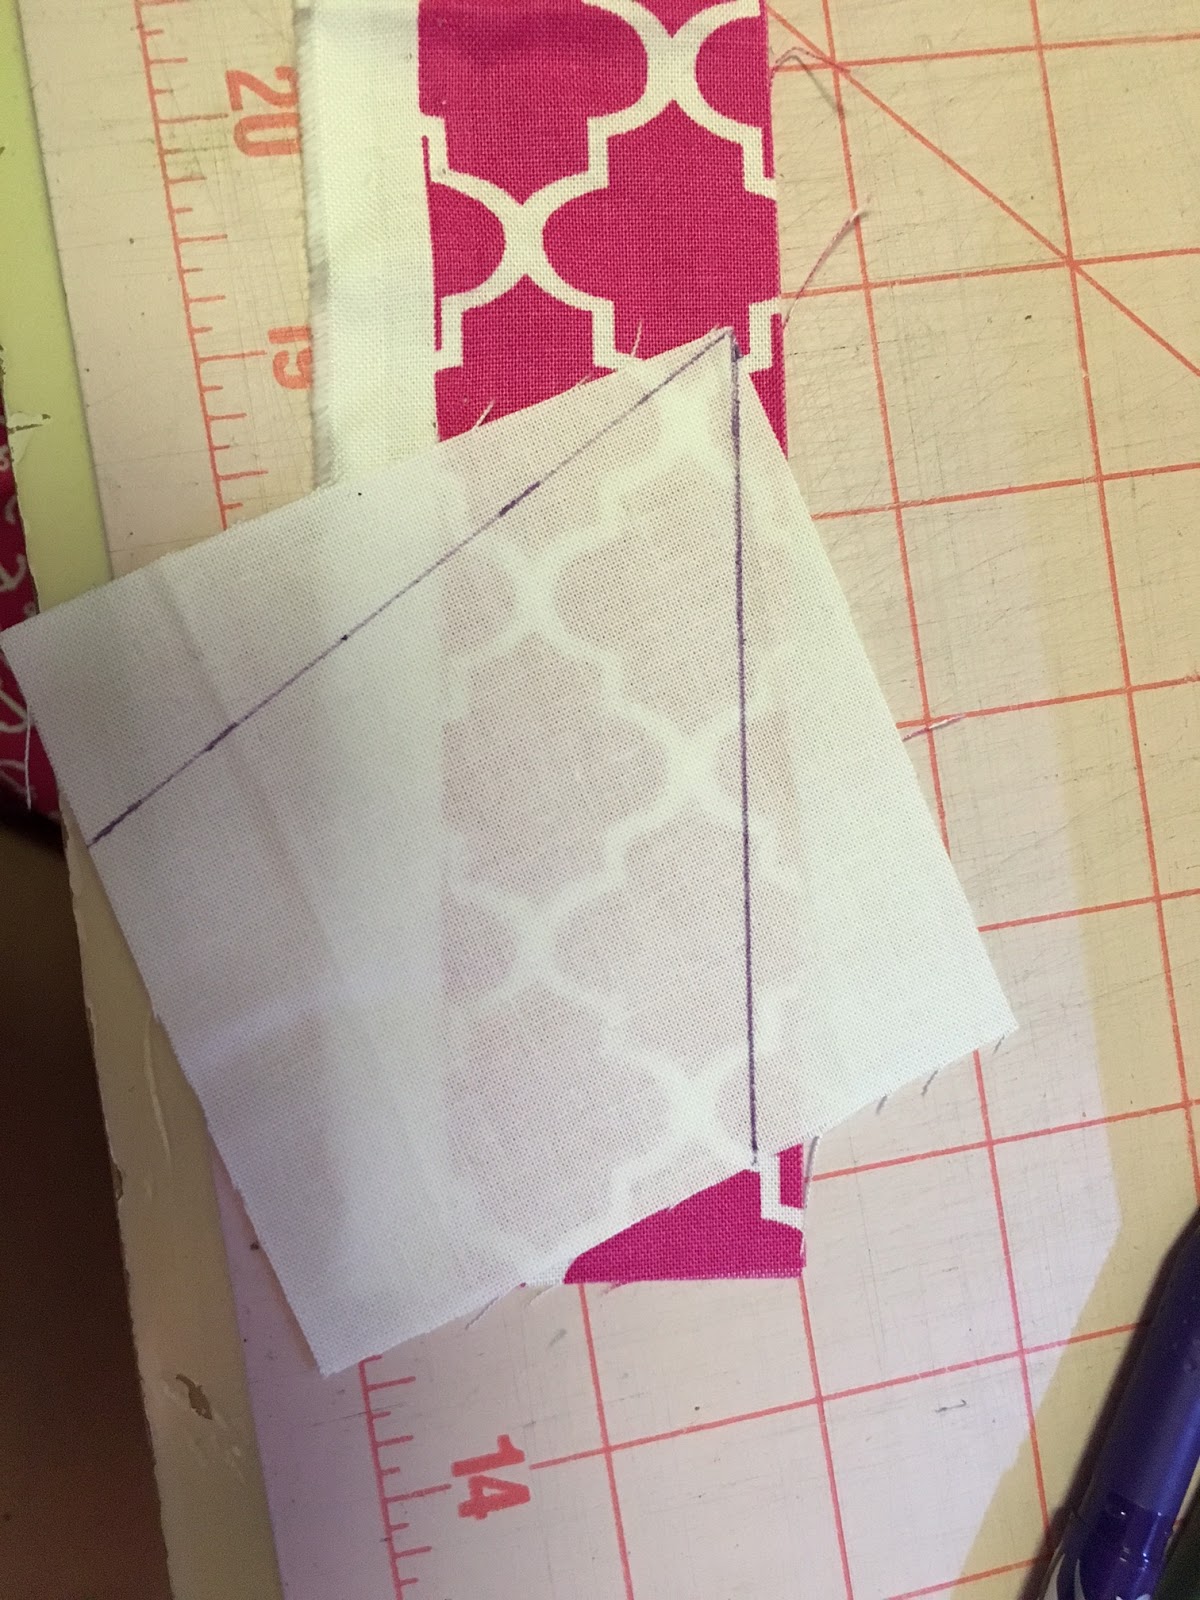
On the back of each square, draw two lines coming from one corner. This should be wonky, so try not to draw the lines in the same place on both edges. Remember that these pieces you will make will eventually be sewn together, so do not make the lines too close to the edge, as that fabric will be lost in the seam when the whole quilt is assembled. (For example: on this square on the lower left side, the upper line is too close to the edge)

For the next two seams, try to keep the images close as you are working, so that you line up the fabrics under the background correctly. I did not, and I ended up doing a lot of seam ripping while doing this block.
First -
Place a main fabric face up, and lay your neutral fabric on top with your lines facing up, and the point that you drew facing away from you.
You will be sewing on the line you marked, so give yourself approx. 1/4' overhang for the seam.
Sew on the line. ( I did the first seam on each of my 16 pieces, one right after the other, (chain pieced) so as to save some time)

Press to the dark. Do not trim yet. (I prefer a dry iron press over finger pressing)


NEXT -
Lay your second fabric face up on your work table. Place your second line with the point facing toward you. (The new fabric is face up, and the one you already stitched on is face down)

Sew on the line (for all 16 pieces) Press to the dark.
At this point, I used the exposed background fabric corner, to line up my ruler and trim the excess fabric off to get back to the original 3.5 inch square. I did not remove the background fabric because it helps to control the number of seams on the back of the block.


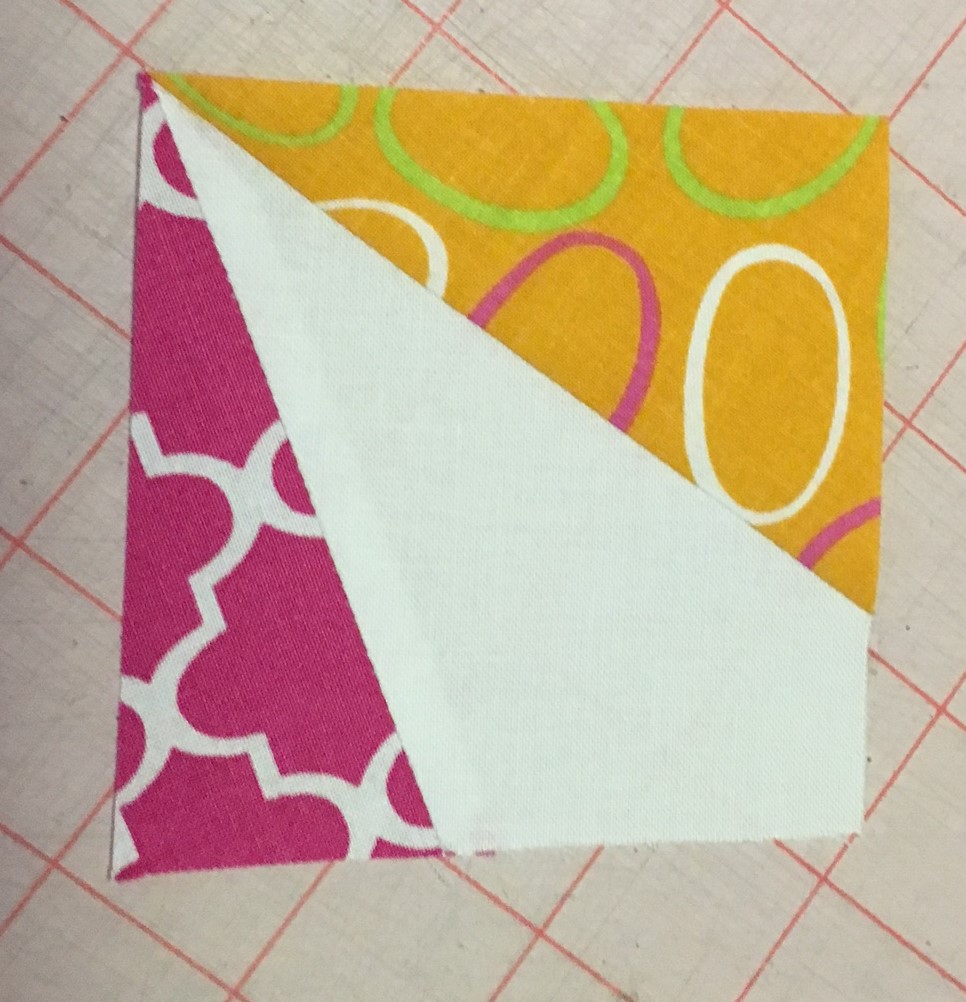
You will have 16 of these finished pieces.
We are ready to assemble.
Taking 4 pieces at a time, you are going to place the upper left and lower right pieces with their points facing to the center. The upper right and lower left will have their points facing to the outside corners.

This creates the Wonky appearance of the pinwheel.
Arrange the other 12 pieces in the same manner to create a block of 4 sets of 4.

(Please use a scant 1/4" when piecing these together)
You will assemble in rows.
Press the seams of the first and third row to the right, and the second and 4th row to the left.
Nest the seams, and sew the rows together and press those horizontal seams open.
Your block is complete.
Your block should finish off at 12.5 inches.
Please do not trim the block if it comes out larger, just send it as is.
Thank you so much! Please email me with any questions.
I cannot wait to see all the beautiful blocks that will arrive!
Just for reference, I wanted to show the NOT correct way to line up the 4 patch. You can see how this is beautiful together, but does not make a Wonky appearance.

Heather!
No comments:
Post a Comment