Monday, April 1, 2024

Hive 2, April Tutorial- Scrappy block for Kim


This block has been on my bucket list for seven years.  It was a Stashbee block for one of my hive mates in 2017, and I fell in love with it.  This is scrappy deliciousness for me.  I hope you are able to simply pull from your scrap stash for it, because that makes the block go together very quickly.   Below are two finished blocks.


You will need the following fabric:

Forty (40) 2-1/2” squares as scrappy as possible with bright colors, but that is only a preference.  Use what you have.

Two (2) 4-1/2” squares from low volume fabric with white background or white or white on white.

Two (2) 4-1/2 “ by 8-1/2” rectangles  from low volume fabric with white background or white or white on white.


Take the 2-1/2” inch squares and sew them into four patches.  They should measure 4-1/2” square. Then sew four of those together to make two sixteen patch blocks.  You will have two four patch blocks left.  Sew each of the four patches to the 4-1/2” inch square of low volume fabric.


Lay out the pieces as follows and sew them into rows. Sew the rows together to finish the block.  It should measure 16-1/4 “ inches.


Hive 6 Tutorial for April 2024 - Springtime Herringbone for Meg

Hi!  My name is Meg, and this is my second year participating in Stashbee.  I had so much fun last year and made amazing friends in my awesome hive, and this year has been just as enjoyable so far 💕💕!  This month I am asking my hive mates to make a herringbone unit for me using 4 half square triangles.  My inspiration for this block is from this tutorial: Easy Herringbone Quilt Tutorial with Half Square Triangles (scatteredthoughtsofacraftymom.com).  I really loved the ombre pink layout featured in that tutorial.  My tutorial is going to be a little bit different from the inspiration tutorial, but that link will give you an idea of what the final product may look like.  Here is a photo of 4 of my practice blocks together:


Fabric Selection:

I want my final product to be springy and girly 💅💮.  I am looking for bright pink, pastel pink, lavender, pastel blue, and bright blue in prints or solids.  I especially love small floral prints!  I am laid back about your fabric choices, and I love seeing everyone's first choice of fabric, rather than your first choice within really tight guidelines.  So, I have tried to make the pull encompass a wide range of fabrics.  Here is a picture of my fabric pull:


You will need to pick 2 fabrics - one colored fabric (pink, lavender, or blue), and one background fabric (white or cream: low volume, white on white, solid, pretty much anything goes!).  If you would prefer, you can pick 2 different colored fabrics that coordinate like I did in the practice blocks above.  For one of them I used a pastel blue and a bright blue, and for another I used a bright pink solid and a bright pink blender.  

Cutting:

Cut two 8-inch squares (go with 8.25 inches if you like to have wiggle room in your HSTs) from your colored fabric(s) and two 8-inch squares (again, bigger if you want wiggle room) from your background fabric.  Here are mine, I chose a pastel pink solid and a low volume background:


Sewing:  You're going to make 4 half square triangles that each finish at 7.5 inches square.

1.  Draw a line from corner to corner on the wrong side of your background fabric squares:


2.  Place each background square right sides together with a colored square and sew 1/4 inch or a scant 1/4 inch on each side of the line.  Cut on the marked line:


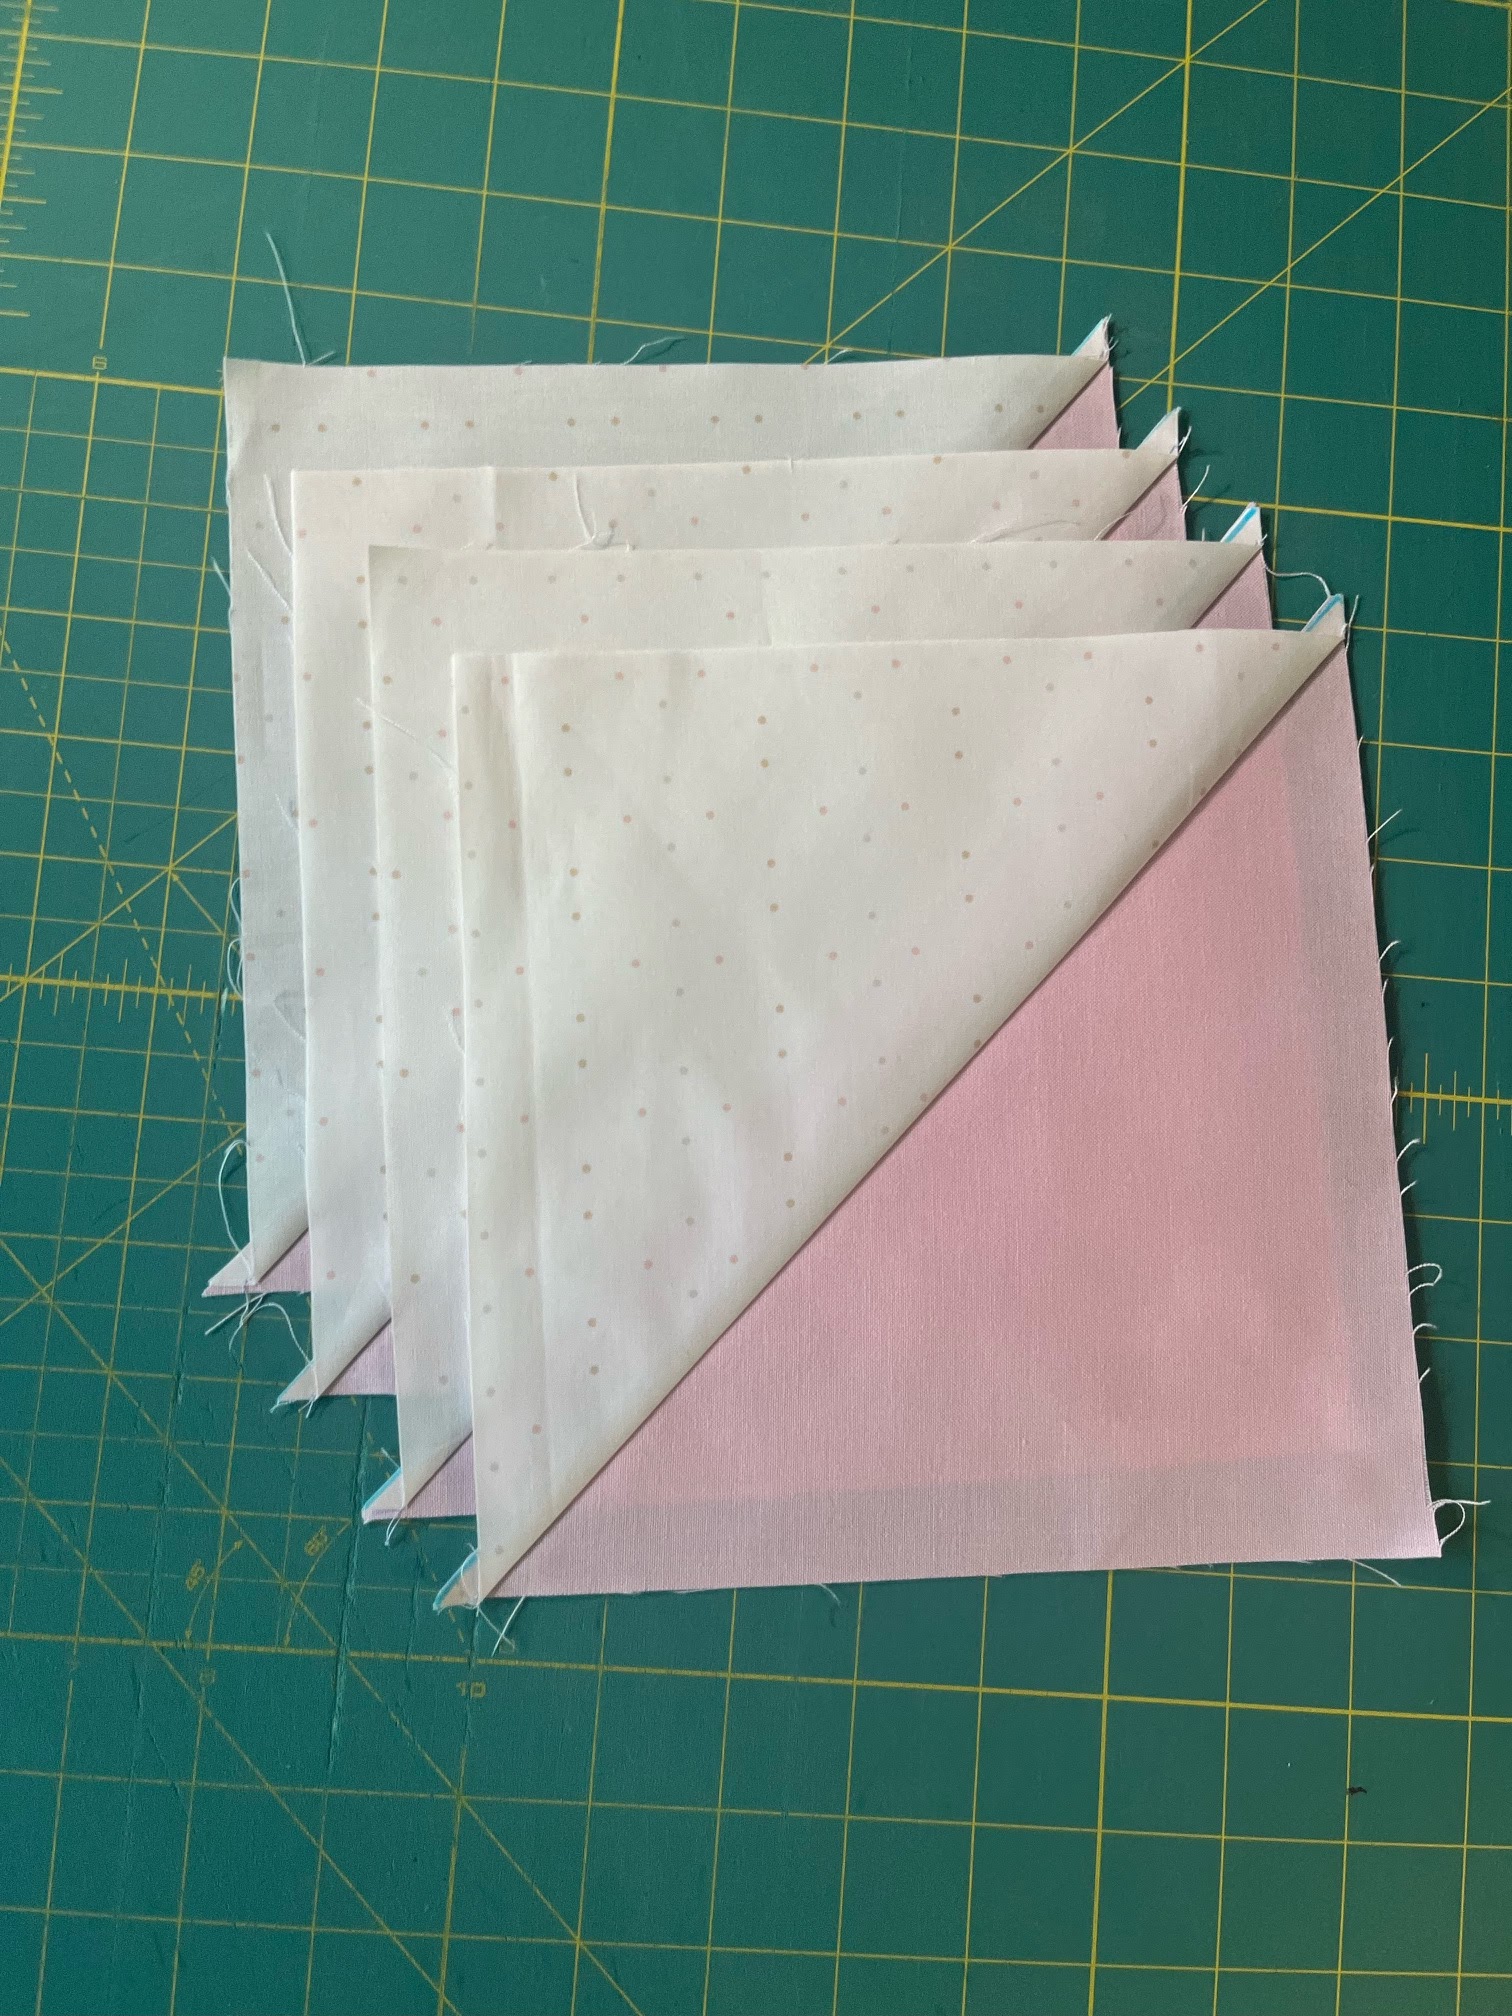
3.  Press in whichever way you prefer.  I am a weirdo and I like pressing towards the light side.  I love to see that perfect quarter inch showing through the lighter fabric.  But you should press your favorite way, whatever that may be :)  Here are my HSTs before squaring up:


4. Square to 7.5 inches and arrange like this:


5.  Sew together in a 4 patch.  Your final block should measure 14.5 inches square, but no need to square up!  I pressed my first two seams to the side so that I could nest, and then pressed the final seam open to reduce bulk.  You can press your seams however is most comfortable for you though!  Here she is:


Wahoo!!!  I think it will be pretty easy, but if you have any questions, please reach out, as I would love to help and chat.  Thank you so much for sewing for me!  I can't wait to see what you all create.  💗

With much love,

Meg from Alabama 💓

Hive 3 - April Tutorial - Cabin Fever Block


Hi to All!  I'm Jan from SC, originally MI.  I've been quilting since late 2016, so considered a newbie by some.  I've been in the online Bee's since 2018, taking a break last year, but back now.  

I'm picking Cabin Fever.  It is a free pattern by Gigi's Thimble. I did a Christmas version shown below in October, 2019.  


Please head over to Gigi's Thimble to print out the pattern.  Her instructions are very easy to follow.

For this version we are going Red, White and Blue.  Here is my test block.


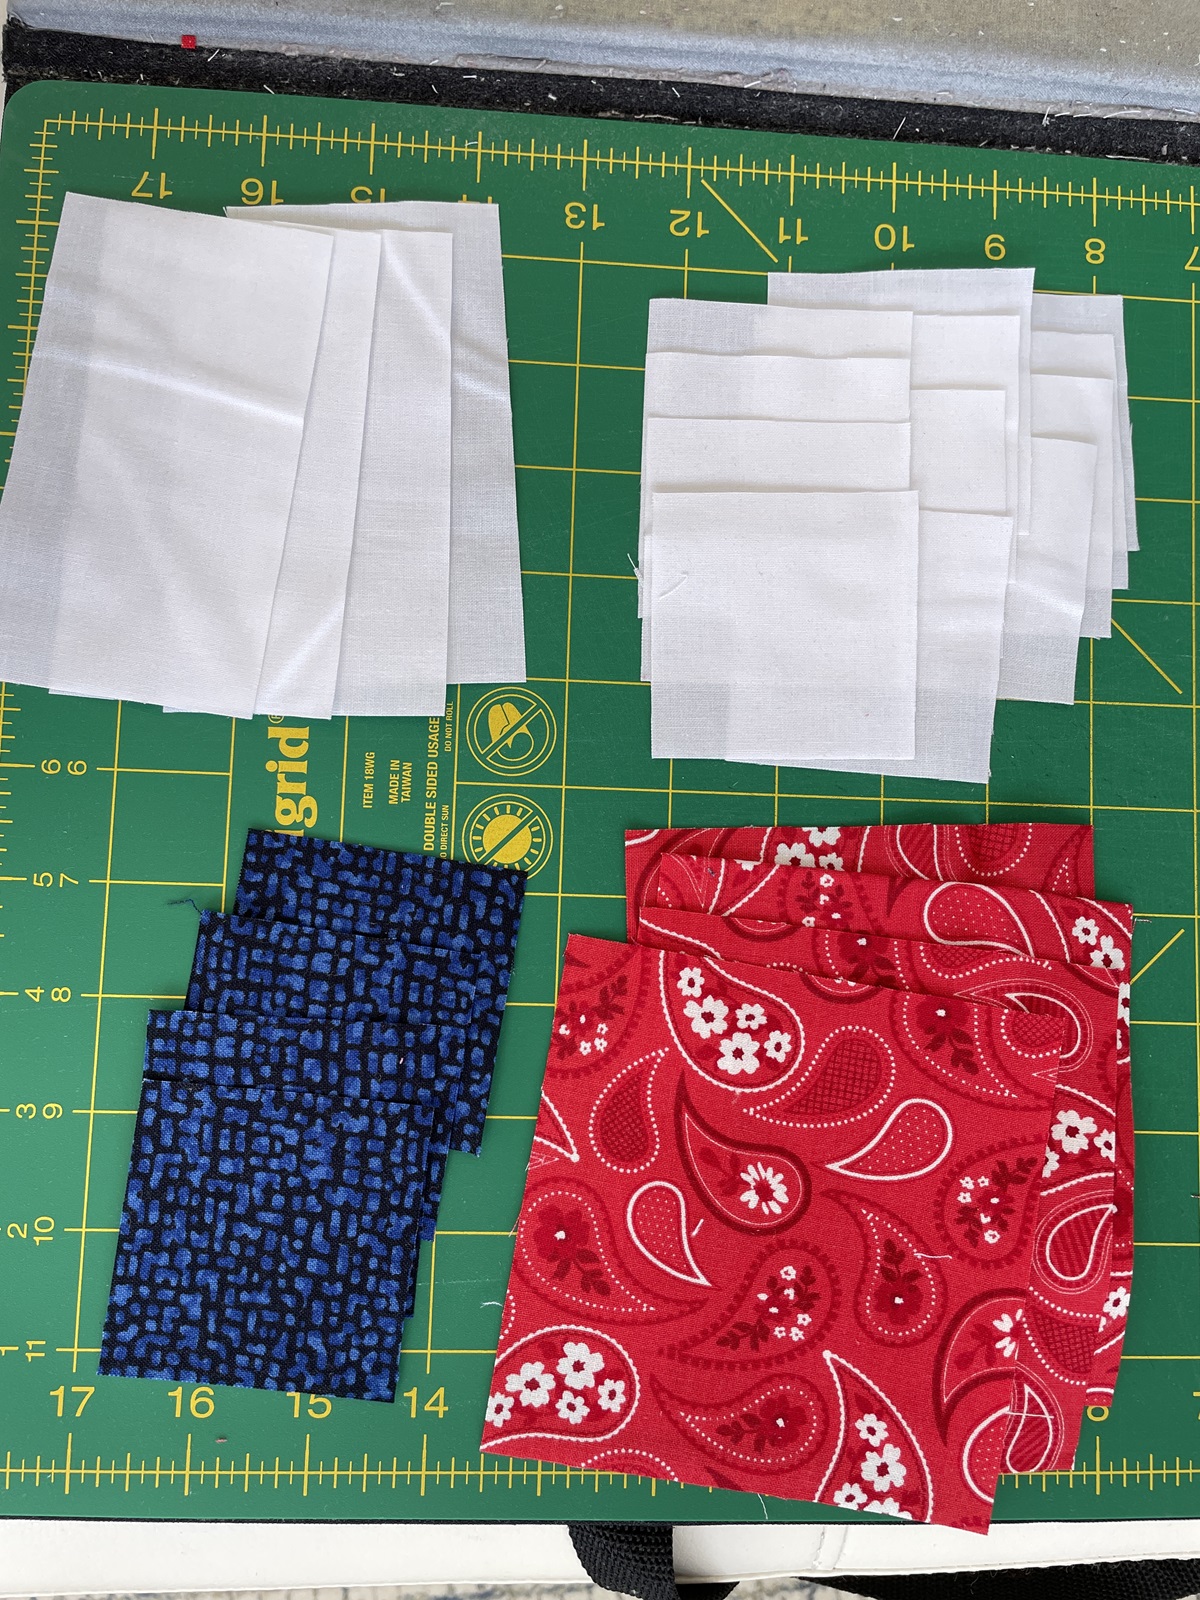
And my fabric pull. Just about anything goes, but please no holiday, batik, kids or trademark fabrics.


Each block will need:

4 - 4 1/2" x 4 1/2"  Red or Blue
4 - 2 1/2" x 2 1/2" Blue or Red
1 - 4 1/2" x 4 1/2" White/White on White with a bit of red or blue
4 - 2 1/2" x 4 1/2" White/White on White with a bit of red or blue
12 - 2 1/2" x 2 1/2" White/White on White with a bit of red or blue


If you use Red for the 4 1/2 squares, please use Blue for the 2 1/2 squares.
If you use Blue for the 4 1/2 squares, please use Red for the 2 1/2 squares.


Page Two starts the directions for the block.  It is a very quick block to put together.

Your block will finish at 12 1/2" x 12 1/2".

Here are two blocks I put together.


Hive 5: April Tutorial- Southern Star


Southern Star for Emily, Hive 5


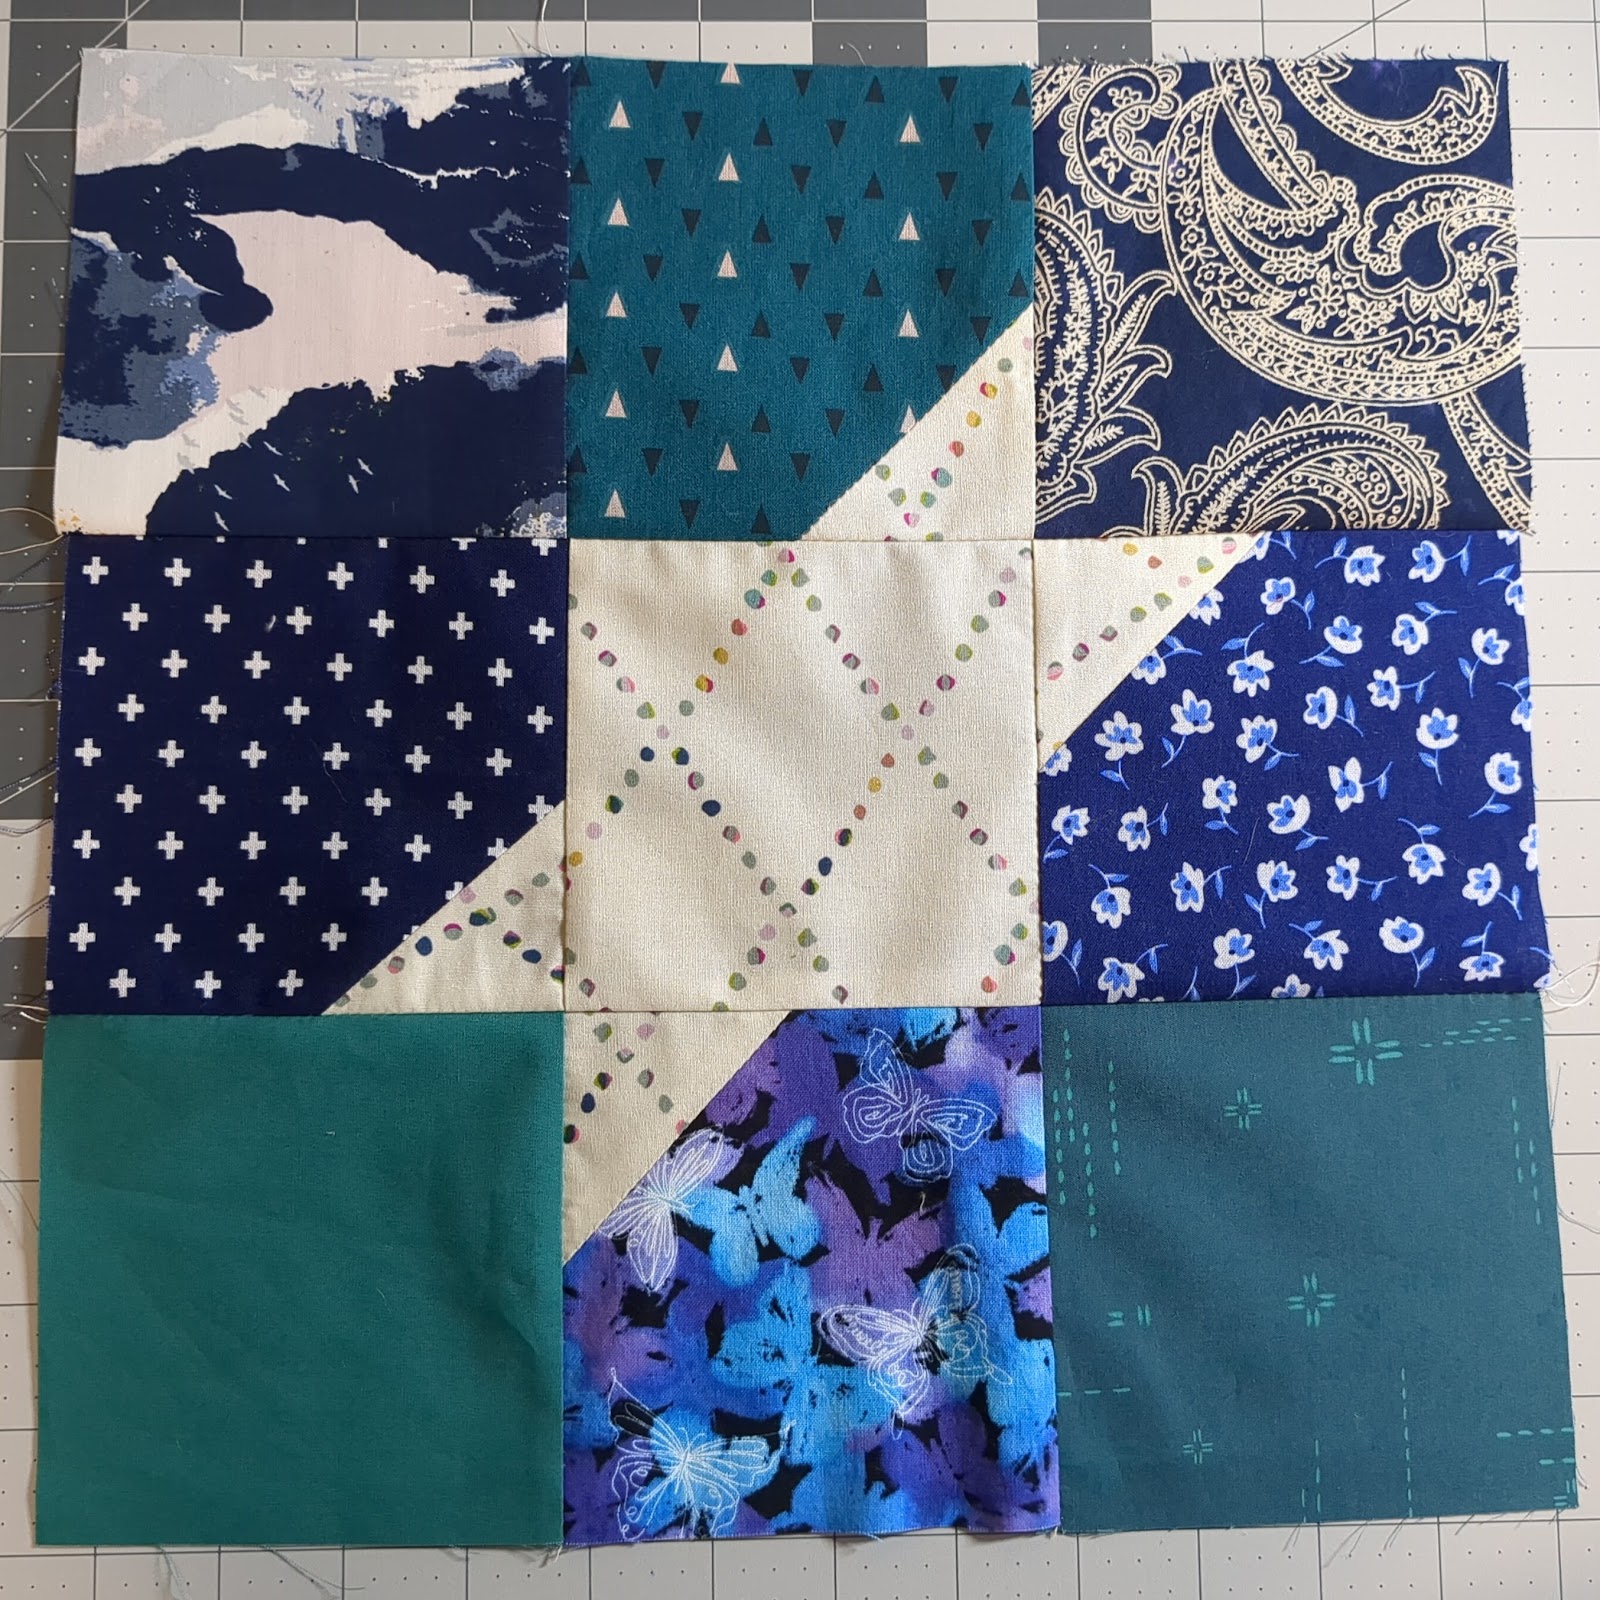
Back in January, our Hive Queen posted her block: a pink and yellow star in any pattern your heart desires. From there, I landed on a Moda Blockheads pattern called Southern Star by Jenelle Kent. I’ve been thinking through colorways for my turn as Queen ever since. I’d like to see a patchwork summer night come out this 12.5” modern star block.

Fabric Requirements

What is not welcome: patriotic, holiday (excluding Halloween), cartoon, licensed, or baby prints. Everything else is a-ok! Different colors in the print are fine, but the overall fabric should read as background- or star-colored.

Background: Eight 4.5” squares in varying shades of medium and dark blues, teals, greens, and purples. Please keep repeated fabrics from touching each other.

Center Star: One 4.5” and Four 2.5” squares in the same fabric. Color should remind you of a clear night sky: yellows, oranges, creams, light pinks, etc. If you’re feeling it, fussy cut something fun.


 Assembly

Assembly is pretty simple. The main difficulty I foresee is ensuring your Center Star points wind up in the right place. All seams are ¼”.

1.       Draw a line diagonally down the center of each 2.5” square.

2.       On four Background squares, sew one Center Star 2.5” square to the upper left corner. Align the line we drew in step one from right/high to left/low. Sew following that line as a guide. Trim the outer triangle off, ¼” from the seam. Press the seam open. Trim to 4.5”.


3.       Arrange your 9-patch so that the Center Star shines through. Assemble like you normally would a 9-patch, maintaining awareness of how each square is oriented and where it belongs. Either press open or nest seams to both keep bulk down and line up neatly.


4.       Your final block should measure 12.5”. Pack ‘em up and send ‘em out!


Hive 4: April Tutorial - Jeannine’s Bookshelf Blocks


The goal for this quilt is to look like a well-loved somewhat stuffed bookshelf. I intend to fill in “objects” on the shelves with FPP blocks later, and will make the shelving later as well, so these blocks are for the books only. 


Fabric choices

Background: - 3+ fabrics that read as black or extremely dark gray - ideally, tonals, monotone prints, or something with a little visual texture, but if you don’t have a good selection in your stash, one of these can be a solid black.

Books: - 5+ fabrics that are bright, vibrant, fun, prints - fussy cuts are cool here! But keep in mind how they play next to each other. 

Labels: - 1+ strip of selvedge or ribbon with words printed on it. Please nothing political/religious. 18” is plenty. 


Layouts:

Obviously, if you are sticking to 10 fabrics, some books will be the same fabric, and the background is going to have many repeats. Please try to stagger the background fabrics, so that they don’t clump together. For the book fabrics, having multiple matching or somewhat matching fabrics of varying thicknesses of “books” can be a fun way to show a “series”, so that’s ok! Maybe differentiate the “books” within a “series” with different words on the selvedges or having some horizontal and some vertical on the “spine”. And please try to vary the thicknesses of each “book” in the “series”. 


Please choose one of these three layouts:


Layout A:

3 - 3.5” wide “books” & background strips

4 - 2” wide “books” & background strips

2 - 1” wide “books” & background strips


Layout B:

2 - 3” wide “books” & background strips

4 - 2” wide “books” & background strips

6 - 1” wide “books” & background strips

2 - 1.5” wide “books” & background strips


Layout C:

1 - 3.5” wide “books” & background strips

4 - 1.5” wide “books” & background strips

3 - 2.5” wide “books” & background strips

3 - 1” wide “books” & background strips

1 - 2” wide “books” & background strips


Please keep all “books” between 9” and 14” tall, and add background strips for a total of 16” tall strips. If you want to be precise and math-y about it, the formula is as follows:

16 - [height of book] + .5 total seam allowance = [height of background needed]


Assembly: 

Piece together all your “books” with their respective “backgrounds” first, then decide on how you’d like to lay them out. 

Add selvedge “titles” at this stage.

I prefer to iron my seams open, but you do you. It doesn’t make much of a difference. 

Once you’ve determined your layout, snap a photo or take notes so that you don’t forget it (if you’re like me), or be brave if you want to, and start sewing strips together from one end to the other.


That’s it! I’ll trim them when I’m assembling, so no need to do any touching up, and if they’re a smidge crooked, well, so are my bookshelves. 


-Jeannine @jeanninehadid on Instagram 


Sunday, March 31, 2024

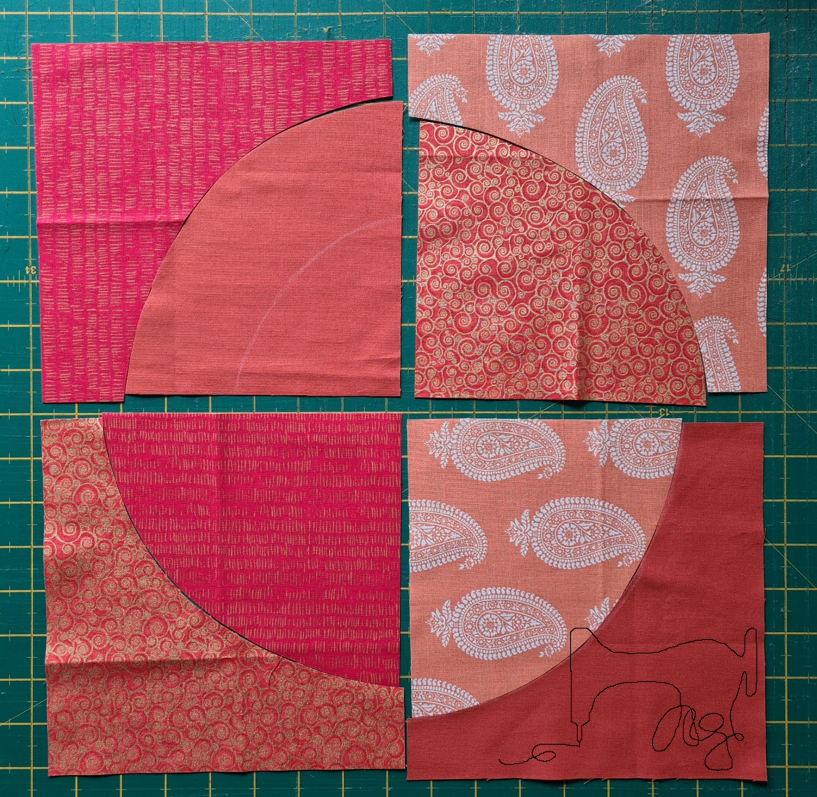
Hive 1, April Tutorial: Stacked Improv Curves for Rita


Hi Lovely Bees,

I’m Rita and this is my fifth year with StashBee. 
I was thinking hard to come up with a block for this year.

Initially, I wanted to make a block, based on one of the pretty cards I received with my blocks last year. I tried it out (and it is a finished quilt by now), but decided, that would be too tricky.
So, I looked for something along that line on the web and
found this tutorial by ‘elm street quilts’: 

Stacked Improv Curves Tutorial | Elm Street Quilts

I am intending to incorporate these blocks into an improv quilt for my BFF, for her upcoming round Birthday (I'm not telling you which one it is... suffice to say, the number before the zero sounds way too big...). 

The finished curve pieced sections should end up (very wonky, very roughly) approximately 7” x 7” (incl. seam allowance). Do not worry about the size, nor the wonkiness of your blocks! This is improv! They'll fit somewhere, trust me 😋.

Deviating from the linked Tutorial:

  • Please do not sew the four curved sections together.
  • Please do not trim the four curved sections.

I want to shuffle them round for a scrappier look. Thank you.

Fabric Colour Choices:

  • Slightly muted colours please, 
  • in the colour families of yellow, through orange, to red.
  • Please use either solids or blenders that read the colour.
  • Think cozy hearth fire.

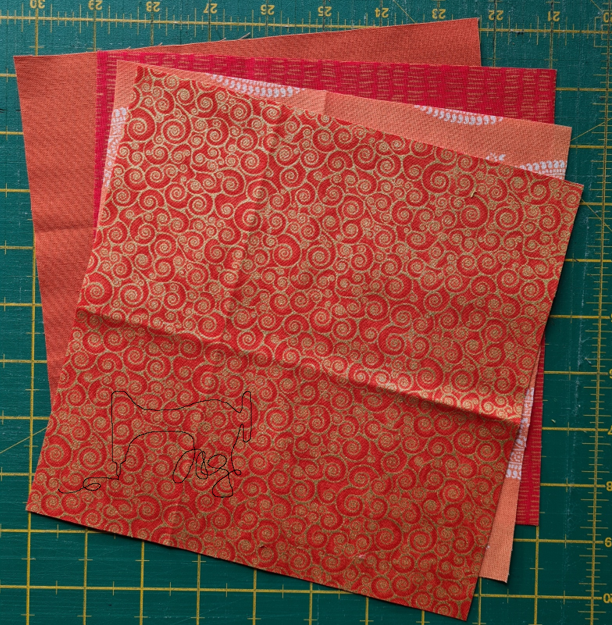
Here is my fabric pull:


Cutting Instructions:

4 different fabrics (either matching colour in different values or a mix between the spectrum – up to you!)

From each an 8” x 8” square.


Sewing Instructions Overview:

  • Please follow the tutorial up to the point, where the second set of cuts are sewn together on the four pieces.
  • Please do not trim the four pieces
  • Please do not sew the four pieces together.
    I want to shuffle them. Thanks.

Here is the overview:

Step 1:

Stack the four Fabric pieces, Right Sides up, lining up the edges, on your cutting mat.

Cut an improv curve – similar to a drunkard’s path block, but free-hand. Just make sure you have plenty of seam allowance on the edges of the fabric pieces. (Keep in mind, that there will be a second cut made later.)

If you are very uncomfortable cutting freehand, you can mark the curves freehand with chalk before cutting. (Remember: this is improv - so: wonky is good!)


Step 2:

Match each outer piece with a different coloured inside piece.


Find the center of the outside and inside pieces by folding them in half diagonally and finger pressing a small crease.

Align the respective outside and inside pieces along the cut line, Right Sides together, pin at least in a few places, working from the creased middle outward, with the convex piece on the bottom.

Step 3:

Sew with a smaller stitch length (I used 1.5 on my machine), with a 1/4” seam allowance.

Press the resulting piece. I pressed my seam allowances to the concave side, which seems the easiest way.

Step 4:

Repeat for all 4 pieces.

Step 5:

Then stack those four pieces, right sides up, lining up the corner of the convex sections.

Make a second freehand curved cut. You decide, where you have more space to do so, either inside or outside the previous seam. Just ensure, you have enough seam allowance to work with.


Step 6:

With these cut pieces repeat Steps 2 to 4.


And that’s a finish!


Thank you so much for sewing for me!

See below a picture of my finished test blocks.

Happy sewing,

Rita