Thursday, February 1, 2024

Hive 1 - February Block Tutorial: Folded Patchwork

 Hello Beautiful StashBees,

This month I'm thinking about being cozy and warm.  Despite living in the south, it has reached low temps that require nice warm quilts.  I hope you find the construction to be challenging enough, because I'll be doing most of the sewing! 

Each section you make (4) will finish at 5 3/4" and I will be sewing them together to make my finished quilt. All the work is in cutting, pressing and securing a mitered corner.  Please do your absolute best to make a perfect mitre and a consistent finished size so I can fit them all together when I construct. 

I can't wait to have them all on my design wall to choose placement!

When choosing fabric, please use a good contrast.  As for the batting, I'm not fussy about poly/cotton/blend. This quilt will be made for snuggling, so if you have cotton batting, that's great. If you run into a situation where you either need batting mailed to you, or you omit the batting altogether, I will mail you a piece and/or I will make do without!  Thank you for agreeing to the extra bulk this may add when mailing.

My fabric "no thanks" are: religious, political, licensed or batiks.  

My fabric "yes please" are: contrasting colors quilting cotton that you already have in your stash. I chose some scraps that were both on the bright side and somewhat muted. Prints or solids, it’s Your Choice!  If you like the two colors together, I probably will too!

I found this block as a free tutorial on Jo Avery's Blog here:

Folded Patchwork Tutorial • Jo Avery - the BlogJo Averyhttps://joavery.co.uk › 2014/06 › folded-patchwork-tu...

Jo Avery's Folded Patchwork Quilt

Fabric Requirements:

(4) 9" Squares (back)

(4) 4.5" Squares (center)

(4) 5.5" Squares of batting


Let's get started. A quick word about glue: if you don’t have a glue stick (generic school glue, Elmer’s, fancy) you can use a dot of liquid school glue and set it with the iron to dry quickly.

Fold and press 1/4" up on center pieces.  I used a dab of glue stick to help them stay flat. Perfection is not needed here, but it's a good warm up for the next 1/4" fold/press which requires precision.


Next, place batting in center of wrong side of back fabric making sure there is a 1 3/4" space around the piece of batting on all 4 sides.


Then fold each corner over toward center so that the overlap is 1 1/2" square. Jo's tutorial instructs to stay 1/8" away from point of batting before folding/pressing. I marked a dash but forgot to photograph it here.


Now press in a perfect 1/4" fold on the raw edges of your back fabric.  I used a glue stick to keep them in place which greatly aided me when lining up and pressing a perfect mitered corner to finish!

Note: you don't need the center piece to be here yet, I just happened to forget to take my picture without it!


Now place your center piece on top making sure it's evenly spaced on all 4 sides. You can pin it in place if desired.


This is where you will fold, press, then pin your sides toward the middle to form perfect mitered corners. I found that without using glue in the previous step, my corners did not want to play nicely and I kept having to re-fold and press. The result was that my finished size was off so I re-made it using a glue stick.


Last step:

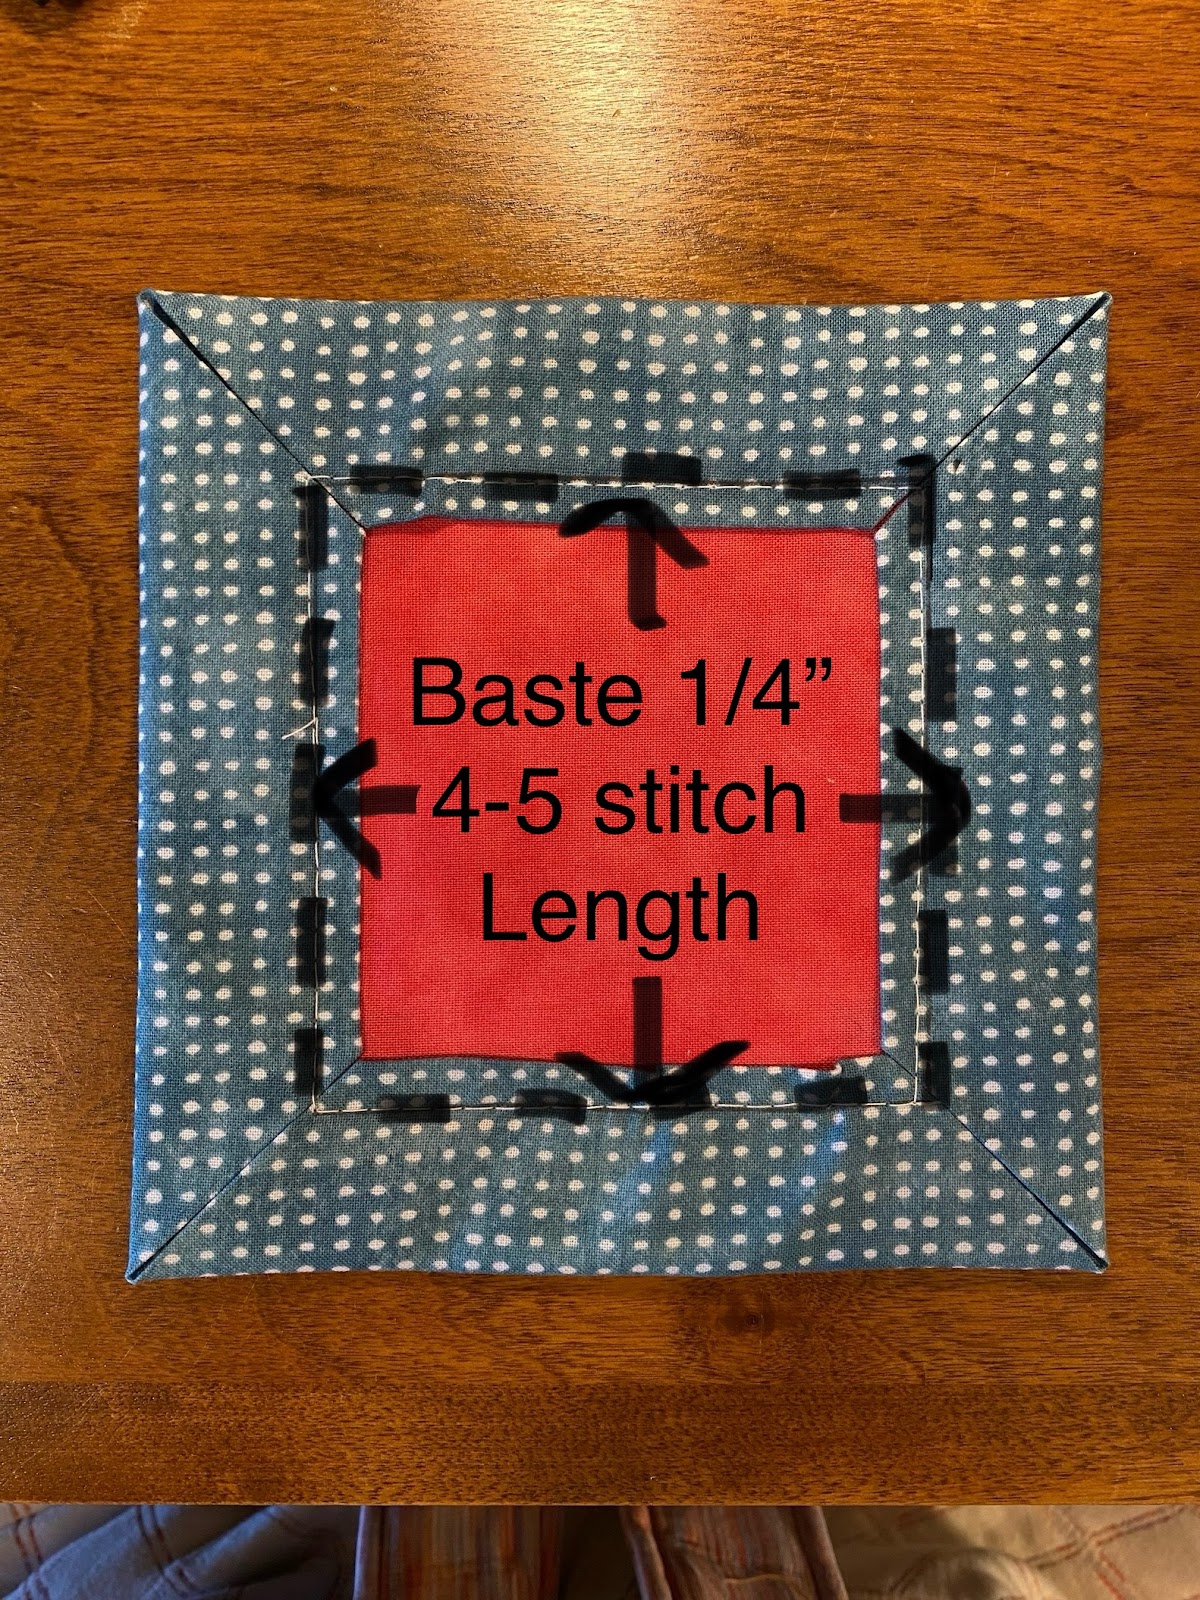
Machine Baste (3-4 stitch length) 1/4" from edge of center fabric to tack it all down. Ignore my photo stitch length that says 4-5. I think 3-4 works better!  Any color thread will do because I'm going to pull it out once I hand quilt my two lines next to your basting. Note: please make sure to press before basting so that your mitre is YOURS and not something I'll need to fiddle with to achieve finished size. Sounds easy, but I found this part challenging.
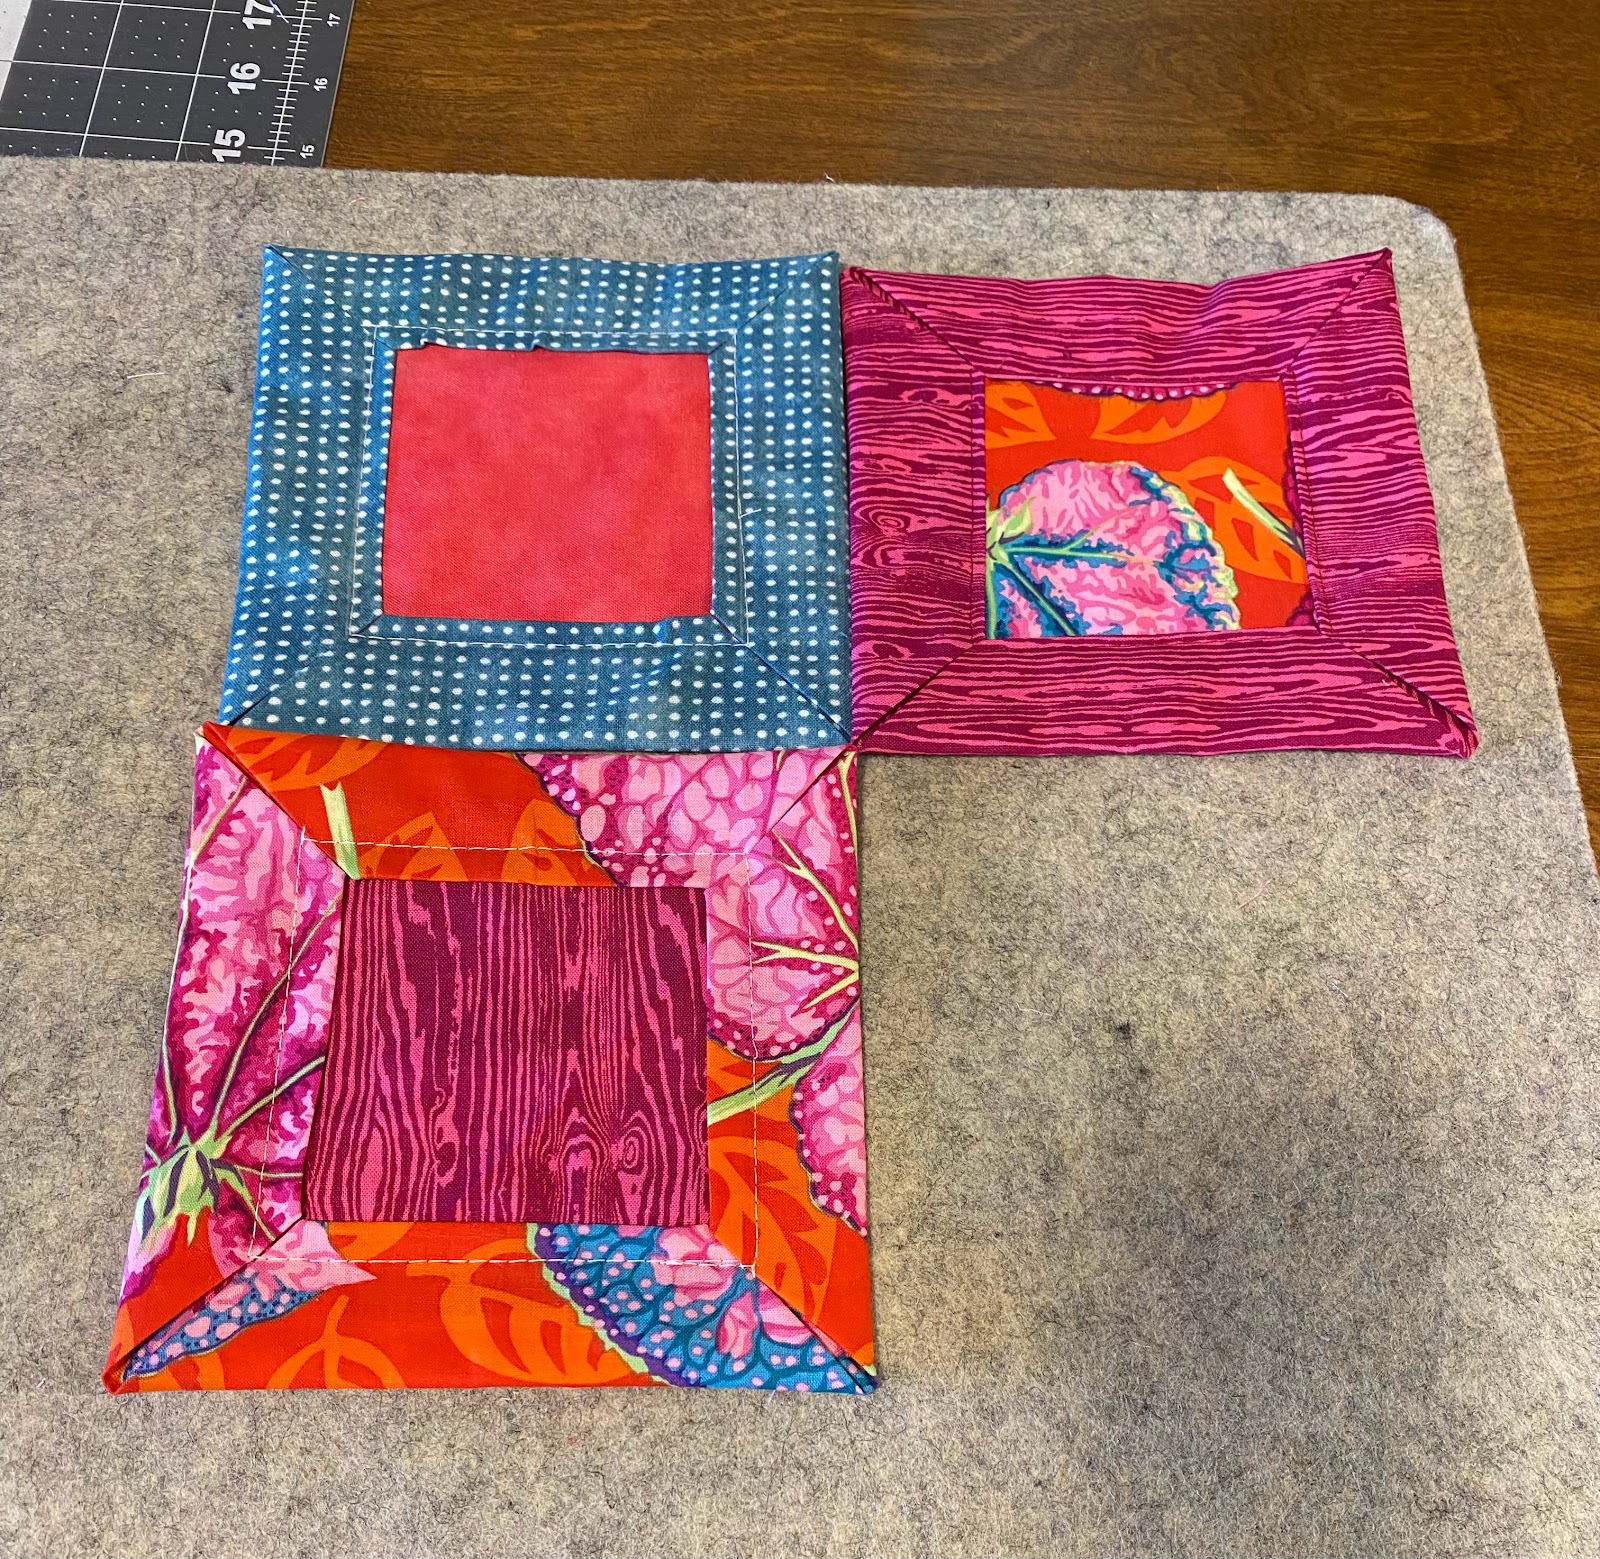
5 3/4" finished blocks


Here is a picture of Jo Avery's lovely quilt in solids.


Thanks for allowing me to step out of the box for this block.  It all started when a friend gifted me a whole set of lovely hand quilting thread!  She had no idea I've never hand quilted anything, so I decided to try it at least once in my lifetime. These small blocks can be carried around with me and quilted easily on the go when I have time to fill.  Wish me luck!

Chris

Hive 5 - February Tutorial - Scrappy Star Block

I've been a Stash Bee participant for many years.  I'm not even sure how many!  And here I am again, another year, another block!  I've made this block many times before and I find it quick, easy, and perfect for scraps.  I know we did star blocks in January, but in my opinion, stars are always a great way to go.  It's the Clover and Violet's Scrappy Christmas Star Block.  Now, I believe in using what you already have so I'll show you mine - fabric pulls and a tutorial.  Oh, and you won't need holiday fabric!


Here's my idea:  The star should be a solid fabric.  For this project, I'd prefer bright colors.  Leave out the pastels, browns, and grays.  The blue star in this block didn't turn out as bright as I'd hope, so look to the end for more blocks.


Any bright solid fabric will do. This is a small sample of my solids.


Here's a sampling of low volume fabrics for the 4 corners.  I'd like each corner to be different.  

I don't have a picture for the stripes.  I rummaged through my scrappy strips and found 8 different prints.  If you check my photos, you'll see that I used the same color family as the star, only in prints.  
Please do the same.


Now the cutting:

STAR
Solid Fabric
 (1) 3.5" square
(8) 2" squares

STRIPES
Print Fabric
(8) 2" X 5"

CORNERS
Low Volume Fabric
(4) 5" Squares


Mark the 2" squares on the diagonal.  


Place on the 2" x 5" strips.  Notice that the diagonal is right to left on 4 strips and left to right on the other 4 strips.


Sewing tip: Sew from the wide of the fabric.  
I place my pins pointing in the direction I start sewing.


Trim 1/4" from the sewing line.


Place 2 strips together and sew (I forgot to take a picture of this step).
A quick word about pressing - I press open.  If you don't want to, then don't.  I'll still love your block.  

Follow layout for assembly.


Sew center with 2 strip sets.
Sew corner squares with strip sets.
Sew sides to center, press & square to 12 1/2"


More Scrappy Star blocks made by me:


Hive 3 February 2024 Tutorial - Checkerboard block for Joanne

Hello, Hive 3! Happy February. 💜 I've chosen a simple checkerboard block based on the Maggie Pearl pattern from Penelope Handmade, which is a free pattern that can be found here. It is a fun and fast block and I hope you enjoy making it.

You will need two fabrics to make the block - one dark and one light. The dark fabric is a non-directional colorful print and the light fabric is a non-directional low volume print (directional fabrics will either end up upside down in some rows or require different piecing instructions to keep them right side up). You can get an idea of my color palette in the photo below, which shows 12 different blocks stacked on each other. Please lean toward muted, cooler colors (no red, orange, etc.) and no solids or batiks. I've found that using small scale prints and monochromatic prints will provide the necessary contrast to obtain a checkerboard look.


Cutting Instructions:

Dark Fabric - two strips 2.5" x 18"

Light Fabric - two strips 2.5" x 18"

I like to stack my fabrics right sides together and then cut the strips so that they are lined up and ready for sewing.

Sewing Instructions:

Please use a scant quarter inch seam throughout. Shortening your stitch length (I use a 2.0) can help make the sub-cut pieces a bit more durable.

Sew one dark strip and one light strip together along an 18" side and repeat with the remaining pair. Press toward the dark fabric. You will then sew the two strip sets together so the fabrics alternate dark, light, dark, light. Press the final seam toward the dark fabric. 

Once the four strips are sewn together, the unit should measure 8.5" wide x 18" tall.  If the unit is not within 1/8th inch of 8.5" wide, please check your cutting measurements and seam allowance and fix as needed. 


Sub-cut the unit into seven 8.5" wide x 2.5" tall pieces - you will have about a half inch of wiggle room.  Arrange the strips as show below.

Sew the rows together (those nesting seams make it so easy!) and you are done.  The seams can be pressed either toward the top or bottom of the block, but please press all seams in the same direction. The finished block should measure 8.5" wide x 14.5" tall. 


Thank you and please let me know if you have any questions. :)

Hive 6 February Tutorial: Easy Improv Squares

Hello Stash Bee friends! I'm so happy to be joining you again for this great group project. I have been in Stash Bee since the beginning, and I think I have only missed one year. I keep telling myself I should gather all my Stash Bee quilt for a group photo, but some of them are still only quilt tops, and one has moved on as a gift to a kindergartener. 

I have home preschool and a few years ago, I started gifting a quilt to my kids graduating to kindergarten. In fact, that Stash Bee quilt was the one that started that tradition for me. The kiddo who has that quilt is now 9 years old. 

Since this is an Instagram hive, I have designed this tutorial to be Instagram friendly. As such, the instructions are mostly in the photos, so very little additional explanation is needed. This block is FAST so I hope you have a fun time whipping a few of these out. 


Fabric selection: You will use solids for this block. Please choose BRIGHT, SATURATED colors when possible, and stay away from selections with obvious muted, dusty or brown undertones. 

You need one light solid and one dark solid of the same color. 


1. Cut a 10-inch square from each of your two fabrics. 


2. Stack your two fabrics so they line up exactly. Using a rotary cutter and ruler, make 3 cuts across fabric at random angles: two vertical cuts, and one horizontal cut. 


3. Your two fabrics will now be split into 6 pieces each. Rearrange the pieces so that each block alternates light and dark. 


4. Sew the horizontal pieces together. Trim across the center line to make a straight line, if necessary. 


5. Sew the two halves together. Your points and lines may not line up exactly. That's okay!


6. Trim each block to 8½ inches. Trimming tip: make sure that the 8½ inch line on your ruler is ON the edge of the fabric, not to the outside of it. 


 Seriously, so easy. I haven't yet timed to see how long it take to make a pair of these, but I'm planning to do that. I had a stack in an evening. 

Hive 2- February Tutorial -Charming Stars Block

 Hi All!

Thanks for joining me for the month of February!

This month's block will be based off of this block found on the Moda website. The original free pattern is called Charming Squares.


For this month's block, I am looking for a starry sky. It uses charm squares or 5 inch squares cut from yardage and smaller squares for the star's points.


Fabric Selection:
For February's block background, I'm looking for dark to medium blues...think navy to dusty blue. I would ask that the blues read as a solid blue. Please no novelty prints. Leaves, floral, dots, and stripes are all fine. If you have batiks, feel free to use those as well. Please use at least 4 different types of blue fabric to give it a scrappy look.

For the star portion of the block, I'm hoping for creams...again that read as a solid. If there's white or tan as a design in the cream, that will work great. Please use creams that read the same value for the star centre and points.

See picture below for an example of my fabric selection.


Cutting Directions:

For this block you will need:
[  ] 8 Navy/Dark Blue/Medium Blue 5 inch squares (for the blue background/sky)
[  ] 1 Cream 5 inch square (star centre)
[  ] 8 Cream 2 7/8 squares (star points)

Block Assembly:
1. Layout 5 inch squares as a 9 patch with your Cream block in the centre.

2. Snowball the centre blues to make the star points. I started with the right sides of the corners. I then did all of the left corners.


Draw a line directly on the back of the 2 7/8 squares from corner to corner. Line it up with the right corner of the 5 inch blue square. Sew on the line. Cut off the corner at least 1/4 from the sewn line. Press your seam open to ensure a flat block.

Repeat for all of the other right corners. Then, repeat with the left corners.

Trim these squares to ensure they are 5 inches.


3. Layout the block to ensure you're happy with the overall look of the block. I like to double check that my blues aren't the same beside each other and that there is an even distribution of colour/value.


4. Sew block together as you would a nine patch. I like to press the seams away from the star point blocks to prevent bulkiness. For the horizontal seams, I like to press my seams open for a nice flat block.


The block should finish at 14 by 14. Please leave it untrimmed.


That's all for now! Thanks so much for taking the time to make this block...I hoped you enjoyed it!

Hive 7 Tutorial for February - Scrapy Strip Block

Last year I requested blocks to make a plus quilt of rainbow colors. 

Here is the link: July 2023 Tutorial

I want to jazz it up, so I am requesting 9.5 in blocks each with a single color theme.

Pick one of these colors and dig out your scraps!  

Jelly rolls work really good for this.


Cut a bunch of strips with a length of at least 9.5 in and a width varying from 1 in to 3 inches.

Here are my red themed scraps:


After sewing all the strips together, press to one side:


Your block most likely will have uneven ends.  Please cut based on the smallest strip.  The goal is to be 9.5 inches or over, but bigger is fine:


Here is what my sample looks like at the end of the day.  It is a bit bigger than 9.5, but that is fine.


I look forward to seeing your blocks and incorporating them into my quilt!

-Jennifer